Welcome

My name is Lisa and I'm a crafty girl with wanderlust working as an engineer by day. My blog chronicles projects in my home as well as pictures and stories from my travels.

Search


Instagram

Blog Index
The journal that this archive was targeting has been deleted. Please update your configuration.
Navigation

Entries in Home Decor (63)

Saturday
Oct272012

New Dining Room Table

Just a few short months ago my dining room had a $10 laminate table that I had picked up from the ReUse Center and some Ikea folding chairs. Not exactly classy, but it got the job done. 

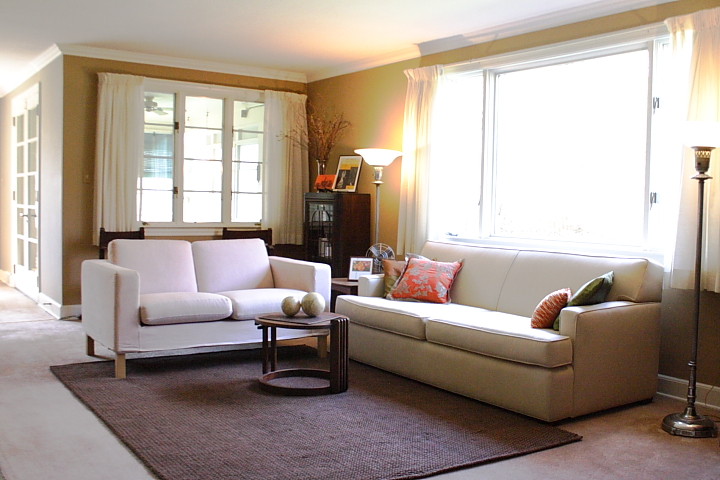
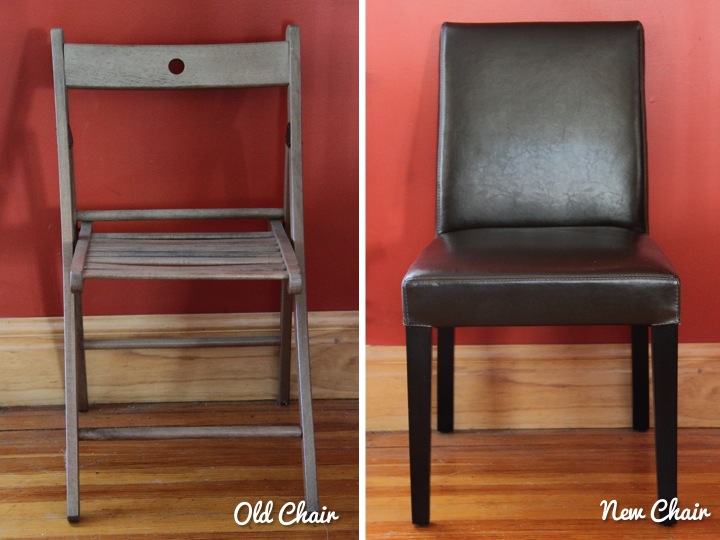
In June I upgraded my chairs when I found an awesome deal on Craig's List for a set of eight Lowe Chocolate Leather Side Chairs from Crate and Barrel for $500. They were beautiful, super comfortable and such a great deal (normally $199 each) that I couldn't pass them up. After that my dining room looked like this:

I was ecstatic about the chairs but it made my table seem even worse. The table is laminate with some white paint spatters on top that required me to always keep it covered. On top of that, the table legs kept me from pushing the chairs at the head of the table in and even then, only six out of the eight chairs fit around it.

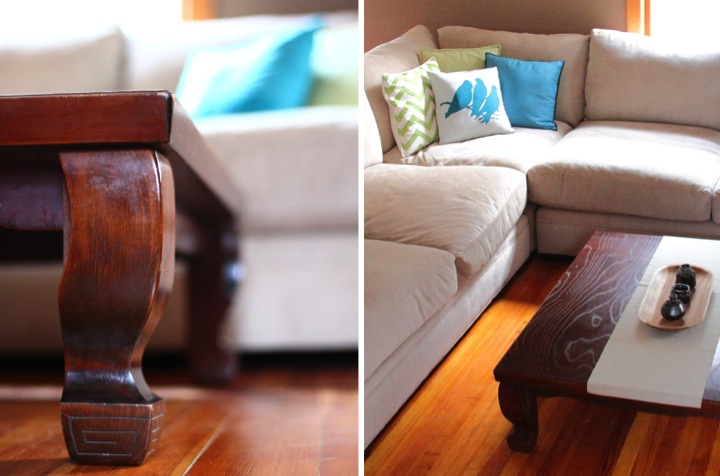
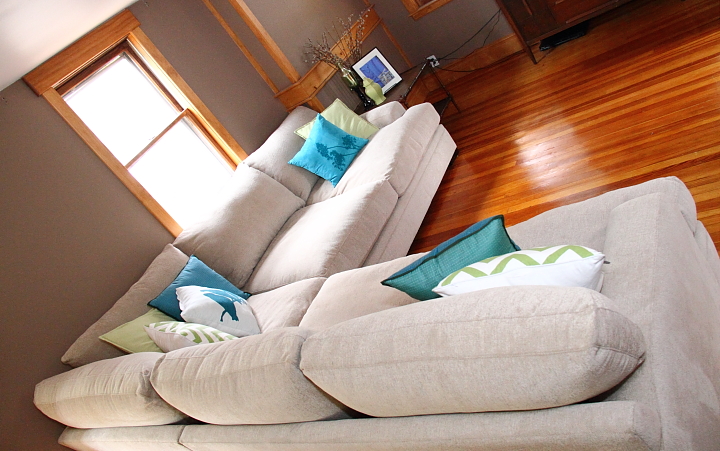
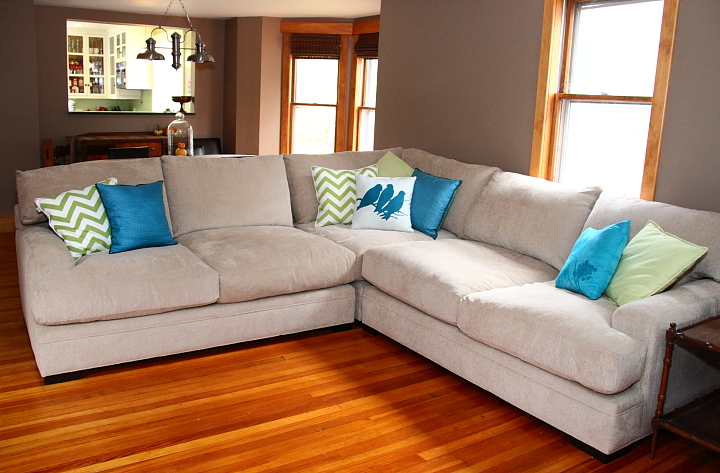
The last straw indicating that my junky old table needed to go was when I bought Super Couch. I have an open floor plan on my first floor so my dining room and living room are one big open space. Super Couch encroached into the dining space a little more than my old couch so I needed a table that wasn't as wide so people could still get around the table comfortably. Here is a picture of the sectional right after I bought it where you can see the dining area behind it a bit.

Being the logical engineer that I am, I had been thinking about the criteria I wanted in a table ever since I bought my new chairs back in June. I definitely wanted something that could seat eight people. I was also leaning toward getting a trestle table so I didn't have to worry about the legs limiting the chair locations. I also wanted something a bit narrower so that with the table centered under the dining room light (which is aligned with the bay windows) I would have three feet between the table and the sectional. My remaining item on my wish list was that the table would have leaves. I like to set up my Christmas tree in the bay window so having the flexibility to be able to make the table a little smaller to accommodate the tree is important to me.

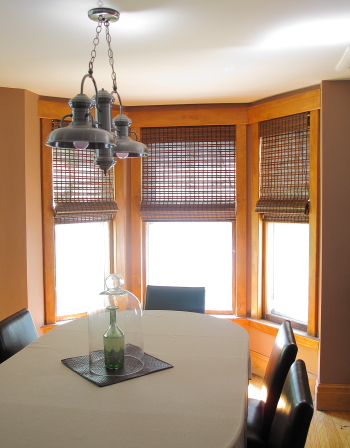
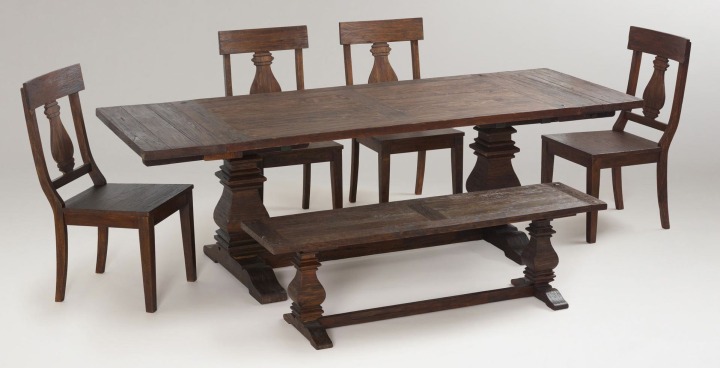
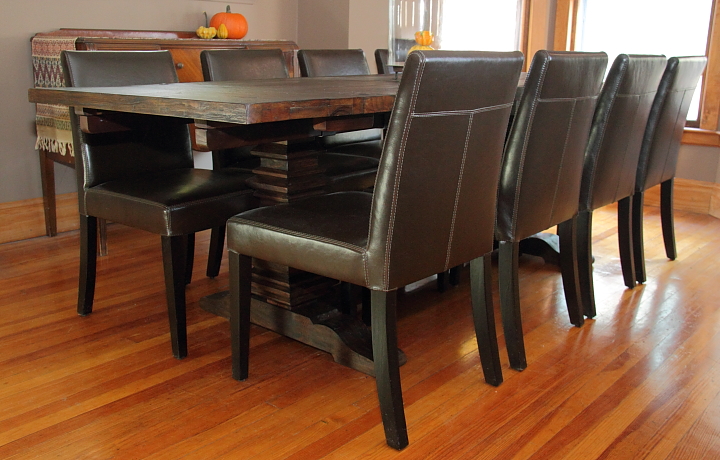
I did some searching around and found a table that fit the bill perfectly. The Arcadia Extension Table at Cost Plus World Market was a trestle table (check!) and narrower than my old table at 36" wide (check!). It also had two leaves (check!) and extended to 96" to fit eight people (check!).

Being a cheapskate I had to think about it a while since it was $699. Last week I got a 25% coupon for furniture by email from Cost Plus World Market (making the table $525) so I decided that I couldn't pass the deal up and it was time to finally get it.

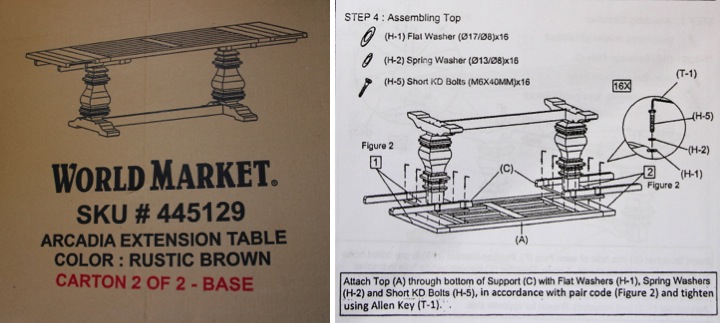
Frank helped me pick up the table (it wouldn't fit in my little hatchback) but with work being busy I didn't have time to set it up until last night. Frank is out of town, but being the stubborn person that I am I set it up by myself ignoring the instruction's warnings that it is a two person job. Luckily I'm pretty strong for a short girl and I managed to get it done. The only thing I had to do differently from the instructions was that after I built the base I put the top on and attached the bolts from under the table since I assessed the situation first and knew that building it upside down and flipping it over was not an option for me by myself.

In the past I have gotten into some scrapes by mistaking my determination for actual strength and ability which leads me to try to do things alone that I really shouldn't. Case in point: attempting to move a piece of 5/8" thick 4' x 8' sub-flooring into place over some joists by myself resulting in slipping and falling through the joists catching myself under the arm. I wasn't badly hurt but I had a huge red line running across my shoulder through my armpit and was a little sore for a while. Not my finest moment, but since then I've tried to be better about asking for help when I need it, although it is still hard for me since in my mind I am as tough as a 6' tall construction worker.

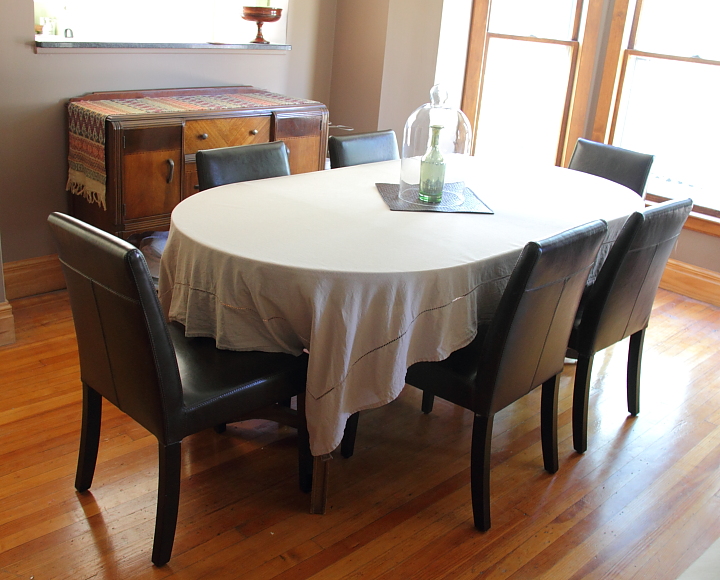
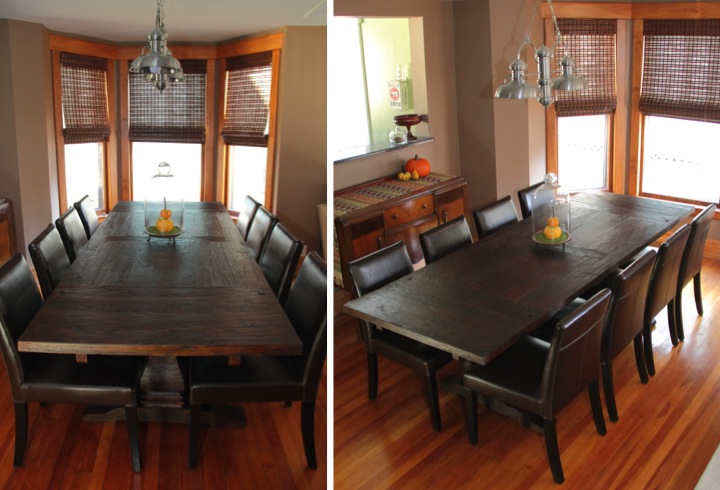
With the table built I couldn't wait to get the chairs around it to see how it looked together. I feel like a real adult now that I have proper dining table and chairs. The paint splattered laminate table has served me well, but there is something nice about a solid wood table.

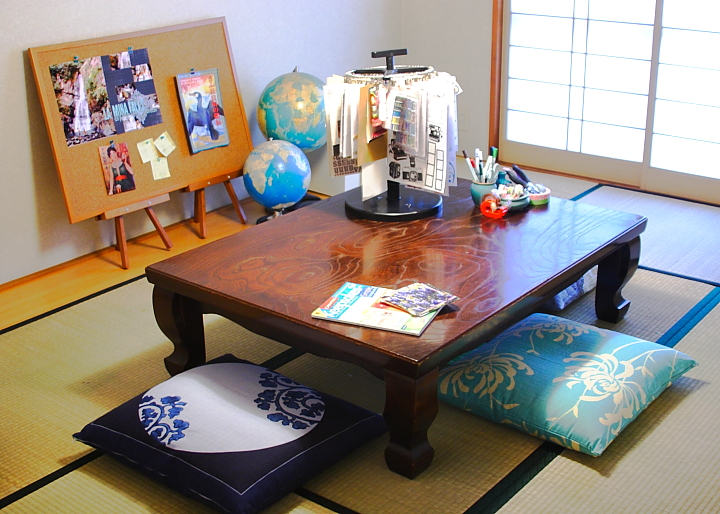
I took some pictures this afternoon of the final arrangement. I have trouble taking pictures of the dining room because the bay windows and the pass through from the kitchen wash out everything near them and make the rest of the room look dark. It looks so much nicer in person.

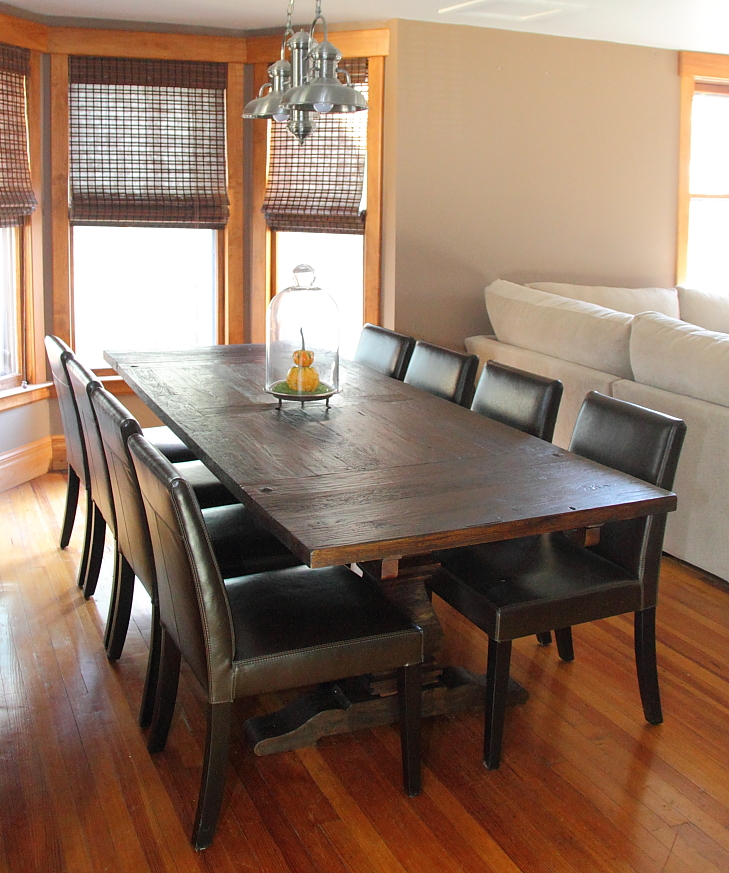
I really like the contrast between the clean, tailored look of the leather parsons chairs and the rustic look of the table. I couldn't be happier about the table and it was worth the wait to get exactly what I wanted. I just need to make up an excuse to have a dinner party now...

From this angle it looks a little crowded but I actually have over three feet between the table and the sectional, just like I wanted.

Still on my to-do list in the dining room is to paint the trim white, maybe change the wall color, replace the free standing buffet with and a built-in and add a little artwork. It is definitely starting to come along, though!

What do you think about the new table? Have you made any fun furniture purchases lately? Did you wait until you were 35 to buy a proper dining table like me because you are a cheapskate? Have you ever accidentally injured yourself during a home improvement project? Do you have any suggestions about how to photograph a room with a window causing lighting issues?

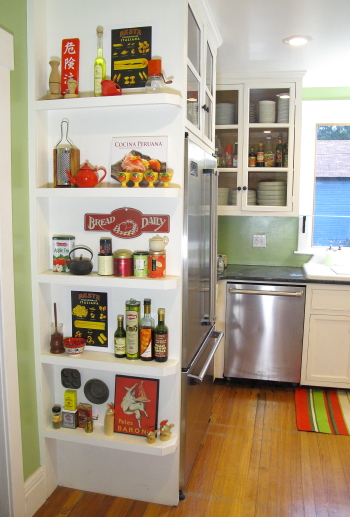
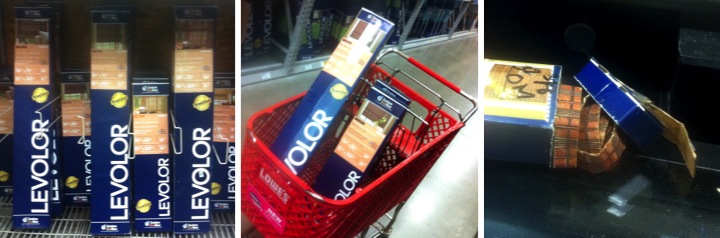
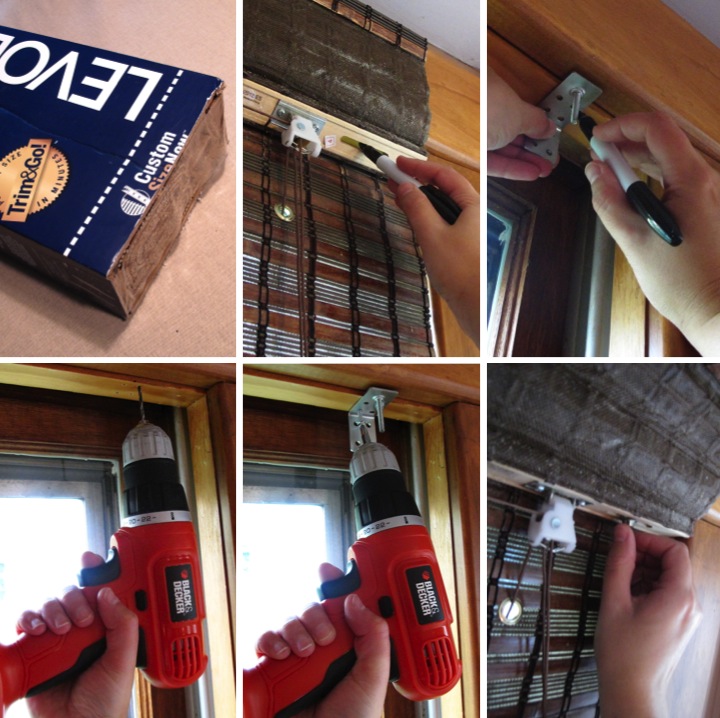
P.S. If you are interested, check out some of my other dining room posts here: New Dining Room Chairs, Bamboo Blinds for my Dining Room, Dining Room Bookshelf Souvenir Collection and Dining Room Then & Now

Friday
Oct262012

DIY Sweater Vase

I've been wanting to do a little fall decorating in my living room but since it is neutral color scheme with light green and teal accents I was a little stumped about what to do until I thought of making this little sweater vase. Since it is definitely sweater weather around here in Michigan it has a fall vibe even though I used a turquoise sweater to match the room.

Making the vase is super simple and doesn't require much time or energy. All you need for supplies is a round vase and a sweater you don't mind cutting up. My vase is a dollar store find and I picked up the sweater at a thrift store. The only thing that you need to be careful about is to make sure that the sleeves of the sweater will slip over the vase snugly and not be too loose.

To make the vase I trimmed one of the sweater sleeves about an inch longer than the glass vase. I then slipped it over the vase aligning the cuff with the top of the vase. To finish it off I tucked the extra edges under along the bottom. Super easy-peasy!

I decided to place some solidago in the vase since it has a lime green color and seemed to evoke fall to me. I paired the sweater vase with a small ornamental kale in a white Ikea pot and a tiny cream colored pumpkin. I think it looks really cute together and is quite seasonal without using traditional autumn colors.

The other thing that I really like about this little sweater vase is that I can easily use this in the winter, perhaps by putting some holly branches or evergreens in the vase and swapping out the pumpkin for a glass ornament.

Are you doing any fall decorating? What seasonal items do you have in your home?

P.S. If you are interested, I've gathered together a gallery of my autumn related posts: Gallery of Fall Posts & Projects

Thursday
Oct182012

My Coffee Table Indirect From Japan

With Super Couch (oh, how I love it!) happily ensconced in my living room I needed to find a solution for a coffee table. Previously I had been using a Pottery Barn Chloe Coffee Table that I had picked up six years ago at a Pottery Barn Outlet for $60. Regular price it was $350 so it was quite a steal. Although it was a great coffee table the long narrow shape looked awkward with Super Couch. I needed something square or at least a very wide in order to fill up the space properly and look proportional to the sectional.

As I was contemplating what to do it dawned on me that the low table that I brought back from Japan might just work. I bought the table at a Recycle Center (a Japanese second hand shop for home goods) for ¥1000 (about $10 US at the time). The table is low because it is meant to be sat at with cushions on the floor. I loved how spacious the table top was and decided to set it up in my Japanese apartment as a work table for crafts. It worked out really well and I spent a lot of time working on projects sprawled out over the table.

I shipped the table back to the U.S. when I returned home but since then the table has languished in one of the back rooms of my house that I never really use. I rescued it from oblivion and placed it in front of the sectional. It was just the right size and fills the space nicely.

I love the curvy shape of the table legs and the grain pattern of the wood on the top. It really is a beautiful piece, especially for the great deal I got it for, and I am glad that I finally have a place for it in my home that showcases it better.

Temporarily on top I put a beige Marit table runner from Ikea that I already had. The tray is a hand carved wooden batea meant for tossing corn and rice that I picked up at a market in Panama this past summer. The two vases on the outside I bought in Seto, Japan and the one in the middle I made when I was a kid. I love how it is a little wonky, but not so bad for being in sixth grade, I think.

I plan to replace the items with something a little more colorful in the future, but for now it will do.

I'm really happy that the table works so well in the living room. Seeing it there when I walk in the front door brings back a lot of great memories from Japan and brightens my day. Now I just need to find a new rug and things will really be starting to come together...

Have you recently "shopped your home" and moved a piece of furniture or decor item to another room? What kind of coffee table do you have?

Monday
Oct152012

The Saga of Super Couch

I bought my first new couch (as in not free from someone or from a garage sale) when I was in grad school twelve years ago back in 2000. It was a Karlanda loveseat from Ikea that I found in the As-Is section for only $200 since it had previously been a floor model.

I was pretty excited about my awesome deal and managed to haul it home by tying it to the top of my Dodge Stratus with a bunch of the Ikea twine. Doing this is not advised (I think only a 23 year old is capable of thinking that it was a good plan) and I am really not sure how I got home in one piece and didn't hurt anyone.

My little blue couch happily lived in two different apartments in Northern California with me. I tried to find a picture of it, but the best I could find was the one to the left as all the others had people sitting on it.

Fast forwarding five years to 2005, I bought my second couch soon after moving to Ann Arbor. My living room was a little lonely with just the loveseat and my futon was in another room so a second couch was in order. A friend from work mentioned that a local store, Newton's Furniture, was going out of business and had a huge sale going on. They did indeed have some awesome deals and I ended getting a lovely tailored cream colored sofa for $999 which was half off the original price.

I loved the new sofa, but the royal blue loveseat looked a little strange next to it. Ikea sold beige slipcovers for the loveseat but even on eBay they were running about $200 which seemed ludicrous to spend since that is how much I bought the whole thing for. I did see that the light blue slipcovers on eBay were not hot sellers and was able to get one for $30. I bought a few packages of Rit fabric dye remover and washed the light blue slipcover with it. It definitely removed the color, but it had a bit of a blue tinge still so I washed it again with a single package of light tan Rit fabric dye which made it the perfect shade of beige to match my new sofa. Below is a picture of the sofas in my old house soon after I bought the second one and DIYed the color of the slipcover on the loveseat.

Now my couches are 12 and 7 years old and while I have loved them, they are definitely showing their age. They also have some practical problems. Neither one is very deep, especially the big sofa, so while they are awesome for me (I'm 5'-2") for most other people they are not very comfortable. I decided to save up some cash and buy myself a comfy sectional for my living room.

I wanted something like the Pottery Barn Comfort Square Sectional which is deep and comfy, but still has a clean look to it. Unfortunately, with the configuration I wanted it would have cost over $4000. That wasn't going to happen, so I hit up some other furniture stores in town.

At Art Van I found an amazingly deep sectional (5" deeper than the Pottery Barn Comfort Square!) that was super comfortable (in the picture below). It was Fontaine Sectional in the Cindy Crawford Home collection and while I loved the shape and style, I was not crazy about the brown color that had an olive greenish tinge to it. I asked the salesman what other colors it came in and he told me that it only came in the one color. I was disappointed and looked around the rest of the showroom, but couldn't find anything else that I liked as much.

I couldn't stop thinking about the Fontaine sectional, which I had dubbed "Super Couch" due to the fact that it was so ridiculously deep. I did a little online searching and I discovered that the exact same sectional came in beige under the name Brighton Park. Even better, the website I found it on had the sectional on sale for under $2000. I thought about it for a while (outside of vehicles and homes it is the largest purchase I've made) and then decided to order it. Super Couch was going to be mine!

After waiting a few weeks, Super Couch was scheduled to arrive this Wednesday and I was excited. Saturday afternoon after the Michigan game (Go Blue!) I got a call from the delivery service letting me know that they were running ahead of schedule and would deliver the sectional on Sunday morning. I was thrilled to get it early, but had to kick it into overdrive to clear out the space for it. Frank came over early on Sunday morning to help me move my old couches. I snapped the picture below right as we were about to move them (after I had already moved the little side table that went between them). I was a little sorry to see them go...

We got everything moved just in the nick of time and at 11 o'clock the delivery truck pulled up in front of my house and started unloading the sectional. As an aside, doesn't my little street look pretty with all of the fall leaves? Also note that as a wiser 35 year old I had the sectional delivered instead of trying some crazy things with a small car and twine (see above couch #1).

In half an hour the delivery men had my sectional all set up and were on their way to another delivery. I was a little surprised by the color. It's more of an oatmeal color than beige, but I like it and think the slightly darker color will probably hide stains a little better than my old beige couches did.

Super Couch is so comfortable that I don't know how I am going to get work done anymore. It is really hard to tell from the pictures how huge it is, but it is massive. For some perspective, if I sit with my back against the cushions my feet just barely stick off the edge of the seat cushions. I know I am short, but that is crazy deep!

I think Super Couch looks great in my living room although now I have all sorts of things I want to do to spruce up the area. The oatmeal color clashed with my grey rug so I need to find a different rug to go in the room. Also my old coffee table is long and narrow which looks strange in the space so I need to find a replacement for that, too. I'd also like to change the wall color, paint the trim white and a few other little things.

One thing about Super Couch that is not super is that it came with a bunch (eleven!) of ugly throw pillows. The striped ones don't look too bad from afar but when you get close they are actually purple, magenta and lime green. I simply have no words for the red, purple and grey brush stroke pillows. Frank said that they looked like they belonged to a pimp from the nineties which is not exactly the look I am going for. Luckily, the covers are removable so I plan to save the pillow forms and make some new covers. It will give me a good excuse to break out my sewing machine.

So there's my long winded saga of Super Couch and its illustrious predecessors. Have you bought any furniture recently? Have you ever used fabric dyes on a slip cover? What is your favorite furniture purchase? Have you ever been the beneficiary of unwanted ugly throw pillows?

Saturday
Oct062012

Protecting Outdoor Pumpkins From Animals

Most of the time I love that my neighborhood is home to a bunch of little animals. Watching a bunny hop across my backyard through my kitchen window as I am watching dishes gives me a warm feeling inside.

On the downside, these cute little critters tend to like to munch on things that I am growing in my garden. Additionally, whenever I put pumpkins and gourds out on my front porch, within a day or two nibble marks start showing up on them.

This year I thought I would try something new by spraying some animal repellent on the pumpkins. I decided to buy some Bonide Shot-Gun Repels-All Animal Repellent since it is all natural and not poisonous to animals. I don't mind the animals hanging out in my yard, I just don't want them to chew on my pumpkins. I sprayed the Repels-All on my pumpkins and gourds and let it dry. Like all animal repellents, it has a pretty strong smell which dissipated after a little while.

It has been a few days now and so far I haven't seen any evidence of little critters snacking on my pumpkins so I am pretty ecstatic. Finally, I can decorate my front porch with pumpkins and have it look cute for more than a day or two.

If you try this yourself please note that I don't have children or pets, so if you do please read the instruction labels to make sure that you use it safely with no issues. Also, I have no affiliation with Bonide Shot-Gun Repels-All Animal Repellent so all opinions are my own, however if you do buy it through my Amazon link I will get a small amount of compensation since I am an Amazon Associate.

Tuesday
Sep252012

Fall Gourd Table Centerpiece

Autumn has hit Ann Arbor with a vengeance. It seems like just yesterday we were dealing with late summer temperatures in the nineties. The last few weeks have become downright chilly and I even had frost on my car yesterday morning.

In embracing the change of seasons I decided to do a little decorating on my dining room table. I have a large glass cloche that I have on my table with a vase under it usually and so I thought I would change out the display with a stack of little gourds on a bed of moss.

A few months back I found an old pillar candle holder for a dollar at the Ann Arbor ReUse Center which I thought would make the perfect base. I cut out a circle of cardboard a little smaller than the inside of the candle holder. I then cut a scrap piece of quilt batting and a piece of craft moss about an inch bigger all around than the cardboard circle. I wrapped the batting around the cardboard circle, attaching it on the back with packing tape. I could have alternatively used my glue gun, but my craft room is a mess and I couldn't find it.

I then wrapped the cardboard circle with the moss, securing it with packing tape just like the batting. I then slipped the moss covered disc into the candle holder for a perfect fit. After stacking a few gourds and placing the glass cloche over top, my simple fall table centerpiece was complete. 

It was super easy to make and I had everything on hand already except the moss and the gourds which made it inexpensive as well.

I am happy with the way it makes my dining room looks festive to welcome the fall season. Now I just need to get myself some cider and doughnuts...

If you are interested in some of my other fall projects, check out how to make a pumpkin vase, how to make pumpkin puree from fresh pie pumpkins and my recipe for curried apple pumpkin soup

Has autumn started where you live? Have you been doing any decorating for fall?

Friday
Sep212012

Kitchen Display Shelves 

One of the things that I love about my kitchen are my display shelves. When I worked out a floor plan for my kitchen the only spot that would work to put the refrigerator positioned it do that the side of it was on full display if you were looking in from the living room. Not so pretty.

I had a few spare inches between the fridge and the door to the laundry room so I decided to box in the refrigerator and add some shallow display shelves. What was a design dilemma turned into one of my favorite parts of my kitchen. I have a tendency to collect tons of things on my travels so this way a great way to showcase some of those items along with some functional kitchen items.

I have been adding things to the shelves to the point where they had just become a messy catch all. Instead of looking pretty, they had become cluttered and ugly. I decided to to a little rearranging and editing of what I had displayed since all of my items were not going to comfortably fit.

I thought I would snap some photos of my rearranging and share a little of the story behind the items I have displayed. It's probably still a bit too cluttered, but being the hoarder that I am I have to take it one step at a time.

Top Shelf
On my top shelf starting from the left I have some wooden pestles that I bought at the market in Chichi, Guatemala. I can't resist picking up local kitchen tools when I travel. Behind that is a sign in Japanese that says "危険注意" which means "Caution Danger" in English. I bought it at a flea market in Kyoto because there are warning signs like these all over Japan everywhere you look. Moving on is a bottle of limoncello from my first trip to Italy back in 2002. The limoncello is long gone, but the bottle is pretty and has good memories associated with it so I filled it up with some water with yellow food coloring and have it on display. The pasta print is from Rome on my most recent trip to Italy, earlier this year. I need to get a frame for it, but it is an odd size. Farthest on the right is an antique nut grinder that I picked up years ago.  

Second Shelf
The leftmost item on my second shelf is the olivewood grater that I bought in Sorrento while Frank and I were in Italy in March. In front of the grater is a vintage red enamel teapot that I bought at a local housewares consignment shop here in town. I collect cookbooks from my travels and the Cocina Peruana cookbook was purchased during a visit to Peru. I like that it has the recipes in both Portuguese and English. In front of the cookbook is a set of egg cups from a trip to Grenada, Spain. I love that you can tell they were handmade by the small variations in size and paint among the four. 

Third Shelf
The left side of my third shelf has an apple tea tin that I saved from a trip to Turkey and a small cast iron teapot from Japan. Continuing with the tea theme on the shelf I have a collection of tea tins from trips in Asia including Taiwan, Hong Kong and Japan with a little ceramic teapot from Taiwan perched on top. The Fresh Bread Daily is a vintage reproduction that I've had for forever.

Fourth Shelf
On my fourth shelf I have a muddler that I bought in Brazil for making their national drink, the Caipirinha. Next to the muddler is a little hand painted bowl that I bought at the Grand Bazaar in Istanbul. Hanging up I have the matching pasta print to the one I have on the top shelf. On the right side of the shelf I have a variety of vinegars that I use plus a tin of Greek Olive Oil that I bought in Athens and saved after I used it.

Bottom Shelf
On my bottom shelf I have saved spice tins from my travels in France, Hungary and New York plus a little spice grinder that I bought in Istanbul. Hanging up are some tiny vintage baking tins and the Pates Baroni sign is from Target over ten years ago. The carved little roosters have a fun story. Over ten years ago a friend of mine visited Japan and bought the little pair on the right as a gift for me. The carving style is known as sasano ittobori and I love how the wings and tails are carved with paper thin curls of the wood. Fast forward several years and while I was traveling around Northern Japan in Yamagata Prefecture I discovered that they were selling these same hand carved birds. Of course I had to buy a rooster to go with the pair I already had and picked a small one with a very long tail.

Do you have any collections on display in your kitchen? What kind of items do you pick up when you travel?

Tuesday
Sep182012

Projects Revisited

Recently I've been out of town a lot (for fun and for work) plus with football season starting and a visit from my sister, I haven't had much chance to work on some new projects lately. Hopefully that will change this week, but for now I thought I would give a little rundown about how some of my projects are working out for me a few weeks or months down the line.

Fabric Organization
I used an Ikea Billy Bookcase with a CD insert for fabric storage in my craft room creating bolts out of foam core for the pieces that were at least half a yard long. The CD insert has the perfect sized cubbies for my fat quarters and my scraps are stored in baskets and jars I already had. I also used an antique Japanese soda crate to store my thread. I have really liked how this has turned out because it is really easy for my to see exactly what I have on hand and not have to go digging through things to find a fabric that I am looking for. My only problem is that I am starting to outgrow this solution, having acquired a few more fat quarters than will comfortably fit in my cubbies.  

Keeping Plants Watered During Vacation in the Bathtub
I tried a trick that I read online to keep my plants from dying while on vacation, namely putting them in the bathtub with a little water and then covering it with plastic wrap to effectively create a terrarium. I tried this while Frank and I were on vacation in Italy earlier this year. I have to say that it worked a little too well. The soil in the plants was very, very damp when I came home. Some of my plants, like the basil, did well with all the moisture but it was too much for my rosemary plant and it died. I think that I would try it again (it was definitely better than all of my plants dying while I was out of town!) but I would cut a lot more holes in the plastic wrap to let more of the water escape.

New Mailbox
The antique cast iron mailbox that I had been using was just too small and my mail was always overflowing and getting bent when it was delivered. After hunting on eBay for a while I found a larger orange vintage mailbox that I made over with some oil rubbed bronze spray paint and hung out front. I absolutely love that my mail doesn't get squished anymore but my problem is that I am too short for it. Because of the wood siding on my house I had to hang it between the angled slats such that there is space for the lid to swing open. One slat farther down would obstruct the door bell, but where it is currently placed makes it hard for me to reach the bottom of the mailbox since it is so deep. I need to get a thin piece of wood to mount on top of the siding and then mount my mailbox on top of that to fix it, but I haven't done it yet. Once I do that I think it will be perfect. Either that or I need to grow a few inches.

New Dining Room Chairs
After years of using some Ikea folding chairs that had seen better days in my dining room I scored a great deal on Craigslist on a set of eight dining room chairs from Crate and Barrel for only $500. I could not be happier with the chairs. Not only were they a super fabulous deal, but they are so comfortable and I love sitting in them. They are also in fabulous shape and you can't tell that they aren't new. I can't say enough about how happy I am with this purchase. I still need to do something about making or buying a bigger table so the chairs comfortably fit, but those things take time.

Front Porch Makeover
I did a few projects on my front porch this summer to spruce it up. First up was my self watering planter. I checked the water level once a week and it worked really well until I was an idiot and went to Japan and didn't check the water level before I left. Not surprisingly, if the water reservoir is empty the self watering doesn't work. It was working really well up until then so I would definitely do it again. I also joined two rugs together using duct tape to make a runner on my porch. It has held together really well and I have had no issues with it coming apart. My other little decor items on the porch, like the house silhouette art I made and my geisha vase, have stood up well being outside with no issues or damage. The teal spray paint on my table has also held up well with no fading of the fun, bright color so far.

I could keep going but I'll stop for now. If there are any of my other projects that you would like an update on, please let me know. I'd love to share. Also, how about your projects at home? What has worked out really well for you? Has anything gone not quite as well as planned?

Friday
Sep142012

Master Bathroom Renovation Recap 

I realized that although I had finished up my master bathroom I had never put together an overall post with pictures from around the whole room. I thought I'd start by sharing the floor plan in the back portion of the upstairs when I bought the house and what I revamped it to.

The previous owners had taken the 13-1/2' x 13-1/2' room in the back and carved out a 5' x 8' space to create a bathroom. It left a really weird nook in the rest of the space that they had drywalled but never finished. The whole thing was quite strange. The room next door was a nice size at 10' x 10' (with a little angle cut off the corner) and seemed to be used as a kitchen at some point based on pipes sticking out of the wall and some teacup wallpaper in the closet. It seemed to me that a better use of the space was to make the old kitchen room into a master bathroom which would then leave a large space in the back room for me to make a craft room.

I spent a lot of time trying to figure out how to layout the new bathroom. The window was off center in the room so by placing my shower in the corner I was able to make the window look like it was centered on the wall. Most of the old bathroom was unsalveagable but I saved the old claw foot tub and placed it under the window. In one corner of the bathroom was a bump out for the old chimney. In order to make it less pronounced looking and give myself some storage I decided to put a built in in the space between the chimney and shower. I kept the door locations the same and from there it was easy to determine the location for the toilet and sink.

Here a few pictures of the space before. Yeah, I know that it looked like a scary old haunted house and I am crazy to have bought the place. Looking back at the old pictures encourages me because it reminds me how far my house has come even though there is a lot more left to do.

Okay, now for the fun part, the after pictures. The room was gutted to the studs with new electrical, HVAC and plumbing. Putting the room back together the bathroom was drywalled and new trim was installed including beadboard wainscoting around the room. The old linoleum was torn out and the floors were refinished. Those major renovations required me to hire some professionals for some things as well as get the helping hand of a friend for some others.

For a color scheme I thought teal and white with a few hints of black would be bright and refreshing. Since my house is over a hundred years old I wanted to keep a vintage feel to my bathroom. Also, since I lived in Japan and really enjoyed their strong culture around bathing (i.e. going to hot springs (onsen) for bathing, taking regular soaking baths at home) I included some small Japanese touches in my bathroom's decorative accents as well.

My clawfoot bathtub was salvaged from the old bathroom and while the porcelain on the inside was in great shape the outside paint was beige and chipping off. I refinished the outside with a pale teal paint and then added a new vintage style chrome faucet with white handles. On the floor in front of the bathtub I made a rug by sewing together some towels. On the walls flanking the window, I framed some pretty decorative packaging from Japanese bath salts.

I made the shower 3 feet by 5 feet which was spacious enough for two shower heads. I also wanted it to be open so I designed it to have the knee walls with clear glass above and splurged to have custom glass installed (I think it was worth it!). With all the space in the shower I decided to build myself a little shower stool to fit in the corner.

This was my very first experience in tiling and being an engineer I was pretty anal retentive about the way I lined up the tile and wrapped the pattern around the corners. I bought a used wet tile saw from a guy off of Craig's List for $100 and it was worth every penny! I chose 3" x 6" white field tile to give a vintage subway tile look plus as an added bonus it was inexpensive. For my accent liner bars I thought that black tile was a good neutral choice so that it left me free to change up the colors in the bathroom in the future without worrying about the tile color.

My built-in is one of my favorite parts of the room. I designed it to have open storage up top as well as some concealed storage down low. For fun I added some black and white damask patterned wallpaper to the back of the top of the built-in. I had a lot of fun arranging the shelves with practical bath items, like towels and my Japanese bath salts, and decorative items, like white coral that I picked up on a beach in the USVI and framed pictures that I took of a famous Japanese onsen. 

Above the toilet I made over a free mirror with some silver spray paint to tie in with the chrome fixtures in the room. On the back of the toilet I have displayed a little white bowl that I made at a pottery studio in Seto, a town famous in Japan for pottery. Seeing it every day brings back some good memories. Since space was tight and I didn't want to add holes to my beadboard, I chose to use a free standing toilet paper holder.

Since I had plenty of storage in the built-in I chose a pedestal sink to keep the bathroom looking open as well as maintain the vintage feel. Like the shower and tub, the new fixtures are chrome with white handles in a vintage style. I thought about building my own medicine cabinet, but then found this one at the Pottery Barn Outlet for such a great deal that I couldn't resist.

For lighting I bought a pair of black porcelain sconces that are vintage reproductions. I have a matching black porcelain ceiling fixture that I paired with a vintage glass globe that I found on eBay. I love how the globe is white on the sides and has the detailed deco pattern in the clear glass on the bottom. My ceiling fan came with a plastic vent cover that I felt didn't go with the look of the bathroom so I built my own vent cover out of wood and some perforated metal.

Inside my medicine cabinet I added some more wallpaper and then organized by using some inexpensive black and white cardboard containers. The bottom of my built-in was organized with some more cardboard containers and wire baskets. By nature I am not an organized person (some days Pigpen has nothing on me) and the little containers really help me to corral things and have some semblance of order. These shelves are by far the neatest area in my house right now. I really wish I was kidding but unfortunately I am not. 

On the back of the door next to the sink (which leads to my master bedroom closet and then on to my master bedroom) I hung up and labeled baskets to sort my laundry. This has really me to keep my piles of laundry off the floor. Now when a basket is full I can just take it off the hook and down to my laundry room.

Well, there you have it, more detail than you would ever want to know about my bathroom. It has been a lot of work but I really love it and I wouldn't want to change a thing (for now that is!).

If you are curious, here is a list of sources for the room. As a disclaimer I started remodeling it back when I bought my house and many of the decorative/storage items I have had for years and years so some items are discontinued and there are a few things I where I just don't remember.

Wall Paint: Valspar Lyndhurst Duchess Blue
Trim Paint: Valspar Betsy's Linen
Bathtub Paint: Valspar Beach House
Ceiling Light Fixture: Rejuvenation Mathison Streamline Porcelain Ceiling Fixture
Ceiling Light Shade: Vintage from eBay
Sconces: Rejuvenation Adrian Streamline Wall Bracket
Shower Door: Custom by Wolverine and Moore Glass
White Shower Wall Tile: American Olean 3-in x 6-in Starting Line White Gloss Ceramic Wall Tile
Black Shower Tile: American Olean 1-in x 6-in Linea Gloss Black Ceramic Tile Liner
Shower Floor Tile: The Tile Shop Hex Matte White .75 x .75 in
Pedestal Sink: Kohler Memoirs (Base Link)
Toilet: Kohler Memoirs
Medicine Cabinet: Pottery Barn Sonoma Wall Mounted Medicine Cabinet (purchased at Pottery Barn Outlet)
Built-in Cabinet Handles: Lewis Dolin Retro Pull
Wallpaper: Norwall Black & White BK32032
Black & White Cardboard Bins: Target One Spot
Wire Baskets: Target
White Reclaimed Wood Picture Frame: Mulbury Gallery (purchased at an art fair in Australia)
Teal Leather Picture Frames: Papyrus
Black Wall Frames: Meijer
Toilet Paper Holder, Cotton Swab Container, Stand Mirror: HomeGoods
Soap Dispenser: Target
Large Starfish: Michael's
Towels: Target Room Essentials
Rug: Made from HomeGoods Towels 
Laundry Baskets: Ikea Nasum

Friday
Aug242012

Bamboo Blinds For My Dining Room

One of the to do items in my dining room has been to put up some blinds on my bay window. Being an old home, the windows are not a standard width but I am too impatient and too cheap to get custom blinds. Instead I bought some inexpensive bamboo blinds and tried trimming them down.

The middle window is 32.5" wide and the sides are 22.5" wide so I bought a 36" blind and two 30" blinds. On the smaller blinds I needed to remove 7.5" which meant 3.75" on each side. I wrapped painter's tape on the end of the blinds and then in the middle of where I needed to cut. The tape kept the pieces of bamboo together while I was cutting. I made a mark on the tape where I needed to trim and then used my chop saw to cut down the ends. It was a good idea in theory but the inexpensive bamboo chipped a lot on the ends and it looked really bad. The blind was only $15 so it wasn't a very expensive mistake and I am glad that I at least tried it.

I took the remaining blinds back to the store and looked around for another option. I found some bamboo blinds that are pricier but that the store will cut down for you. They were also a nicer quality and had a privacy backing. At a total of $128 for the three blinds it was way more than I wanted to spend but still a lot less than if I ordered custom blinds.

Luckily the store had exactly what I needed left in stock, one 36" wide blind and two 24" wide blinds. I brought them over to the cutting area, gave them my window measurements and did some other shopping while I waited.

Unfortunately when I came back the machine had screwed up one of the shades and didn't cut it all the way through. They weren't going to have restock for that blind for another week but they were able to call the other store across town to hold the one that they had left in stock.

After a jaunt across town I finally had all three shades and I crossed my fingers that everything would fit and be the correct size. Luckily the install was easy and I had the shades up in no time. I just measured where the brackets needed to go, marked the hole locations, pre-drilled the holes, screwed in the brackets and then attached the blinds.

Getting blinds for my dining room ended up being more of an ordeal than I thought it would be but I love how they look and I am so happy that I have this item checked off of my long to-do list. I think that when I eventually paint the trim white the bay window will really look phenomenal.

Are you working on any window treatments for your home? Have you ever had something you thought was going to be simple turn out to be more trouble than you thought?