Welcome

My name is Lisa and I'm a crafty girl with wanderlust working as an engineer by day. My blog chronicles projects in my home as well as pictures and stories from my travels.

Search


Instagram

Blog Index
The journal that this archive was targeting has been deleted. Please update your configuration.
Navigation

Entries in Front Porch (7)

Monday
Oct272014

Fall Planting

With winter on the horizon I like to have something growing in front to the house for as long as I can so I did a little fall planting a few weeks back.

I picked up a variety of mums, kale, cabbages and pansies and set to work. On my porch steps I put some large purple and burgundy colored mums in a planter and set decorative cabbages in urns in front of them.

In the front bed I planted some beautiful purple celosia in between my boxwood shrubs. I've never tried planting it before in my garden so I'm curious to see how late in the season it will keep blooming. Along the front of the bed I planted some decorative green/white and green/purple cabbages to create a border.

In my hanging baskets I planted burgundy mums and pansies. I like how the different hanging heights of the baskets look together.

In the bed that circles my tree I planted some frilly looking green/purple decorative kale in between my hostas.

I'm happy to have some flowers and greenery in my front yard for as long as I can, especially if we have another really cold winter this year. It makes coming home a bit more cheerful on a bleak day.

Wednesday
Dec042013

Decorating the Front Porch for Christmas

Now that December is here I am starting to get into the Christmas spirit. I started my decorating this year with my front porch swapping out my summer accessories for more festive things. 

I swapped out my multi color rug for an inexpensive solid teal rug that matches the accent trim on my house. On my accent table I placed some greens in a metal pitcher from Ikea. In front I had a little red pail that I got from the Target One Spot that I filled with pine cones. I picked up several of the red star pails a few summers back and love how versatile and festive they look.

I swapped out my pink pillows for red outdoor pillows layered with small burlap snowflake pillows I found at Target.

Just to the right of my front door I put a small Christmas tree in the planter I built this past summer along with an outdoor lantern that I used in the backyard this past summer.

It only took a few minutes but it makes me so happy and puts me in the Christmas mood when I walk up to my front door.

This weekend Frank and I are going to get a Christmas tree and hang Christmas lights on the house and I can't wait. Have you started any holiday decorating this year? 

Tuesday
Jun252013

Porch Garden Bed for Summer 2013

After sharing the transformation of my front tree bed last week I thought I would also share how things are shaping up with the plants for my porch garden bed.

This garden bed is always a bit of a struggle for me because of the wide range of lighting conditions. The front is heavily shaded by the two huge trees in my front yard, however the side gets full sun all day. Don't even get me started about trying to deal with the corner section.

Trying to figure out a cohesive design with plants that work in the various areas of the bed has been a bit of trial and error for me over the past few summers. I try new things and see what thrives and what doesn't. Of course I do some research about what conditions work best for a plant before I try it in a location, but that isn't always a surefire guarantee. I'm sure I will always be tinkering with this garden bed.

Across the front I have three boxwood shrubs. They seem to do well there and I like that they stay green over the long Michigan winter. Last year I planted some starfire dahlias for color in front of the boxwoods but the bunnies in my yard really enjoyed biting off the flower buds so I chalked that up to a failed experiment. This year I decided to go back planting New Guinea impatiens which have worked well in that spot in the past. The bunnies seem to leave them alone and they are happy in the shade.

For the past two years on the corner I have planted pink mandevilla which has worked really well. I wanted to do again this year, but I couldn't find a decent plant at the nursery. I spotted some calla lilies on sale at Lowe's however, and thought that I would give them a shot. I've planted them with success in between the boxwood before, but this spot is a bit sunnier so we will see how things go.

Along the side I have some small shrubs that I thought I killed back in the summer of 2011 when I was traveling around Southeast Asia for three weeks and they didn't get any water. Last year I pruned back the dead branches and they are really thriving now. I like that they have a different shape from the boxwood but the leaves are similar making it a nice tie-in. I also planted some pink superbells in front of the shrubs that I tried in that spot and worked well last year.

Up on the porch I have a few hanging baskets of fuschia and petunias. I am not a big fan of plastic planters so this year I repotted the plants in white metal Socker hanging planters from Ikea. At only $4.99 each they look nicer than the plastic and were pretty inexpensive as well.

I've had everything planted for a little bit with everything doing well so far. I'll just have to wait and see how the bed continues to grow over the rest of the summer.

If you are curious for reference, here is the same garden bed from last summer.

How is your summer gardening coming along? Do you have any difficult spots with mixed light?

Thursday
Feb212013

Switching Up Some Switches

Since I am still not feeling the best I've been tackling some small projects around the house. I am missing my power tools but it's still good to be making a bit of progress, albeit slowly.

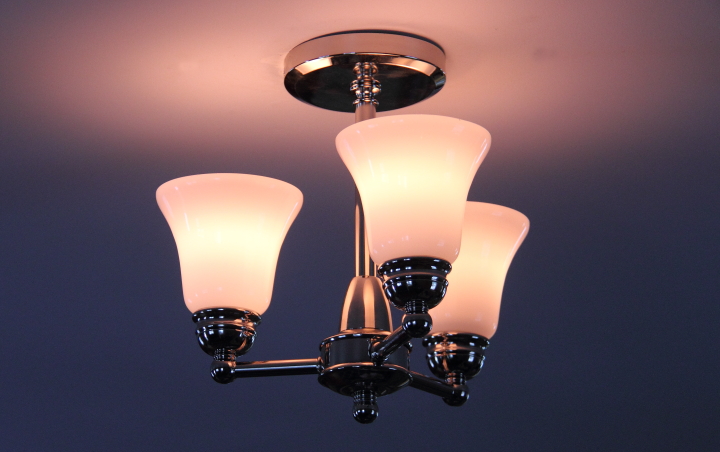
Last weekend one of the little projects was swapping out some of the switches in the living room. With the new living room light being so bright now it seemed like a good idea to put it on a dimmer for times when it was a little overwhelming. 

When I work on the electrical in my house instead of just shutting off the circuit breaker for what I am working on I like to shut off the main breaker on my panel just to be on the safe side. I took off the switch panel and then removed the screws that hold the switch into the electrical box.

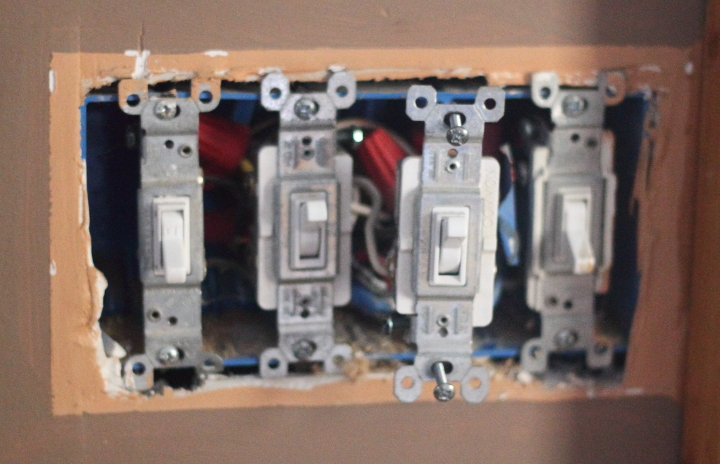
The switch I was replacing was a three way switch. I am not going to go into great lengths about three way switch wiring, but if you are replacing one it is really important to take note of which wire is connected to the common screw and which ones are connected to the travellers before you disconnect the wires. The common screw is easy to identify because it is a different color from the others, usually black of copper. Here is my new three way switch with the screws labeled.

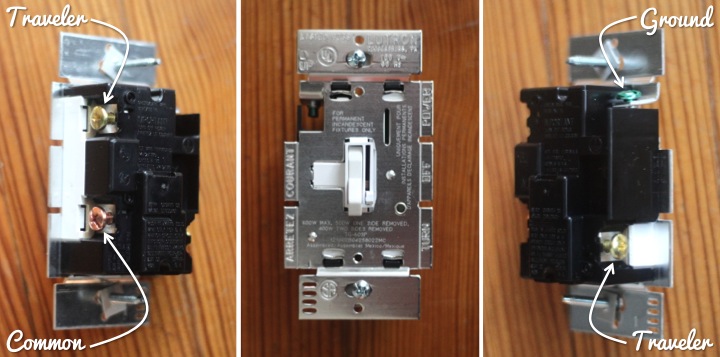
There are different ways to wire up a three way switch, depending on how many lights are involved and the order in which you wire everything up, but here is a simple way to think about it to understand why you want to keep the wires straight.  The power is coming into (or out of) the switch at the common screw and the travelers are two lines between them. When you toggle one of the three way switches you are either connecting the power by having the switches toggled to the same traveler wire or disconnecting the power by having them connected to opposite travelers. 

After I removed the wires from my old three way switch, I reattached them to my new switch, making sure to attach the wire that was attached to the old common screw to the new common screw. Super easy!

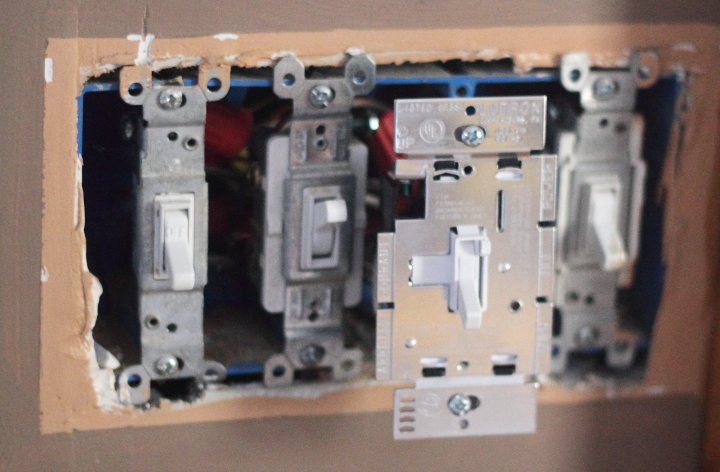
The dimmer I got has a slider next to the toggle switch so I can set a brightness level that I like and switch it on and off. It is really nice to have this convenience and now I am thinking I need to add a dimmer for the dining room light...

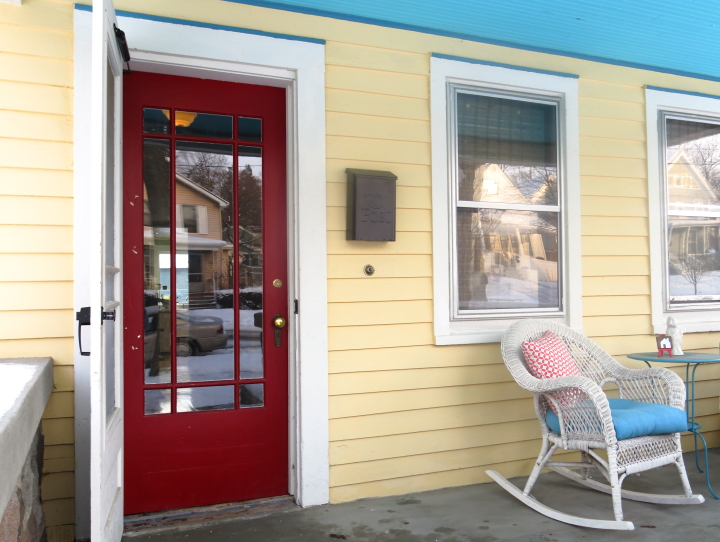
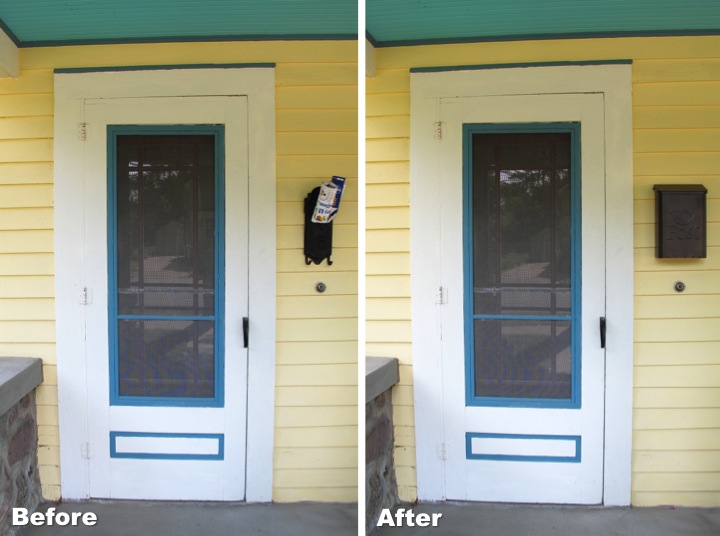
Next up was adding a wireless motion detector to my front porch light. Living alone, I like to come home with my front porch light on. Since I work a lot of late nights that meant that I was leaving my light on all day which really wasn't the best plan. I saw this wireless motion detector and thought it would be just the thing for me.

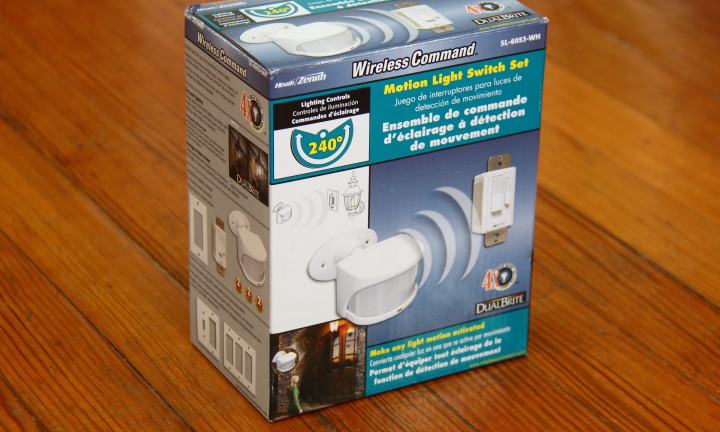
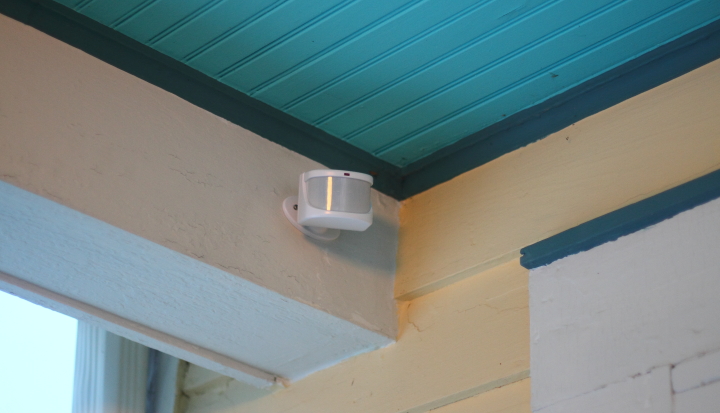
The kit consists of two parts, a detector and a switch with an antenna and receiver. The installation was fairly simple. Frank mounted the detector in the corner of my front porch for me while I swapped out the old switch with the new receiver switch. 

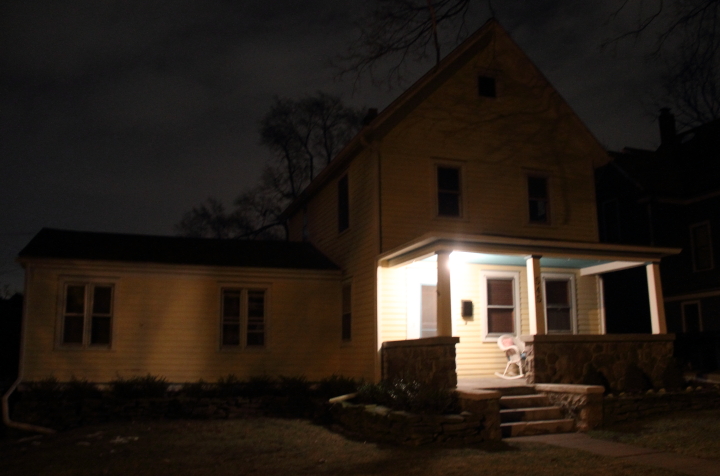
The system works great. It has a setting where it will come on half power at dusk and stay on like that for three hours. If it detects any motion it comes on full power. At first we thought it wasn't working because it seemed to be on a lot, but then we realized that we needed to reduce the range since it was picking up cars that were driving down the street. I really like it and wish I had installed it sooner.

The last item to cover is the switch cover. I've never seen a four gang switch plate with a single decora opening on the left and three toggle switch openings so I wasn't exactly sure what to do. I found these snap together switch plates so I decided to use them to make the switch plate I needed.

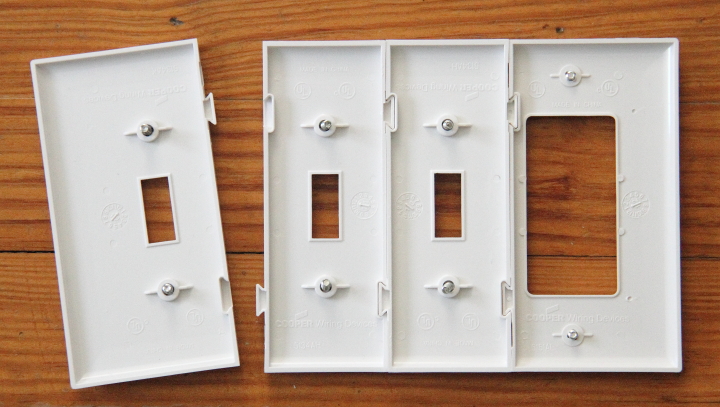
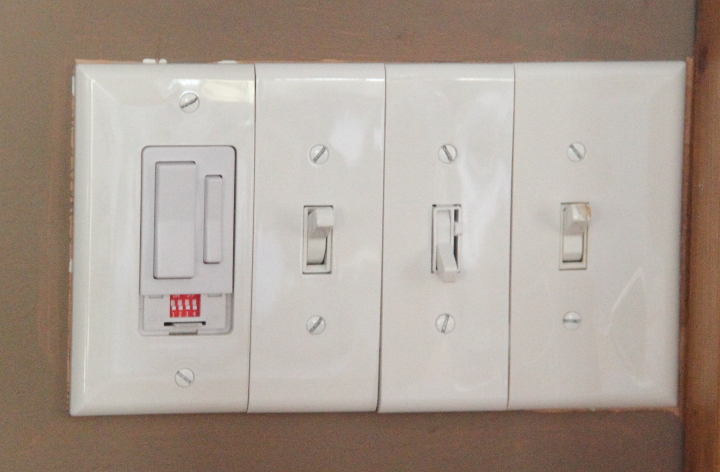
I have to say that although it meets my needs right now I am not crazy about it, since the seams are super obvious. At some point down the line I'll make something that looks nicer, but for now it is okay. It's a small price to pay for having a dimmable living room light and a motion sensor for my porch light.

Tuesday
Feb052013

Shopping for a New Front Door

My house is in need of a new front door. The door that was on my house when I bought it was a wooden door with three small rectangular glass windows staggered like a set of stairs along the top. Appropriate for a house built in the 1960s? Sure. Appropriate for a house built in the late 1800s? Yeah, no. Here is a picture of of my house back in 2007 soon after I bought it with the old door on it. My poor house looked so scary then! I apologize for the crappy photo but it is all I have.

The old door was one of the first things to go after I bought my house. It was replaced by a beautiful salvaged door with lovely glass panes that I painted red. It is the right period for my house and I love how it looks however after living with it for a few years it has to go.

First, the door is not the sturdiest and I think it would be better suited to being an interior door. Second, it is a little small for my door frame and that combined with the large amount of glass makes it extremely terrible for losing heat in the winter.

So as much as I love the glass front door it is time to replace it. I dragged Frank along with me on my search since a door won't exactly fit in my tiny little car. We hit up the Ann Arbor ReStore first. It has donated building salvage that can be a hit or miss. I found my five panel doors for my upstairs closet there but this trip was a definite miss with very slim pickings for doors.

Next up was Materials Unlimited in Ypsilanti. This place is a beautiful architectural salvage store with amazing things. If I had an unlimited budget I would be buying up the place. On the first floor they have antique furniture with a ceiling dripping with salvaged lights they have restored.

On the second floor they have beautiful hardware like knobs and hinges in good condition in glass display cases.

The basement is my favorite place, though. They have a room of old salvaged hardware that is in a bit rough condition but fun to sift through.

I also love all of these salvaged balusters. Wouldn't it be fun to redo a staircase with them?

The basement is also where all of the salvaged doors are located. Frank and I started looking through them to find a good candidate.

All of the doors have tags telling you where they were salvaged, age if known and other cool details.

The first door that was a candidate was this beautiful Victorian eight panel door that was salvaged from Detroit Odd Fellows Hall from 1874. I really liked the design but since it was pine and a little thinner than I would like we decided to keep looking.

The final winner was this three panel door salvaged from Battle Creek, Michigan dating to 1912. The door is constructed from Birch and Oak and is super solid with lovely detail along the panel edges.

I am really excited about the new door and can't wait until the weather warms up a bit (my garage is freezing right now!) so I can work on refinishing it.

Tuesday
Sep182012

Projects Revisited

Recently I've been out of town a lot (for fun and for work) plus with football season starting and a visit from my sister, I haven't had much chance to work on some new projects lately. Hopefully that will change this week, but for now I thought I would give a little rundown about how some of my projects are working out for me a few weeks or months down the line.

Fabric Organization
I used an Ikea Billy Bookcase with a CD insert for fabric storage in my craft room creating bolts out of foam core for the pieces that were at least half a yard long. The CD insert has the perfect sized cubbies for my fat quarters and my scraps are stored in baskets and jars I already had. I also used an antique Japanese soda crate to store my thread. I have really liked how this has turned out because it is really easy for my to see exactly what I have on hand and not have to go digging through things to find a fabric that I am looking for. My only problem is that I am starting to outgrow this solution, having acquired a few more fat quarters than will comfortably fit in my cubbies.  

Keeping Plants Watered During Vacation in the Bathtub
I tried a trick that I read online to keep my plants from dying while on vacation, namely putting them in the bathtub with a little water and then covering it with plastic wrap to effectively create a terrarium. I tried this while Frank and I were on vacation in Italy earlier this year. I have to say that it worked a little too well. The soil in the plants was very, very damp when I came home. Some of my plants, like the basil, did well with all the moisture but it was too much for my rosemary plant and it died. I think that I would try it again (it was definitely better than all of my plants dying while I was out of town!) but I would cut a lot more holes in the plastic wrap to let more of the water escape.

New Mailbox
The antique cast iron mailbox that I had been using was just too small and my mail was always overflowing and getting bent when it was delivered. After hunting on eBay for a while I found a larger orange vintage mailbox that I made over with some oil rubbed bronze spray paint and hung out front. I absolutely love that my mail doesn't get squished anymore but my problem is that I am too short for it. Because of the wood siding on my house I had to hang it between the angled slats such that there is space for the lid to swing open. One slat farther down would obstruct the door bell, but where it is currently placed makes it hard for me to reach the bottom of the mailbox since it is so deep. I need to get a thin piece of wood to mount on top of the siding and then mount my mailbox on top of that to fix it, but I haven't done it yet. Once I do that I think it will be perfect. Either that or I need to grow a few inches.

New Dining Room Chairs
After years of using some Ikea folding chairs that had seen better days in my dining room I scored a great deal on Craigslist on a set of eight dining room chairs from Crate and Barrel for only $500. I could not be happier with the chairs. Not only were they a super fabulous deal, but they are so comfortable and I love sitting in them. They are also in fabulous shape and you can't tell that they aren't new. I can't say enough about how happy I am with this purchase. I still need to do something about making or buying a bigger table so the chairs comfortably fit, but those things take time.

Front Porch Makeover
I did a few projects on my front porch this summer to spruce it up. First up was my self watering planter. I checked the water level once a week and it worked really well until I was an idiot and went to Japan and didn't check the water level before I left. Not surprisingly, if the water reservoir is empty the self watering doesn't work. It was working really well up until then so I would definitely do it again. I also joined two rugs together using duct tape to make a runner on my porch. It has held together really well and I have had no issues with it coming apart. My other little decor items on the porch, like the house silhouette art I made and my geisha vase, have stood up well being outside with no issues or damage. The teal spray paint on my table has also held up well with no fading of the fun, bright color so far.

I could keep going but I'll stop for now. If there are any of my other projects that you would like an update on, please let me know. I'd love to share. Also, how about your projects at home? What has worked out really well for you? Has anything gone not quite as well as planned?

Sunday
Jul082012

Decorating My Front Porch

Now that I've done a few little things to spruce up my front porch, like make a self-watering planter, spray paint my table teal and lay out a new rug, I thought it was time to decorate a little.

I wanted to add a few cute things, but because it is outside I didn't want to add anything valuable in case they got ruined.

My first addition was inspired while I was perusing the Ann Arbor ReUse Center. I found a tiny wooden plaque that someone had hand painted with the message "Blessed are the brief...for they have fewer phone bills." At first glance it was pretty tacky, but when I flipped it over the backside was a nice already stained plaque in good shape. It was only $0.50 so I was sold.

Once I got home I decided that I wanted to add a little house silhouette on the front of the plaque. I had some extra vinyl left over from when I made my templates for etching my Limoncello bottles so I used that. I sketched out a house outline on the back of the vinyl, cut it out and adhered it to the plaque.

I needed something for the plaque to stand on and a tiny wood easel that I bought for a dollar from Jo-Ann Fabrics did the trick. I wanted to add a little color so I painted it coral pink with some craft paint. Once the paint was dried I set up the easel on my front porch table and placed the little plaque on it.

With my little home plaque joining my self watering petunia plant on the top of the table, I turned to finding something to go on the lower shelf of the table. Rummaging through some old things I came across this white ceramic geisha drink glass and thought it would be perfect. When I turned twenty-one I celebrated by going out to Benihana (yeah, I am a wild one!) for dinner and my very first legal alcoholic drink was a fruity mixed drink in that glass. Over the intervening years I've held onto it but it really hasn't done much other than collect dust. It was just the right size and proportion to fit on the shelf so outside it went.

While I was at Home Depot picking up some paint I stumbled across these coral pink and light blue outdoor pillows on sale for $11. The pattern picks up the colors in my scheme and looks bright and cheery. They are also very soft and comfy which will make relaxing on the front porch even better.

I'm pretty happy with how everything has come together and while I am sure that I will probably do some tweaking later, I think it is basically finished...for now.

Are you enjoying your front porch this summer? Is it someplace that you enjoy hanging out? Have you done anything to decorate it?