 I have a tendency (which my husband hates!) of starting and not finishing house projects. To spur myself on, I thought I'd join the One Room Challenge this year as a guest participant. My hope is that with a deadline I'll not only begin but also actually complete transforming my attic loft space into a craft studio. I've got a lot of ambitious plans that I'm doing myself but I always like a challenge.
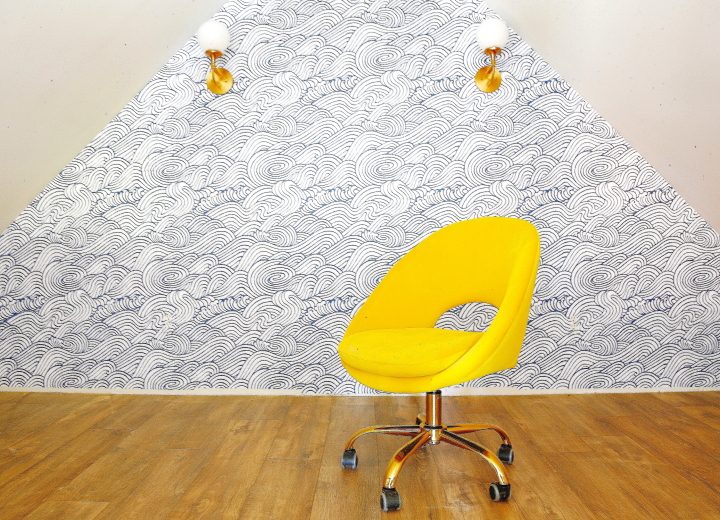
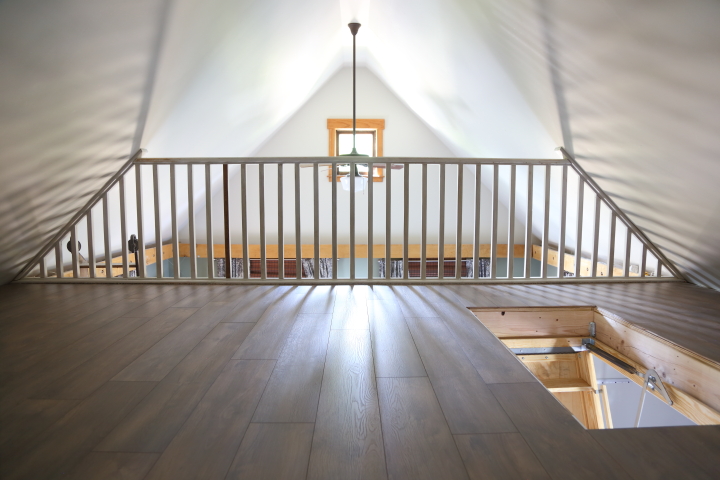
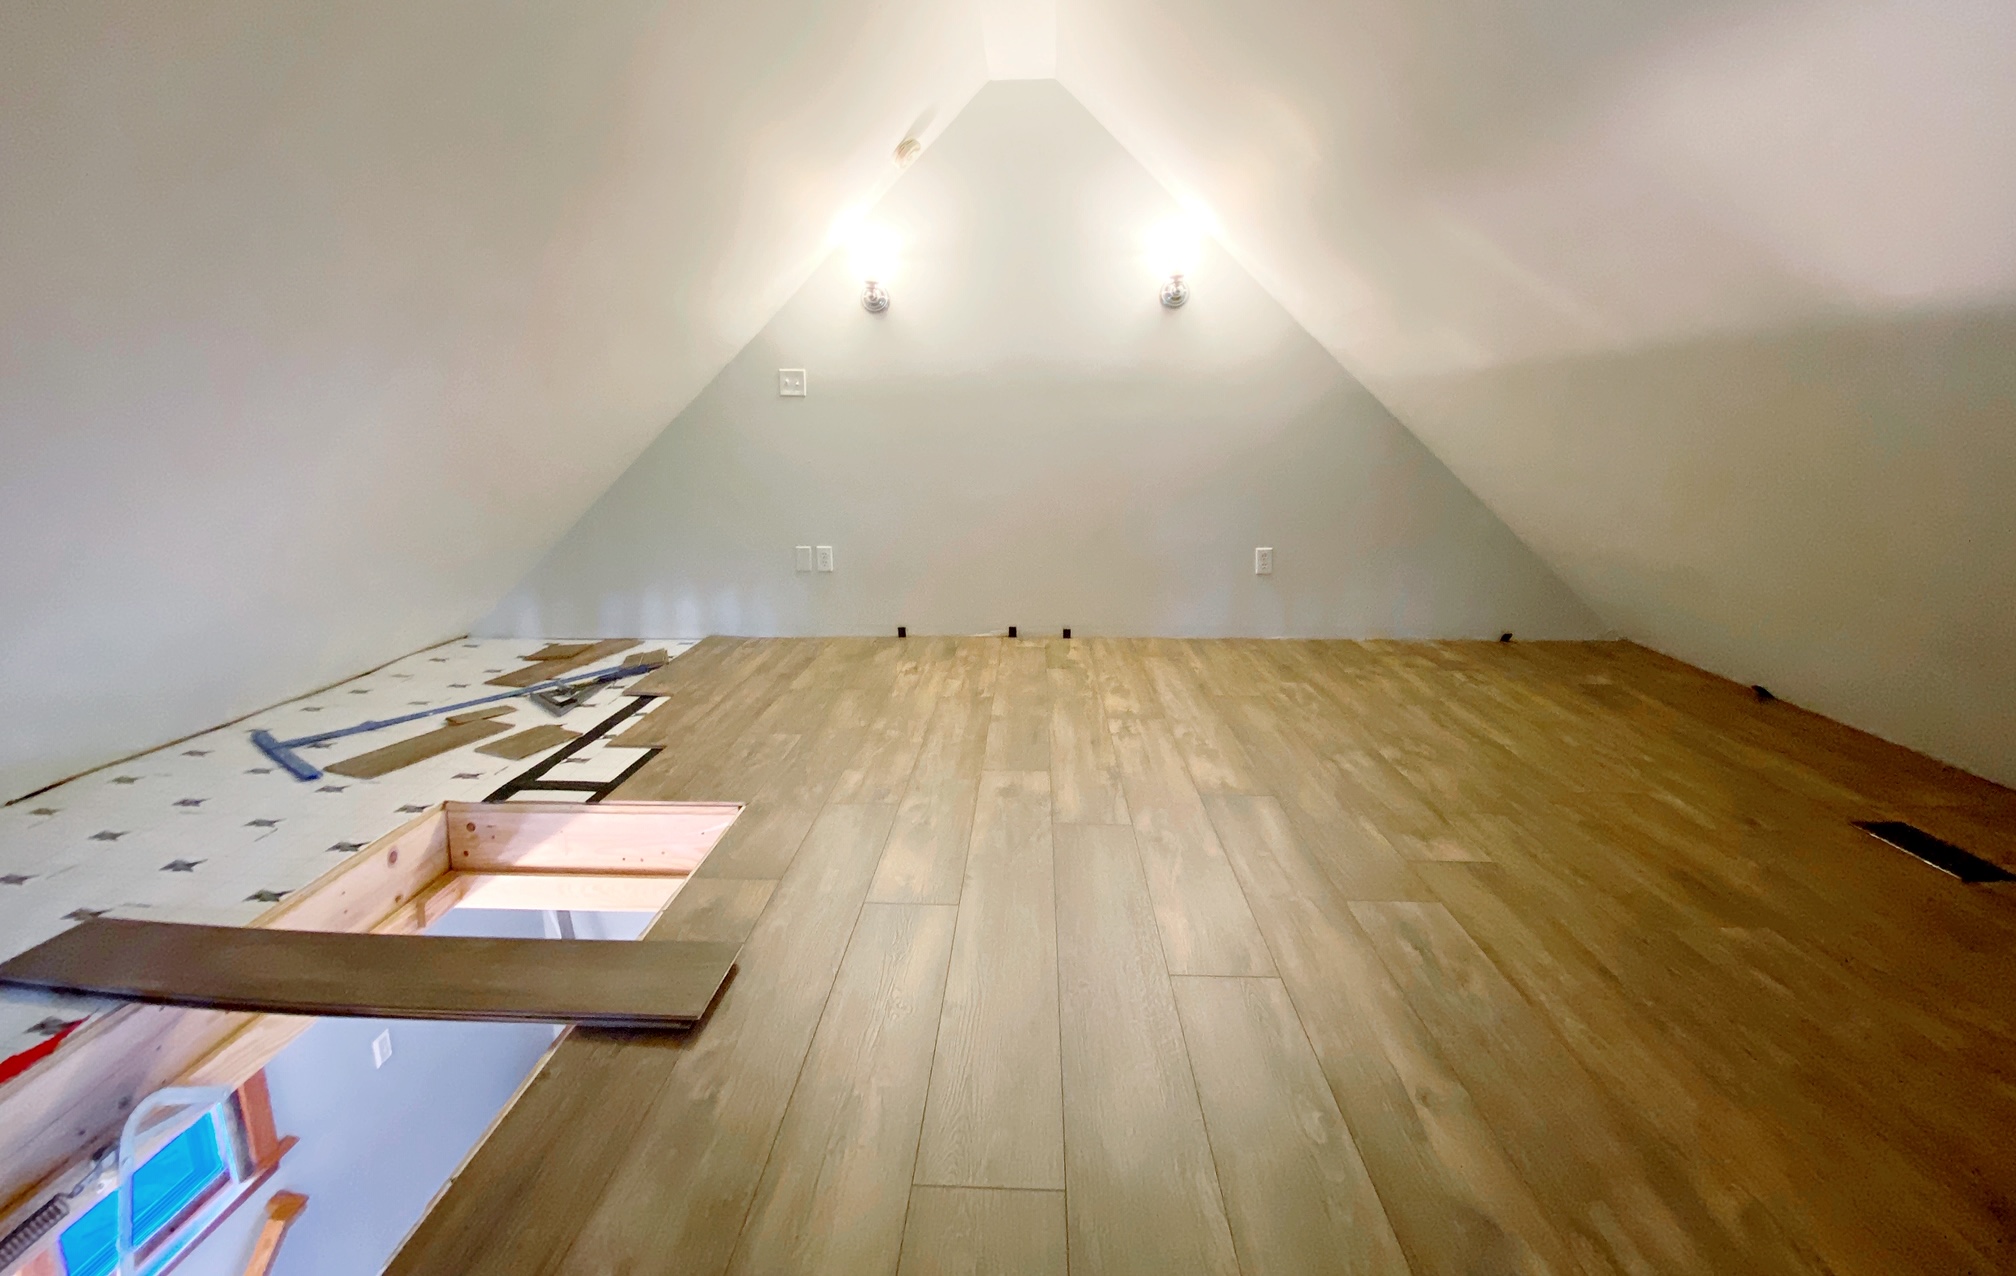
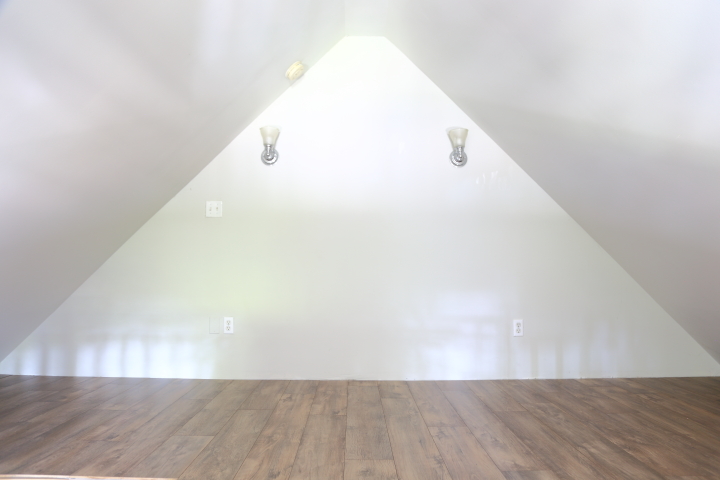
Back when I first bought my home in 2007 and renovated the main part of the house I created my bedroom by combining two small bedrooms and lofting the ceiling. While I was at it I created a loft attic space that overlooks the bedroom in the space above the upstairs bathroom, hallway and closet. It’s a great bonus space but it’s sat unused all these years. Recently I decided to finally make use of the space and use it to create a craft studio for myself. Here is the space as it looked at the beginning of September.
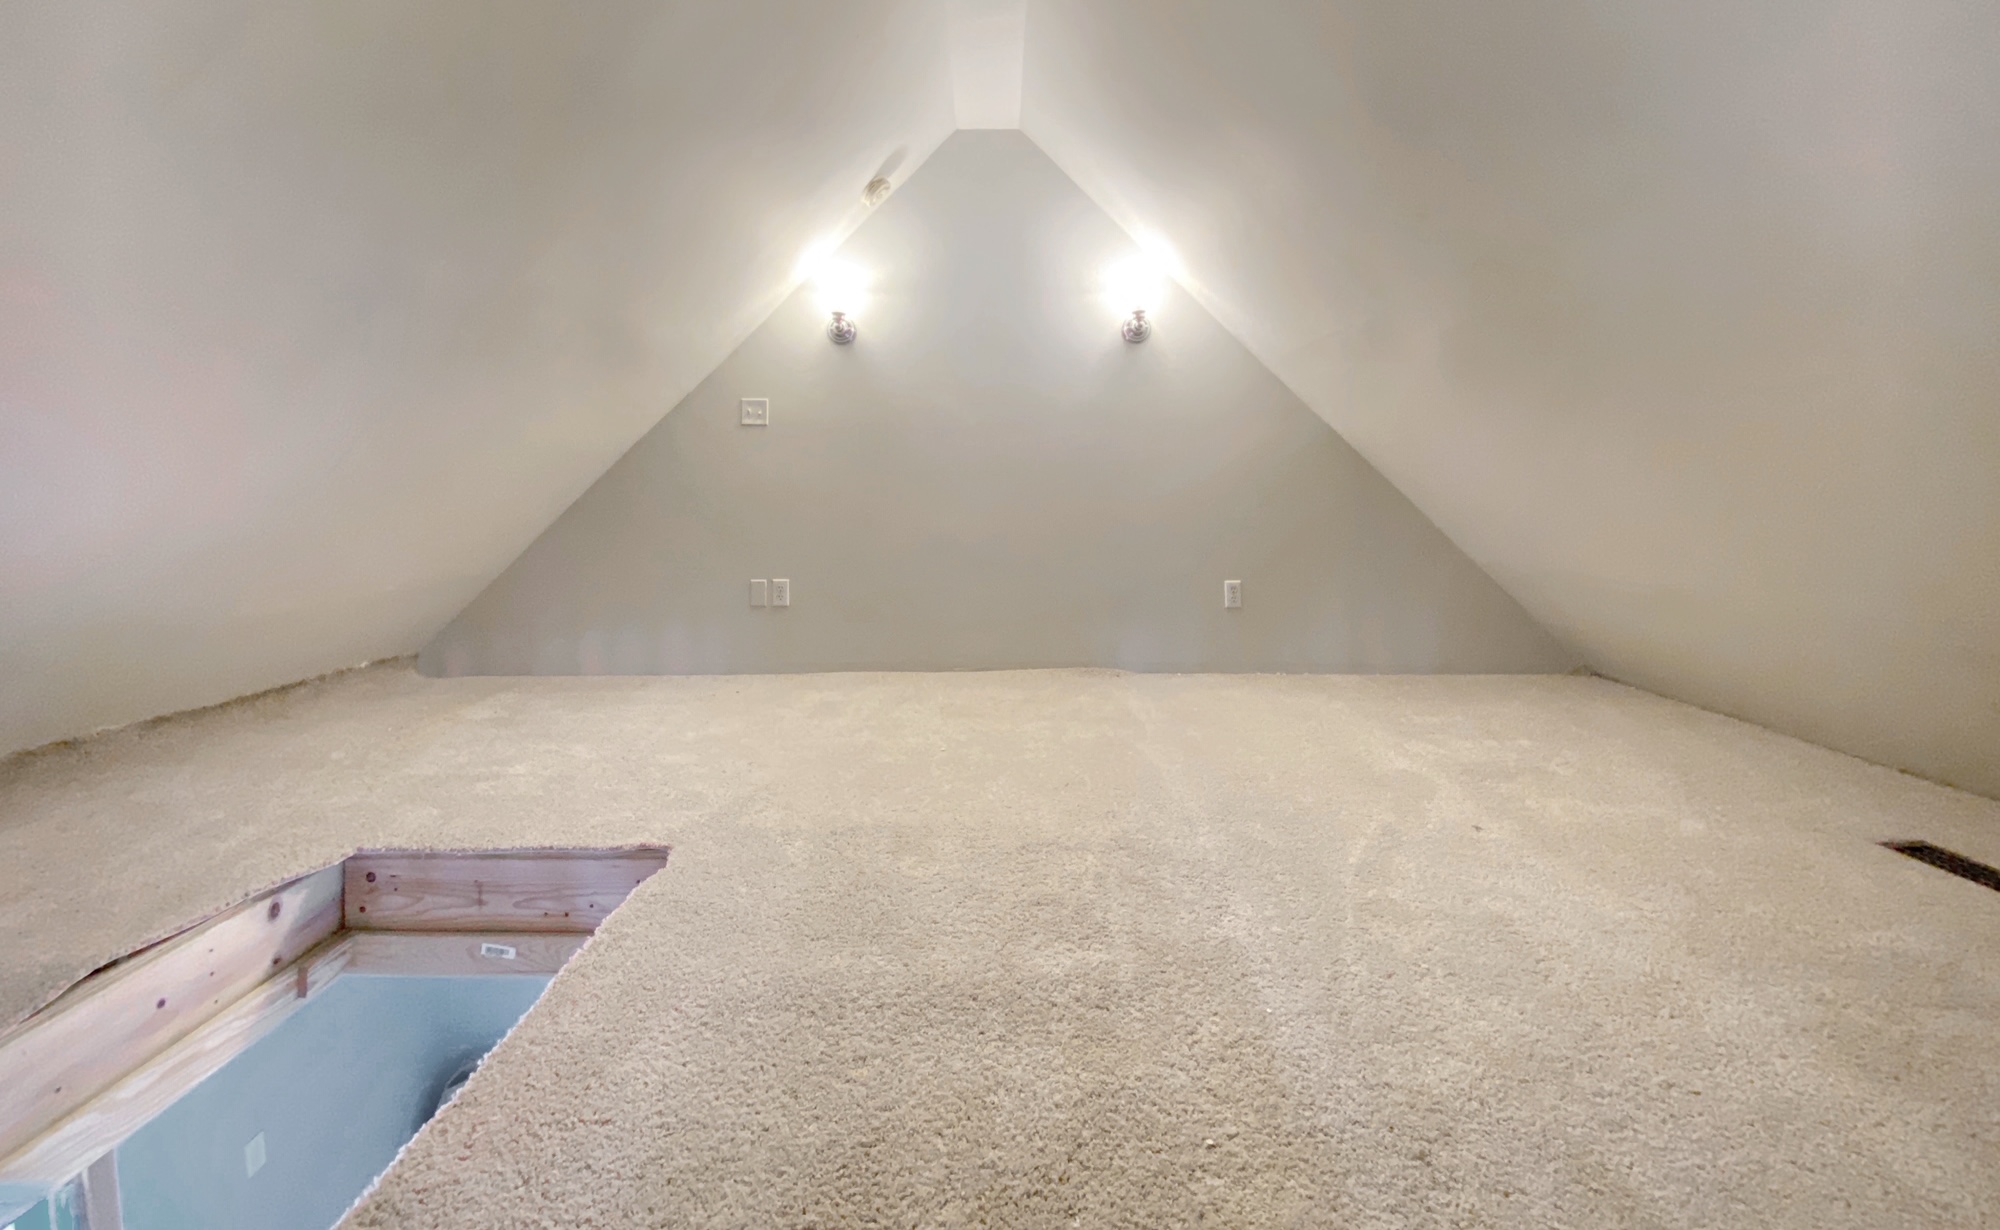
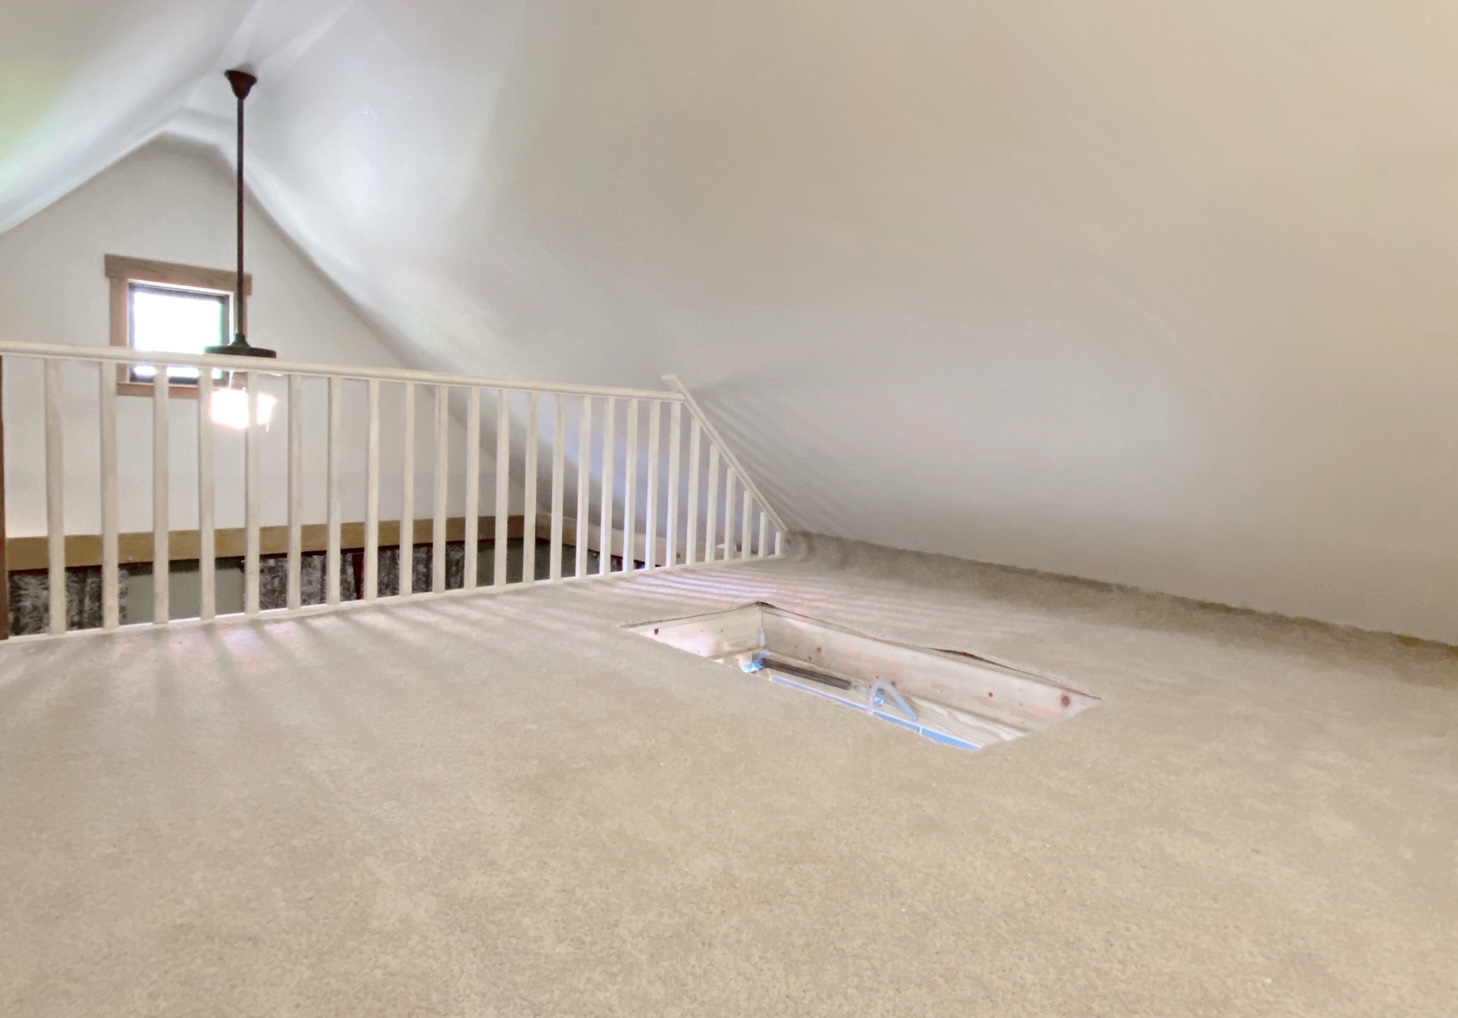
It's bland at the moment, but I think it has a lot of potential. At 18' x 13' it's a generous size but I need to be creative in laying things out since the sloped ceiling and attic ladder restrict things. My plan for the loft studio is to create a space with a lot of storage, a nice sized work space and a cozy reading nook. I've never made a mood board before since I'm generally someone who evolves spaces over time, but it was fun.
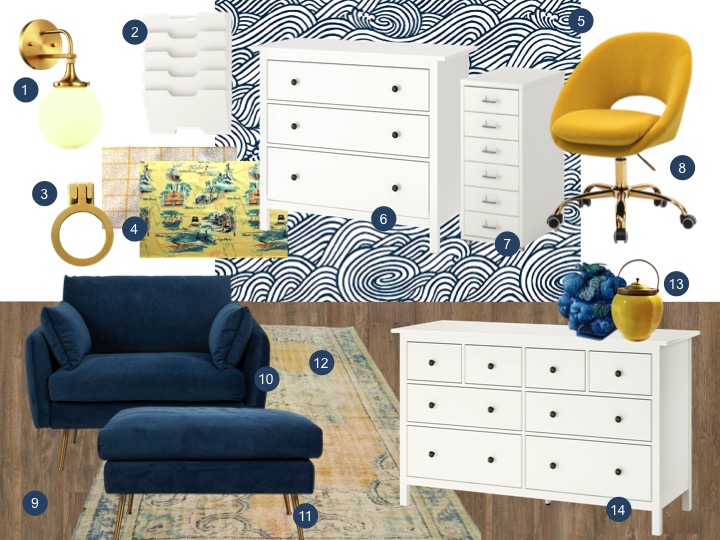
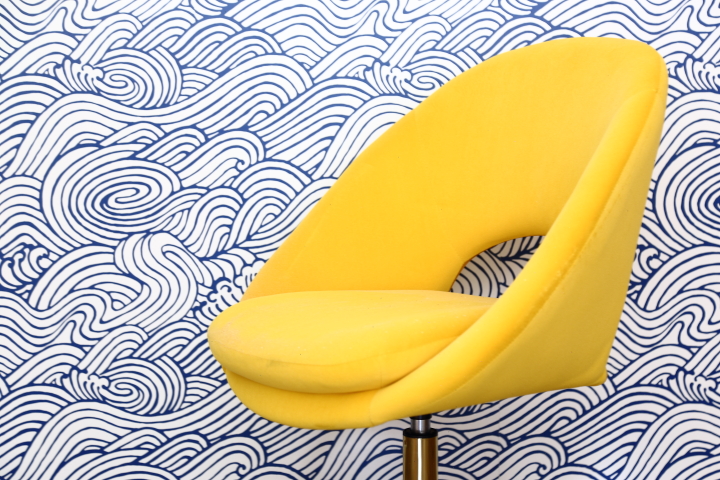
1. Sconce | 2. Paper Storage | 3. Drawer Pulls | 4. Vintage Fabric | 5. Wallpaper | 6. Dresser | 7. Drawer Unit | 8. Desk Chair | 9. Flooring | 10. Armchair | 11. Ottoman | 12. Vintage Rug | 13. Vintage Storage Jars | 14. Dresser
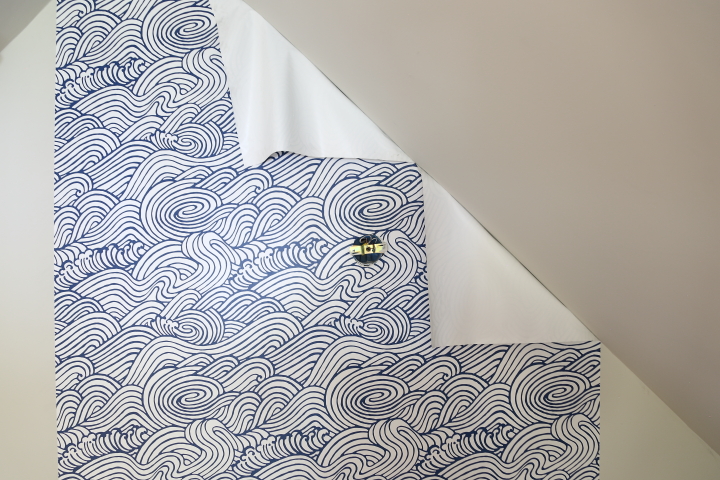
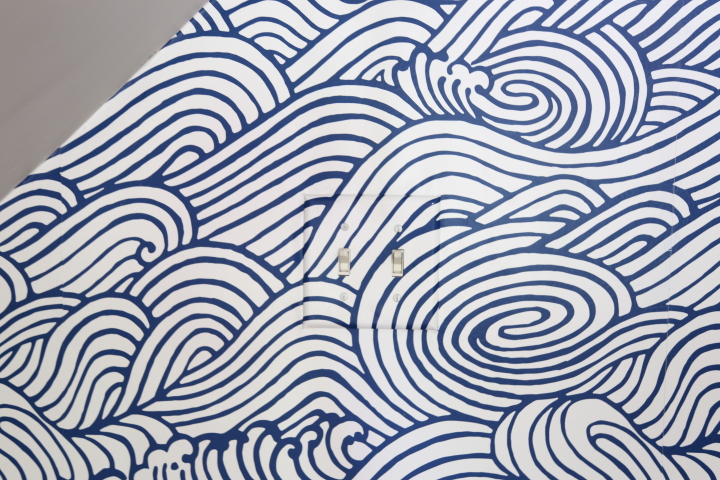
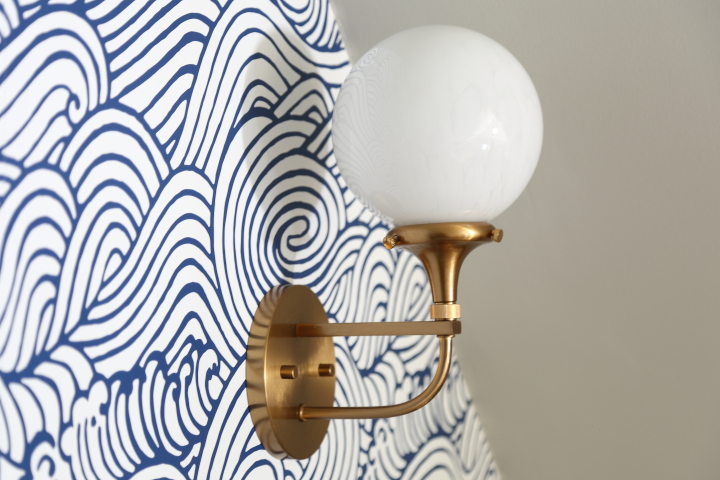
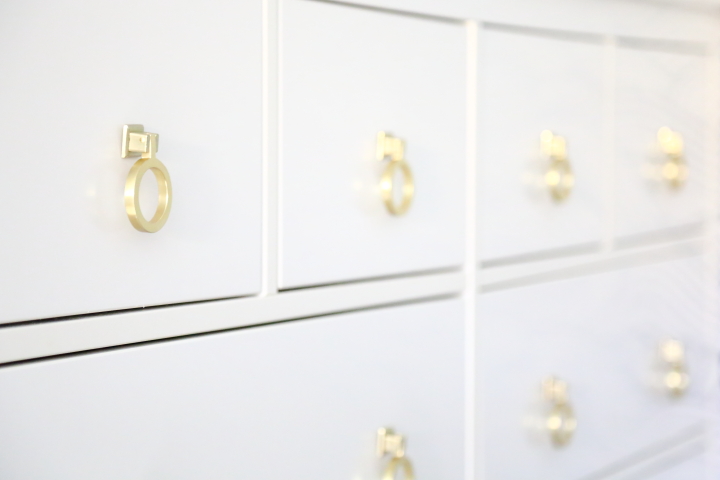
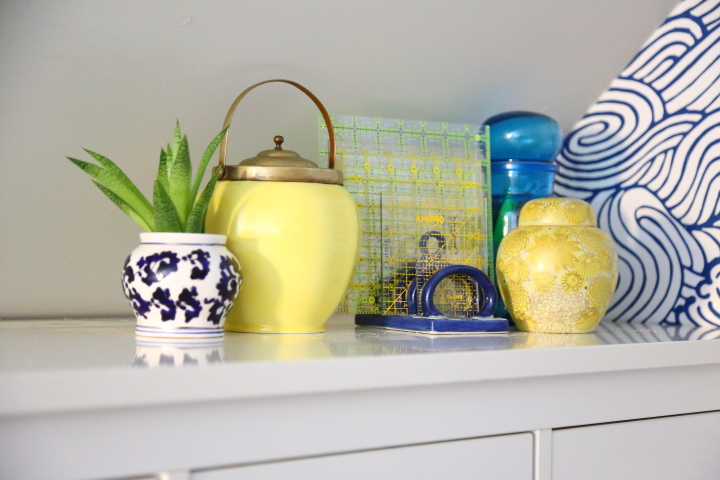
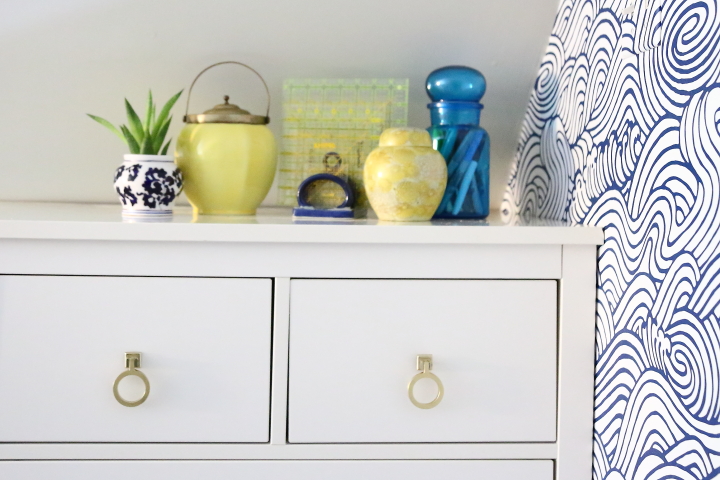
To start I'm adding new flooring (9) with some fun wallpaper (5) on the back wall and new lighting (1) with a pretty vintage Turkish rug (12) to anchor the space. Right now there isn't a railing around the attic ladder opening, so I plan to build a guard rail but I'm still contemplating the design. I'm going to use two dressers (14) that I already own to create built-ins along the side walls and then also build some custom bookcases and integrate paper storage (2) into them. To create a workspace I plan to modify another dresser (6) as part of the desk and will tuck extra drawer units (7) underneath for more storage. I picked cheerful yellow chairs (8) for desk seating and a large comfy blue armchair (10) and ottoman (11) for the reading nook, with pillows I'll make from some vintage fabric (4). For some finishing touches I'm upgrading the hardware on the dressers with brass ring pulls (3) and have a few vintage ceramic jars for visible storage (13). I'm sure as I get into things my plan will change, but this is what I'm thinking right now.
I got a jump on the space in mid-September by getting rid of the cheap carpeting I had installed 13 years ago and putting in some new flooring. I used a utility knife to cut the carpet and pad into manageable sized pieces and then rolled them up, securing them with twine. My husband helped me out by lugging the rolled up pieces down to the garage for me. Thank you, Frank!
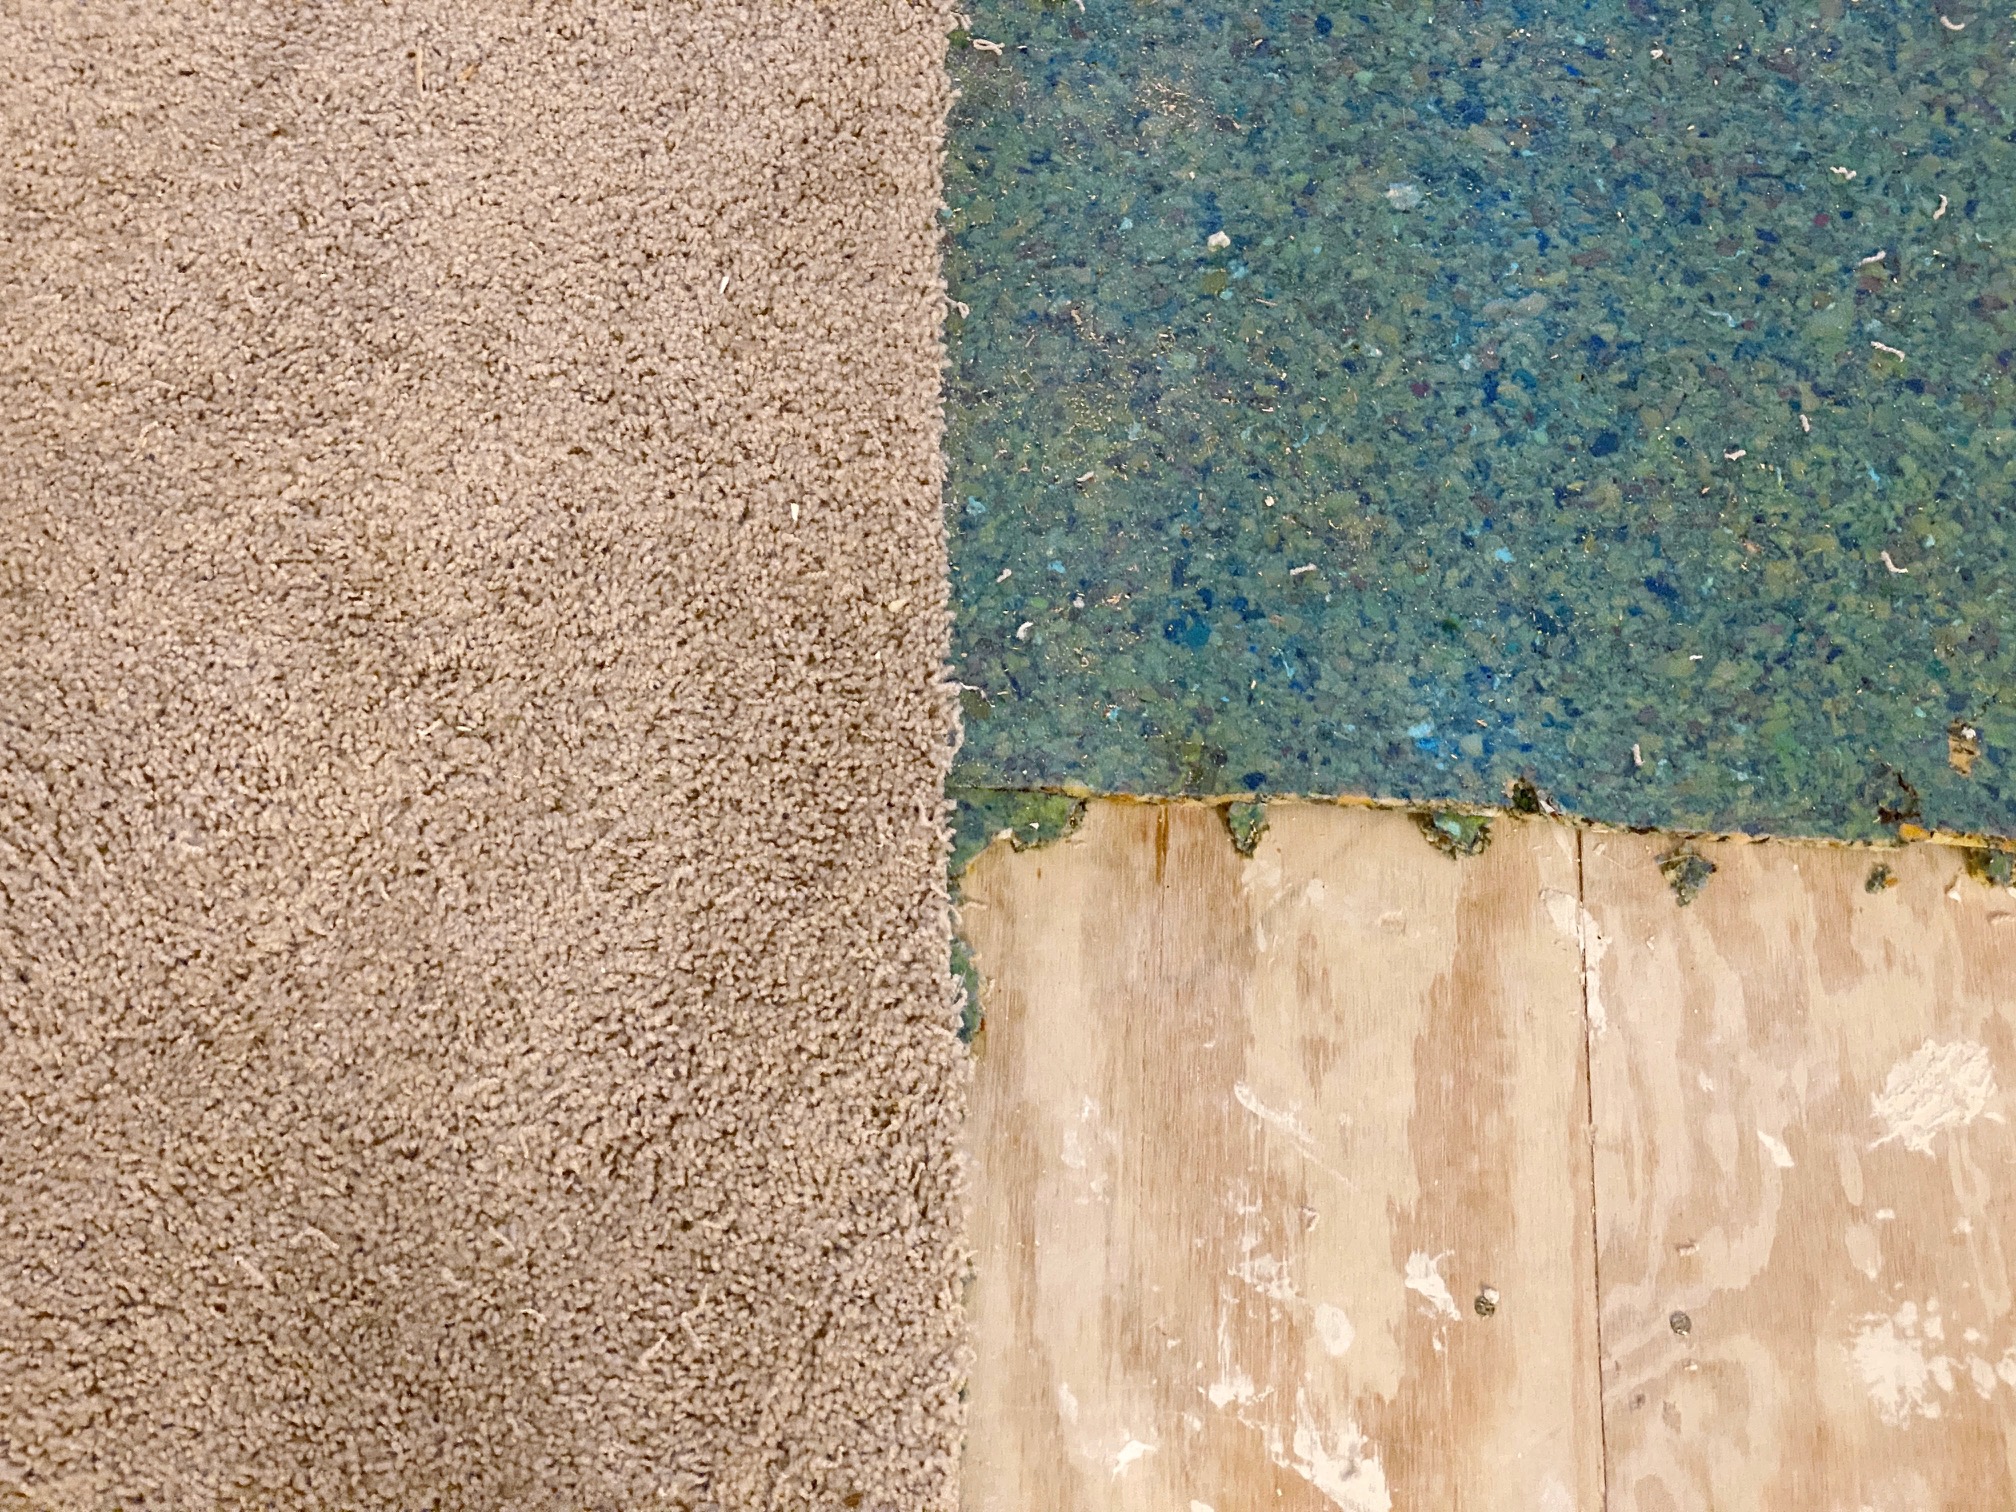
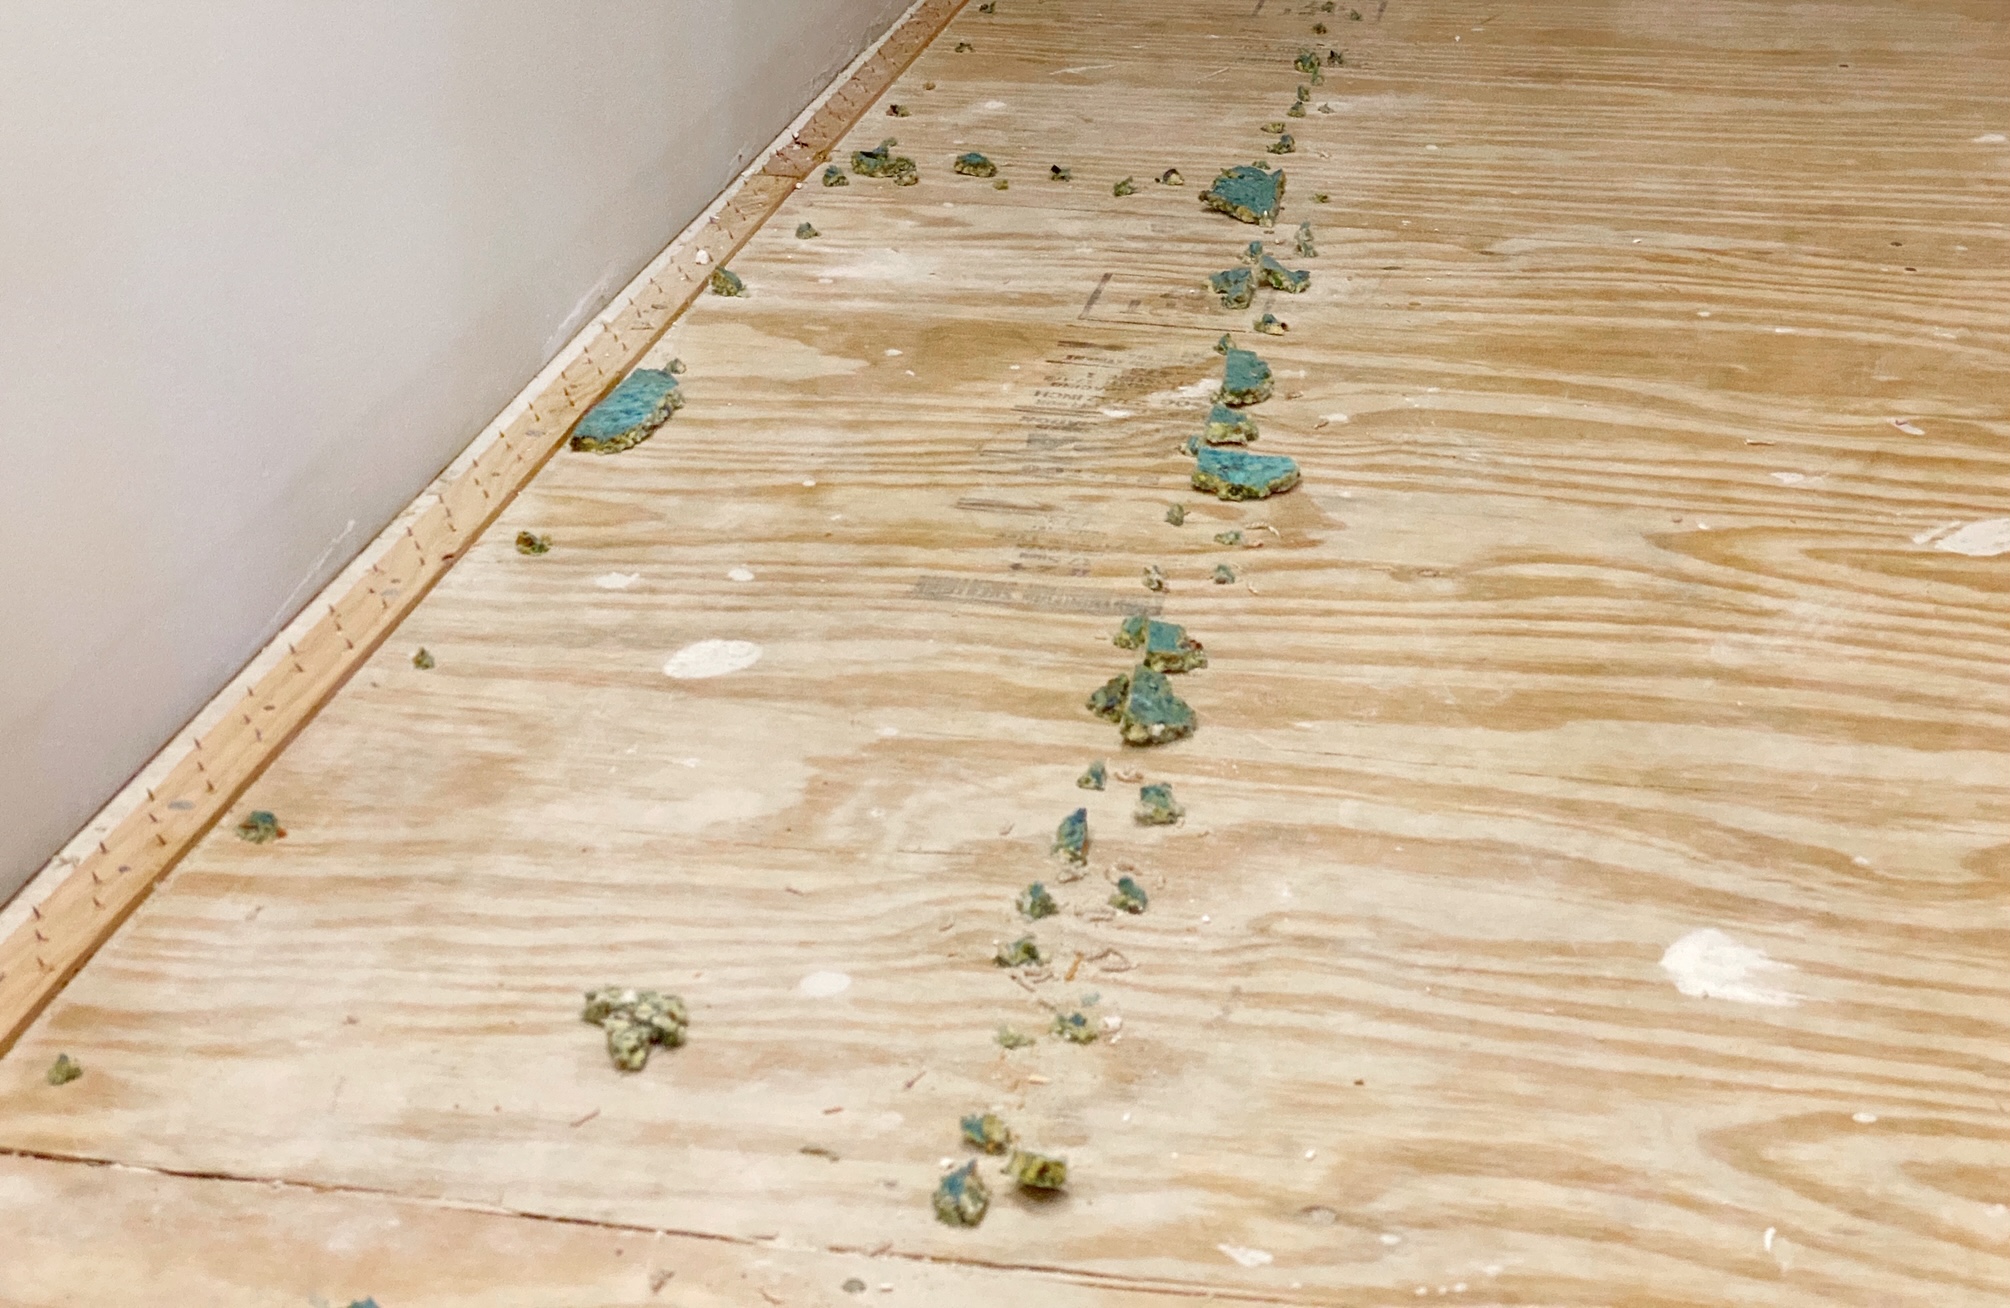
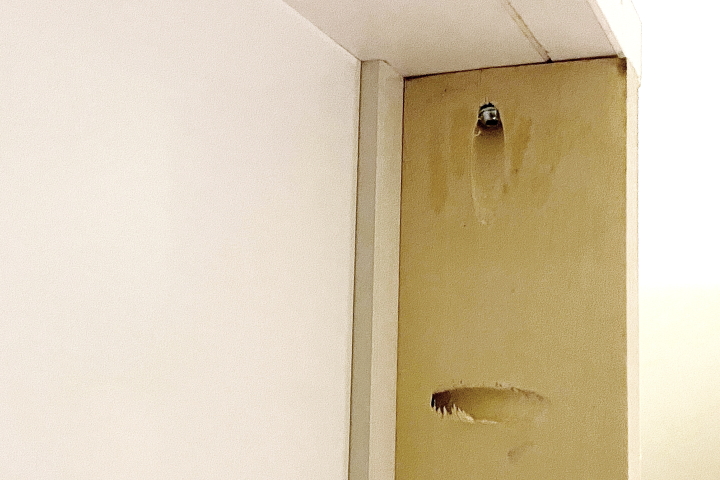
Next up was the tedious job of removing all of the carpet pad staples and carpet tack strips. I used pliers to attack the staples and a small pry bar to pull up the tack strips. Working along the back wall was quick work but where the ceiling met the ground was the worst since I had to crouch or lay on my side to fit.
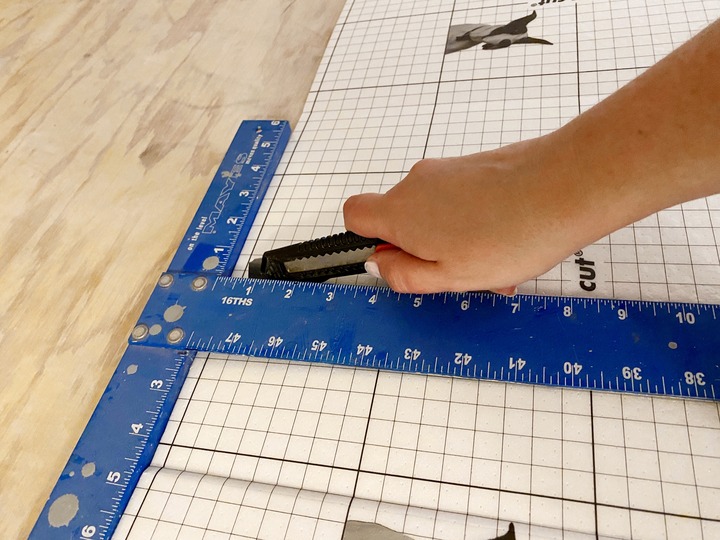
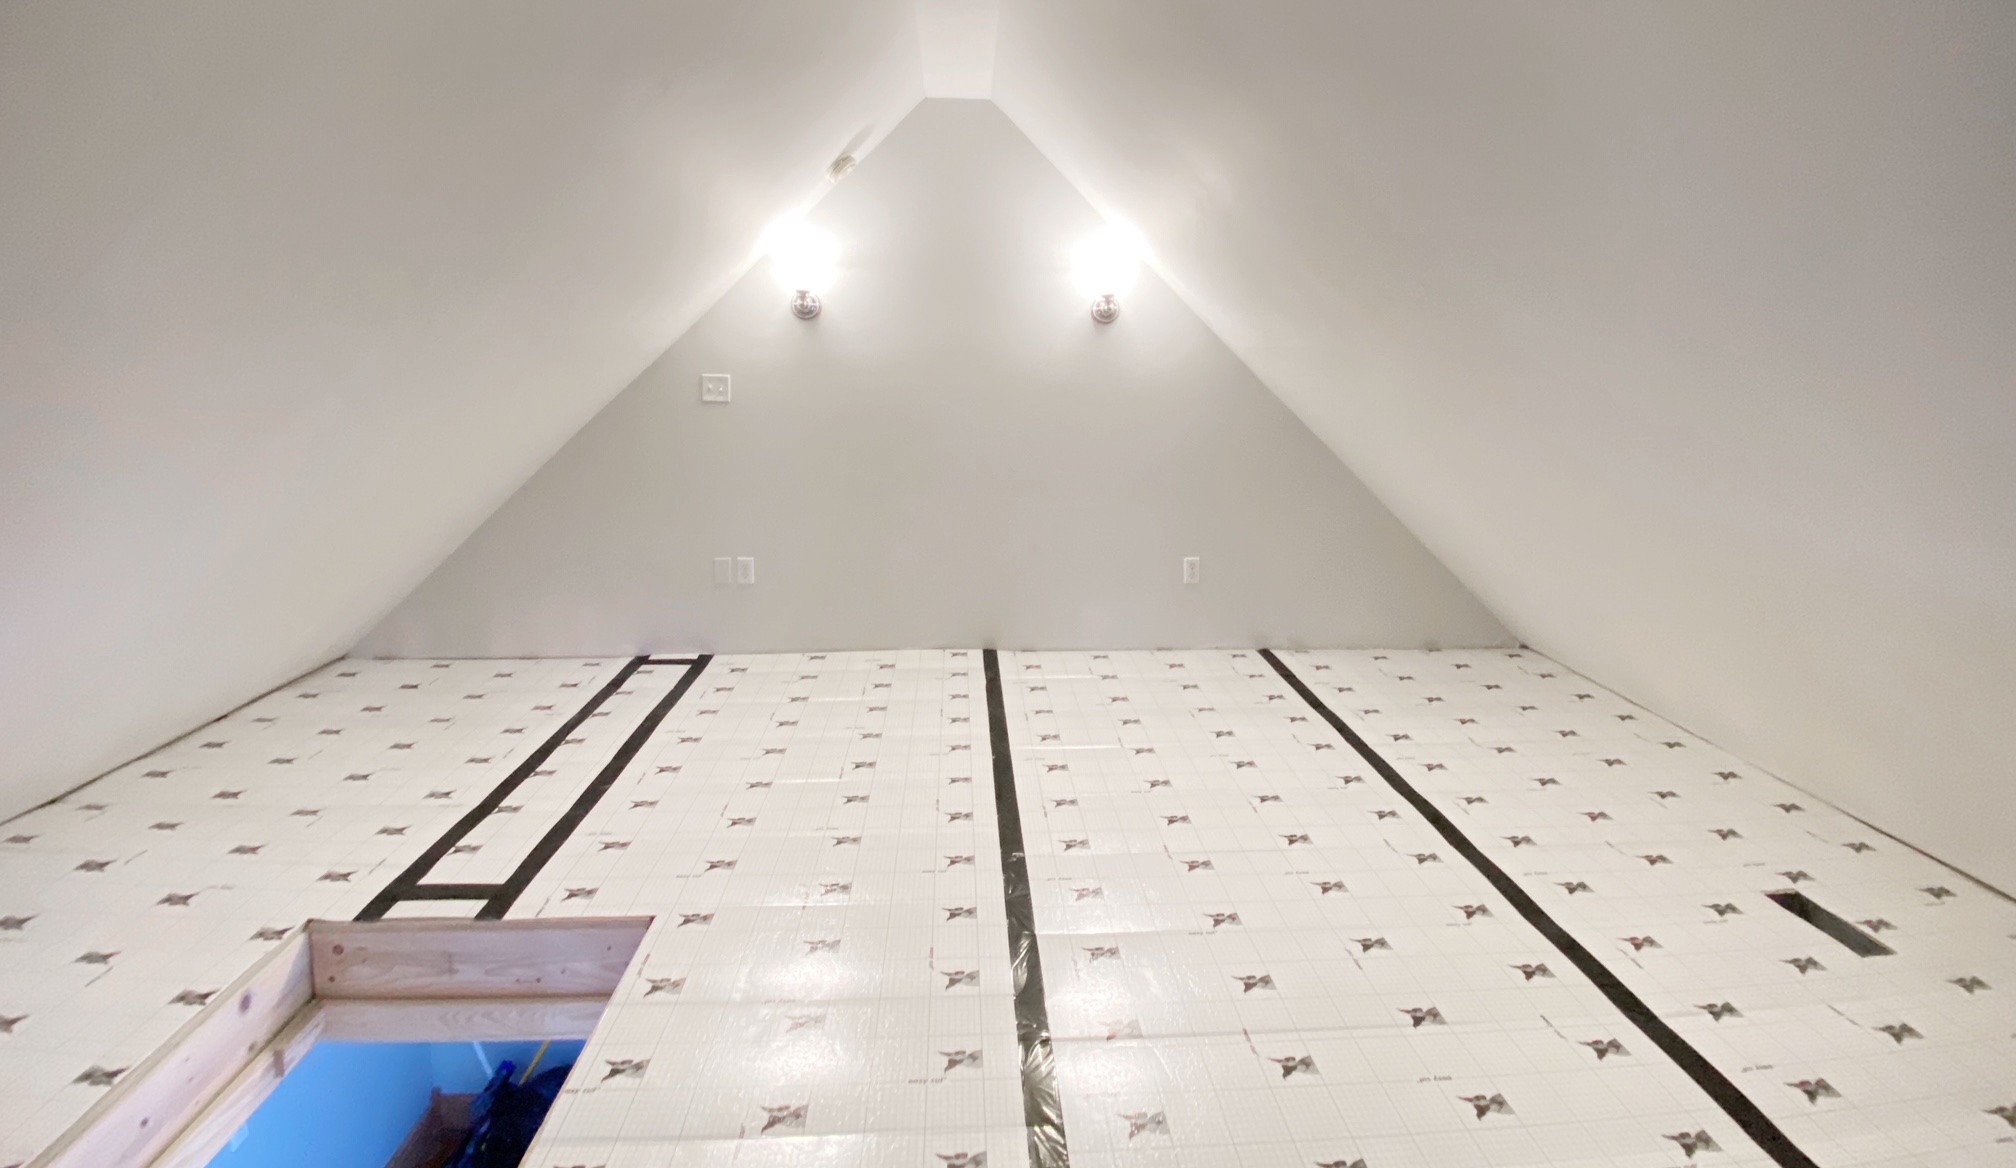
After all the staples and tack strips were removed, I was back to bare plywood subfloor and ready to lay down the underlayment which creates a moisture and sound barrier for the flooring. The underlayment I bought had a grid pattern on it which made it easy to cut to size with a utility knife and a straight edge. After I laid each piece I taped the seams creating a seal.
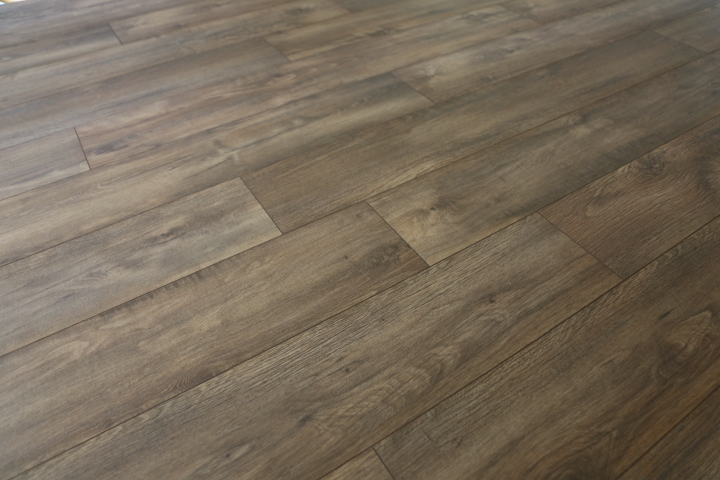
With the prep work done it was finally time to lay flooring. My house is 140+ years old so I chose to have hardwood and tile in the rest of the house since those floorings are fitting with the age of the house. This is an attic space, however, and not wanting to spend the time and expense of laying hardwood I settled on Memphis Light Oak laminate flooring. Another added benefit of the laminate is that it is only 8mm thick which is nice in a room where headroom is at a premium.
Laying the laminate was pretty easy and much less time consuming than hardwood because it is a floating floor. As with any flooring getting the first row perfect was important to prevent any issues in laying subsequent rows. I decided to install the flooring perpendicular to the back wall for a few reasons. My flooring joists run parallel to the back wall so this installation orientation allows the flooring to be perpendicular to the joists. Aesthetically, it makes for less busy sight lines and is in the same direction as the natural light source coming from the windows in my bedroom. Finally, with the way the ceiling slopes at the sides, installing it parallel to the back wall would have caused me to have to leave a large space along the side walls because some clearance is needed during installation to angle the planks and to click in place.
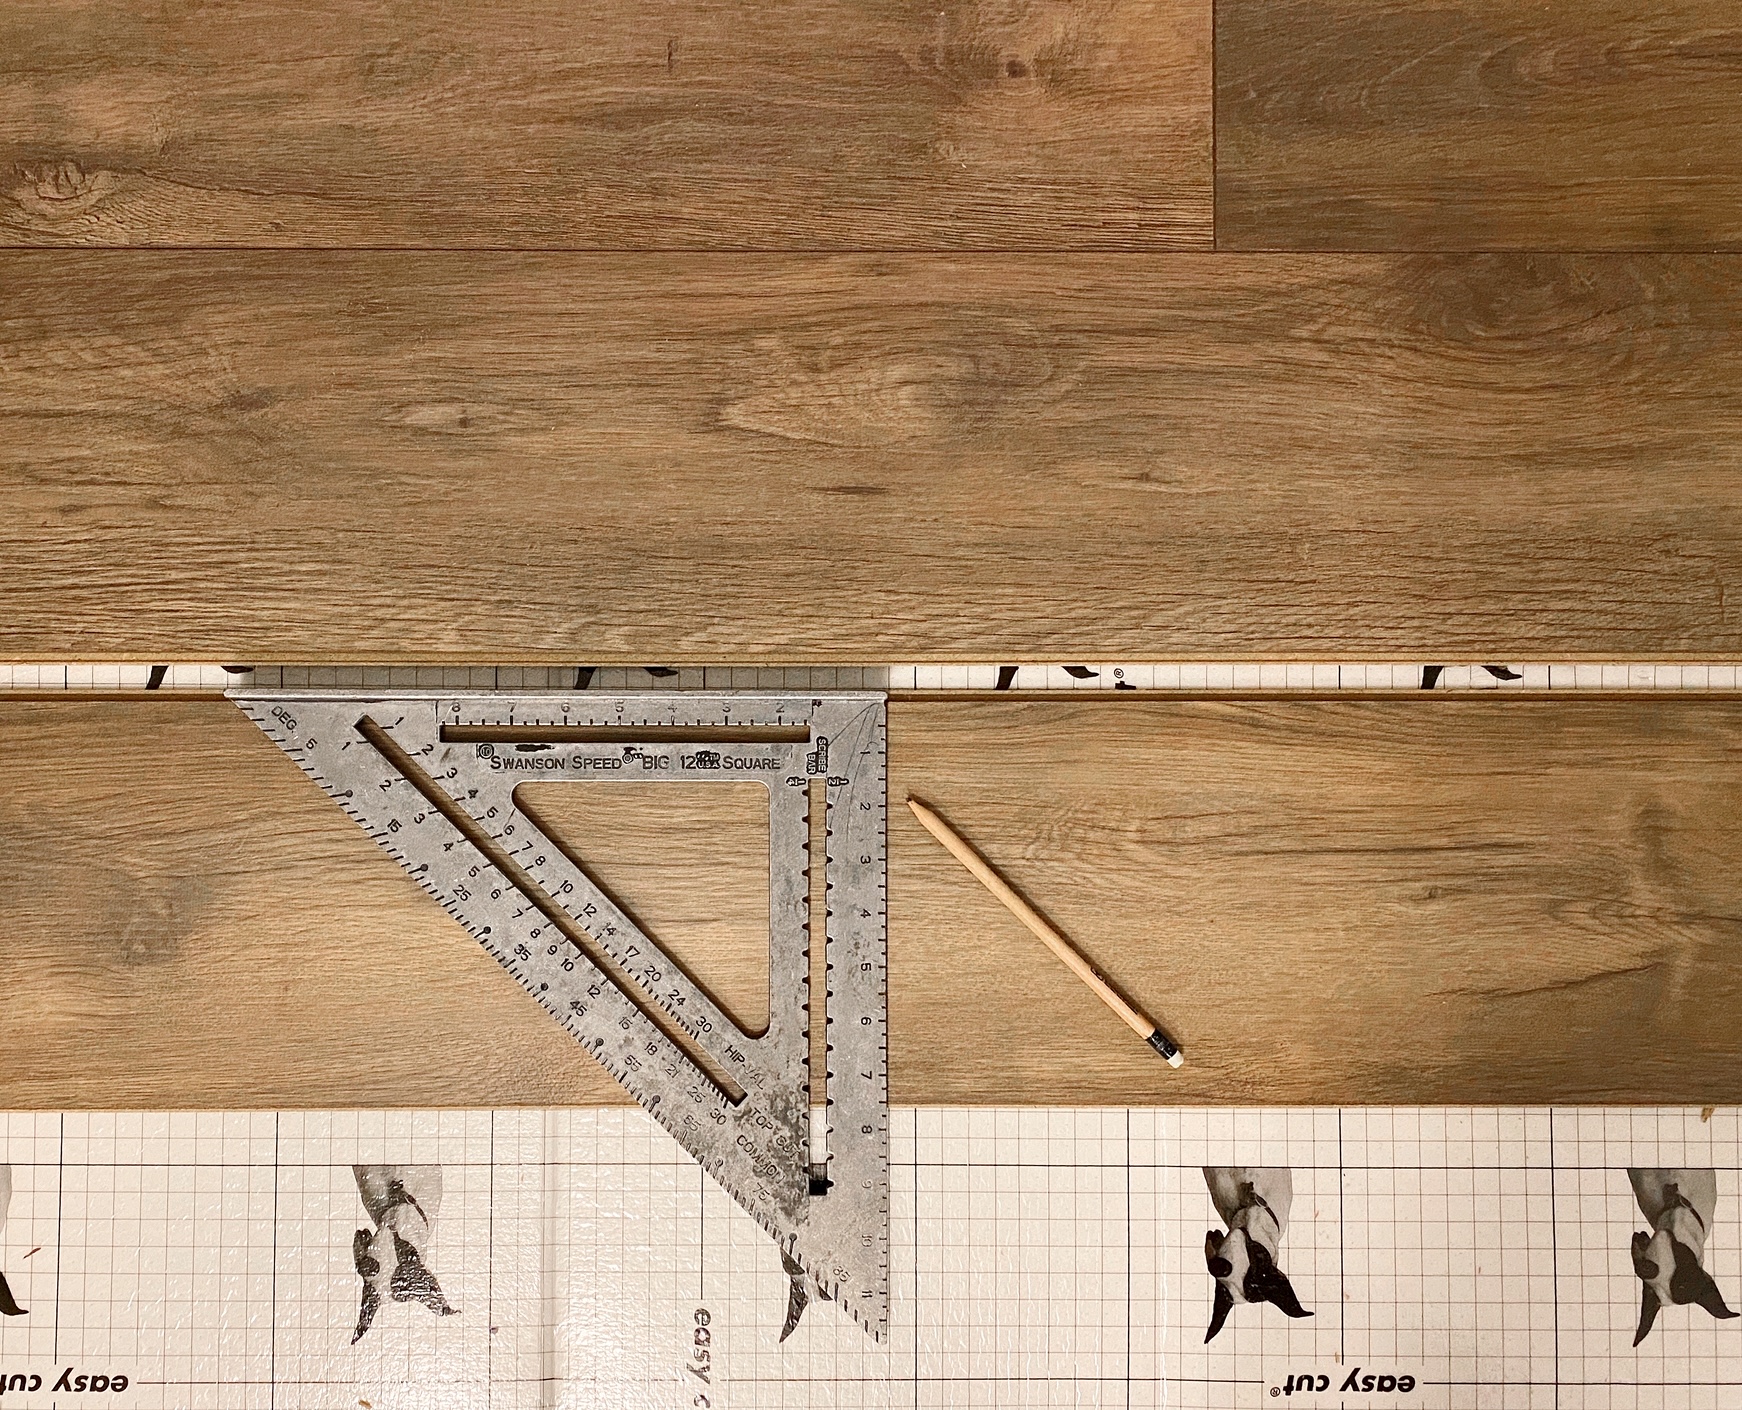
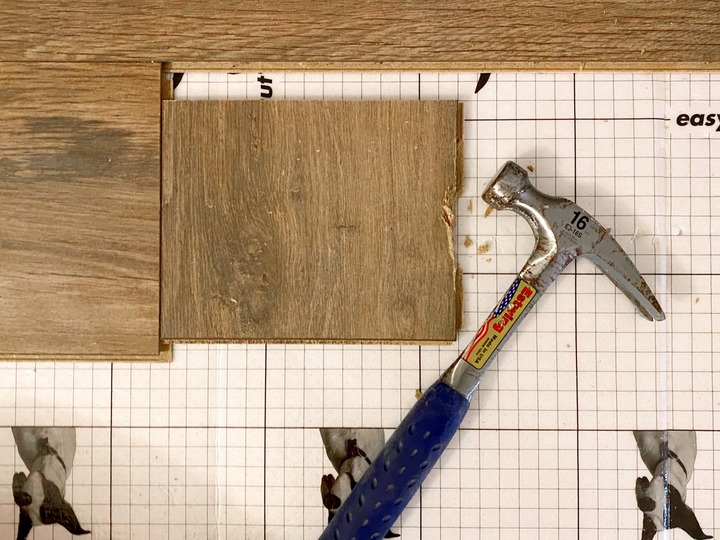
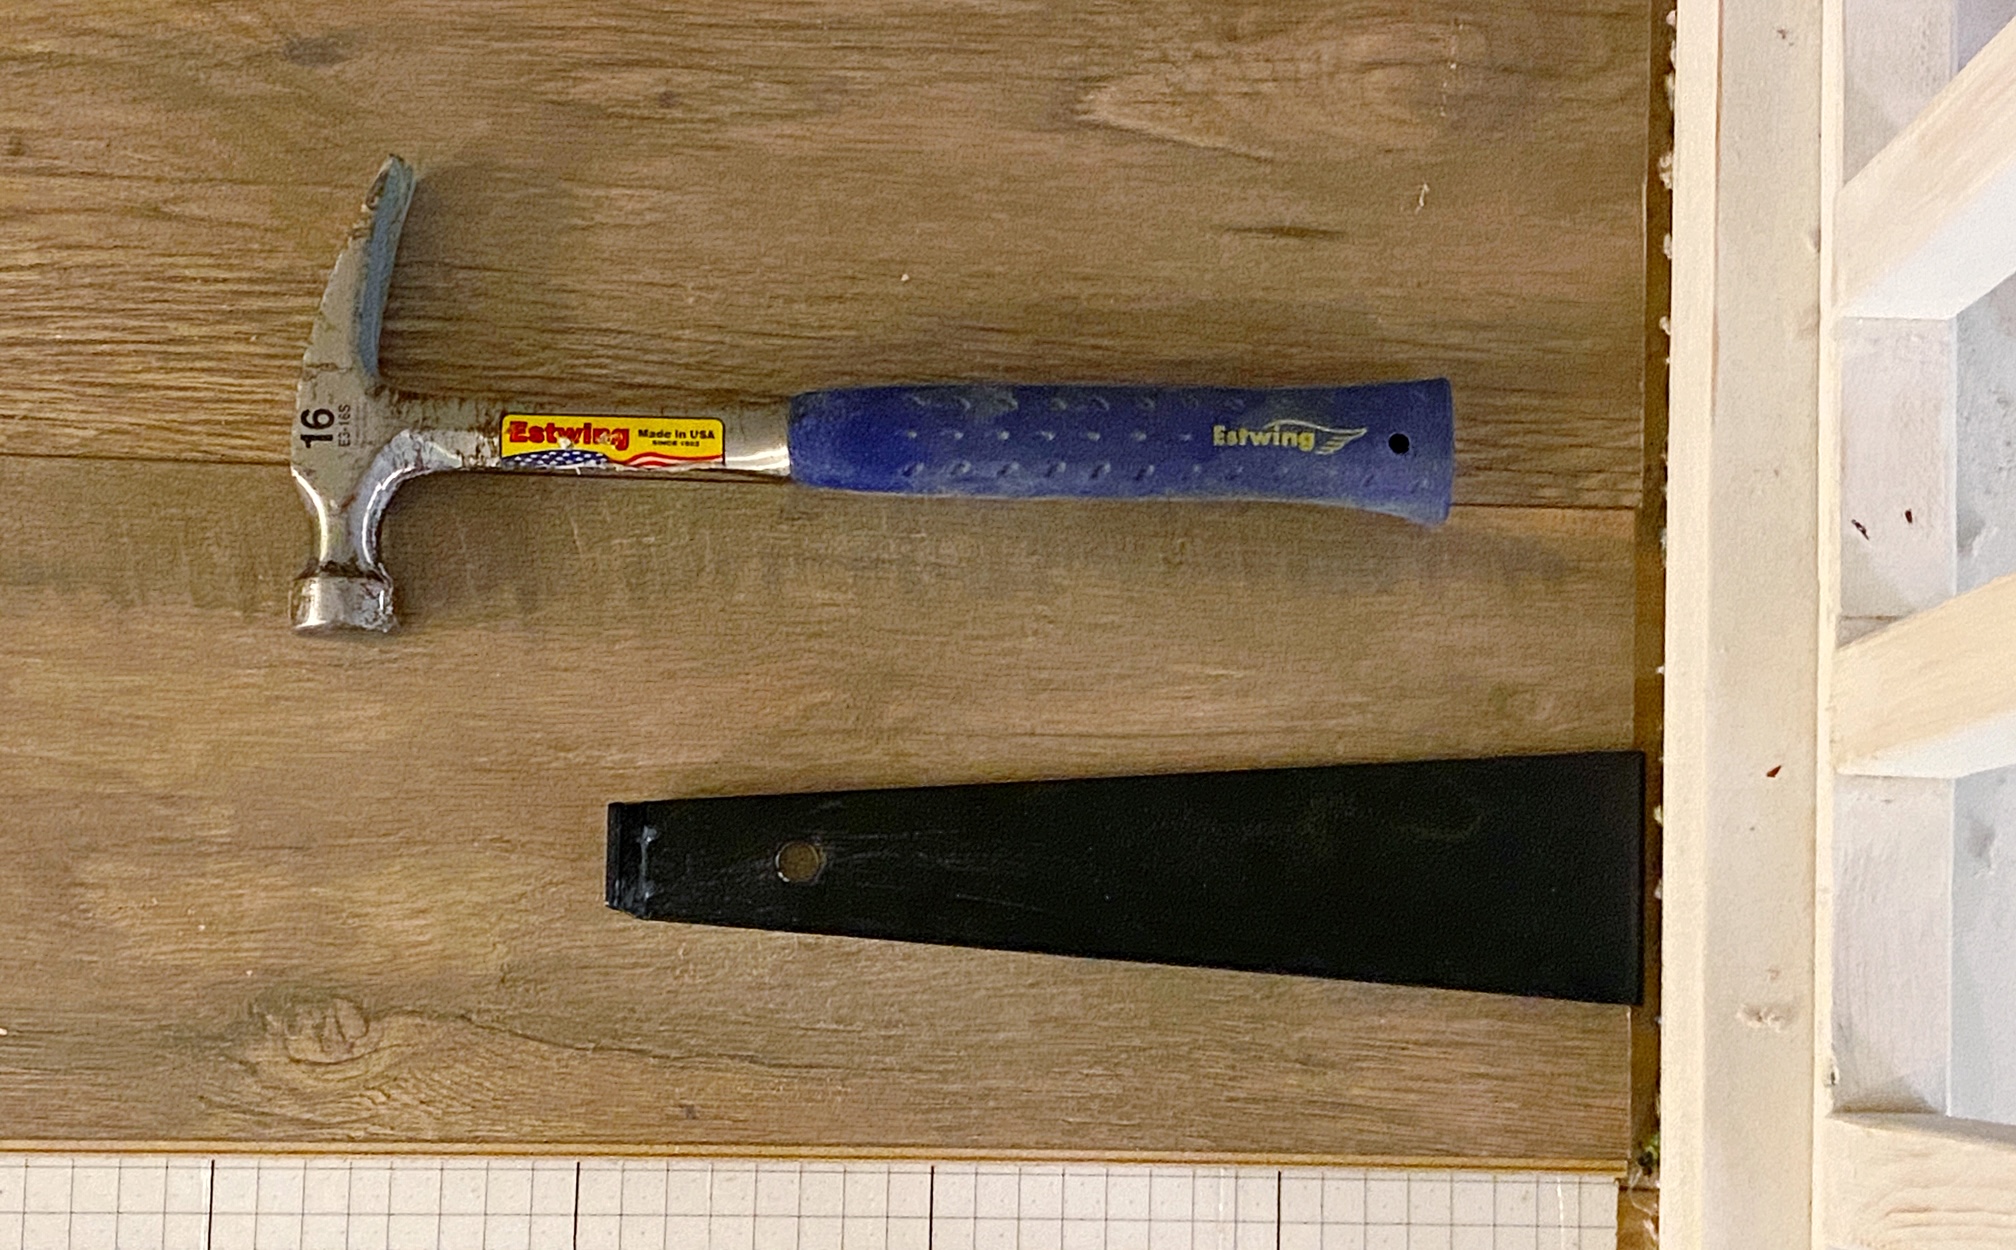
Installation was pretty straightforward, just angle the tongue of the plank into the groove of the previous row and click in place. To close the gap with the adjacent piece, I used a scrap piece as a tapping block to prevent damaging the tongue and hammered until the joint was tight. For the last plank of a row I used a puller bar to get the joints tight.
Not having to use a flooring nailer combined with the laminate being much wider than the 2-1/4" hardwood flooring that I have in the rest of my house made this a much quicker job than installing hardwood. The most time consuming thing was that to make my end cuts I had to run down two flights of stairs and out to my garage to use my miter saw since I didn't want to bring it inside and create a lot of saw dust. I used my circular saw and jigsaw to make the cuts around the attic ladder opening and heating vent.
I noticed two things that I had to be careful of that weren't really a factor when laying hardwood. Since the floor is floating, if you don't have wall spacers when you tap your planks in place it is easy for the planks to move and hit the wall, eliminating your expansion gap. Secondly, after a only a handful of hits with the hammer the laminate tapping block starts to shred so I needed to replace it every few rows of flooring. It was important to keep sweeping up the splintered off pieces to make sure that the underlayment didn't have any debris on it when adding new planks.
Laying the final rows were the worst because of the cramped headroom. I had to rip down the last row on my table saw to get them to fit and then had to lay on my side while tapping in the pieces. I was quite happy when it was done and I think the result is a nice blank space to create a functional and pretty craft studio.

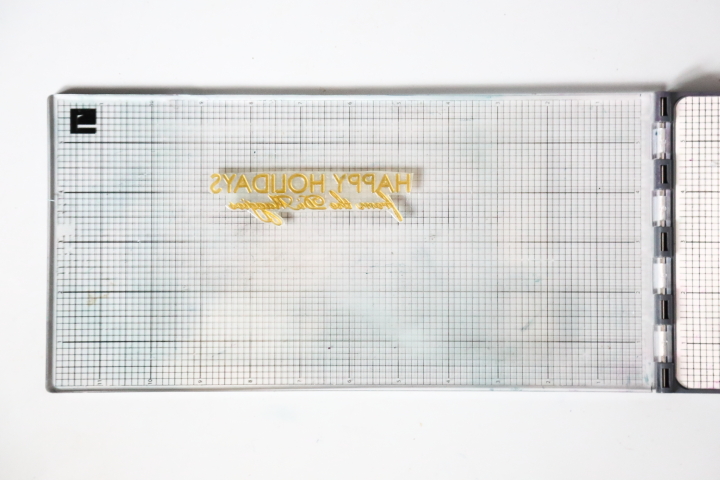
Next up is wallpaper and new lighting!


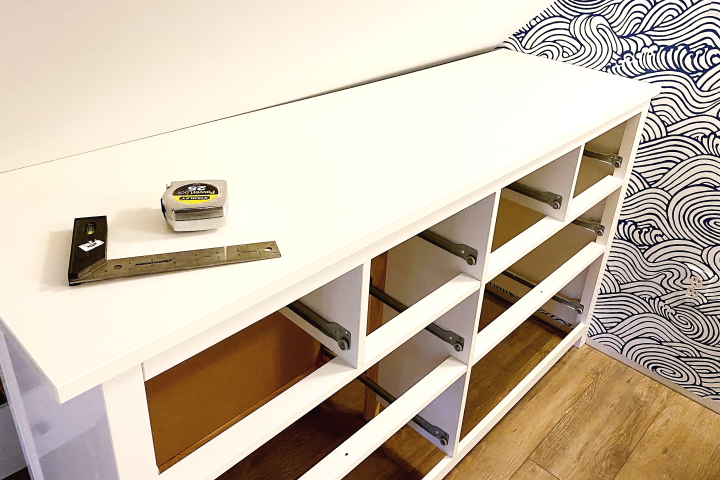
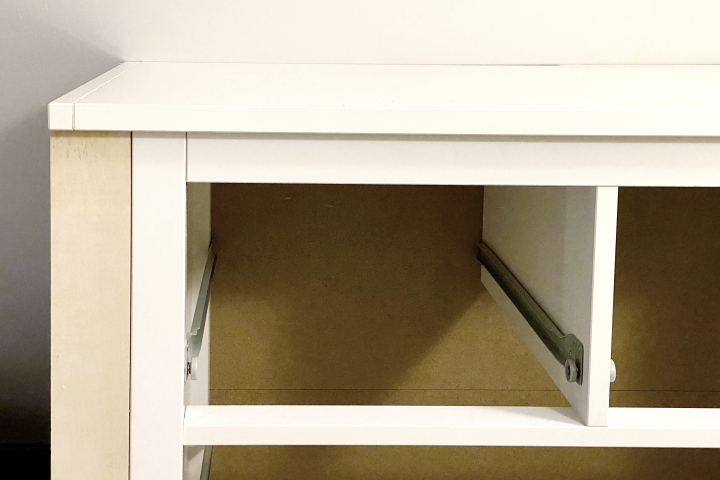
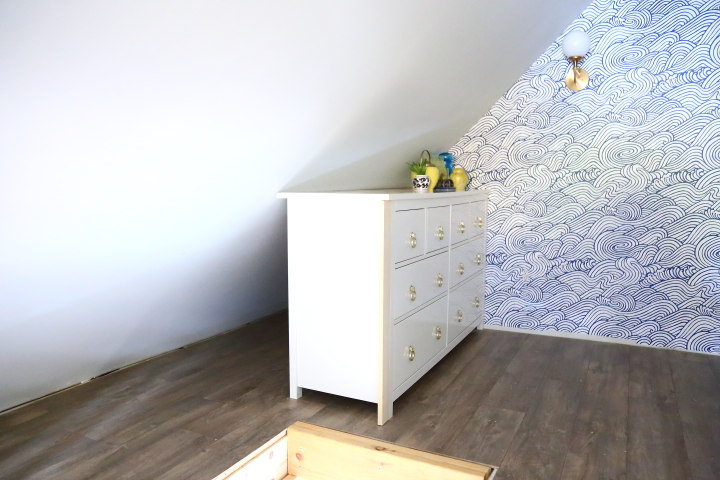
 It's Week 3 of the One Room Challenge and so far I've laid new flooring and hung wallpaper and new lighting. We spent last week on a road trip to visit my two eldest nieces at their colleges and enjoy some fall leaves so I didn't make a lot of progress on my Loft Studio for this week's update. I did start working on my built-in storage, however. I already owned two 8 drawer Hemnes dressers so my plan is to modify them to look built-in.
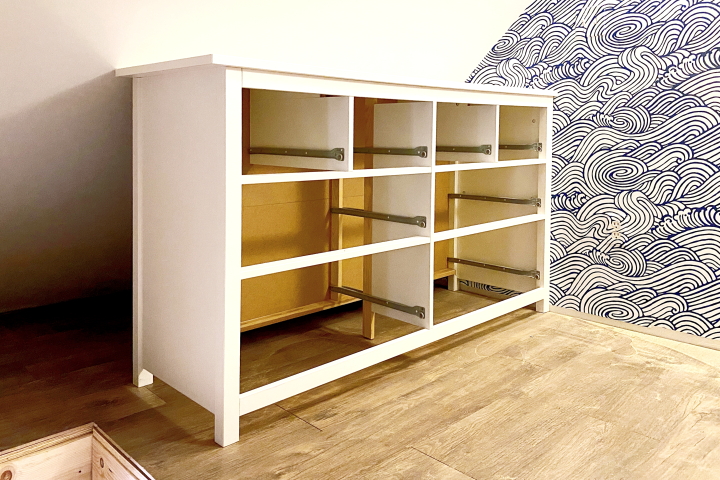

 Lisa |