Welcome

My name is Lisa and I'm a crafty girl with wanderlust working as an engineer by day. My blog chronicles projects in my home as well as pictures and stories from my travels.

Search


Instagram

Blog Index
The journal that this archive was targeting has been deleted. Please update your configuration.
Navigation

Entries in Recipes (26)

Wednesday
Dec022015

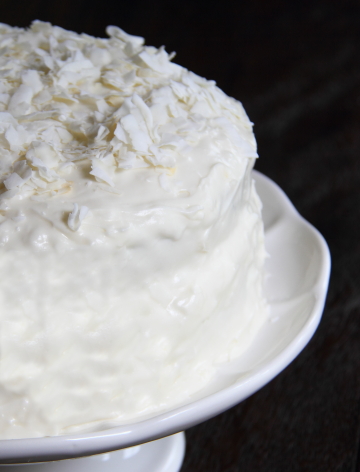
Cranberry Orange Cream Tart

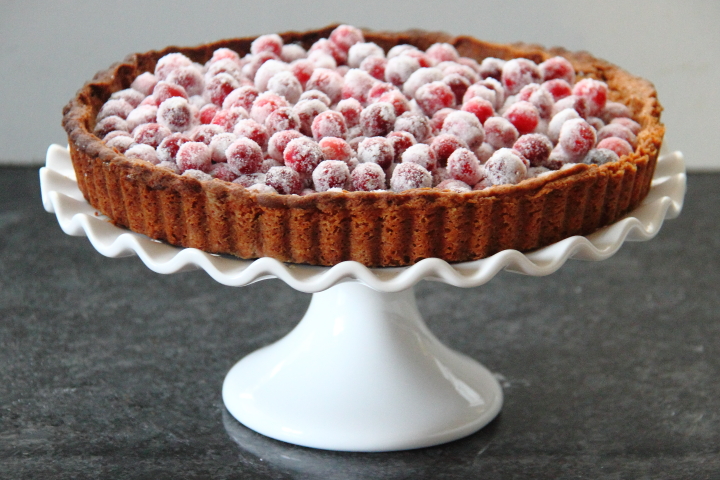
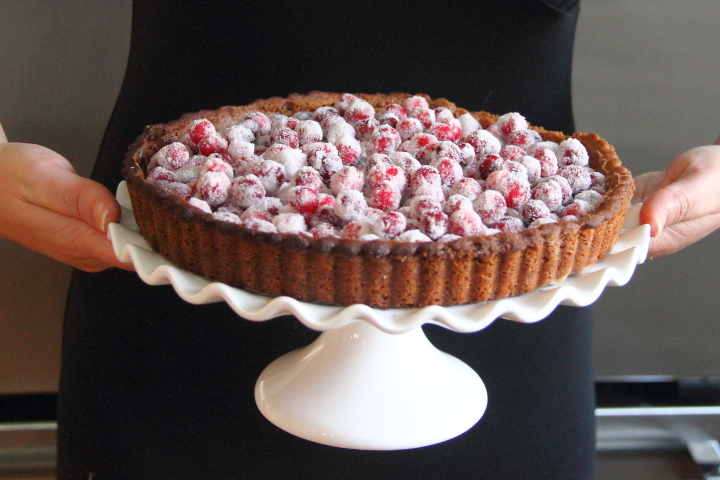
I like to cook but I love to make desserts. Whether it is a work potluck or a family dinner I always sign up for making dessert. This past summer I made a berry mint cream tart to bring to a picnic. I loved the recipe and thought it would be fun to adapt the flavor to cranberry orange for the winter plus beef up the pastry a bit since I like a thicker crust. The result was a beautiful tart that tasted even better than it looked. It is definitely time consuming but worth the effort for a special occasion. I made this for Thanksgiving but I think it would also be fantastic for Christmas dinner or a New Years party.

Ingredients
5 cups fresh cranberries
4 cups sugar, divided
3 cups caster (superfine) sugar 
3 cups water
1 cup milk
zest of 2 large oranges
3 large egg yolks
3 tablespoons cornstarch
1-1/2 teaspoons vanilla extract, divided
1/2 cup heavy cream, chilled
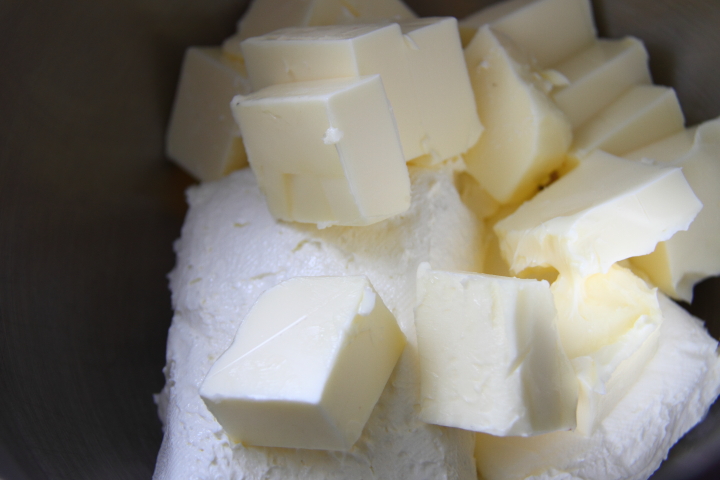
3/4 cup unsalted butter, room temperature
1/4 teaspoon salt
2 cups all-purpose flour
raw rice or pie weights for weighting down the shell    
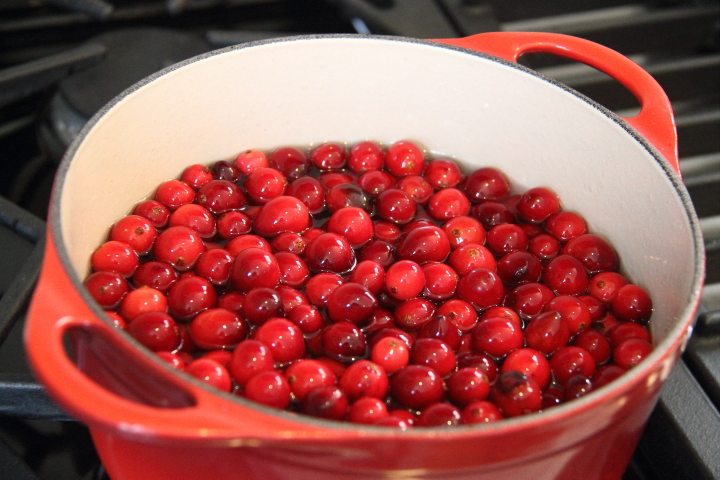
Sugared Cranberries
- Make a simple syrup by heating the water and 3 cups of sugar in a pot until all the sugar dissolves
- After letting the simple syrup cool for ten minutes pour the cranberries into the pot
- Allow cranberries to steep for at least two hours
- Pour the caster sugar in a shallow dish, drain cranberries and then roll them in the caster sugar until coated
- Place sugared cranberries on wax paper and allow to dry 

Orange Cream
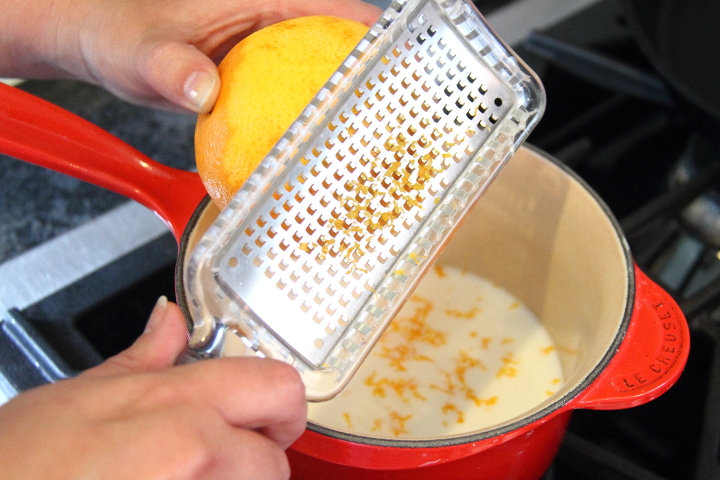
- Pour milk in a small saucepan and grate the peel of the oranges directly into the milk
- Bring the milk to a boil, remove from heat and then let stand for five minutes
- In a separate saucepan whisk together the egg yolks, 1/2 cup sugar, cornstarch and 1 teaspoon vanilla extract
- Whisking constantly bring the mixture to a boil over medium heat causing the mixture to become very thick
- Continue to whisk the pastry cream while simmering for three minutes
- Place the pastry cream in a bowl, cover the surface with plastic wrap and then refrigerate until cool and firm
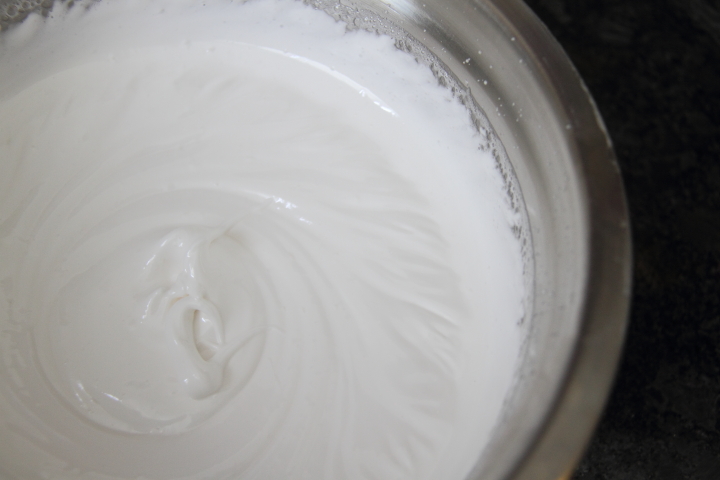
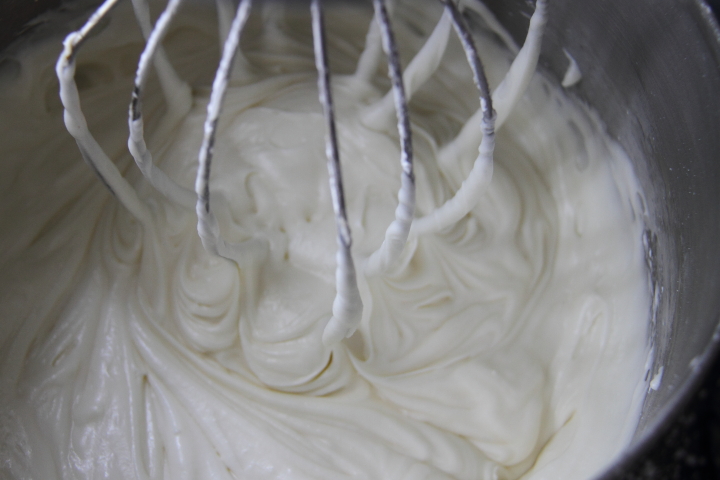
- Beat heavy cream until stiff peaks are formed
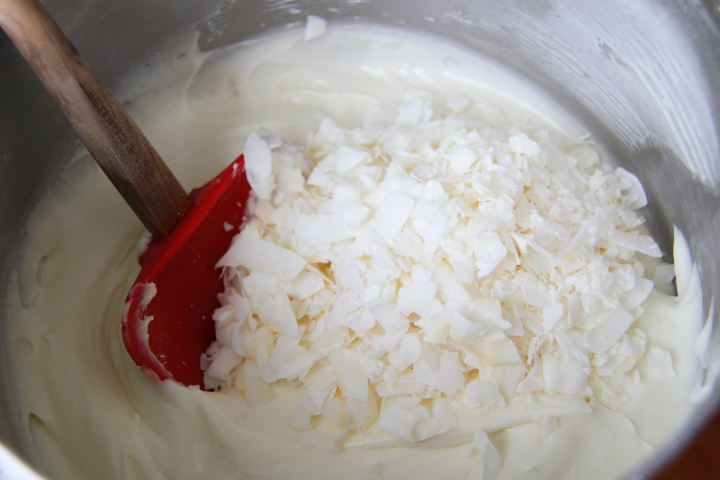
- Whisk pastry cream until it is smooth and then fold in the whipping cream until thouroughly incorporated 

Tart Shell
- Cream the butter with 1/2 cup sugar, salt and 1/2 teaspoon vanilla extract 
- Mix in the flour until a soft dough forms
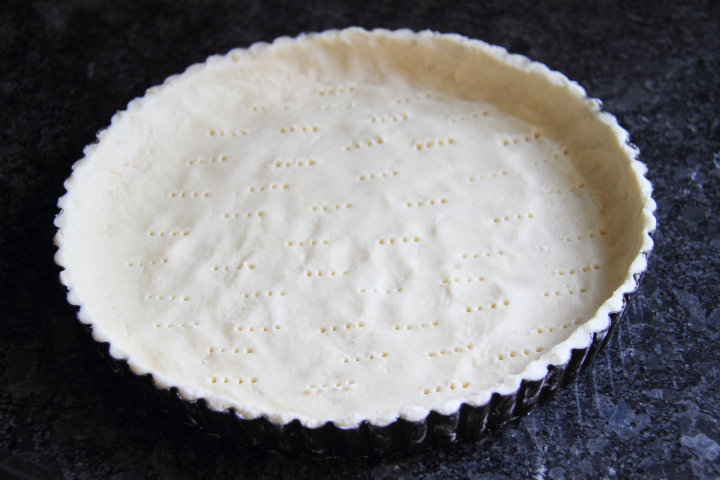
- Butter a 10-inch tart pan with a removable fluted rim
- Press the dough in the tart pan covering the bottom and up the side of the pan
- Chill the shell for 30 minutes and prick the shell all over with a fork
- Line the shell with foil and fill the foil with the rice or pastry weights
- Bake the shell on the lower rack of a preheated 375°F oven for 15 minutes
- Carefully remove the foil (with the rice or pastry weights)
- Continue to bake for an additional 10-12 minutes until it is crisp and golden
- Allow the shell to cool on a rack for 5 minutes, remove the side of the pan and then cool completely 

Tart Assembly
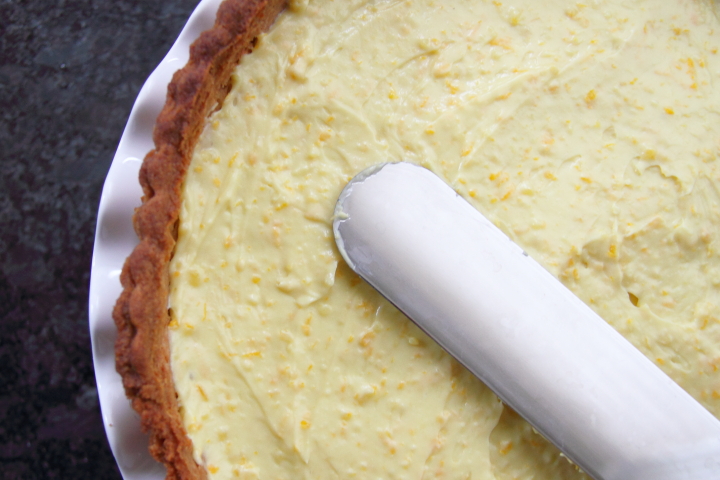
- Spread the orange cream into the bottom of the tart shell using a spatula
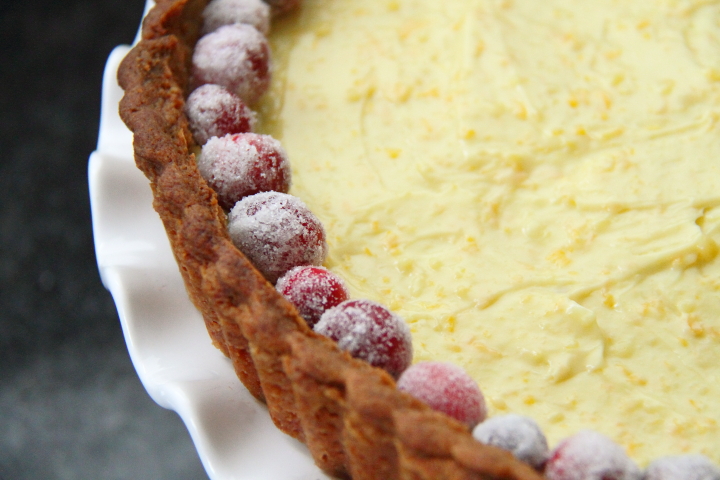
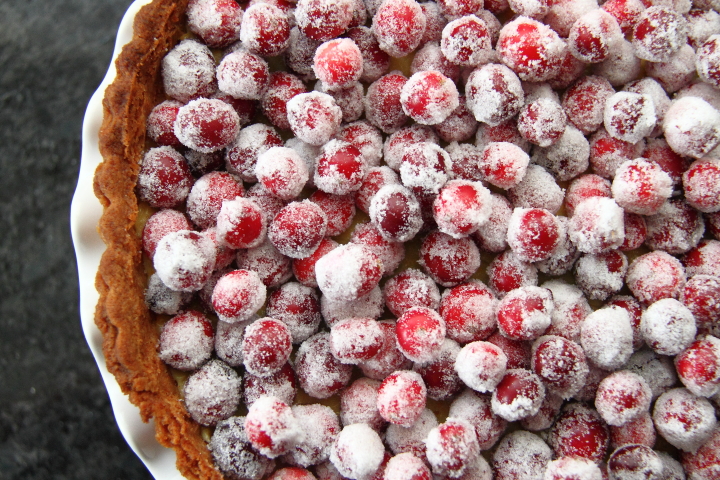
- Gently place sugared cranberries on top of the orange cream, covering the entire tart 

Tips and Tricks
- Make sure that the simple syrup has cooled sufficiently before adding the cranberries otherwise you run the risk of the skins splitting
- For efficient time flow I recommend arranging the work as follows
   1) Prepare the simple syrup and let the cranberries steep
   2) Prepare the orange cream up to the point that the pastry cream is chilled in the refrigerator
   3) Make the tart pastry dough and chill
   4) Roll the cranberries in the caster sugar
   5) Bake the pastry shell and allow it to cool
   6) Finish the orange cream with the whipping cream
   7) Assemble the tart
- To make sure that there are no gaps of orange cream showing along the edges I like to place a row of cranberries around the perimeter of the tart first and then fill in the center 

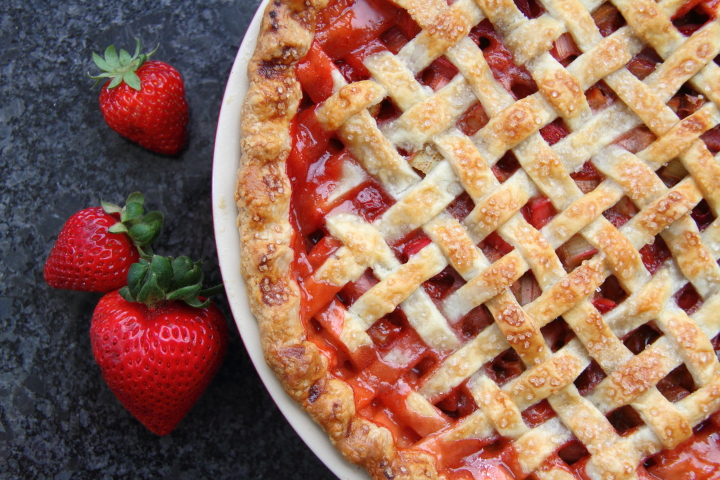
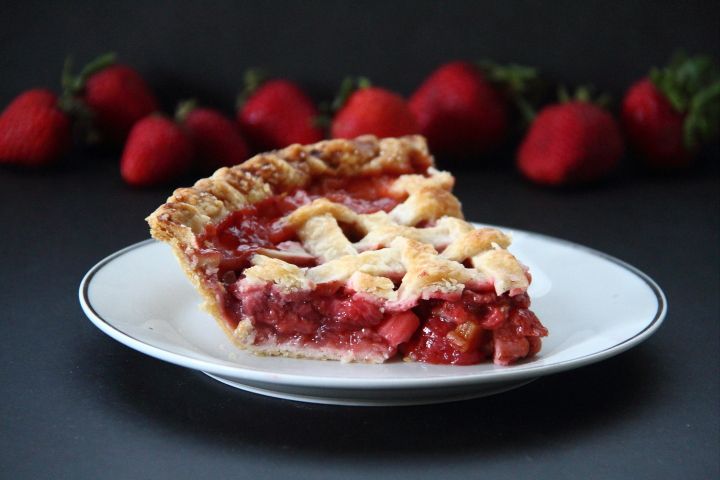
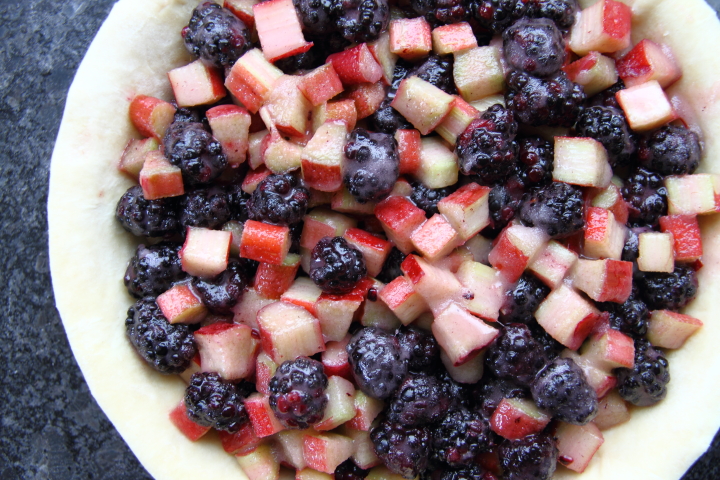
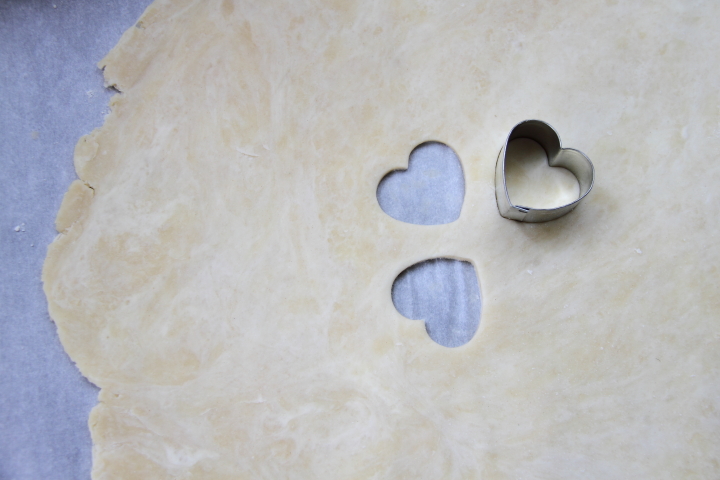
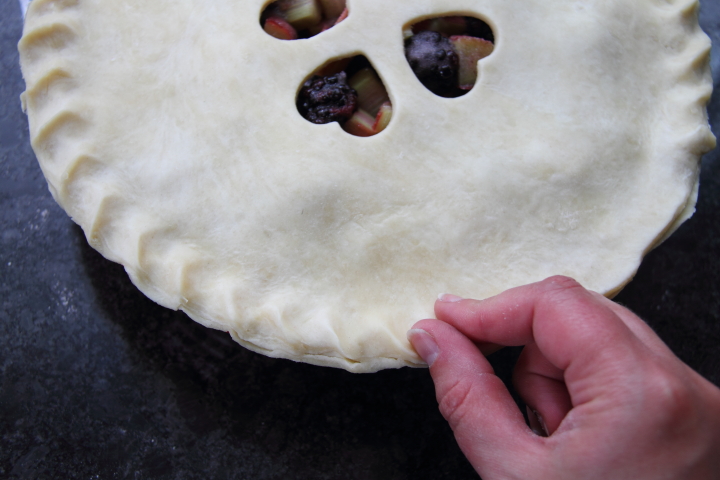
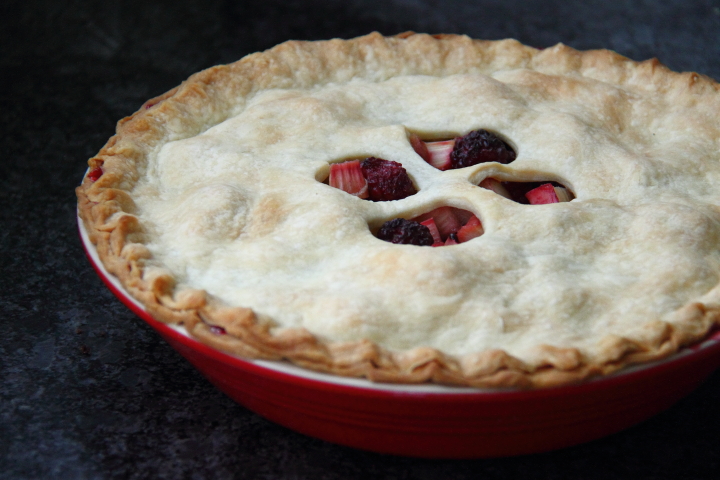
For more dessert recipes try my No-Bake Mini Pumpkin Cheesecakes, Caramel Apple Cupcakes, Blackberry Rhubarb Pie or Chocolate Chili Cupcakes

Monday
Jun152015

Strawberry Rhubarb Pie

Summertime means fresh fruit is in season which obviously means it is time to make pie. One of my favorites is the classic strawberry rhubarb pie. It is my grandfather's favorite and I grew up loving to eat it with him as a special treat.

Ingredients List
- 3 cups rhubarb, cut into 1/2" cubes
- 3 cups strawberries, sliced
- 1 cup sugar
- 3 Tbsp. corn starch
- 1 tsp. cinnamon
- 1/2 tsp. salt
- 1 large egg, separated
- 1 teaspoon water
- Large granule sugar (optional)
- Double pie crust pastry

Directions
- Cut the rhubarb and place it in a bowl with the strawberries
- In a separate small bowl stir together the sugar, corn starch, cinnamon and salt
- Pour sugar mixture over rhubarb and strawberries, tossing filling to coat the fruit
- Roll out half of the pastry and line the bottom of a pie plate with it, trimming off excess
- Roll out remaining half of the pastry
- Add filling to the pie plate and then top with pastry using lattice crust or other vented style top
- Whisk egg white and water together to make egg wash glaze
- Brush glaze on pie and sprinkle with large granule sugar if you like
- Bake for 20 minutes at 425° F, turn heat down to 350° F and back another 35-40 minutes until the crust is golden and the filling is bubbling

Tips and Tricks
- I make my own crust but you can also use store bought
- To make your pastry easier to deal with, keep it in the refrigerator until you are rolling it out
- To prevent your crust from browning too much, wrap it in tin foil for the first 20 minutes of baking

If you are interested, check out my apple pie recipe, my mixed berry pie recipe, my blackberry rhubarb pie recipe and my recipe for making pie crust from scratch


Tuesday
Mar172015

Mint Oreo Truffles for St. Patrick's Day

Happy St. Patrick's Day! I wanted to make some St. Patrick's Day treats to bring into work for my co-workers today but I had a TV conference for work last night so I didn't get home until after eight. Since I had no intention of staying up too late I had to make something on the simple side so I decided to make some mint oreo truffles which don't require any baking. 

Ingredients List
- 1 package of mint oreos (30 oreos)
- 6 oz. cream cheese
- 1/2 teaspoon mint extract
-
Dark Green and Vibrant Green Candy Melts
- Green sprinkles and non-pareils

Directions
Pulse oreos in food processor until they are finely ground.

Add cream cheese and mint extract to oreos and pulse food processor until mixture is fully combined. Form mixture into equal size size balls, place on a a tray covered in parchment paper and place in the freezer for at least one hour.

Place candy melts into a small microwave proof bowls or glasses that are tall enough to dip one of the truffles into it. Microwave them for 60 seconds and then stir. If some lumps still remain microwave another 30 seconds and then stir until smooth. Dip truffles into the melted candy and then place back on parchment paper. 

While the candy coating is still wet add sprinkles for a festive touch. Once the candy coating has cooled and hardened you can stack the truffles on a serving plate or package them in treat bags.

Tips and Tricks
- To make even sized balls I used a small ice cream scoop to measure out equal amounts of oreo mixture.
- If the mixture is too soft or sticky to shape into balls, place it in the refrigerator for a few minutes.
- If your melted candy starts to cool making dipping difficult, just put the bowl back in the microwave for a few seconds until it is smooth again.
Monday
Aug252014

S'mores Pudding Dessert Cups

Yesterday my group from work got together to have a barbecue. I signed up for making a dessert, however my oven just broke and we don't have a repair technician coming out for a week so I needed to make something that used just my cooktop. Making a pudding seemed like an obvious choice and I though s'mores would be good for a barbecue. Making s'mores inspired pudding is nothing new, but I decided to make my own version using my favorite graham cracker crust and chocolate pudding recipes. 

Ingredients
- 1-1/4 cups graham cracker crumbs
- 1/2 cup butter (1 stick), divided
- 1/4 cup brown sugar
- 3/4 tsp. cinnamon, divided
- 1/4 cup cocoa
- 2 cups sugar, divided
- 1/4 tsp. salt
- 3 Tbsp. cornstarch
- 2-1/4 cups milk
- 3 tsp. vanilla, divided
- 1/4 tsp. cream of tartar
- 2 egg whites, room temperature
- 1 Tbsp. light corn syrup
- water 

Graham Cracker Crust
- Use food processor or rolling pin to create fine graham cracker crumbs
- Melt 1/3 cup of butter and pour into bowl with graham cracker crumbs, brown sugar and 1/4 teaspoon cinnamon
- Mix up ingredients with a fork and measure out equally into 24 dishes, about 1 Tablespoon each
- Press crust into the bottom of each dish to form bottom crust and refrigerate 

Chocolate Pudding
- Mix together cocoa, salt, cornstarch with 2/3 cup sugar and 1/2 tsp. cinnamon in a saucepan or small pot
- Gradually whisk in milk
- Over medium heat, continuously whisk mixture until it begins boiling
- After whisking for one minute while boiling, remove from heat and stir in remaining butter (2-2/3 Tbsp) and 2 tsp. vanilla
- Evenly divide pudding among the 24 dishes and return dishes to refrigerator 


Marshmallow Fluff Topping
I included the ingredients for the marshmallow fluff topping in the list above for ease of shopping and gathering ingredients, since I used a marshmallow frosting recipe that I found online, I will let people click over for the directions. It was very delicious, however I found the consistency quite soft, so I am more inclined to classify it as a marshmallow fluff instead of frosting. After letting it cool down a bit I piped the topping over the pudding with a large swirl.

To garnish the dessert cups I used some Hershey's miniatures with pieces of graham crackers. To get clean cuts of graham crackers I have found that using a serrated knife works the best.

I think the s'mores pudding dessert cups turned out well and they were really delicious. Definitely a fun treat for a party!

Wednesday
May152013

Blackberry Rhubarb Pie

I love just love rhubarb and found some beautiful stalks at the grocery so I decided to pair it with some blackberries to make a pie for Mother's Day. Rhubarb is pretty tart so I added a good bit of sugar to offset it in the pie filling. I think that the rhubarb and blackberries made a great combination and it was a big hit with everyone at Mother's Day dinner.

Ingredients List
- 3 cups rhubarb, cut into 1/2" cubes
- 3 cups blackberries
- 1 cup sugar
- 3 Tbsp. corn starch
- 1/2 tsp. salt
- Double pie crust pastry

Directions
- Cut the rhubarb and place it in a bowl with the blackberries
- In a separate small bowl stir together the sugar, corn starch and salt
- Pour sugar mixture over rhubarb and blackberries, tossing filling to coat the fruit
- Roll out half of the pastry and line the bottom of a pie plate with it, trimming off excess
- Roll out remaining half of the pastry
- Add filling to the pie plate and then top with pastry using lattice crust or other vented style top
- Bake for 20 minutes at 425° F, turn heat down to 350° F and back another 35-40 minutes until the crust is golden and the filling is bubbling 

Since I was making this pie for Mother's Day I decided to used a heart shaped cookie cutter to cut vents in my top crust before putting on top of my pie. For the edges I simply pinched the two crusts together.

Tips and Tricks
- I make my own crust but you can also use store bought
- To make your pastry easier to deal with, keep it in the refrigerator until you are rolling it out
- To prevent your crust from browning too much, wrap it in tin foil for the first 20 minutes of baking

If you are interested, check out my apple pie recipe, my mixed berry pie recipe, and my recipe for making pie crust from scratch

Monday
May132013

Coconut Cream Cheese Icing

For Mother's Day yesterday I brought the desserts for the dinner gathering we had with Frank's family. Since Frank's mom absolutely loves coconut, I decided that for one of the desserts I would make would be a chocolate cake with coconut cream cheese icing.

For the cake I used Ina Garten's Beatty's Chocolate Cake recipe. It makes an awesome, moist cake and is one of my very favorites. Be warned, however, that if you make this cake that because it is so light it is a little on the fragile side. If you make it you definitely need to line the bottom of the pans with parchment paper as the recipe states in order to get the cake to release without sticking. One time when I was out of parchment paper I just buttered and floured the pan and had some issues getting the cake to release properly.

For the icing I used my coconut cream cheese icing recipe. Due to the flaked coconut in the icing, you can't get the icing to be super smooth on the cake, but it is so delicious that it doesn't really matter. I will always choose taste over aesthetics any day with my baking.

Once the cakes were cooled I iced the two layers of chocolate cake with the coconut cream cheese icing and then topped it with some more flaked coconut for fun.

Frank's mom really loved the cake and it was a big hit with everyone at dinner yesterday. It is definitely a combination I will make again. 

Ingredients List
- 1 (8 ounce) package cream cheese, softened
- 1/2 cup butter, softened
- 1 tsp. vanilla extract
- 4 cups powdered sugar (about 1 lb.)
- 2 Tbsp. coconut milk
- 1-1/2 cups flaked coconut 

Directions
- Cream butter, cream cheese in mixer with vanilla extract
- Mix in powdered sugar one cup at a time
- Stir in coconut milk to achieve desired consistency
- Fold in flaked coconut with spatula 

Tips and Tricks
- To achieve the desired consistency, if the icing is too thin add more powdered sugar and if it is too thick add more coconut milk
- You can add a teaspoon of coconut extract if you want to intensify the coconut flavor
- Because of the cream cheese in the frosting it is best to keep the iced cake in the refrigerator until serving

Monday
Jan072013

Making Masala Chai

I love drinking my tea sweet with lots of milk so when I discovered masala chai back when I was in college I was instantly hooked. It is such a lovely sweet and spicy drink and is definitely among my favorite beverages, especially when it is chilly outside.

Masala chai originates from South Asia and literally means "mixed spice tea." It is often referred to as chai tea in the West, but since chai actually means tea calling it chai tea is redundant.

Two years ago my friend, Pam, who spent time living in India, gave me a lovely present of some spices, black tea, a tea strainer and instructions for making masala chai. I had never realized how easy making your own was until receiving that thoughtful gift. As an added benefit it makes your home smell wonderful while you are boiling the spices.

There are about a million different ways to make masala chai (varying the spices, changing the ratio of water and milk, what step in the process you add the milk, steeping or boiling the tea, etc.) but I thought I would share a simple recipe that I enjoy which makes enough for about two cups. If you have never made masala chai at home before you can use this as a starting point and experiment to find what recipe fits your tastes.

Ingredients List
- 4 whole cloves
- 4 green cardamom pods, crushed
- 1 cinnamon stick
- 2 thin slices of fresh ginger
- 1 star anise pod
- 2 cups milk
- 2 cups water
- 2 tablespoons sugar
- 2 tablespoons loose black tea (Assam, Ceylon) 

Directions
- Place spices, water, milk and sugar in a small sauce pan and simmer for 10 minutes

- Remove from heat, add tea leaves and allow tea to steep for 4 minutes 

- Pour masala chai into cups through tea strainer, straining out the spices and tea leaves

Tips and Tricks
- If you plan to make chai masala often I recommend buying spices in bulk at an Indian grocery which is much cheaper than buying small jars at the regular grocery (If you are in Ann Arbor I like Bombay Grocers)
- Have fun experimenting to find what recipe you like best! 

Thursday
Dec062012

Pie Crust From Scratch

It is no secret that I love pie. I'll use just about any excuse I can to make (and eat!) one. For me, one of the secrets of a good pie is having a good, homemade crust. Making a crust from scratch may seem difficult but it is actually quite quick and easy. Here is a simple pastry recipe for a two crust pie.

Ingredients List
- 2 cups flour
- 1 tsp. salt
- 3/4 cup butter, chilled and cut into pats
- 5-6 Tbsp. cold water

Pastry Directions
- Stir together flour and salt in a bowl
- Cut in butter with a pastry blender until the mixture becomes coarse crumbs
- Sprinkle in the water a little at a time, mixing the the dough lightly with a fork after each addition
- Form dough into a ball with your hands, wrap in plastic wrap and refrigerate for at least half an hour 

Rolling Out Directions
- Divide dough into half, form into a flat disc and place on a lightly floured surface
- With a rolling pin, roll out the dough in a circle until it is 1/8" thick and about 2" larger than your pie plate
- Roll half of the circle onto your rolling pin to transfer the pastry to the pie plate
- Gently lay the bottom half of the circle on the pie plate and roll the rest over the plate
- Trim excess crust 

Tips and Tricks
- For success both your butter and your water must be very cold
- If you don't know how to use a pastry blender, you just hold the bowl with one hand, and push the blender into the dough with the other, repeating until the mixture has become coarse crumbs
- If you do not have a pastry blender you can cut in the butter by using two knives in a scissor fashion (i.e. blades crossing each other like scissors to cut the butter up)
- Don't use too much water or over mix the dough- you want it to barely hold together
- Make sure to store the dough in the refrigerator until you use it as it is much easier to work with cold dough
- To limit how much flour I need to use to prevent sticking I like to roll my dough out on parchment paper
- If you make a mistake transferring the pastry to the pie plate just roll it out again 

If you are interested, check out how to make a lattice top or use cookie cutters with your pastry to decorate your crust.

Thursday
Nov292012

Graham Cracker Gingerbread Houses

With Thanksgiving behind us and December on its way I am ready to be in the holiday spirit. Nothing is more festive than gingerbread houses so I thought I would share some tips for making your own using graham crackers.

I made graham cracker gingerbread houses as a kid and last year I made a few base houses for Frank's nieces and then let them decorate themselves with candy and icing on Christmas Eve. It is a really fun and easy project and doesn't require baking.

To start you need (you guessed it!) a box or two of graham crackers. I have found that the best way to cut them is to lightly score them with a serrated knife, like a bread knife, and then break it on the scored line. Whenever I tried to cut right through I would have some breakage at the end. You should expect that some of the crackers in the package will be broken or you make accidentally break them so be prepared with extra crackers.

For "glue" you need to mix up a batch or royal icing. You can use your own recipe or try my royal icing recipe. Fill up an icing bag with a round tip with the icing and you are ready to start assembling. As you proceed it is really important for the icing to completely dry at each step otherwise you run the risk of the seams breaking as you put the house together.

To make the ends of the houses I cut angles on two pieces of graham cracker, put and bead of icing down the edge and pressed them together, laying them flat on a cookie sheet face down. To reinforce them I put another bead of icing on the back.

Once the ends were dried I put together the walls of the houses with two graham crackers placed lengthwise for the sides. Again I used royal icing to attach everything. For extra strength I took the trimmed off corners from making the ends and attached them inside of the house where the walls met. This added a lot of stability to the house.

For the roof pieces I used two pieces of graham cracker plus an additional half cut lengthwise. I put them together the same way as the ends but I decided to also press an additional half of a graham cracker on the middle of the back to make sure it was a strong and wouldn't later buckle. Once the roof pieces were dry I carefully attached them to the top of the house and the bases were complete. 

To make a snowy roof, I coated it with royal icing and then used frosted shredded wheat to make the shingles. Overlapping the shredded wheat and varying between starting a row with a full or half piece gives it more of a shingled roof look. Also, it is best to do one side at a time so that your icing doesn't set up while you are still working.

Finally, you can decorate to your hearts content with candies, attaching them with royal icing. Peppermint swirls, licorice sticks, gumdrops and gummy candies are all excellent colorful candies to use, but really the sky is the limit. This is a really fun activity and doing it with Frank's nieces last year was a really wonderful time.

Wednesday
Nov282012

Apple Pie

I just love apple pie. It is such an American classic and one of my favorites to make (and also to eat). You can usually get pretty nice apples almost all year round (unlike some other fruits) so this is a great pie to make from summer through early winter.

I've been making apple pie since my early teens and to me no summer picnic or Thanksgiving meal is complete without out one. Not only does it taste delicious but it also makes my home smell wonderful while it is baking.

Ingredients List
- 2 pounds apples: peeled, cored and cut into 1/4" slices
- 1 tsp. lemon juice
- 2/3 cup sugar
- 1/2 tsp. ground cinnamon
- 1/4 tsp. ground nutmeg
- Double pie crust pastry

Directions
- Prepare the apples (peel, core and cut) and place them in a bowl
- Add the lemon juice, sugar, cinnamon and nutmeg and toss the apples in the mixture
- Roll out half of the pastry and line the bottom of a pie plate with it, trimming off excess
- Roll out remaining half of the pastry
- Add apples to the pie plate and then top with pastry using lattice crust or other vented style top
- Bake for 40-50 minutes at 425° F until the crust is golden and the filling is bubbling 

Tips and Tricks
- Using a variety of apples gives a nice flavor I think. For this particular pie I used Granny Smith and Raeburn but feel free to experiment, just avoid apples with a high water content.  
- I make my own crust (I'll share the recipe in another post) but you can also use store bought
- To make your pastry easier to deal with, keep it in the refrigerator until you are rolling it out
- To prevent your crust from browning too much, wrap it in tin foil for the first 25 minutes of baking