Welcome

My name is Lisa and I'm a crafty girl with wanderlust working as an engineer by day. My blog chronicles projects in my home as well as pictures and stories from my travels.

Search


Instagram

Blog Index
The journal that this archive was targeting has been deleted. Please update your configuration.
Navigation

Entries in Holidays (10)

Monday
Dec252017

DIY Letterpress Holiday Cards with Foil Accents

Happy holidays! This year we got snow on Christmas Eve and Christmas Day so we are enjoying a cozy white Christmas here in Michigan. It's been a busy month but I managed to finish making our holiday cards and mail them out a few days ago.

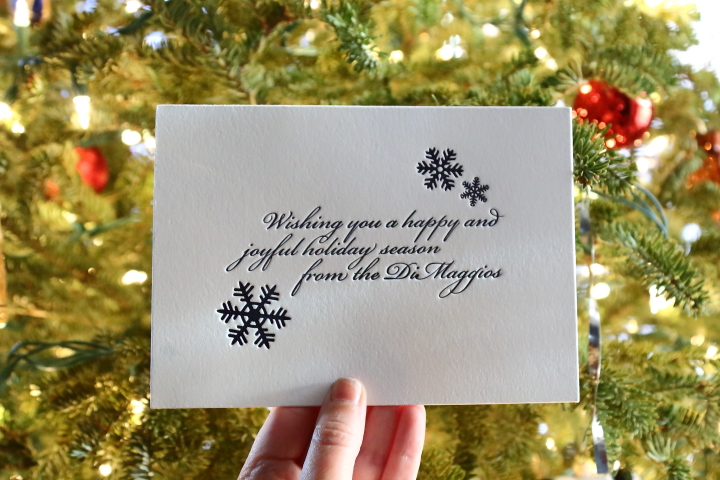
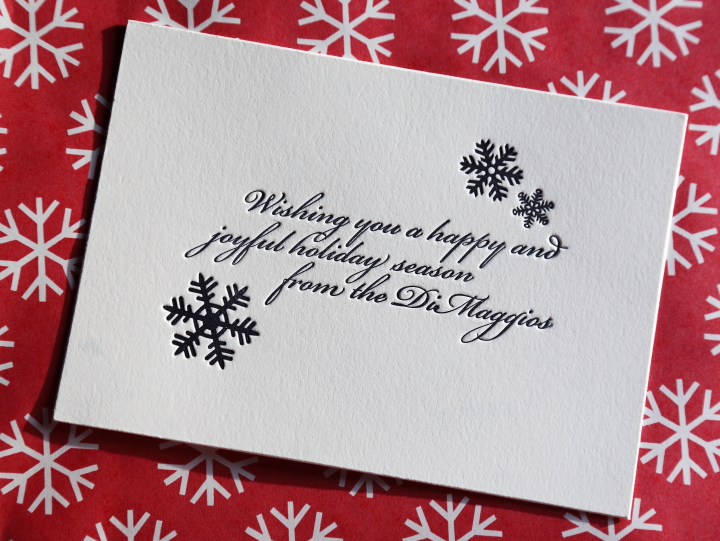
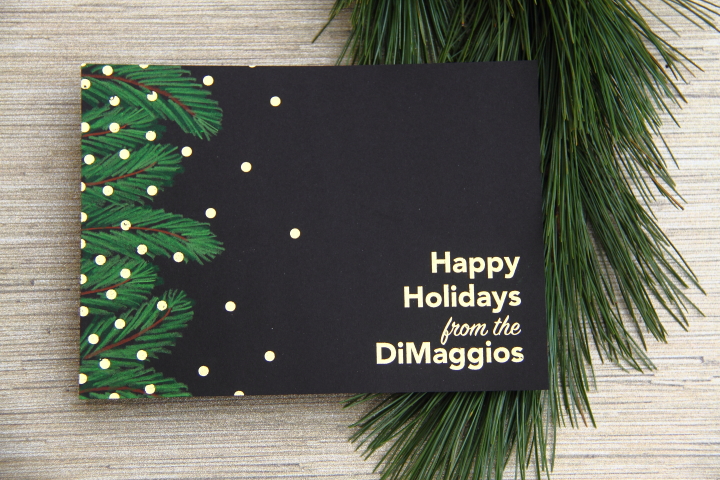
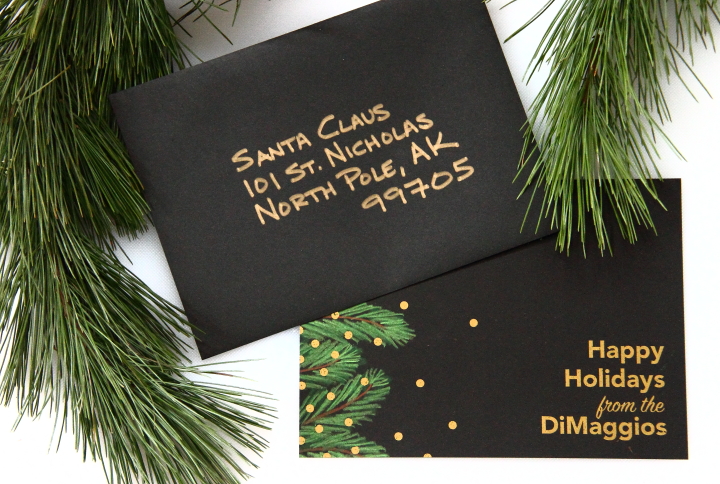
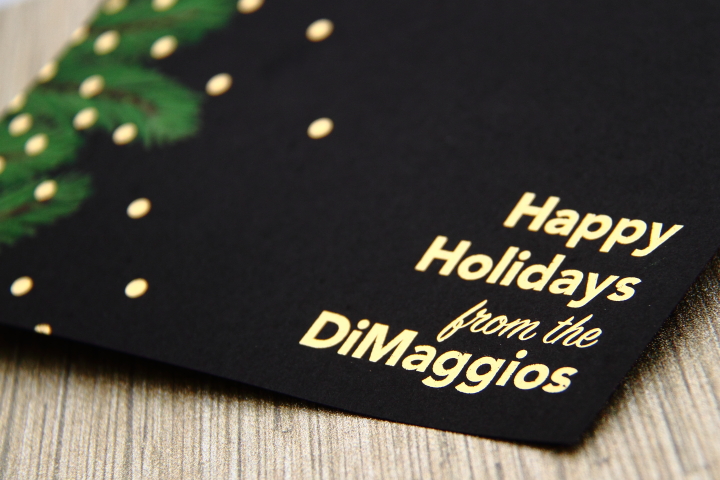
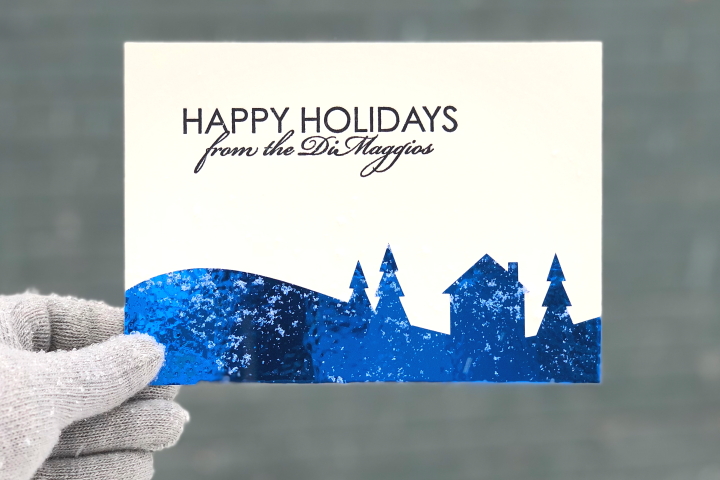
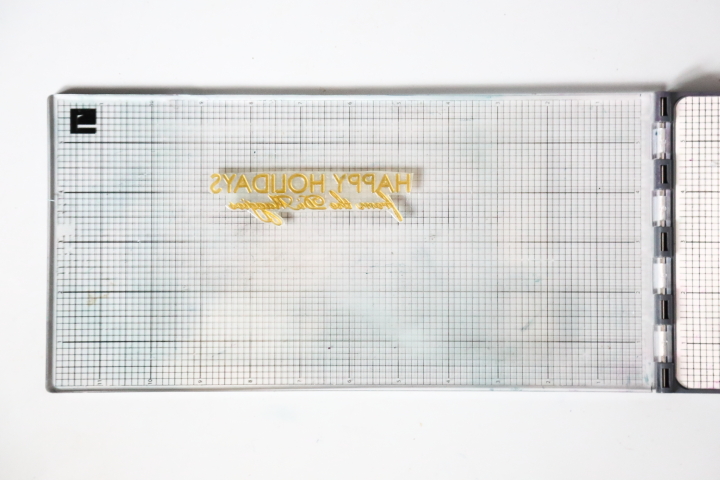
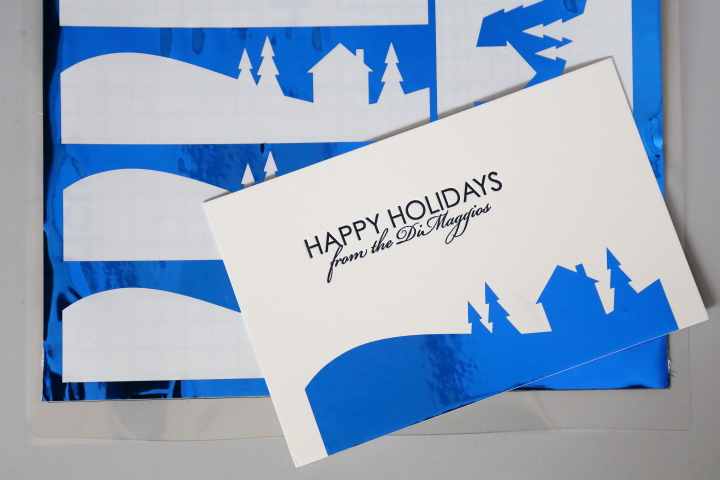
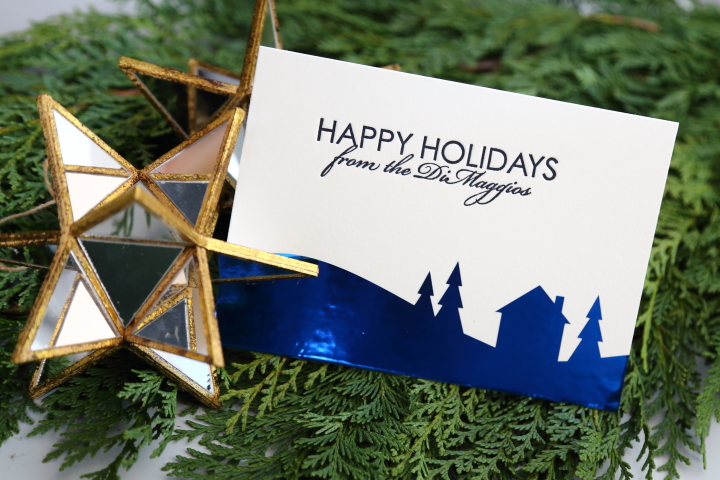
For the design this year I wanted to do letterpress again since I have enough navy ink left over from making our letterpress wedding invitations to last a lifetime. I created a simple greeting "Happy Holidays from the DiMaggios" using Adobe Illustrator and then ordered a letterpress plate through Boxcar Press.

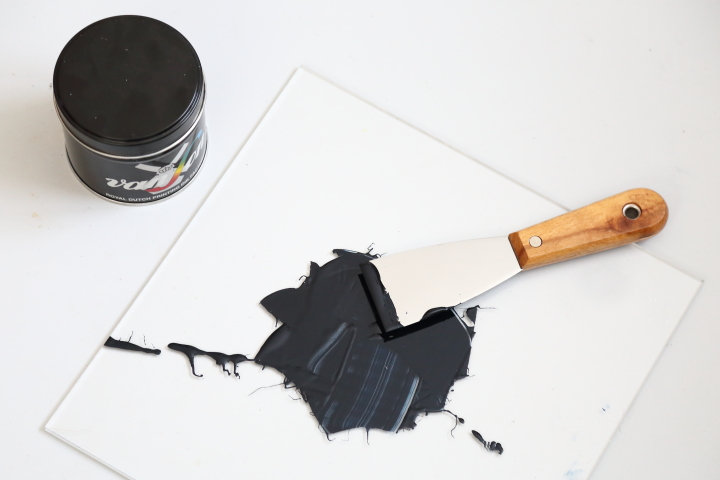
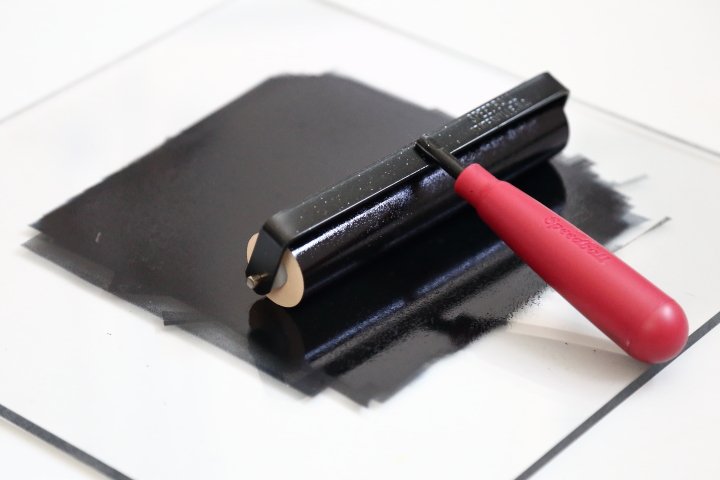
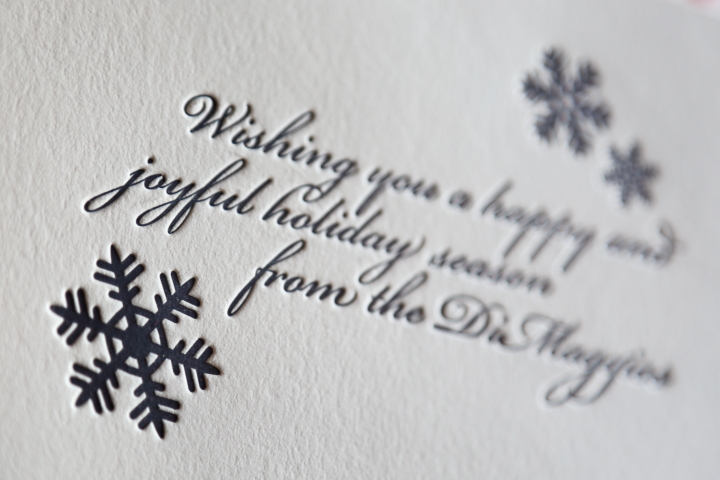
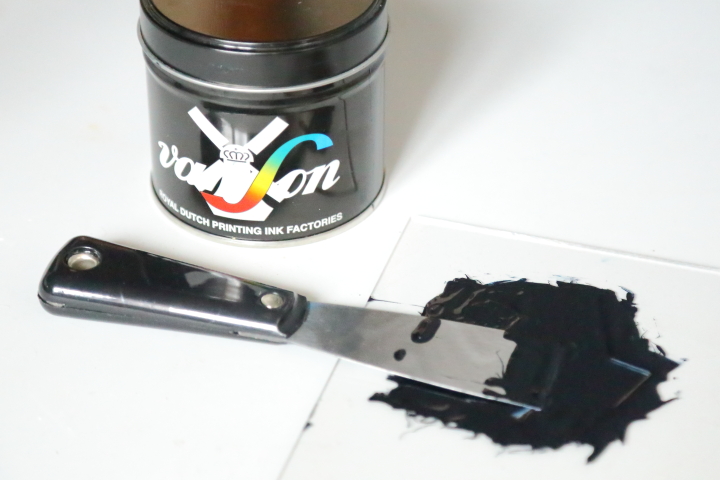
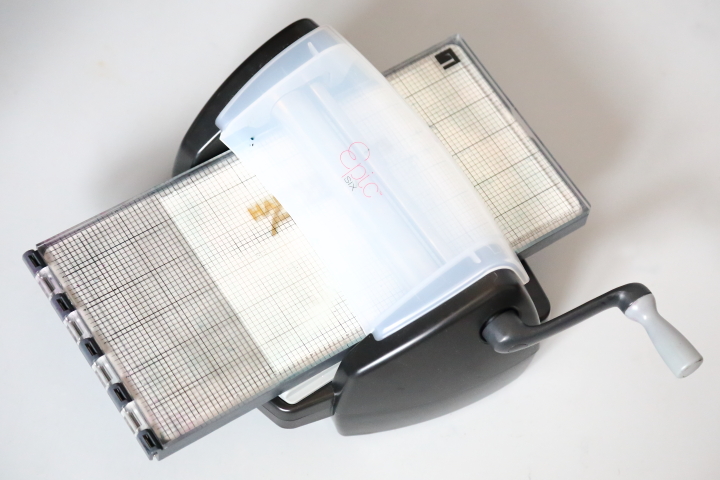
To make the invitations I used the tools that I previously used for my past letterpress projects, Lifestyle Crafts Letterpress Combo Kit, letterpress plate, two pieces of acrylic plexiglass, a palette knife and a rubber brayer. For these cards I also used Crane's Lettra Pearl White 220lb Cover which is my favorite because due its thickness you can make a really lovely impression with it. I buy it in 8-1/2 x 11 sheets which I cut in half to print the cards and then later cut down.

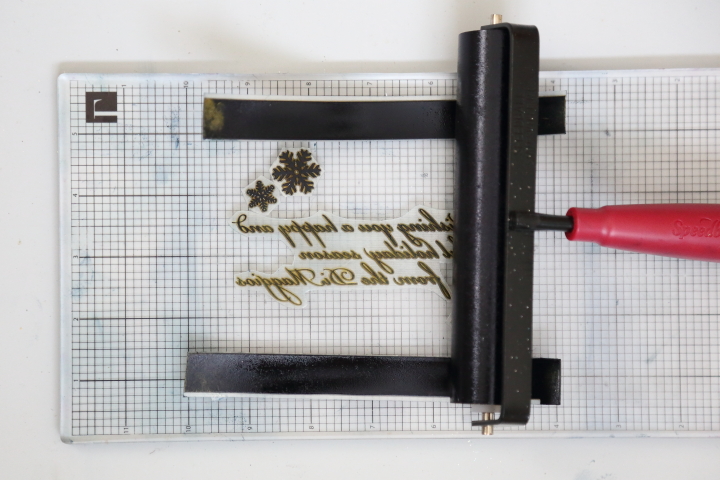
I've explained my letterpress process in this previous post which has all the details but the number one tip is that you need way less ink than you think. Practice makes perfect and over time I am becoming happier with the quality of the impressions when I print and at the same time I am managing to get less ink stains on my hands. It now takes me less than a minute to ink the plate and print each card.

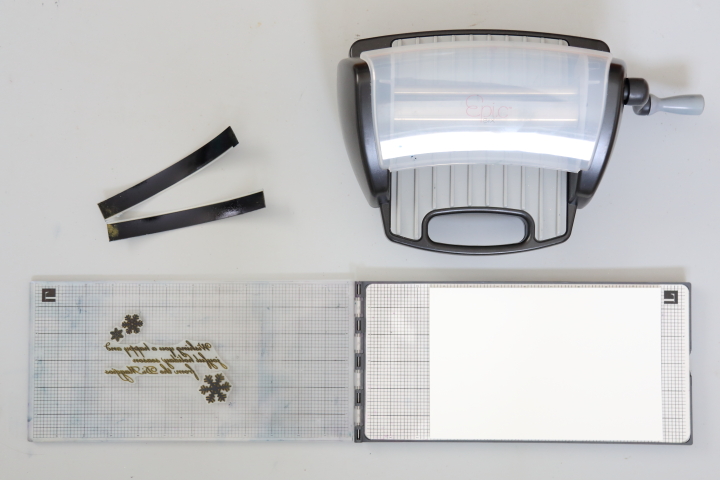
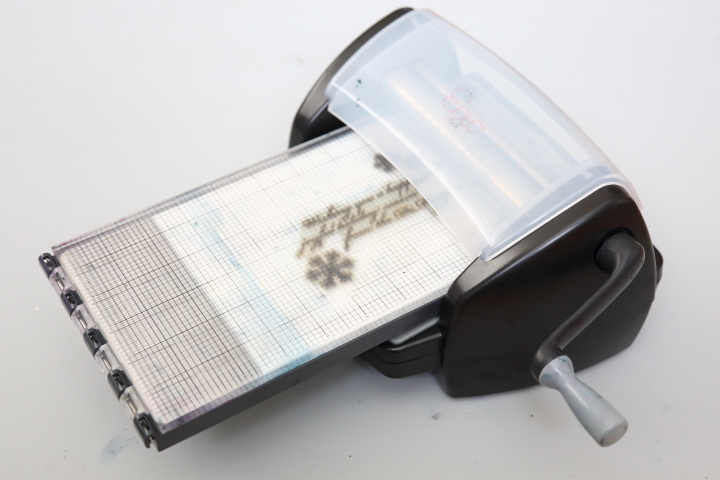
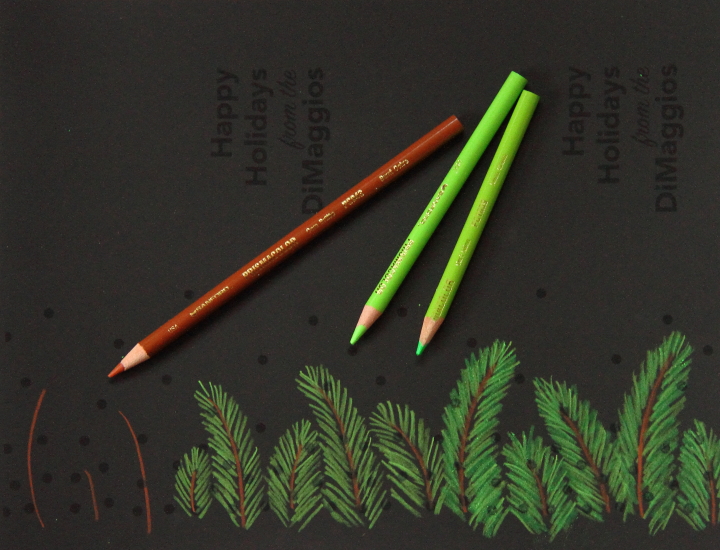
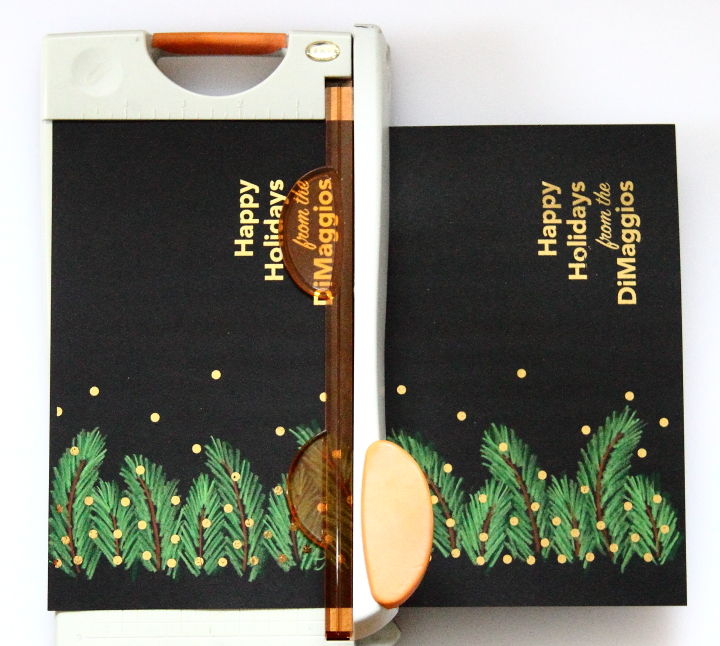
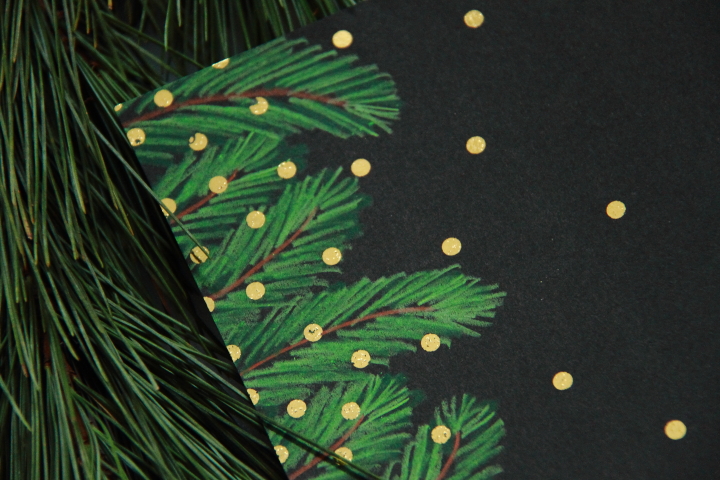
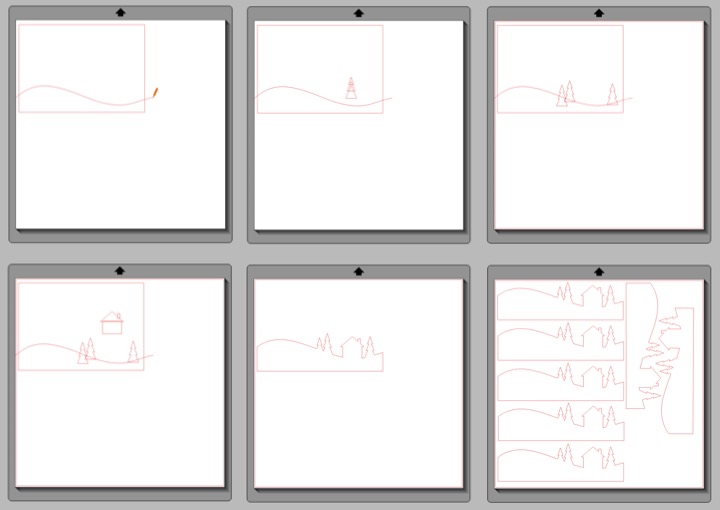
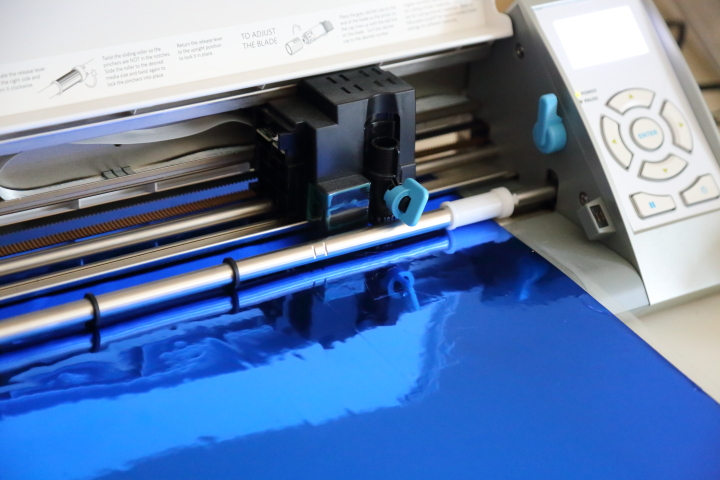
After printing the cards I wanted to add a foil detail along the bottom so I drew a little snowscape design on my computer using Silhouette Studio. Since I knew that my final card was going to be 7" wide I made sure to make my design a quarter inch wider. Once I was happy with the design I copied it across the workspace so I could cut 7 at a time and then used my Silhouette to cut the design out of blue adhesive foil. If you don't have a Silhouette you can make a pattern from cardboard and then trace and cut out the design by hand.

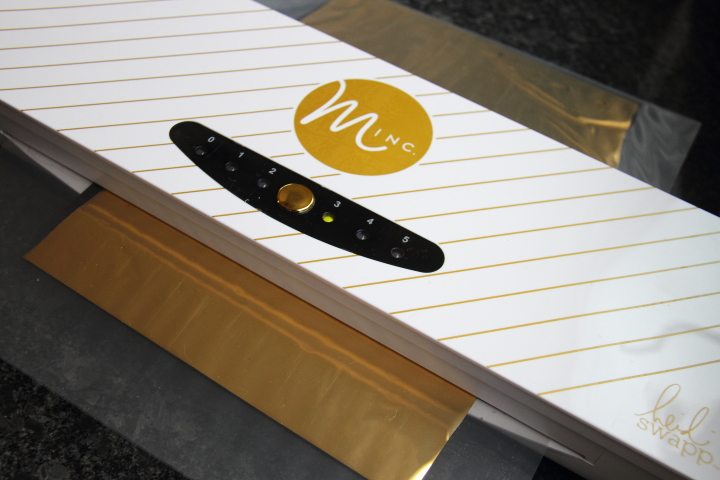
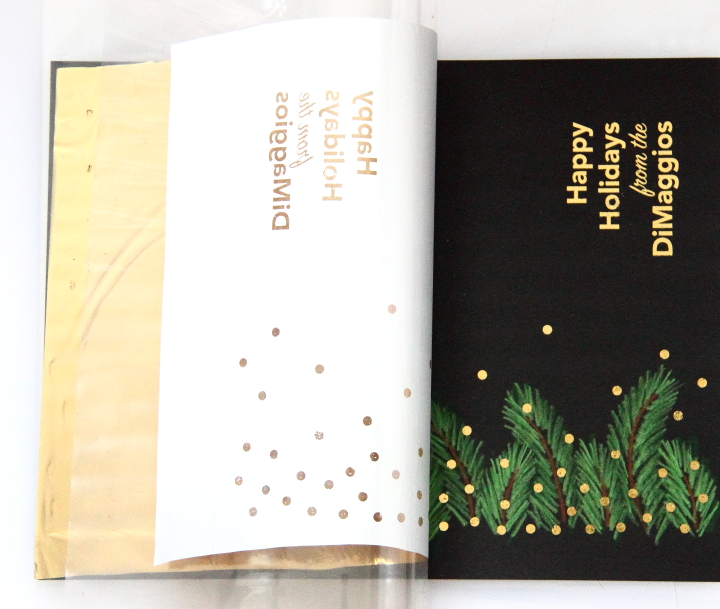
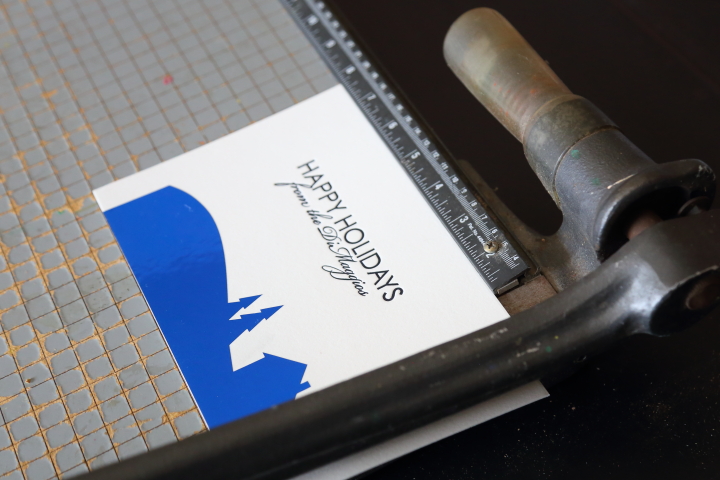
I applied the foil designs along the bottom of the cards and then trimmed the cards down to 7" x 5" to fit into A7 sized envelopes. Because of the thickness of the 220 lb. stock I used to bring my cards to Kinko's and use their paper cutter to trim down cards. However, a few months ago I picked up a huge 24" x 24" paper cutter at a second hand shop for $20 which is perfect for handling the thick stock. Despite being a little worn from a previous life in an elementary school art department, the paper cutter was super sharp and I was able to quickly trim all of the cards. Making the cards oversized and then cutting them down ensures that the edges of the foil design line up with card perfectly.

With the cards finished I mailed them off to our friends and family. It was fun to add the blue foil to the design this year and I'll have to come up with a different unique touch for next year. Wishing everyone a wonderful holiday season and a happy 2018!

If you are interested you can check out some more of my handmade holiday cards here and here.

Saturday
Dec242016

DIY Letterpress Holiday Cards

I love to make our annual holiday cards and this year I decided to do a simple letterpress card. I previously had made our letterpress wedding invitations a few years ago so I had the benefit of some lessons learned this time around. I already had plenty of navy ink that I had previously custom ordered for the wedding invitations and my Lifestyle Crafts Letterpress Combo Kit so all I needed was to order some more paper and create a design. I'm just going to share some basics in this post so for a thorough rundown about the process, check out my wedding invitation post as well as the information from Boxcar Press..

I started by creating my design using Adobe Illustrator with a simple greeting and a few snowflakes. I then ordered my plate through Boxcar Press. They have a minimum size so I like to add on a bunch of other fun things that I may use later, like small designs, greetings or initials. Also, when ordering they will send you extra plate strips for free that you can use as bearings when inking so definitely ask for it in the comments of your order. After receiving the plate I cut out the design using a scissors and removed the blue backing so that I could stick it to the top board of my letterpress bed. 

The big thing that I learned from last time was to start with a very, very small amount of ink and use a large acrylic piece to work with as your base. Instead of using the small piece that came with the kit, I ordered a nice large 12"x12" acrylic piece. I used my ink knife to only spread out a pea sized amount of ink and then worked it with my knife back and forth until it was smooth.

I then transferred only a small amount from my blade onto a second large piece of acrylic and used my rubber brayer to roll it back and forth until I had a very, very light coat of ink on the brayer.

I used some of the polymer plate strips that came with my plate for roller bearers. I didn't do this when I did my wedding invitations (it didn't work well for me then) but this time it resulted in a much better impression. With my brayer loaded with ink, I very lightly rolled it over my letterpress plate. It is very important to only roll once otherwise you will have way too much ink on the plate and you will get a messy impression.

After the plate was inked removed the polymer plate strips and put my paper on the bottom board of the letterpress bed.  I splurged and used the Crane's Lettra Pearl White 220lb Cover again. It is hard to show in pictures but it is amazingly thick and beautiful and I felt it was definitely worth it. Instead of using gage pins to align my paper on the letterpress bed I just aligned it with the markings on the letterpress and then trimmed down the card afterward. 

With the paper in place I carefully flipped the top of the letterpress over the bed. I then put the letterpress bed into the Epic Six and turned the crank which pushed the letterpress bed through the machine. After trimming it down to size my card was complete.

To make sure that I got good impressions, after each print I wiped the sentiment part of the plate clean with a dry cotton rag before reinking. I found that not wiping the snowflakes worked best to make sure that they filled in well. I also found that after trimming the cards down, if it was a little rough on the edges using a very fine sandpaper (600 grit) made it nice and smooth for a professional look.

I am very happy with how the cards came out and hope that our friends and family have enjoyed receiving them this year. It was definitely worth some blue ink stained fingers.

If you are interested you can check out some more of my handmade holiday cards here and here.

Monday
Dec212015

Gold Foil Holiday Cards with Hand Drawn Evergreens

Nothing says holiday like a little sparkle so this year I decided to design my holiday cards using black cardstock and gold foil. For an extra touch I also added some evergreen branches that I drew with colored pencils.

To apply the foil design I used my Heidi Swapp Minc Foil Applicator. I started by making designing my card with scattered small dots across the left and my holiday greeting in the lower right corner. I made my cards 5"x7" and fit two on a page. I then printed my card using my laser printer onto black cardstock. The Minc reacts to the toner of laser printing so it won't work with an ink jet printer but you can always bring your print to a copy store to make laser printed copies.

Next I drew my evergreen branches using colored pencils. I started by using brown to draw some branches along the side of the card. I then used light colored green to add pine needles and then added a little shading with a slightly darker colored green.

When I was experimenting with making the cards I tried drawing the evergreens first and then laser printing the design but I found I had much better results when I did the laser printing first.

With the evergreens drawn I placed my cardstock into my Minc transfer folder, layered some gold reactive foil on top, and fed it into my Minc using a setting of 3.

About a minute later it was done and I could peel back the foil to see the gold design where I the laser print had been.

 After I trimmed down my cards to size they were complete.

To send off my cards I used black A7 envelopes I purchased at my local stationary shop, Rock Paper Scissors. As an aside, if you are ever in Ann Arbor you should definitely stop to visit it as well as its sister store, Bed & Butter, which is an amazing shop to pick up things for your home. To match the gold foil on the cards I addressed the envelopes with a gold metallic Sharpie.

I really like how the cards turned out. The gold foil is festive and the hand drawn evergreens are a personal touch and make each card unique. Now I'm off to the post office to drop them in the mail...

Wednesday
Dec022015

Cranberry Orange Cream Tart

I like to cook but I love to make desserts. Whether it is a work potluck or a family dinner I always sign up for making dessert. This past summer I made a berry mint cream tart to bring to a picnic. I loved the recipe and thought it would be fun to adapt the flavor to cranberry orange for the winter plus beef up the pastry a bit since I like a thicker crust. The result was a beautiful tart that tasted even better than it looked. It is definitely time consuming but worth the effort for a special occasion. I made this for Thanksgiving but I think it would also be fantastic for Christmas dinner or a New Years party.

Ingredients
5 cups fresh cranberries
4 cups sugar, divided
3 cups caster (superfine) sugar 
3 cups water
1 cup milk
zest of 2 large oranges
3 large egg yolks
3 tablespoons cornstarch
1-1/2 teaspoons vanilla extract, divided
1/2 cup heavy cream, chilled
3/4 cup unsalted butter, room temperature
1/4 teaspoon salt
2 cups all-purpose flour
raw rice or pie weights for weighting down the shell    

Sugared Cranberries
- Make a simple syrup by heating the water and 3 cups of sugar in a pot until all the sugar dissolves
- After letting the simple syrup cool for ten minutes pour the cranberries into the pot
- Allow cranberries to steep for at least two hours
- Pour the caster sugar in a shallow dish, drain cranberries and then roll them in the caster sugar until coated
- Place sugared cranberries on wax paper and allow to dry 

Orange Cream
- Pour milk in a small saucepan and grate the peel of the oranges directly into the milk
- Bring the milk to a boil, remove from heat and then let stand for five minutes
- In a separate saucepan whisk together the egg yolks, 1/2 cup sugar, cornstarch and 1 teaspoon vanilla extract
- Whisking constantly bring the mixture to a boil over medium heat causing the mixture to become very thick
- Continue to whisk the pastry cream while simmering for three minutes
- Place the pastry cream in a bowl, cover the surface with plastic wrap and then refrigerate until cool and firm
- Beat heavy cream until stiff peaks are formed
- Whisk pastry cream until it is smooth and then fold in the whipping cream until thouroughly incorporated 

Tart Shell
- Cream the butter with 1/2 cup sugar, salt and 1/2 teaspoon vanilla extract 
- Mix in the flour until a soft dough forms
- Butter a 10-inch tart pan with a removable fluted rim
- Press the dough in the tart pan covering the bottom and up the side of the pan
- Chill the shell for 30 minutes and prick the shell all over with a fork
- Line the shell with foil and fill the foil with the rice or pastry weights
- Bake the shell on the lower rack of a preheated 375°F oven for 15 minutes
- Carefully remove the foil (with the rice or pastry weights)
- Continue to bake for an additional 10-12 minutes until it is crisp and golden
- Allow the shell to cool on a rack for 5 minutes, remove the side of the pan and then cool completely 

Tart Assembly
- Spread the orange cream into the bottom of the tart shell using a spatula
- Gently place sugared cranberries on top of the orange cream, covering the entire tart 

Tips and Tricks
- Make sure that the simple syrup has cooled sufficiently before adding the cranberries otherwise you run the risk of the skins splitting
- For efficient time flow I recommend arranging the work as follows
   1) Prepare the simple syrup and let the cranberries steep
   2) Prepare the orange cream up to the point that the pastry cream is chilled in the refrigerator
   3) Make the tart pastry dough and chill
   4) Roll the cranberries in the caster sugar
   5) Bake the pastry shell and allow it to cool
   6) Finish the orange cream with the whipping cream
   7) Assemble the tart
- To make sure that there are no gaps of orange cream showing along the edges I like to place a row of cranberries around the perimeter of the tart first and then fill in the center 

For more dessert recipes try my No-Bake Mini Pumpkin Cheesecakes, Caramel Apple Cupcakes, Blackberry Rhubarb Pie or Chocolate Chili Cupcakes

Friday
Dec272013

Merry Belated Christmas!

Merry belated Christmas! Frank and I had a great Christmas spending Christmas Eve at his sister's home and heading to his parents' on Christmas Day. We ate too much delicious food and had fun hanging out.

I've been busy the last week working on finishing making my Christmas gifts so I thought I would belatedly share our home's Christmas decorations. Frank and I didn't host anything but I still love to dress up the house a bit for the holidays.

Except for some new ornaments for the tree all of the decorations were things that I already had on hand or made previous years for Christmas. We got a noble fir from a local tree farm and set it up in the corner of our living room. We decorated it with silver and teal glass balls that I already had with a new collection of glass ornaments that we started this year representing places we've visited along with our hobbies and interests.

A few years ago I made some teal and white throw pillow covers for Christmas that I put out again this year. My favorite one is the corduroy one with the felt snowflakes on it.

I couldn't resist adding a little bit of holiday fun on our TV stand with some extra glass balls and a star.

I added some more glass balls in a wooden dish that I got in Honduras on our coffee table. I made the teal and white runner a few years ago and have matching ones on the dining table and buffet as well.

On the dining table I cut out teal felt circles to top candlesticks I had from IKEA for perches for silver spray painted pinecones. In between the candlesticks I placed goblets I found thrifting which I filled with more glass ball ornaments.

On the buffet I filled two glass jars, one with mini pine cones and the other with glass balls, and put some white bottle brush trees under a cloche behind them.

Because I already had everything on hand it didn't take me long to decorate and it was worth it to having everything look festive for Frank and I to enjoy for our first Christmas married.

How was your Christmas? Did you have a nice day with family or friends?

Thursday
Dec192013

2013 Holiday Cards

I am finally starting to get some of my holiday cards in the mail today. This is the first holiday for Frank and me to send a card together since it is our first Christmas married and I had a lot of fun making these cards for our friends and family.

To make the card I started with some blank cards that I had found a while back that had two folds with a cut out at the top. Since I have friends from a variety of religions I decided to make the card saying "Wishing you joy this season."

I thought it would be cute to have the "joy" pop out from the back of the card through the opening so I used my Silhouette Cameo to cut out circles with the word "joy" from red textured cardstock . I attached the circles to the center of the opening with some foam tape so they stood off from the card 1/8".

I added the rest of the words using my Silhouette Cameo to cut "wishing you" and "this season" from black vinyl and used transfer paper to add them just above and below the circle on the innermost part of the card. To make it all stand out I used some white polka dotted black washi tape to frame around the opening on second page of the card. 

I like how the card turned out. It was simple enough that I could make a bunch of them in a day (thank goodness I am on vacation this week!) but they are unique for Frank and I to send to the special people in our life.

Happy Holidays!

Tuesday
Dec172013

My Japanese Christmas Tree Decorated with Orizuru (Paper Cranes)

When I was living in Japan I was set on having a small Christmas tree for my apartment. Most Japanese people are not Christians but due to Western influences some Christmas customs like exchanging presents, particularly between couples on Christmas Eve, have become popular. As a result I was able to find myself a little table top tree with all the trimmings after hunting around for a bit. I found my little set-up at Nittori, which is home goods store kind of like a Japanese version of Ikea. My options were quite limited since the trees were sold as a package set including the lights and decorations, but at least I had a small Christmas tree plus it was a great deal at only ¥999 (about $10 US) for everything.

After taking the tree home and setting it up in the corner of my living room I thought it looked a little plain with just the silver balls and lights since I wasn't so keen on the red bows and garland that also came with my set. After thinking for a bit I decided to make some paper cranes to add to the tree's decorations. Orizuru (折鶴, folded crane) is a classic origami design and the paper cranes are symbols of peace, good fortune and good health among other things. It seemed like the perfect fit for my Christmas tree.

I pulled out a few sheets of red origami paper as well as some special red foil paper that I had and made about a dozen cranes to grace my Christmas tree. I nestled them in the boughs and loved the way they looked incorporating a bit of the Japanese culture from where I was living with my personal tradition of having a Christmas tree. 

When I moved back to the US I didn't have unlimited space to ship things back so I got rid of my little Christmas tree but I did save the menagerie of orizuru that I had made for the tree. While my Japanese Christmas tree wasn't the largest or most beautiful of the trees that I have had over the years it is definitely one that has a special place in my heart.

Sunday
Dec022012

I ♥ A2: Midnight Madness

On Friday night Frank and I walked downtown after dinner for Midnight Madness where everything in Ann Arbor was open late for holiday shopping and winter festivities.

We decided to start our evening at Bill's Beer Garden, which recently opened up in October of this year and is located at the Downtown Home and Garden store. They have a small kiosk that they serve a variety of drinks from with picnic tables and chairs set out for patrons to relax with their beverages.

This weekend was the last weekend that the beer garden was open for the season and it was jam packed with people. There were a few fire pits set out to keep people warm and in addition to the normal beer and wine they had hot cider and mulled wine on the menu.

Frank had a beer and I of course had mulled wine since I was so chilly. It was a really fun and festive atmosphere and I am looking forward to going there next summer when it is warm out.

After finishing our drinks we ventured out to Main Street. Everything looked so pretty with the trees along the street festooned with white twinkle lights and all of the shops decorated for the holidays. 

The streets and shops were bustling and it was so crowded that we decided not to venture into any stores and check things out another day. The atmosphere was great and we did a walk up and back on both sides of Main Street peeking in the glass display windows. All in all it was a fun winter evening and got me into the holiday mood.

Is your town decorated for the holidays yet? Do you have any holiday fairs or events that you have been to or are coming up? Have you started your holiday shopping or are you slow like me?

Wednesday
Jul042012

Mixed Berry Pie for Fourth of July

Happy Fourth of July! Although it is blisteringly hot and humid here in Michigan I felt compelled to make a pie this morning to bring to the Independence Day get-together that I am going to this afternoon. The first reason is that so many wonderful berries are in season and just begging me to bake with them. The second reason is that pie is delicious.

I love making mixed berry pies with all sorts of fruit combinations: strawberries, black raspberries, blueberries, rasperries, blackberries... you get the picture. It is a great and delicious way to use up whatever fruit you have on hand. Today I paired some blueberries and raspberries since it makes a festive color combination. The pie smells delicious and I am having some serious will power issues not cutting into it before I head to the party. 

Ingredients List
- 4-5 cups berries (depending on the size of your pie pan)
- 2/3 cup sugar
- 3 tablespoons cornstarch
- Double pie crust pastry

Directions
- Toss the berries with the sugar and cornstarch to coat and let sit for at least fifteen minutes
- Roll out half of the pastry and line the bottom of a pie plate with it, trimming off excess
- Roll out remaining half of the pastry
- Add berries to the pie plate and then top with pastry
- Trim excess pastry, crimp the edges and cut vents in top crust for steam to escape
- Bake for 45-55 minutes at 375° F until the crust is golden and the filling is bubbling 

Tips and Tricks
- I make my own crust (I'll share the recipe in another post) but you can also use store bought
- To make your pastry easier to deal with, keep it in the refrigerator until you are rolling it out
- To prevent your crust from browning too much, wrap it in tin foil for the first 25 minutes of baking
- Part of the fun of making pie is being creative with the vents on your top crust. I love making a woven top, but since today is Fourth of July I used star shaped cookie cutters to make my vent. Any large vents should be made before you place your top crust on your pie 

Sunday
Apr082012

Simple Easter Arrangement

Happy Easter! To me nothing represents the renewal of Spring like pussy willows so I decided to use them to make an Easter arrangement for my table.

Making this was super easy. To start I just put a bunch of pussy willows that I picked up at our Farmer's Market for a few dollars in a rectangle glass vase. To spruce up the plain vase a bit I took a strip of 6" painting masking paper, folded it in half and wrapped it around the vase, securing it with some double sided tape. I wanted to add a little spring color so I tied a bow around the paper with some spring green satin ribbon.

I needed a little something else so I made nests out of a trio of little wooden bowls that I picked up in a market in Brazil a few years back. I crumpled up some more masking paper and tucked a little bit in each bowl. I then cradled a single egg in each one and arranged the little nests next to the pussy willows.

I like that it turned out simple, yet with strong Spring feel. Now I need to get myself geared up to attack some Spring cleaning later this week. It's much more fun to decorate, though...

Did you do any decorating for Easter or for spring? Have you accomplished any Spring cleaning (unlike me)?