Happy holidays! This year we got snow on Christmas Eve and Christmas Day so we are enjoying a cozy white Christmas here in Michigan. It's been a busy month but I managed to finish making our holiday cards and mail them out a few days ago.
For the design this year I wanted to do letterpress again since I have enough navy ink left over from making our letterpress wedding invitations to last a lifetime. I created a simple greeting "Happy Holidays from the DiMaggios" using Adobe Illustrator and then ordered a letterpress plate through Boxcar Press.
To make the invitations I used the tools that I previously used for my past letterpress projects, Lifestyle Crafts Letterpress Combo Kit, letterpress plate, two pieces of acrylic plexiglass, a palette knife and a rubber brayer. For these cards I also used Crane's Lettra Pearl White 220lb Cover which is my favorite because due its thickness you can make a really lovely impression with it. I buy it in 8-1/2 x 11 sheets which I cut in half to print the cards and then later cut down.
I've explained my letterpress process in this previous post which has all the details but the number one tip is that you need way less ink than you think. Practice makes perfect and over time I am becoming happier with the quality of the impressions when I print and at the same time I am managing to get less ink stains on my hands. It now takes me less than a minute to ink the plate and print each card.
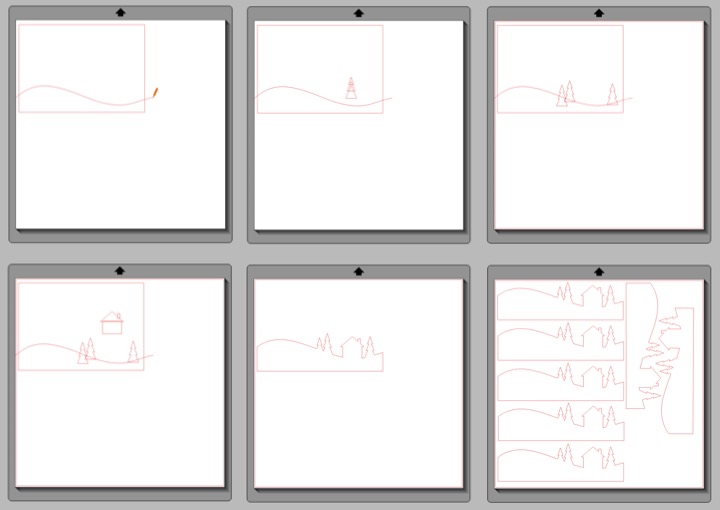
After printing the cards I wanted to add a foil detail along the bottom so I drew a little snowscape design on my computer using Silhouette Studio. Since I knew that my final card was going to be 7" wide I made sure to make my design a quarter inch wider. Once I was happy with the design I copied it across the workspace so I could cut 7 at a time and then used my Silhouette to cut the design out of blue adhesive foil. If you don't have a Silhouette you can make a pattern from cardboard and then trace and cut out the design by hand.

I applied the foil designs along the bottom of the cards and then trimmed the cards down to 7" x 5" to fit into A7 sized envelopes. Because of the thickness of the 220 lb. stock I used to bring my cards to Kinko's and use their paper cutter to trim down cards. However, a few months ago I picked up a huge 24" x 24" paper cutter at a second hand shop for $20 which is perfect for handling the thick stock. Despite being a little worn from a previous life in an elementary school art department, the paper cutter was super sharp and I was able to quickly trim all of the cards. Making the cards oversized and then cutting them down ensures that the edges of the foil design line up with card perfectly.
With the cards finished I mailed them off to our friends and family. It was fun to add the blue foil to the design this year and I'll have to come up with a different unique touch for next year. Wishing everyone a wonderful holiday season and a happy 2018!
If you are interested you can check out some more of my handmade holiday cards here and here.