Welcome

My name is Lisa and I'm a crafty girl with wanderlust working as an engineer by day. My blog chronicles projects in my home as well as pictures and stories from my travels.

Search


Instagram

Blog Index
The journal that this archive was targeting has been deleted. Please update your configuration.
Navigation
Wednesday
Jul022014

An Evening at Manhattan Beach

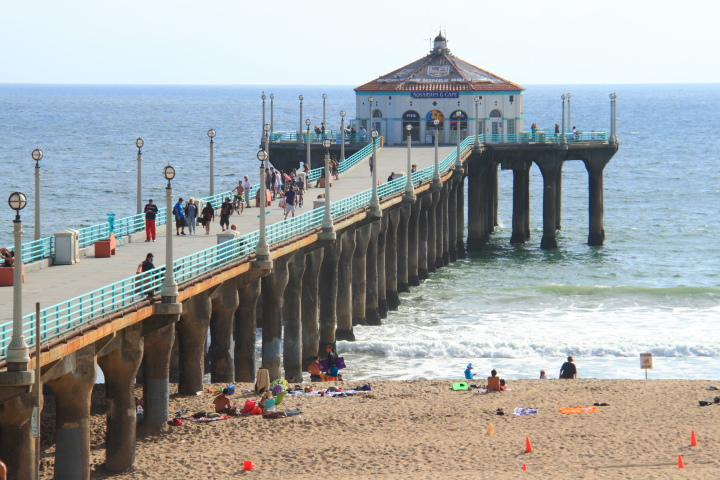
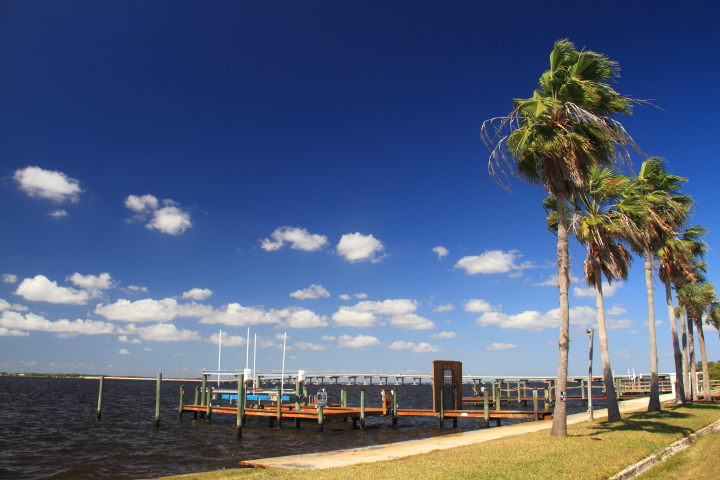
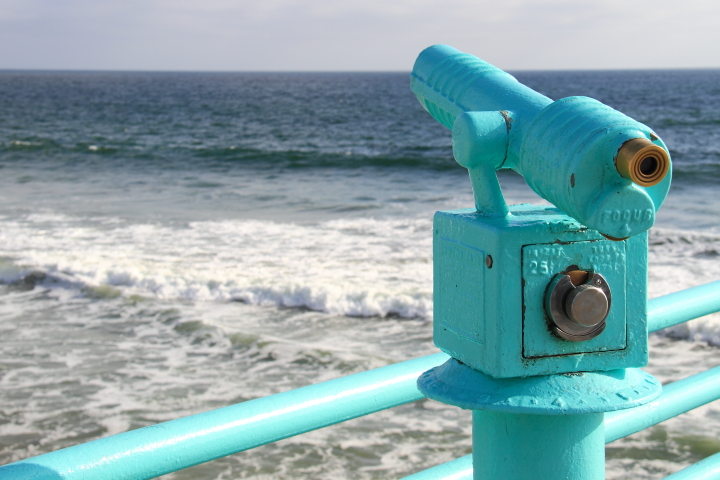
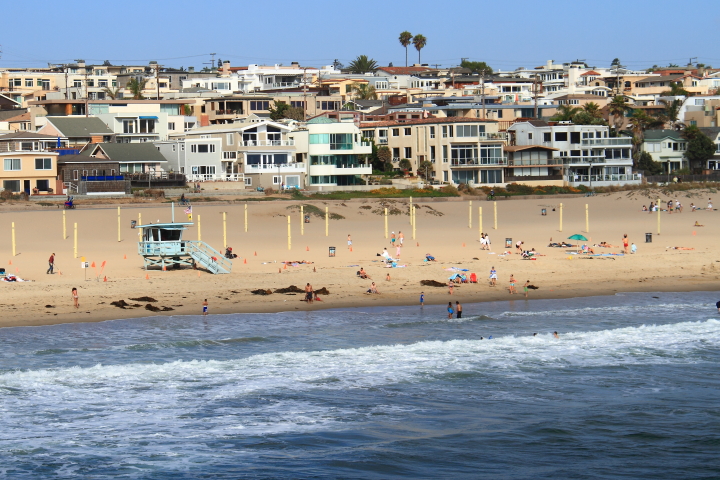
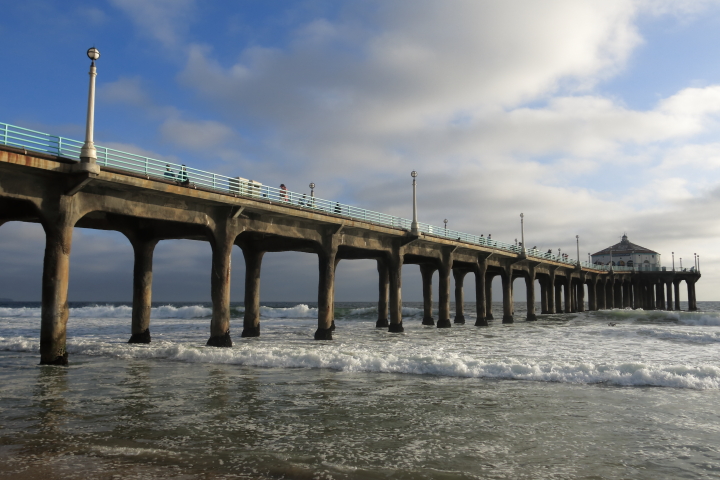
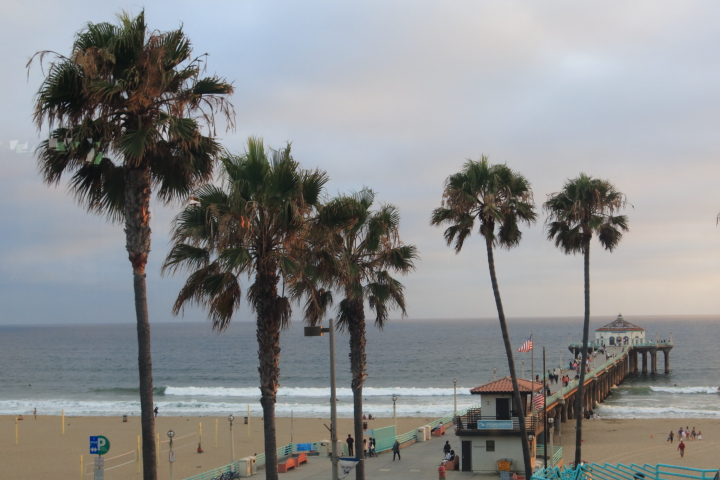
At the beginning of this week I've been on a short trip to LA for work. I flew out on Monday afternoon and had made plans to get dinner with a friend, Don, who had recently moved out to California at 7:30 at the Strand House in Manhattan Beach. The traffic from the airport wasn't as bad as I had anticipated so I ended up getting there early leaving me some time to walk along the beach. I started by strolling out along the Manhattan Beach Pier for some lovely views back at the beach and the surfers trying to catch waves near the pier.

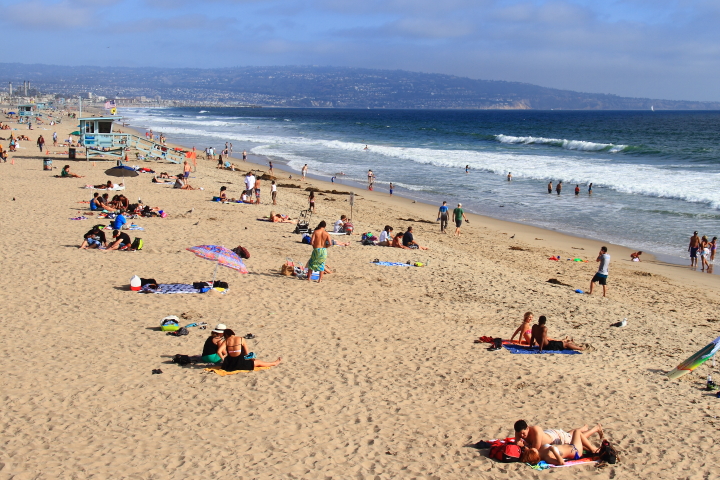
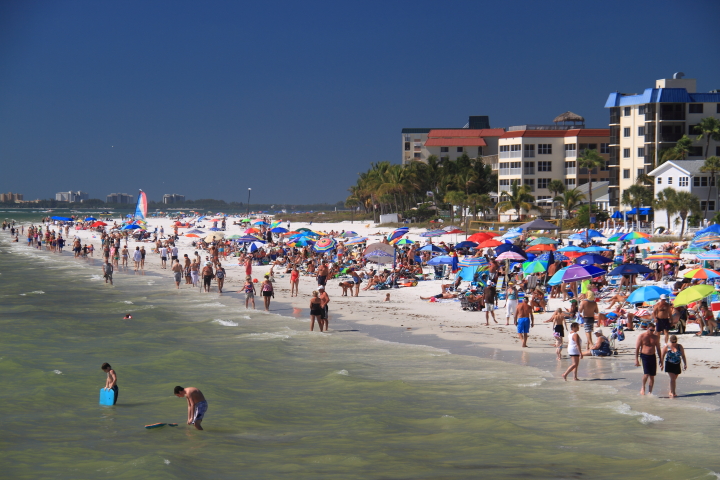
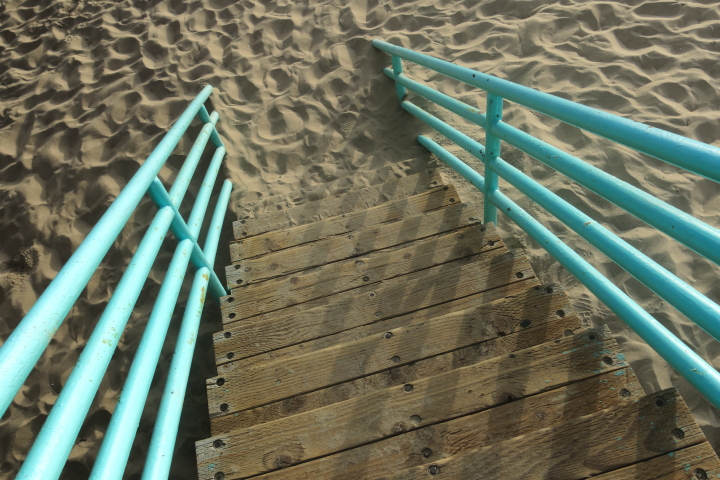
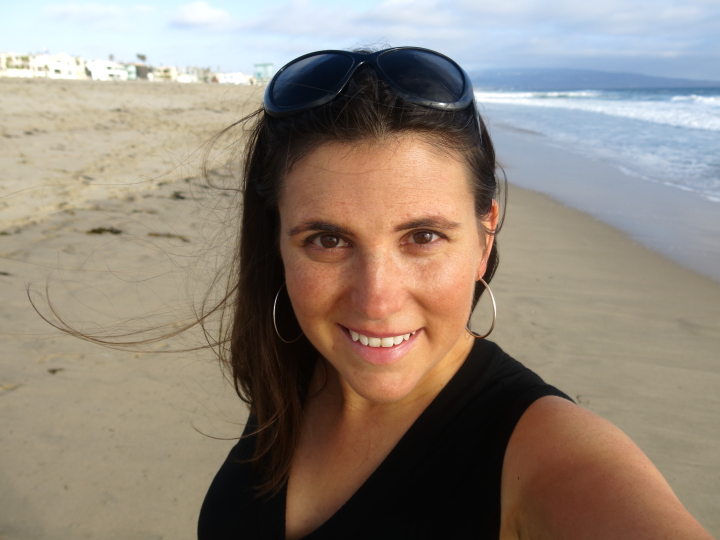
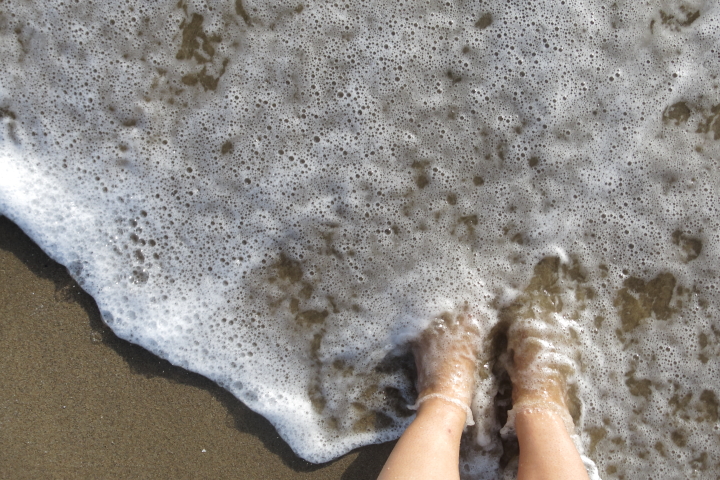
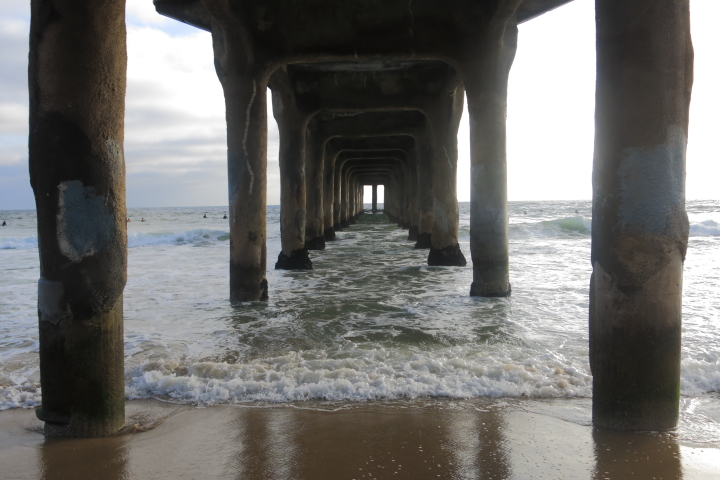
After walking the length of the pier and back I took off my shoes and descended down the stair to walk along the beach. There really is nothing like walking barefoot in the sand.

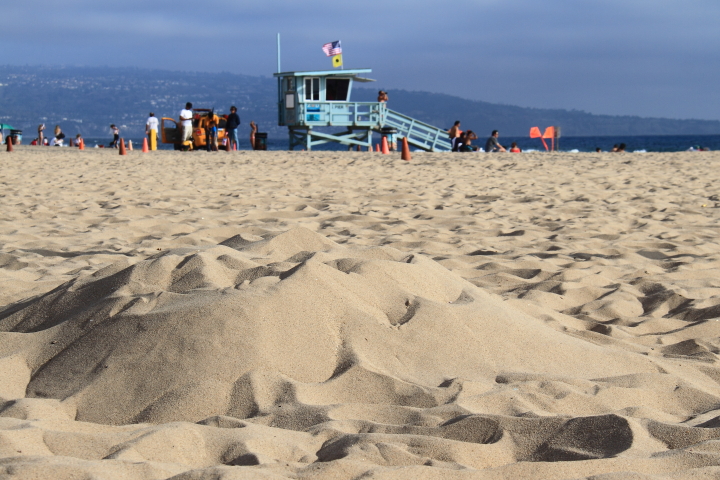
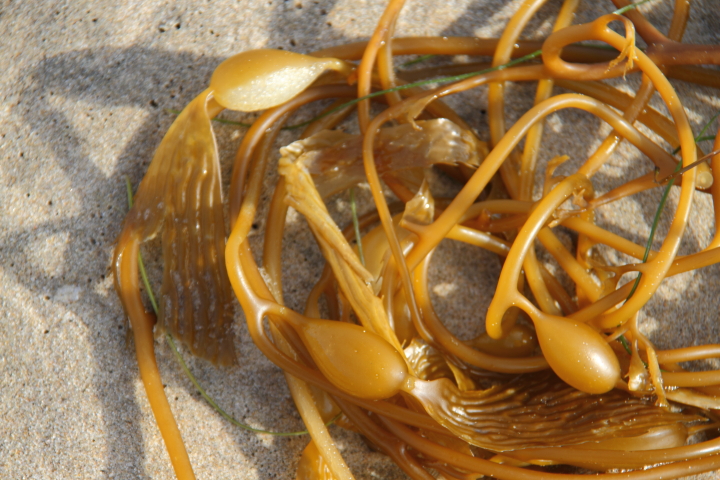
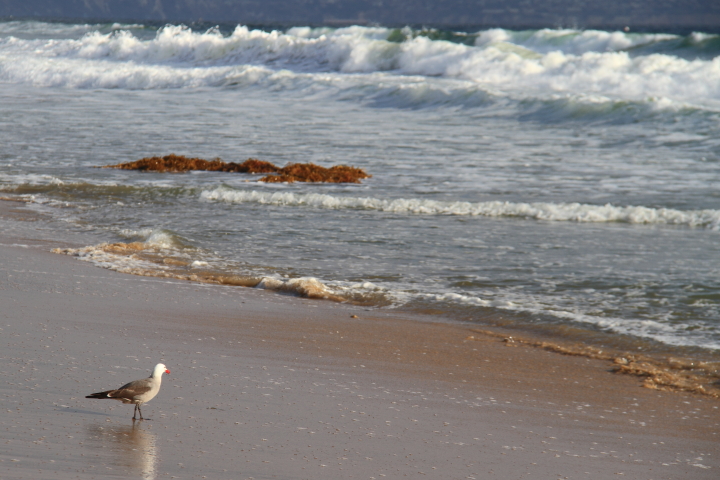
I walked in the surf soaking up the last remaining rays of sun and breathing in the salty air. It was perfect weather and everything looked gorgeous bathed in the early evening light.

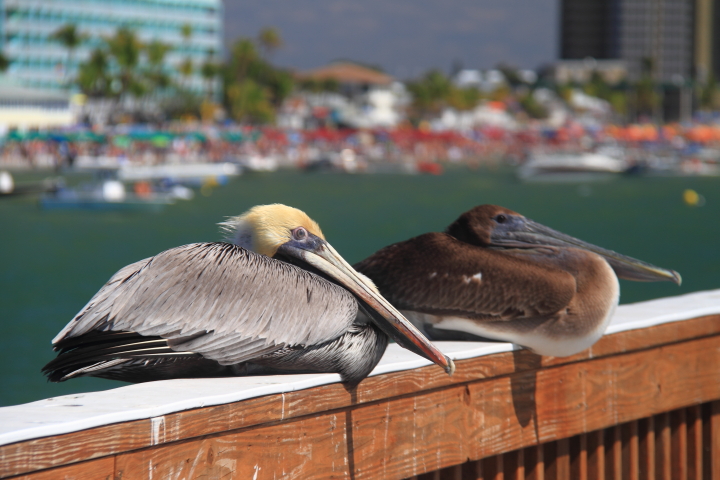
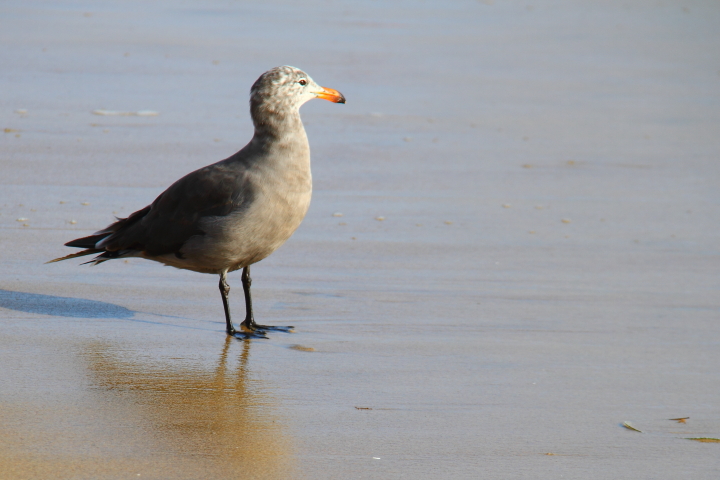
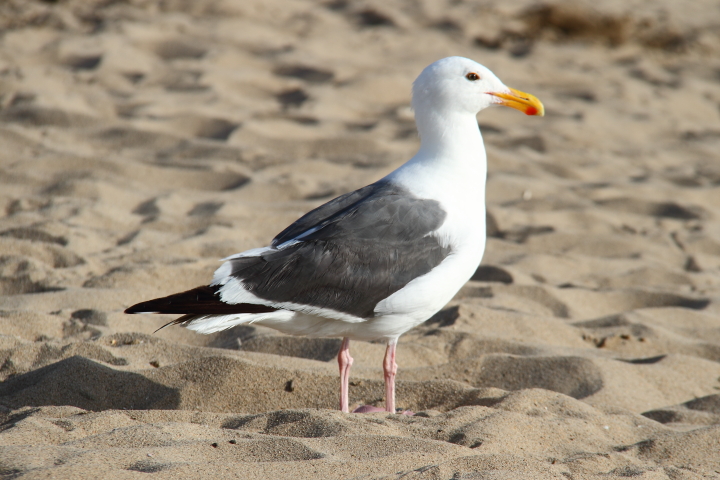
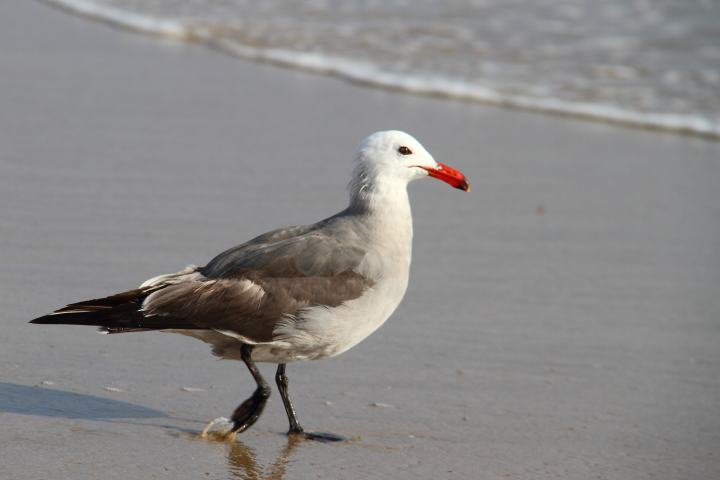
I've never met a sea bird that I didn't take a picture of...

It was time to meet up with Don so I walked back towards the pier and used the public showers to rinse off my sandy feet.


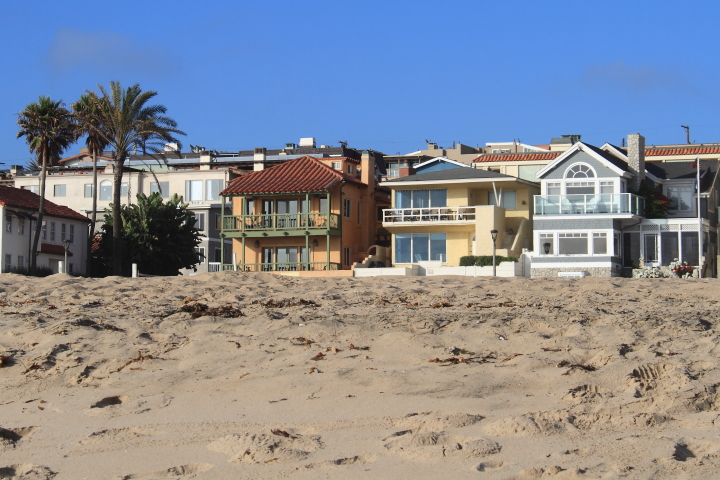
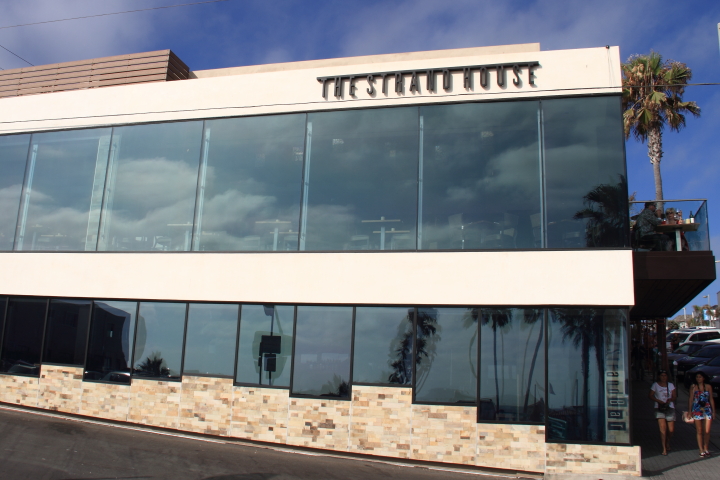
The Strand House is located on Manhattan Beach Boulevard, perched for a perfect view overlooking the ocean.

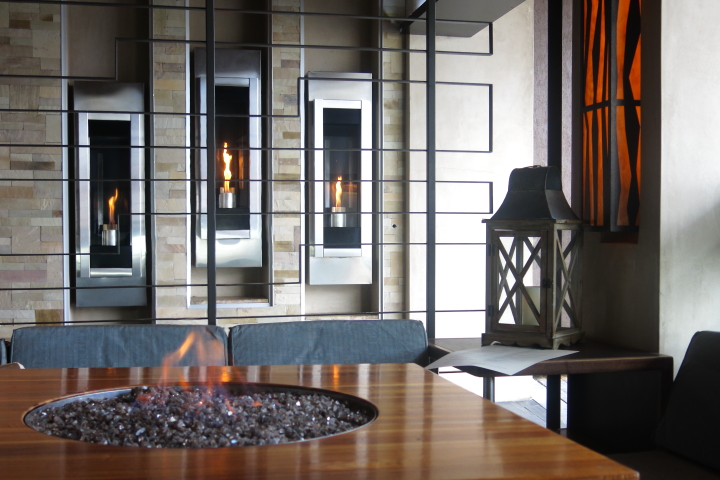
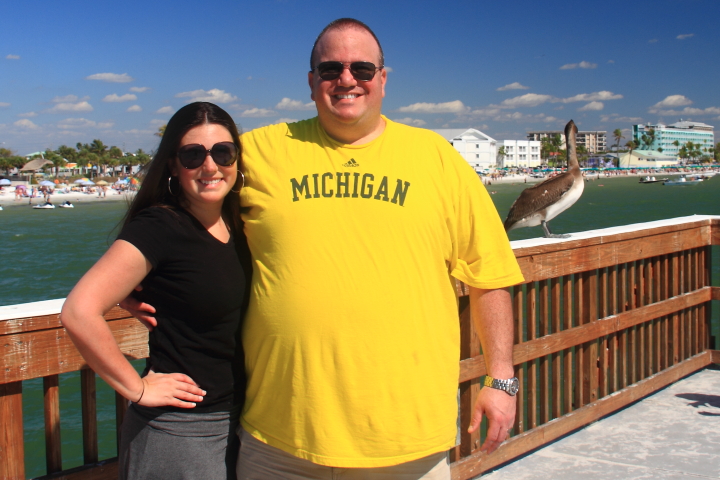
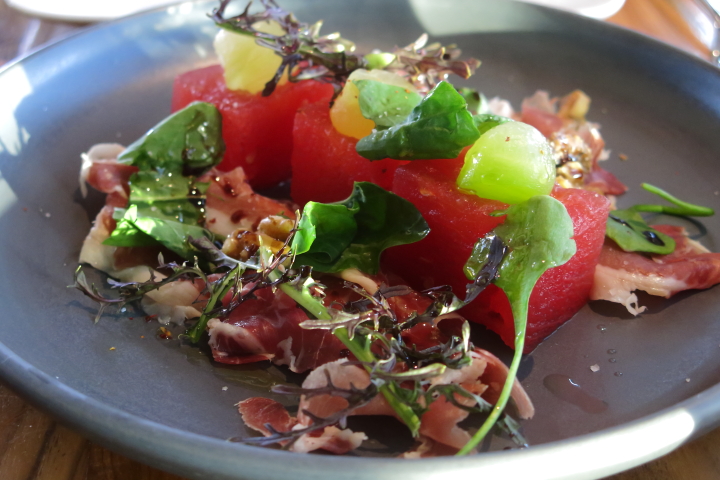
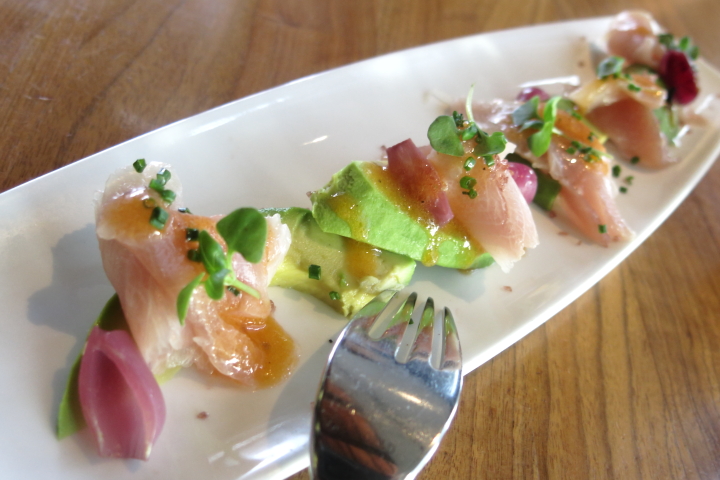
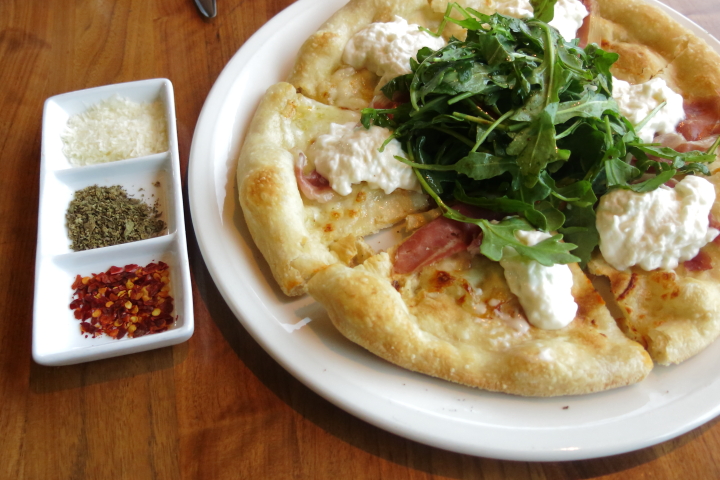
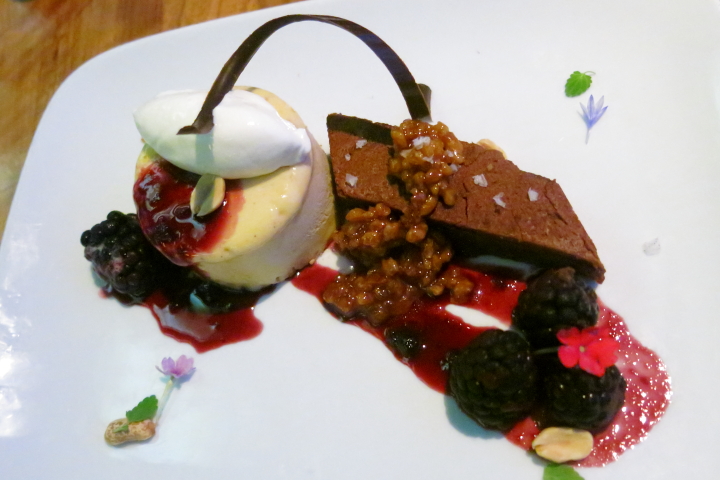
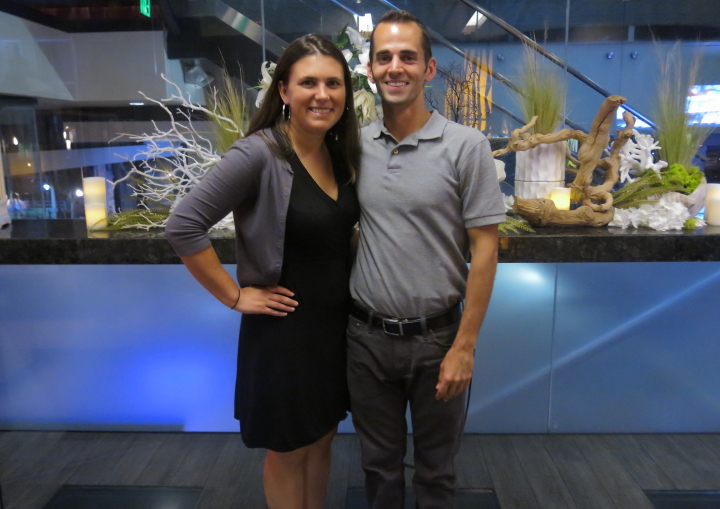
It was really great to catch up with Don, learn about his move and how he was enjoying settling in. Our dinner was also really delicious. We shared a salad of pickled watermelon and speck, hamachi crudo with avocado, a prosciutto pizza with burrata and arugula and roasted peanut semifreddo with cacao nib cake for dessert. Everything was absolutely fantastic.

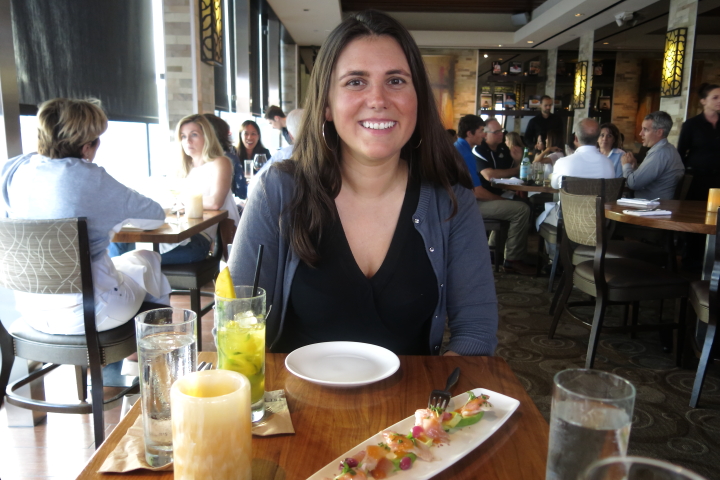
In addition to having fun chatting with Don and eating a delicious meal, the view from the restaurant was fantastic. All too soon we were done, the sun had set and it was time to say goodbye to Don.

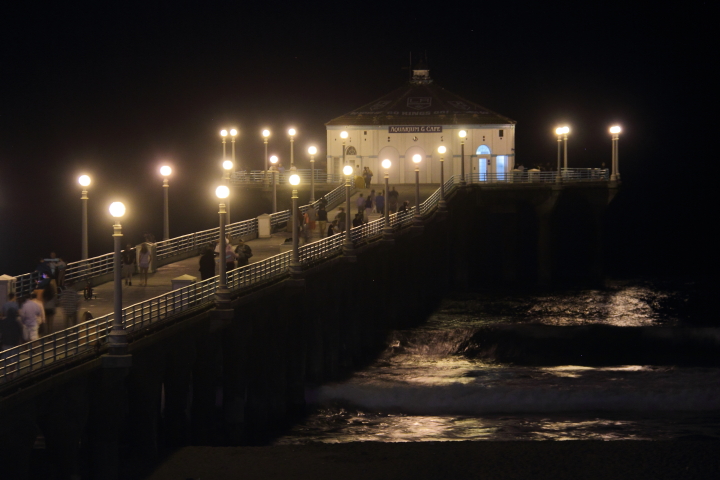
Before I got in my car and drove to the hotel I couldn't resist one last photo looking out at the pier as I ended the evening.

Saturday
Jun282014

Christ the Redeemer (Cristo Redentor) 

With all eyes on Brazil as the World is gripped with World Cup fever (Congratulations to the US Team for advancing to the Knockout Stage on Thursday!) I have been thinking back on my trip to Brazil in the summer of 2007. I had friends that were living in Florianopolis for a few months so I couldn't resist going to Brazil to visit them. I spent a few days in Floripa with them and then headed off to see Iguaçu Falls and Rio de Janeiro by myself.

I thought I would share a few stories from that trip, starting with my visit to the iconic symbol of Rio de Janeiro, the Christ the Redeemer Statue (Cristo Redentor in Portuguese).

Built between 1922 and 1931, Christ the Redeemer looks down over Rio from a perch atop Corcovado Mountain in the Tijuca Forest National Park. Chosen from several design submissions, the statue was a collaboration between French-Polish sculptor Paul Landowski and Brazilian civil engineer Heitor da Silva Costa. In 2007, the statue was chosen as one of the New Seven Wonders of the World through international voting.

Christ the Redeemer was constructed from reinforced concrete and soapstone and stands at an amazing 98 feet tall without its pedestal. Before visiting I knew that the statue would be huge but I really didn't have any concept of how big it actually is. To put it in perspective, I am shorter than the statue's nose.

In my pictures you can see that there were some damaged spots on the statue and in 2010 the statue underwent a massive restoration.

Apart from seeing the awe inspiring statue up close, visiting Christ the Redeemer also was wonderful for the amazing views of Rio from the mountaintop.

My favorite view was overlooking Sugar Loaf Mountain (Pão de Açúcar) and the mouth of Guanabara Bay (Baía da Guanabara).

I also had a lovely view Rodrigo de Freitas Lagoon (Lagoa Rodrigo de Freitas).

Here I had a peek of the famous Copacabana beach and the ocean beyond.

I also had a few beautiful views of the Two Brothers (Morro Dois Irmãos).

I tried to take a picture of myself with Pão de Açúcar in the background but ended up completely blocking it with my head.

Visiting Christ the Redeemer was an awesome experience to see not only the statue but also the views of the city. It is a must see for anyone visiting Rio de Janeiro.

Monday
Jun232014

Creating a Berry Patch Behind the Garage

The small strip of land behind the garage has always been a hot mess. When I bought the house it was a jungle of overgrown black raspberries with poison ivy lurking along with other weeds. I had tried to unsuccessfully clear it out with nothing but a bad case of poison ivy for my troubles and ended up hiring someone to do it for me. Of course, the next summer everything was back with a vengeance. Since I didn't learn my lesson the first time I tried tackling it myself with the same itchy results and ended up hiring to have it cleared out again. Unfortunately, I wasn't so clear about the fact the black raspberries were keepers and to my dismay it was all wiped out. Last summer Frank put several bags of mulch down to keep the weeds and poison ivy at bay but this year I wanted to have a more permanent solution as well as plant some berries again.

We started by cleaning out all of the random things that had been stashed behind the garage and getting rid of the few weeds that had popped up again. Frank rototilled the dirt and then I spread it with a rake to level things out.

Next, I evenly spaced out our berry plants (4 raspberry and 4 blackberry) along the garage and planted them.

To define the berry patch border we decided to use black composite edging. I rolled it out on the patio, weighing it down with bricks to flatten it. Once we were ready to install it, I attached a stake to the edging every four feet.

Frank dug a shallow ditch where we wanted to place the edging and then I put the edging in place, hammering in the stakes and backfilling and tamping the soil down around it.

I definitely wanted to keep weeds at bay so I spread a bunch of mulch around the berries and laid out a sheet of landscape fabric on the pathway we were creating.

The biggest part of the project was filling in the path with nearly a square yard of marble rocks. Frank used a wheelbarrow to move all of the rock and then after he dumped it I spread it out with a rake. It was pretty exhausting but I love how it looks.

We finished off the project by putting down some more mulch along the fence and laying down a piece of sod. I think it looks great and in the three weeks since we did this it has remained gloriously weed and poison ivy free. The plants have been growing and some of the blackberry bushes have several young berries on them. I'm not expecting many berries this year but I have high hopes for the years to come.


Friday
Jun202014

Flying Over Norway

In April Frank and I started our Scandinavian vacation by flying from Detroit to Amsterdam, continuing on to Oslo. I slept well on the first leg of the journey but on the short flight from Amsterdam to Olso I was glued to my window with the beautiful views. The clouds were gorgeous, lit up by the early morning sun. Later when we dipped below the cloud cover I could begin making out the coastline of southern Norway. 

At the time I didn't know exactly what I as looking at, only that it was lovely. Since returning home I used the satellite view on Google maps (yes, I enjoy being a dork) to figure out where I was looking when I took these photos out the window. Below is the town of Lillesand nestled into the rugged coastline.

I was quite amazed at how clearly I could see these bridges linking Stathelle and Brevik.

At this point the flight path veered away from the coastline over the beautiful countryside of Vestfold County.

Next I caught a glimpse of the islands of Kommersøya, Gåserumpa, Killingholmen and Bjerkøya.

We proceeded past Drammensfjord with a view of the city of Drammen in the distance.

Below Drammensfjord is on the left with the town of Sætre on Inner Oslofjord on the right.

Finally we approached Oslo. You can see Bygdøg on the left with the city center on the right.

Straight down out the window I could see Nordstrand and the cargo terminals of the port.

Looking back out I now had a closer view of Oslo. On the left along the water is Tjuvholmen, the neighborhood where Frank and I stayed while in Oslo. Continuing along the water is Aker Brygge and then the ferry terminals of the Port of Oslo. The tall brick building just inland of the ferry terminals is the City Hall and right up the hill surrounded by trees is the Royal Palace.

After flying by Oslo we continued northeast over more lovely countryside, finally landing at the Oslo Airport. It was such a gorgeous flight and it made me even more excited to start our trip.

Wednesday
Jun182014

Tiling Progress in Downstairs Bathroom 

Between work and traveling, finding time to work on the bathroom has been tough, but I am inching along and made some headway on tiling the shower surround. I last left off with taping the cement board joints and setting the first two rows of tile. Since then I broke out my tile saw and pretty quickly I had set six more rows of subway tile plus the black liner bar.

At this point things got a little more complicated as I had to tile around the niche and had to modify my tile spacers to work with the chair rail tile. The chair rail tile is dimensional so the flat spacers wouldn't fit. I used some wire snips to trim the arcs off of one side and then put them in perpendicularly under the chair rail tile. I used the snipped off part between top of the chair rail and the next course of subway tile. Whatever works, right?

The other complicating factor was that the chair rail is just a smidgen under 6" so I couldn't line it up with the subway tile. I ended up offsetting it a bit from the subway tile to disguise the mismatch in length. 

I used painter's tape to keep the row that spanned the top of the niche in place since it had no support below. I had to work quickly at this point before the thinset set up too much make small adjustments in order to make sure that the rows that stacked up on the right side aligned with the row over the niche.

Next, I tiled the back of the niche, making sure to line it up with the surrounding tile.

At this point I had used up the batch of thinset that I had mixed up so I decided to pre-cut some of the tile that I would need for the rest of the niche before I mixed up the next batch. I wanted to trim out the niche with some bullnose tile but I didn't like the thick width that was available so I cut down my own from some tile that I had with a bullnose edge along the top.

I set the rip guide on my saw to the width of the black liner bar tiles that I was using and cut a bunch of thin bullnose pieces. It is hard to get the rip guide in the exact same spot again so I always cut a few more pieces than I will need just in case.

I also pre-cut the mitred corners for the niche before I mixed up the next batch of the thinset. To get the 45 degree angle I butted my tile up against my small speed square. When I am doing something like this I like to make the mitre cut first and then I cut the squared end down as I fit the piece when I am setting the tile.

I feel like at this point I should mention that I absolutely love my tile saw. I bought it used from Craigslist for $100 (a strange story in itself) back when I was tiling the master bedroom shower and it has been worth every penny and more. I couldn't even imagine doing this with tile nippers, plus I feel like everyone should own their own wet saw.

Back to the tiling, I mixed up some more thinset and tiled the top, bottom and sides of the niche trimming it all out with the thin bullnose I had cut. Again I used painters tape to hold the pieces without support in place. By the time I had the niche finished the row above the niche had set enough that I could remove the painter's tape that was supporting it and finish tiling to the ceiling.

I'm not going to lie, the niche took me a while with all of the cuts and it isn't perfect, but I really like it and think it was worth the effort. With the niche out of the way I don't have a lot of complicated cuts left so tiling the side of the shower and wainscoting should go fairly quickly. I can't wait to get the tiling done!

For other related posts about this bathroom renovation check out the history of my downstairs bathroomfixtures for my bathroom renovationplumbing in the downstairs bathroominstalling the floor tile underlaymentinsulating the ceiling, installing the vapor barrier for the shower, installing drywall and cement board, tiling a vintage mosaic border, mudding, taping, sanding and painting and taping the cement board joints. If you are interested in my completed master bathroom renovation check out master bathroom renovation recap. 

Thursday
Jun122014

10 Pictures From Fort Myers in March 2014

Frank and me on the Fishing Pier at Fort Myers Beach

This winter was a tough, long one for us in Ann Arbor. We did escape the polar vortex for a long weekend in Florida to visit my grandparents and also stop in Fort Myers where Frank used to visit every spring with his family when he was growing up.

View of Matanzas Pass Bridge from Nervous Nellie's

Although the restaurant that Frank would often grab clam chowder for lunch when he was a kid was gone, another restaurant was in that spot and we stopped there for the largest lobster rolls I've ever seen and a beautiful view of Matanzas Pass Bridge.

Lobster Roll at Nervous Nellie's

After lunch, which was on the harbor side, we walked down Old San Carlos Boulevard toward the Gulf, passing through the little shopping area known as Times Square.

Clock tower at Fort Myers Beach's Time Square

Being a beautiful weekend the beach was packed with people enjoying the sun and water.

Colorful beach umbrellas along Fort Myers Beach

Frank and I walked out on the Fishing Pier for a lovely view back at the beach and a few sea birds as well.

Pelicans on the Fishing Pier at Fort Myers Beach

View looking back at the beach from the Fort Myers Beach Fishing Pier

That afternoon we drove past the house that Frank's grandmother once owned. It was only two blocks from the Caloosahatchee River and every night when they were visiting her they would walk to the river to watch the sunset.

Looking across the Caloosahatchee River

We spent the next morning on Sanibel Island and headed back to Fort Myers in the afternoon. When we drove down McGregor Boulevard with its impressive palm trees flanking each side, Frank told me that when he was little seeing those palm trees meant he was almost to his grandma's house.

Palm trees lining McGregor Boulevard

Our last stop in Fort Myers was downtown where we grabbed lunch at a great deli and walked around a bit admiring the Art Deco buildings before our flight home.

Art deco building in Downtown Fort Myers

Although we weren't in Fort Myers very long it was great to see some of the places that were part of Frank's childhood, plus escaping from the snow didn't hurt, either!

Monday
Jun092014

Monogram Baby Blanket

Today I thought that I would share a baby blanket that I made for my friend's little guy a few months back. His room is car themed so I when I found license plate flannel at the fabric store I knew that it would be perfect. I bought some plush red minky fabric to pair with it for the front of the blanket and I was ready to go.

I wanted to add a little bit of interest to the front so I decided to add a monogram to the front using felt. I created a design on the computer (a circle with his initials in it), printed it on the computer and cut it out of white and black felt. 

I cut down the red fabric to the size that I wanted and then worked on the monogram in the bottom right corner. I sewed down the white circle first and then layered the black ring and letters over it attaching it with a tiny hand stitch (like I did with these scarves).

I wanted to use the license plate flannel for both the backing and binding of the blanket so I cut it to be 3" wider and 3" longer than the red fabric.

I spread out the license plate flannel face down and then layered the red fabric over it face up, centered so that there was a 1-1/2" border of the license plate flannel around the perimeter of the red fabric. 

I folded the license plate flannel so that the edge touched the edge of the red fabric and then folded it over again, pinning it in place to make a 3/4" binding.

At the corners I trimmed away a little extra flannel and then folded the licence plate flannel so that it would create a mitered corner and pinned it in place.

I sewed the binding down and the blanket was done. I think that the blanket turned out cute and is definitely warm and snuggly. Perfect for such a sweet little man!

Thursday
May292014

Setting the First Wall Tile in the Bathroom

On Monday I finally got to begin setting the wall tile for the bathroom. But before I began tiling I had to tape all of the cement board joints. First I mixed up a batch of thinset using the same type that I'll be using for tiling later. 

I filled all of the joints with thinset, embedded 2" alkali-resistant glass fiber tape in the thinset and then leveled everything smooth. The alkalinity of the thinset can cause regular fiber mesh tape to deteriorate over time so it is important to use alkali-resistant type.

Once I had finished all of the joints I had some thinset left over from the batch I mixed up so I decided to start setting tile. Setting the first tile properly is critical since that will determine the rest of your tile layout. If the first tile isn't level and centered the whole installation will be off.

I wanted my chair rail tile to line up with the bottom of my shower niche so I applied some thinset to the center of the wall with my 1/4" square notch trowel. Starting from where I wanted the chair rail tile I worked my way down setting my tiles with 1/16" spacers until I got to my second to the bottom tile.

I then took a 1x4 cut to the width of the shower, butted it up to the bottom tile and screwed it into the wall at the center point. Setting my 4' level on top of the board I used the center screw as a pivot point and adjusted the board.

Once I had the board level I screwed it to the wall on the ends to secure it and pulled down the tiles from the wall making sure to scrape off all the thinset from the cement board. This gave me a clean slate with a ledger board in place to make sure that my chair rail tiles will line up where I want them. I'm sure a professional would have a better way of doing this but it took me less than ten minutes and I was afraid that if I just measured down I might be slightly off and that would have driven me nuts.

I troweled some thinset on the cement board, measured the midpoint and carefully set the first tile. From that tile I worked my way out setting the first row with 1/16" spacers. I moved up to the second row, carefully measuring to make sure that it was offset 3" from the row below and set the tiles from the inside out. At this point I was out of thinset so I called it a day. I know it is only two courses, but it is nice to have just a little bit of tile up on the wall. Hopefully I can fit in some time to work on it again this weekend.

For other related posts about this bathroom renovation check out the history of my downstairs bathroomfixtures for my bathroom renovationplumbing in the downstairs bathroominstalling the floor tile underlaymentinsulating the ceiling, installing the vapor barrier for the shower, installing drywall and cement board, tiling a vintage mosaic border and mudding, taping, sanding and painting. If you are interested in my completed master bathroom renovation check out master bathroom renovation recap. 

Tuesday
May272014

Mudding, Taping, Sanding and Painting!

Of all the basic remodeling jobs, finishing drywall is my least favorite. Covering screws and flat seams aren't so bad, but corners are the worst for me and unfortunately, even though my bathroom is small it has a lot of them at strange angles because of the sloped ceiling.

I had done my initial mudding and taping a while back but had been procrastinating about finishing everything up. Since I had a four day weekend from work I used two of the days to mud, sand and repeat. Because the spot where the sloped ceiling meets wall with the door is less than 90 degrees, my small angled sanding sponge came in handy to get in the tight spot for a nice finish.

After several rounds of mudding and sanding I finally had things smooth and to the point where I could finally move on.

I used my shop vac to clean up all the sanding dust and wiped down the walls and ceiling before putting on a coat of tinted primer.

Two coats of paint later and the ceiling and walls were all a nice dark charcoal grey (Valspar's Mark Twain Gray Brick). To help disguise the low ceilings I painted the ceiling and walls the same color and I thought the almost black color would be nice to balance out all of the white tile and woodwork that will eventually be in the room.

Next up is tiling the shower surround, which I already got started with on Monday. Despite having a hard time finding time to get this bathroom done I can't wait to get it finished!

For other related posts about this bathroom renovation check out the history of my downstairs bathroomfixtures for my bathroom renovationplumbing in the downstairs bathroominstalling the floor tile underlaymentinsulating the ceiling, installing the vapor barrier for the shower, installing drywall and cement board and tiling a vintage mosaic border. If you are interested in my completed master bathroom renovation check out master bathroom renovation recap.

Wednesday
May142014

Curtains for the Master Bedroom

After rearranging the master bedroom to fit in our new king size bed I wanted to add some new curtains to replace my roman shades. Being a 140+ year old house, the windows are a bit of a crazy situation. The windows on the front of the house sit a little lower down then the ones on the sides plus one of the side windows is a larger replacement window I had to install to bring the house up to fire code for egress. I thought by using some shades and curtains I could disguise the mismatch of windows in the room.

After a little hunting around I found some pretty steel and ivory canvas curtains from West Elm marked down from $44 to $19.99 and jumped on buying them. I then bought allen + roth natural fiber roman shades and Threshold knob drapery rods in brushed nickel from Target. 

I bought 72" length shades so that I could hang them right under the beams in the room. This not only makes the windows seem taller but also helps mask fact the the windows on the front of the house are lower than the ones on the side.

Next I hung the curtains snugly under the beams. It is really amazing how these two windows which are the same size can look so different with a change of window treatment. I just love how the window on the right appears so much larger.

The new window treatments make the room seem so much larger and taller plus it makes the crazy window situation appear much more uniform. I am so happy with how it all turned out.

Pulling the curtains a little closer together on the window along the side of the bed disguises the fact that it is over a foot wider than the other windows.

Next up I want to add some art over my dresser in the corner. It is going to be a little tough since the dresser is on an angle but I have an idea that I think might work.

Have you been doing any refreshes in your home this spring?