


Vintage Mosaic Tile Border For the Downstairs Bathroom
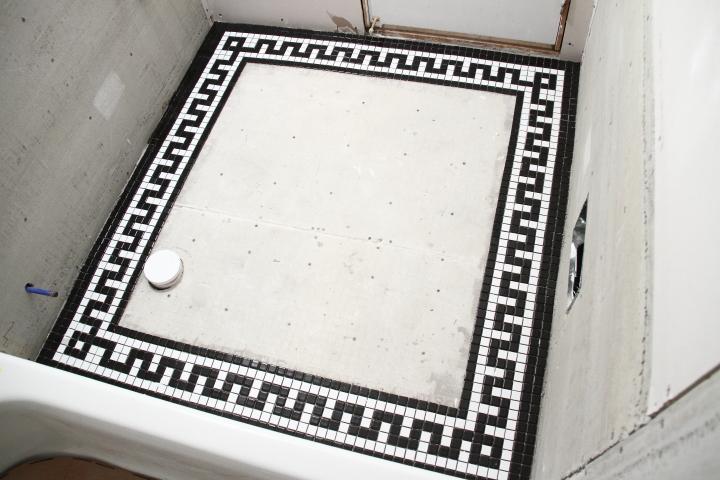
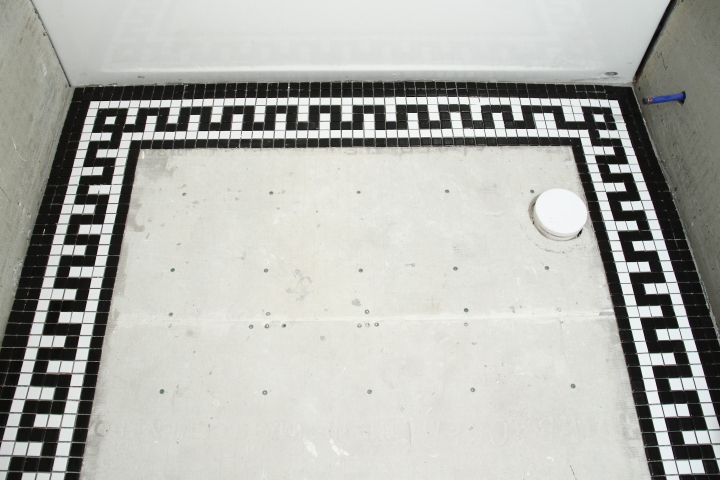
One of the things that I have been really excited about doing in the downstairs bathroom was the floor tile. Since my house is over 130 years old I wanted to use mosaic tiles to create a vintage look with a border around the perimeter of the room. I looked at bunch of images for inspiration and found that American Restoration Tile was a particularly great resource. I love the look of the Greek key border, but since the area I have to tile is small I needed a smaller border and settled on creating a square jogging border design.
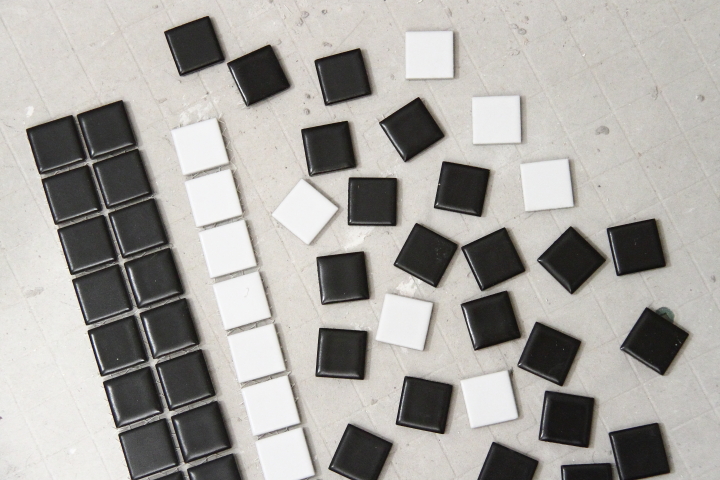
I bought one sheet each of 1"x1" black mosaic tile and 1"x1" white mosaic tile and tested the pattern to be sure that I liked it. I was sold so I went back to the store and bought enough sheets for the project.
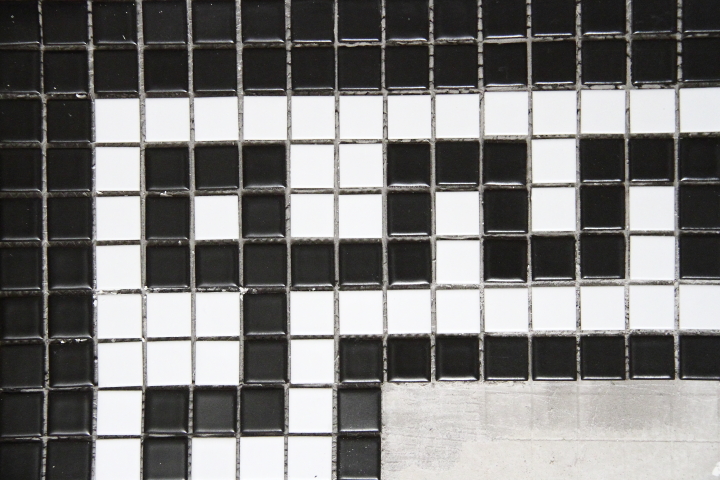
To get started I used a pair of scissors to cut through the mesh backing of the mosaic sheets to create some strips of the black that were two tiles wide and one tile wide and then some strips of the white tile that were one tile wide. I also peeled a bunch of the tiles off from the mesh backing to use to piece together the jogging square.
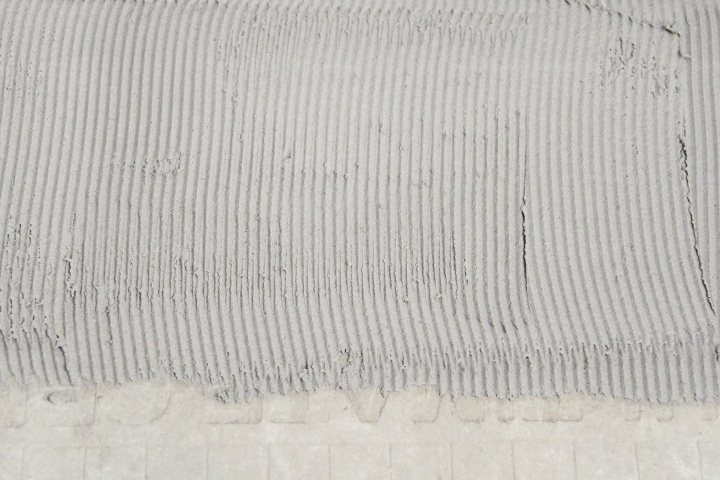
After I did a dry fit to confirm everything I used a 3/16" X 5/32" V-notch trowel to spread thinset in sections along the perimeter of the floor. This was my first time tiling with mosaics and I really had to be careful with the amount of thinset I was using to make sure that it wouldn't squeeze up between the tiles.
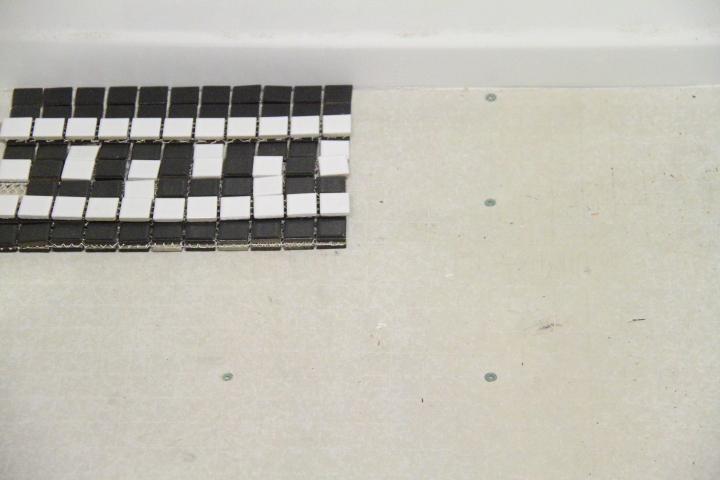
I laid a strip two wide strip of black tiles against the wall followed by a strip of white. I then used the individual tiles to create the jogging square and then added another strip of white and black. I thought a while about how to handle the corners and decided that I liked a simple square the best. There weren't any spacers that I could find that matched up with the spacing on from the mesh very well so I used a combination of eyeballing and a straight edge to keep my spacing even as I went along.

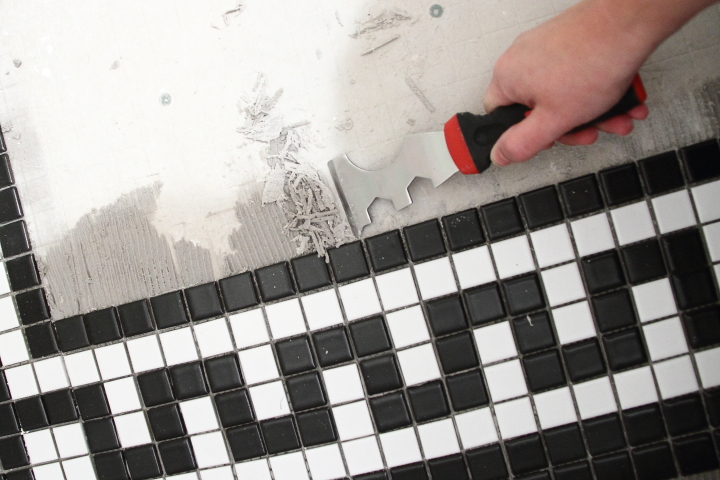
After I finished the border I went back with my 5-in-1 Painter's Multi Tool to scrape up the extra thinset so that I would have a flat, even surface for when I go back to add my field tile.
I had two extra columns in the width of the room and one extra in the length of the room so I had to adjust the pattern a bit in the corners. The most visible corner is the one in front of the tub across from the toilet (in the bottom right corner of the below picture) so I kept that one with the proper spacing. On the corners that are on the wall with the door I added an extra white column on either side of the corner square. For the remaining corner I added an extra white column next to the square and in the first pattern but it will be behind the toilet so it will be hidden. I wish that it worked out to have the exact number of tiles I needed for an even pattern but overall I think it looks balanced.
I'm really excited with how the border has come together and I am excited to bust out my tile saw and add the hex field tile to the floor.
For other related posts about this bathroom renovation check out the history of my downstairs bathroom, fixtures for my bathroom renovation, plumbing in the downstairs bathroom, installing the floor tile underlayment, insulating the ceiling, installing the vapor barrier for the shower and installing drywall and cement board. If you are interested in my completed master bathroom renovation check out master bathroom renovation recap.
 Lisa | 10 Comments | Share Article | Email Article | Print Article
Reader Comments (10)
This is STUNNING, Lisa! I did a subway tile backsplash in my kitchen, but this is far more intricate. Excited to follow along as you continue this project! :-)
Thank you so much, Stephanie! I hope to do a subway tile backsplash in my kitchen someday, too.
albbar e3d3fd1842 https://redebr.org/chicountrosu
albbar e3d3fd1842 https://redebr.org/chicountrosu
albbar e3d3fd1842 https://redebr.org/chicountrosu
albbar e3d3fd1842 https://redebr.org/chicountrosu
zykowren e3d3fd1842 https://www.nextbestplayer.com/fitboymehef
zykowren e3d3fd1842 https://www.nextbestplayer.com/fitboymehef
zykowren e3d3fd1842 https://www.nextbestplayer.com/fitboymehef
zykowren e3d3fd1842 https://www.nextbestplayer.com/fitboymehef