
Between work and traveling, finding time to work on the bathroom has been tough, but I am inching along and made some headway on tiling the shower surround. I last left off with taping the cement board joints and setting the first two rows of tile. Since then I broke out my tile saw and pretty quickly I had set six more rows of subway tile plus the black liner bar.

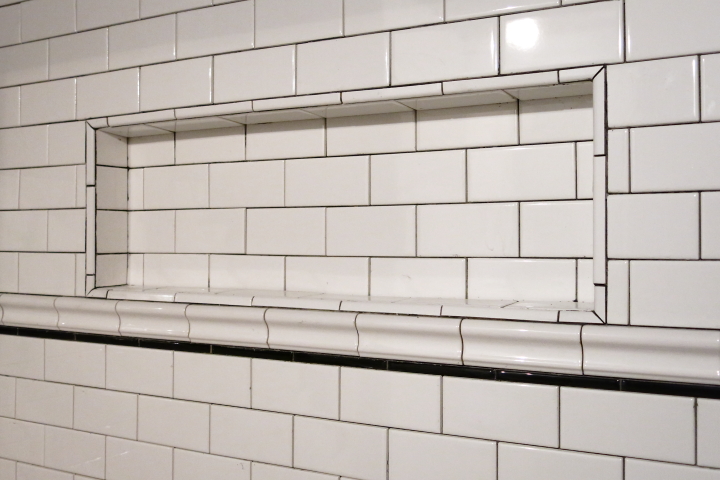
At this point things got a little more complicated as I had to tile around the niche and had to modify my tile spacers to work with the chair rail tile. The chair rail tile is dimensional so the flat spacers wouldn't fit. I used some wire snips to trim the arcs off of one side and then put them in perpendicularly under the chair rail tile. I used the snipped off part between top of the chair rail and the next course of subway tile. Whatever works, right?
The other complicating factor was that the chair rail is just a smidgen under 6" so I couldn't line it up with the subway tile. I ended up offsetting it a bit from the subway tile to disguise the mismatch in length.
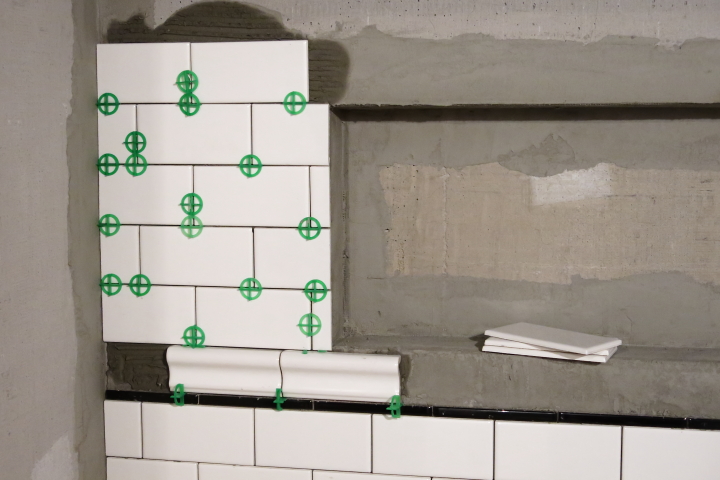
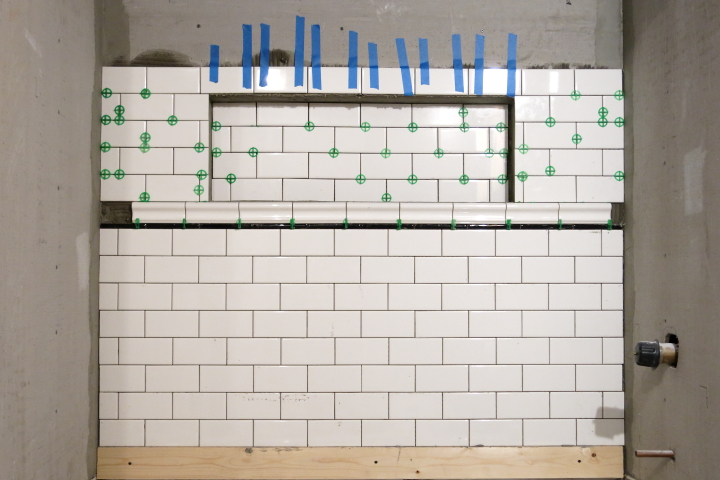
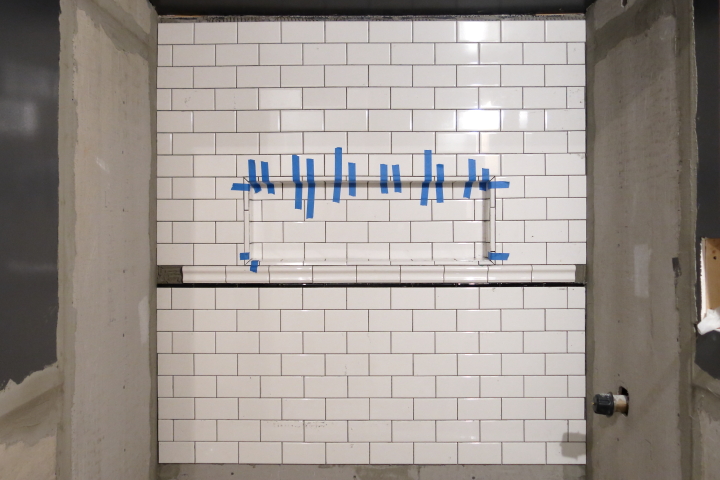
I used painter's tape to keep the row that spanned the top of the niche in place since it had no support below. I had to work quickly at this point before the thinset set up too much make small adjustments in order to make sure that the rows that stacked up on the right side aligned with the row over the niche.
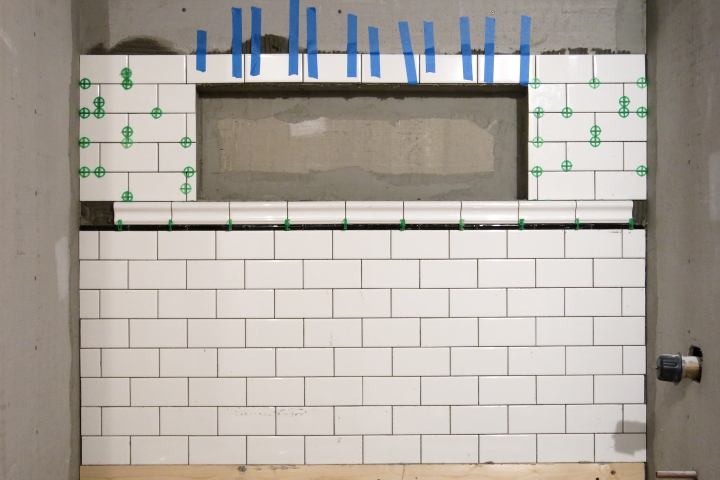
Next, I tiled the back of the niche, making sure to line it up with the surrounding tile.
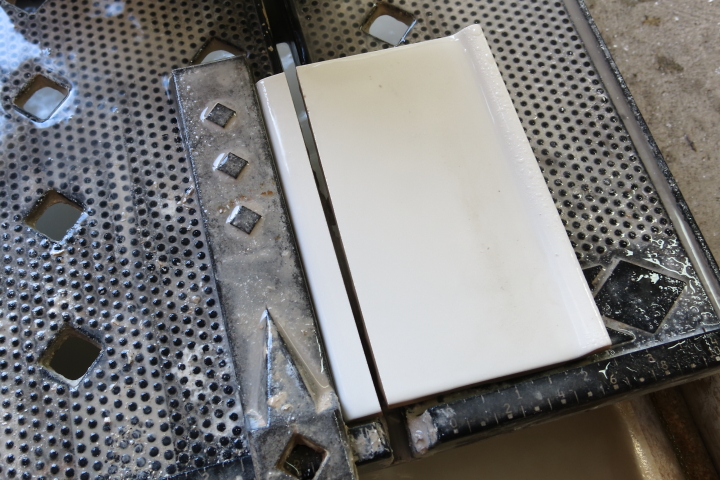
At this point I had used up the batch of thinset that I had mixed up so I decided to pre-cut some of the tile that I would need for the rest of the niche before I mixed up the next batch. I wanted to trim out the niche with some bullnose tile but I didn't like the thick width that was available so I cut down my own from some tile that I had with a bullnose edge along the top.
I set the rip guide on my saw to the width of the black liner bar tiles that I was using and cut a bunch of thin bullnose pieces. It is hard to get the rip guide in the exact same spot again so I always cut a few more pieces than I will need just in case.
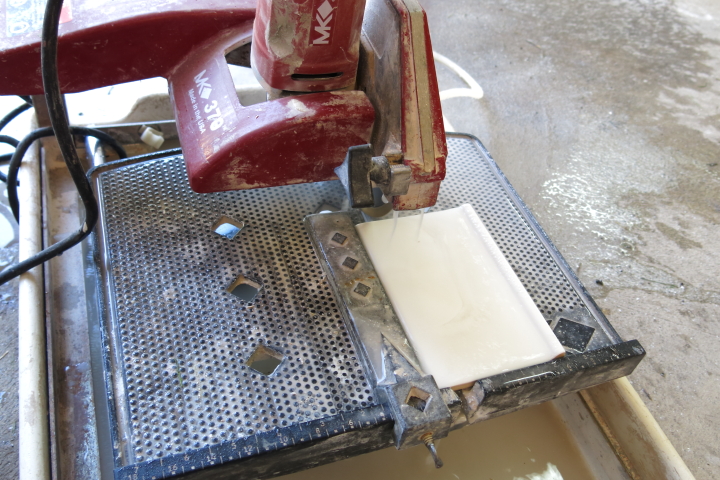
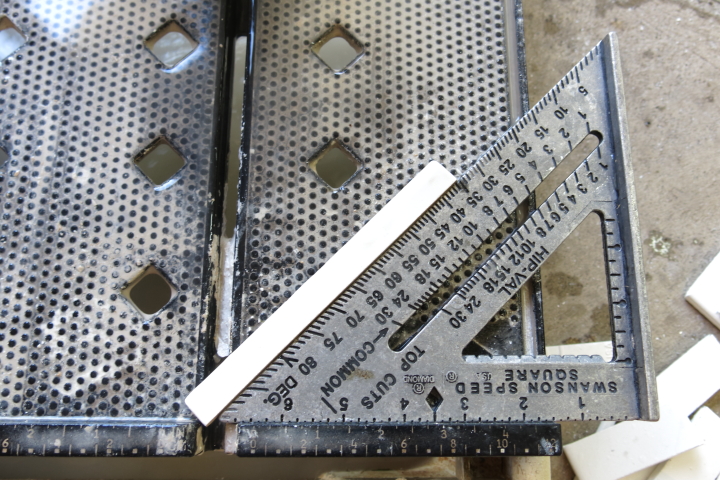
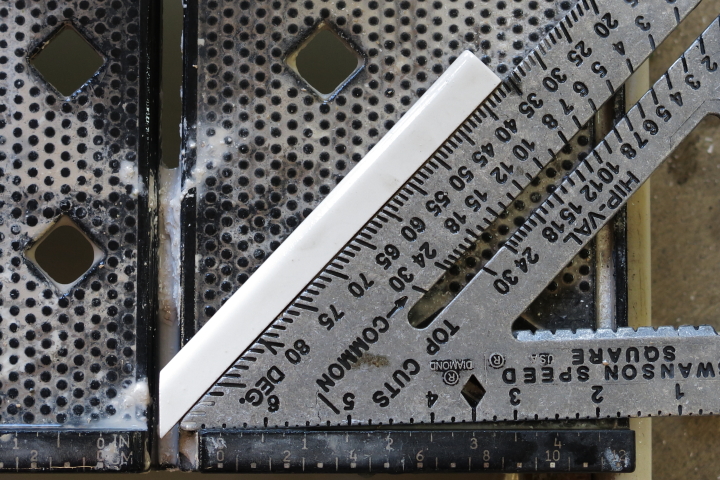
I also pre-cut the mitred corners for the niche before I mixed up the next batch of the thinset. To get the 45 degree angle I butted my tile up against my small speed square. When I am doing something like this I like to make the mitre cut first and then I cut the squared end down as I fit the piece when I am setting the tile.
I feel like at this point I should mention that I absolutely love my tile saw. I bought it used from Craigslist for $100 (a strange story in itself) back when I was tiling the master bedroom shower and it has been worth every penny and more. I couldn't even imagine doing this with tile nippers, plus I feel like everyone should own their own wet saw.
Back to the tiling, I mixed up some more thinset and tiled the top, bottom and sides of the niche trimming it all out with the thin bullnose I had cut. Again I used painters tape to hold the pieces without support in place. By the time I had the niche finished the row above the niche had set enough that I could remove the painter's tape that was supporting it and finish tiling to the ceiling.
I'm not going to lie, the niche took me a while with all of the cuts and it isn't perfect, but I really like it and think it was worth the effort. With the niche out of the way I don't have a lot of complicated cuts left so tiling the side of the shower and wainscoting should go fairly quickly. I can't wait to get the tiling done!
For other related posts about this bathroom renovation check out the history of my downstairs bathroom, fixtures for my bathroom renovation, plumbing in the downstairs bathroom, installing the floor tile underlayment, insulating the ceiling, installing the vapor barrier for the shower, installing drywall and cement board, tiling a vintage mosaic border, mudding, taping, sanding and painting and taping the cement board joints. If you are interested in my completed master bathroom renovation check out master bathroom renovation recap.