Welcome

My name is Lisa and I'm a crafty girl with wanderlust working as an engineer by day. My blog chronicles projects in my home as well as pictures and stories from my travels.

Search


Instagram

Blog Index
The journal that this archive was targeting has been deleted. Please update your configuration.
Navigation

Entries in Porch (4)

Monday
Oct272014

Fall Planting

With winter on the horizon I like to have something growing in front to the house for as long as I can so I did a little fall planting a few weeks back.

I picked up a variety of mums, kale, cabbages and pansies and set to work. On my porch steps I put some large purple and burgundy colored mums in a planter and set decorative cabbages in urns in front of them.

In the front bed I planted some beautiful purple celosia in between my boxwood shrubs. I've never tried planting it before in my garden so I'm curious to see how late in the season it will keep blooming. Along the front of the bed I planted some decorative green/white and green/purple cabbages to create a border.

In my hanging baskets I planted burgundy mums and pansies. I like how the different hanging heights of the baskets look together.

In the bed that circles my tree I planted some frilly looking green/purple decorative kale in between my hostas.

I'm happy to have some flowers and greenery in my front yard for as long as I can, especially if we have another really cold winter this year. It makes coming home a bit more cheerful on a bleak day.

Saturday
Jun302012

Front Porch Rug

As I was sorting through things at my house I rediscovered a pair of 30" x 50" woven rugs.

When I lived in California I would frequently stop by the Crate and Barrel Outlet Store in Berkeley for some fabulous deals. I picked up these rugs for a ridiculously cheap price (around $10, if I remember correctly). After I moved to Michigan I didn't really have a place where they fit in my house so they have just been sitting packed away.

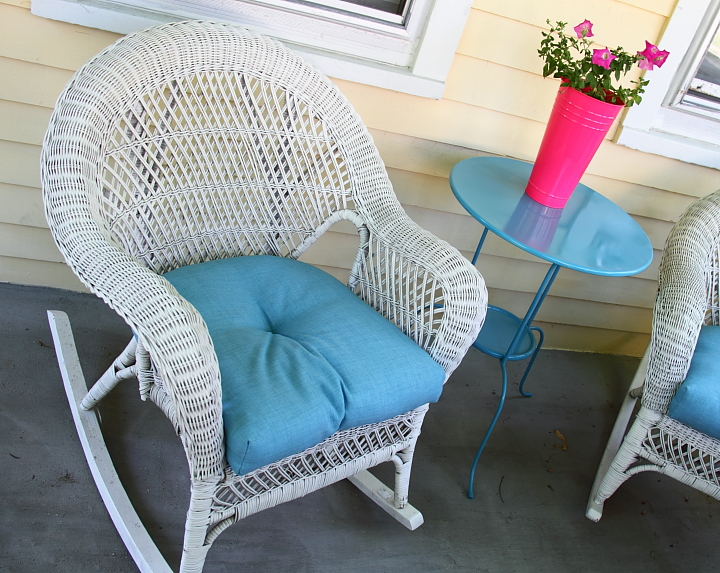
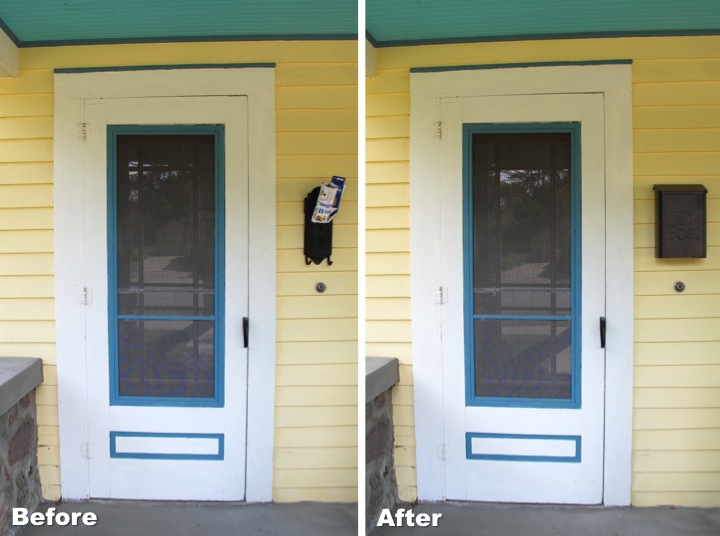
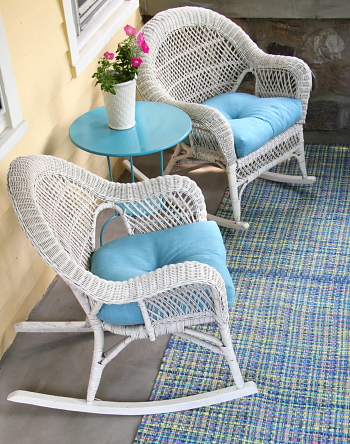
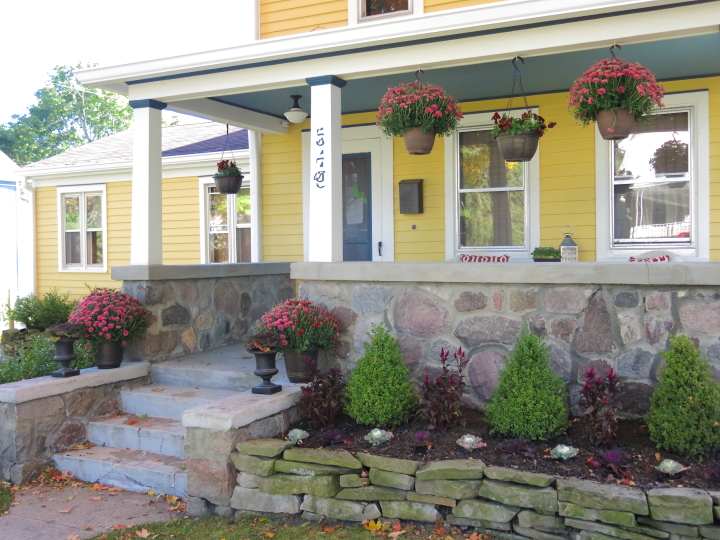
When I stumbled upon them again I thought that they would be perfect on my front porch. The weave has a royal blue with teal, yellow and pink which really ties together all of the colors I have out front. They aren't meant to be outdoor rugs, but they are sheltered from the elements by the porch roof and since I already had them and wasn't using them I figured I have nothing to lose. 

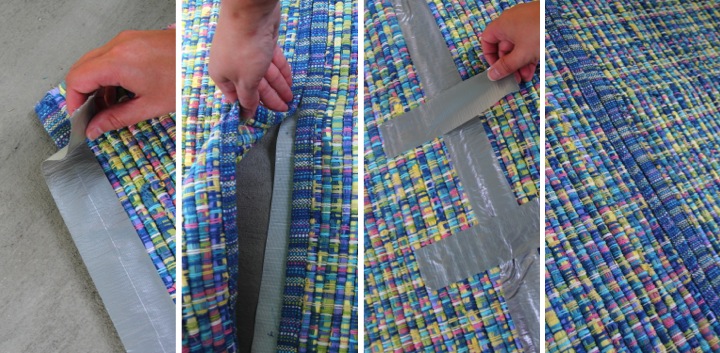
I decided to make a runner out of the rugs. To attach them together I used the marvel of modern life: duct tape. Is there anything you can't use duct tape for? It really is amazing...

I flipped one of the rugs face down and adhered a piece of duct tape along the edge, overlapping half of the tape on the rug. I then flipped it right side up and then aligned the edge of the second rug so that they butted up together snuggly. I pressed the rug firmly into the tape and then flipped them upside down once more. I added some cross pieces of duct tape to ensure they wouldn't pull apart. After that I flipped the rugs right side up again and I was done. 

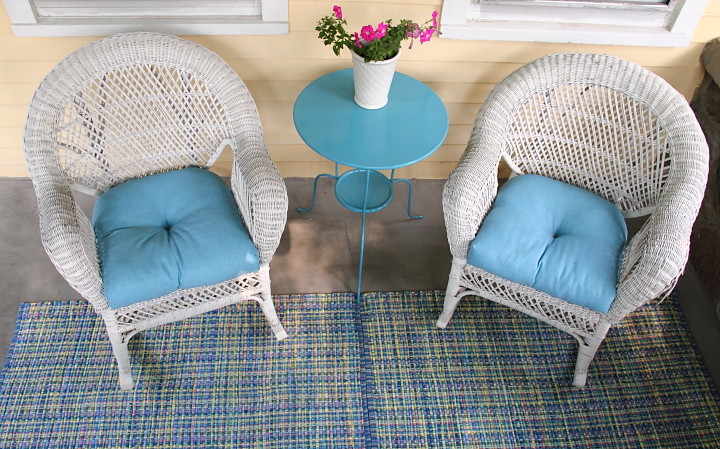
You can see the edges of the rug since the edge binding is a little different, but the rug pattern is so busy I don't think it is very noticable. I think the rug looks great and really makes the porch a cohesive space.

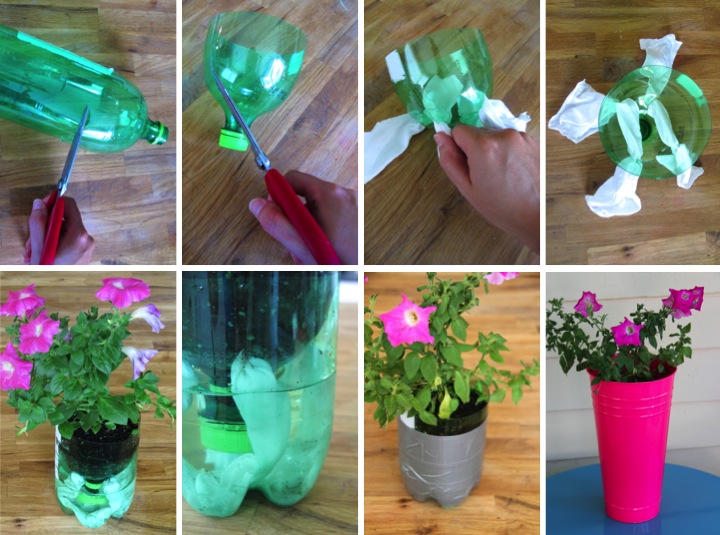
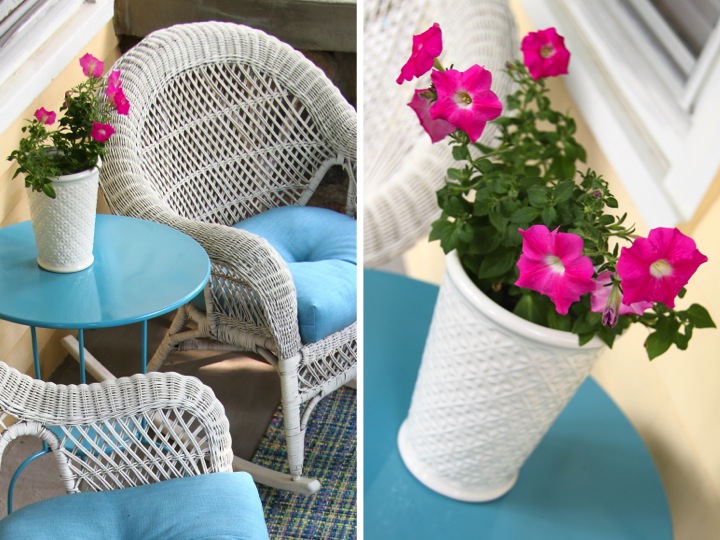
While I was out on my porch taking pictures I thought I would give an update on my self watering planter that I made using a soda bottle. Two weeks later in ninety degree heat, my petunia is thriving. It has been blooming nonstop and I couldn't be happier. I checked on the water in the resevoir today and it was a little low so I added some, but that is all the maintenance I have had to do.

I decided to switch out the pot I had set the planter inside. I found this white pot on clearance at Target for $6 and liked that it wasn't as tall as the pink tin I had originally used. I think it looks more balanced now.

I love spending time on my front porch and this latest update makes it feel even more cozy and welcoming to me. Have you been hanging out on your front porch this summer? 

Monday
Jun252012

Self Watering Planter Using a Soda Bottle

I am terrible at keeping my potted plants alive. A few long days at work where I forget about them or a trip out of town and they are dead as a doornail. I've seen some links about using a soda bottle to make a self watering planter like this one and this one I thought I would make my own variation.

I started by cutting the top third of the bottle off with a pair of scissors. It was a bit tough to get a straight edge but I cleaned it up after the pieces were separated. Next, I needed to have something act as a wick for the water. I cut four small slits in around the neck of the bottle and then took two unused paint rags and poked one end of each rag through the holes. I wet the rag and filled up the bottom of the bottle to act as the water reservoir. It is important that the water is high enough that the ends of the rag will sit in it but not as high as the slits. I then placed the top of the bottle inside of the bottom and then planted a petunia plant inside.

The roots of plants don't do well if exposed to light so I wrapped some duct tape around the bottom of the bottle to block the light. I wanted something that looked a little cuter than the soda bottle and a $2.50 metal floral container that I bought at Target was the perfect fit to place my new self watering planter inside. 

I decided to put the plant outside on my front porch. With the cute plant I decided to also spruce up the little table I have out front. I bought an inexpensive Lindved table from Ikea several years ago and the white finish was showing its age from being exposed to the elements. With a few thin coats of teal outdoor spray paint it looks brand new and makes a great place for my petunia plant. So far it has been a week and the plant is still alive and kicking. I'll have to see how it goes...

Have you had any luck using self watering for your plants? What are your tricks for keeping your plants alive?

Monday
Jun042012

New Mailbox

When I bought my home I quickly ditched the 1970s style mailbox and replaced it with a vintage cast iron one that I found on eBay. I love the style of it, but unfortunately it is a little small for modern mail so I have been looking for something else. 

Finding a vintage metal mailbox that is larger than what I had was actually pretty difficult. Finally I found on eBay a burnt orange mailbox that was plenty big to fit my mail. I scooped it up for $9.99, gave it a thorough cleaning and refinished it with a few thin coats of oil rubbed bronze spray paint.

I have to say that I like the charm of my old cast iron mailbox better, but it wasn't worth having my mail all bunched up and bent. The new mailbox is still cute and I can now recieve my mail flat. I'll have to think of something fun to do with my old mailbox now.

What do you think? Have you ever had any too small mailbox issues?