


Square Beadboard Garden Planter

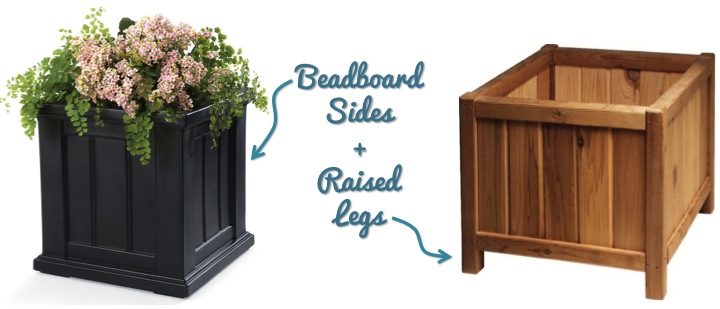
With spring here I have been wanting to spruce up my front yard and I had an inkling to try building a garden planter for myself for my front porch steps. On my Yard and Garden Pinterest board I had pinned a few planters that I drew some inspiration from. I liked the beadboard sides from the planter I pinned from Plow and Hearth and the legs that raised the planter off the ground that I pinned from the Simply Planters.
After doing a little sketching I came up with a design that I liked that also fit the space that I was planning on putting the planter on my front steps. I have shared my supply and cut list, but it would be very easy to resize the dimensions if you wanted to make a bigger planter.
Supply List:
1 - 2x2 @ 4 feet long
1 - 1x2 @ 8 feet long
1 - 1x3 @ 8 feet long
1-1/4" pocket hole screws
Brad nails
Wood glue
Cut List:
4 - 9" x 9" pieces of beadboard for sides
8 - 1x2 @ 9" for side supports
3 - 1x3 @ 9-3/8" for bottom slats
4 - 1x3 with 45° mitered ends @ 9" (measured from short side), 14" (measured from long side) for top
4 - 2x2 @ 11-1/2" for legs
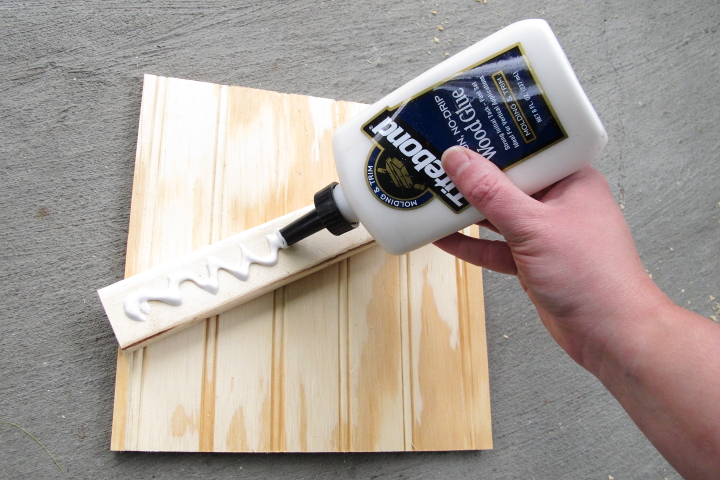
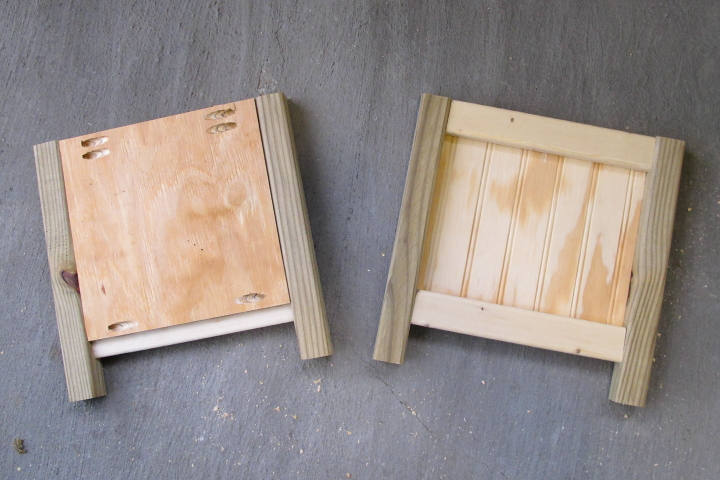
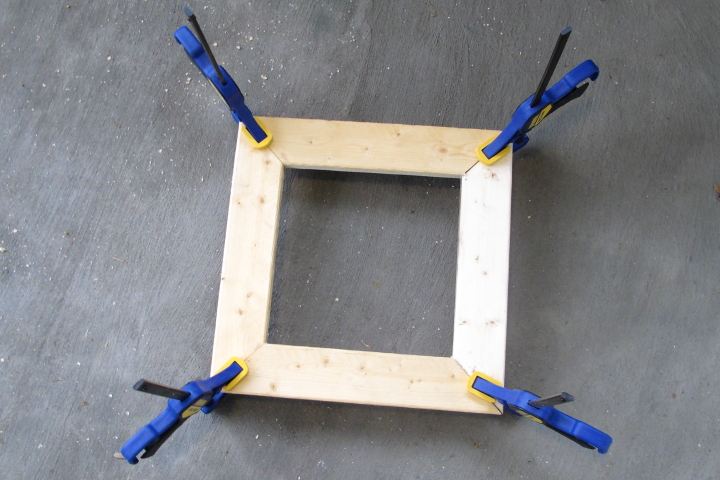
To start I put some wood glue on the back of the side supports and attached one to the top and bottom of each piece of beadboard.
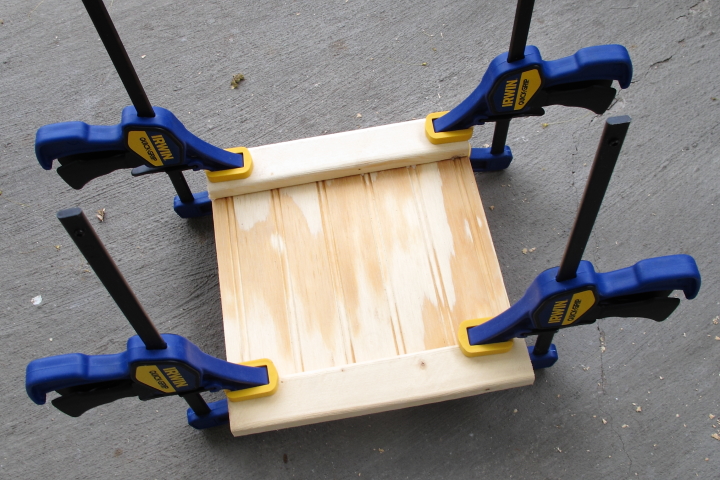
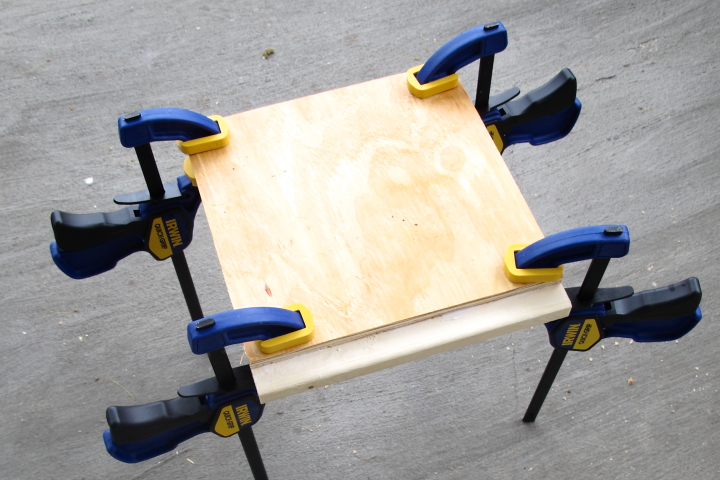
I aligned the top support flush with the top of the beadboard and the bottom one I overhung by 3/4" which left me space to attach the bottom slats later. I then clamped the supports to the beadboard while the glue dried.
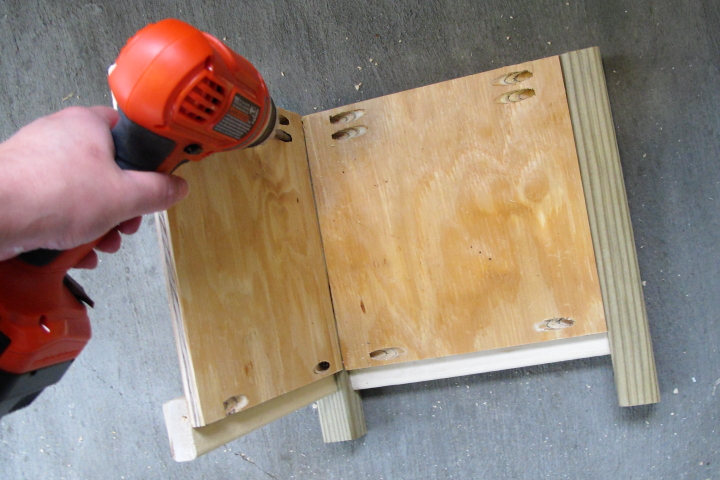
Next, I used my Kreg Jig to drill pocket holes on both sides at the top and bottom of each side beadboard piece. For two of the sides I attached the legs with pocket hole screws, aligned flush with the top.
I then attached the two remaining sides to one of the sides with legs using pocket hole screws.
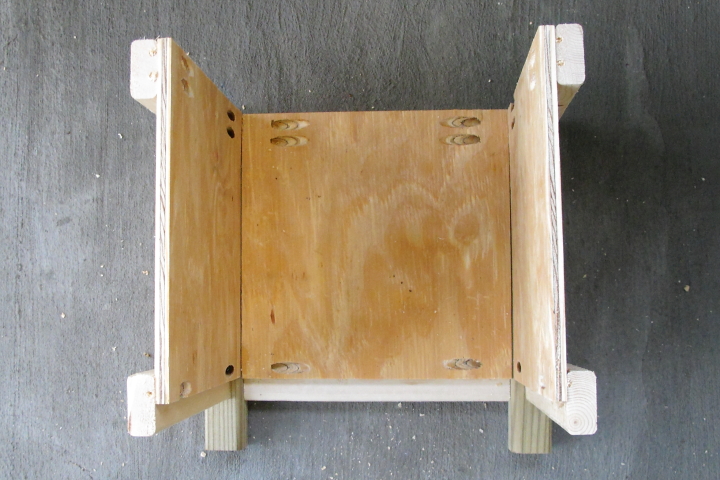
I then attached the last side to complete making the box of the planter.
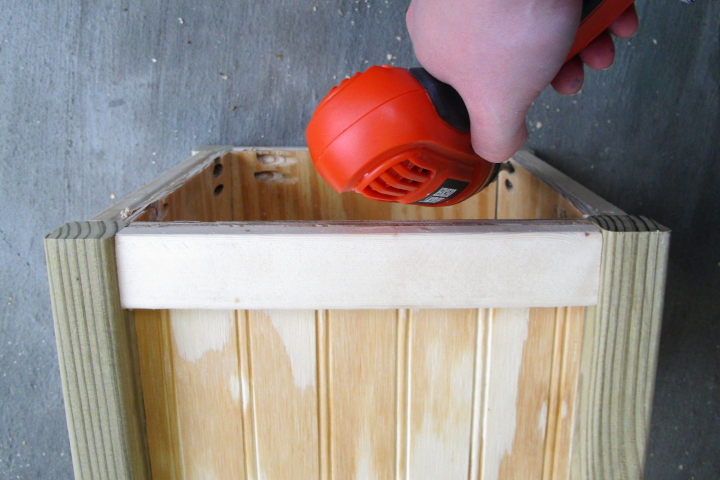
To make the top I put some wood glue on the mitered ends, clamped it all together into a square and then used my nailer to add a few brad nails to tack it together.
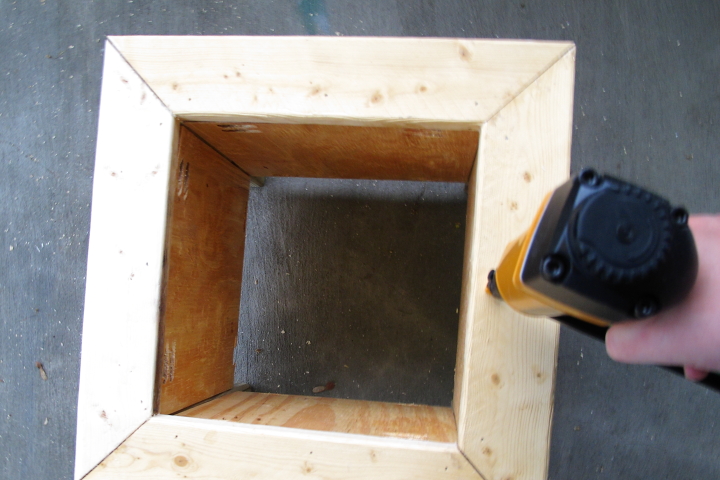
After the glue dried, I used a bit more wood glue and my nailer to attach the top to the planter box.
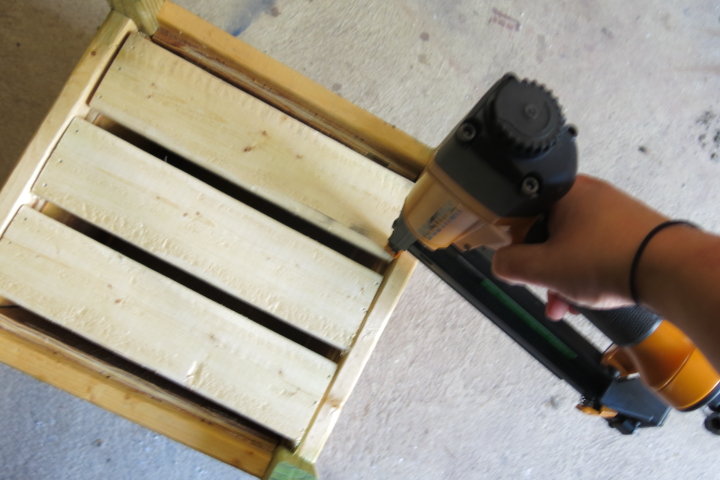
I then flipped the planter upside down and attached the bottom slats with some wood glue and my nailer. I left spaces between the slats for drainage.
I used wood filler to fill in the nail holes and imperfections and then sanded the whole piece smooth.

I wiped the planter down with a tack cloth and then painted it with a few coats of Valspar's Duramax Paint and Primer in Everglade Deck.
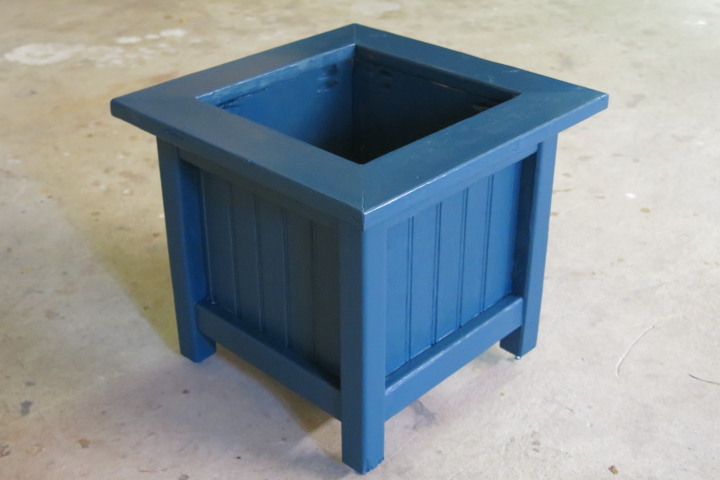
Once the planter was dry I was excited to get planting but I didn't have any potting soil so I just placed a potted calla lily in the planter for now. Before I do put potting soil in the planter I plan to line the bottom with some landscaping fabric so that water can drain out between the slats but the soil wouldn't fall through.
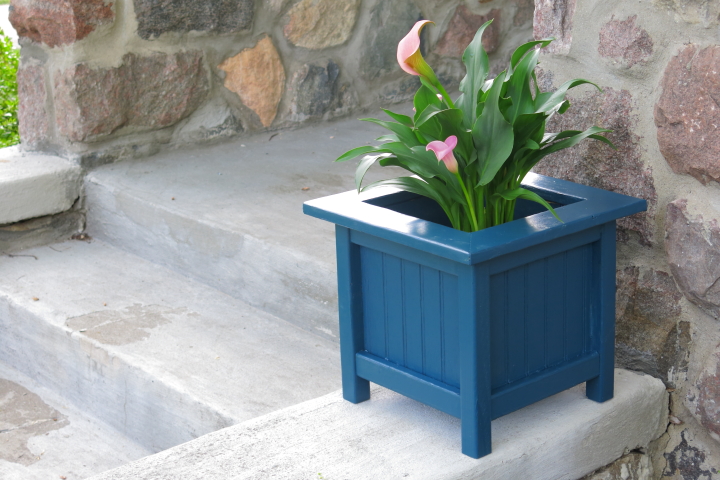
I'm really happy with how my planter came out and think it will add a little fun to my front porch. With this turning out successfully, I think I will have to make a second one to have a matching pair.
Note: I am posting as part of the Pinterest Challenge hosted by Young House Love, Bower Power, Sparkle Meets Pop and Red Bird Blue. If you posted anything for the challenge, please share your link with me!
 Lisa | 21 Comments | Share Article | Email Article | Print Article
Reader Comments (21)
Looks great! Easy to build and a nice color!
A great tutorial. I'm pinning this one and printing it out for my husband to make for me. If he doesn't get started soon though I' going to make it myself. Thanks for the details. Love the blue. I'd like to see a long shot of its placement and how you finally plant it up. Thanks. Jo @ Let's Face the Music
This came out great! I am going to have to convince my husband to build me a couple for the front porch. Just wondering - did you put any sealer on it?
Love this! I love the color you painted it too. Found you thru YHL! :)
Lauren @ muchadoaboutsomethin.blogspot.com
It has that wow factor.
John- Thank you so much!
Jo- Thank you! I'm going to post a long shot of it and the whole porch once I have the second one built as well.
Grace- Thank you! I haven't put any sealer on it yet, but I plan to before I actually puts some plants in it.
Lauren- Thank you so much!
Mary-Lou- Thank you! I think it will really dress up the porch.
That is a gorgeous planter! And I love the paint colour you chose...it really pops against the gray stone on your house. Great job!
WOW these look great! I need to buy myself some more tools I think… :)
Jane- Thank you! I am really happy with how the color looks out front, too!
Justynn- Thank you! I firmly believe that a person can never have too many power tools...
Each beadboard Panel has an 8 inch finish width. The panels have lap joints so each panel will overlap the prior panel.
Very helpful blog. I have purchased some artificial flowers from Fourwalls.in, It will look beatiful in this Vase. Thanks for sharing.
Babmar is one of the most trusted brand name in weather-resistant handwoven outdoor furniture. We specialize in manufacturing the highest quality commercial grade handwoven outdoor furniture on the market and are known for our stylish designs and affordability. Babmar is an established worldwide luxury outdoor furniture manufacturer.
This is a great job. I love your beadboard design and ideas, this is so lovely.
If you're looking for the best stuff, like I am, just visit this website frequently since it offers feature content. Thank you.
We are the oldest and most trusted provider of custom online cricket IDs. We provide online cricket ID and 24/7 customer support. One of the reliable Cricket ID providers in India can help you make money from your hobby.
I'm so grateful that you shared this wonderful knowledge on your blogs; I'll be able to utilize it a lot when I promote my website on social media. Thank you for sharing.
Try online betting with Fairplay24, a reliable site in India. You can bet on various sports and events with confidence, knowing it's safe. Enjoy fair play, good odds, and exciting wins!
Tez888 is a top online betting site where you can bet on many sports, like cricket and football, among others.
I had a great experience with 99 exchange . I was really impressed by how it simplifies online betting, making it more exciting and fair. Whether you're into cricket or football, it's a fantastic platform for all types of bettors. I highly recommend it!
sky exch is celebrated as the premier online betting platform in India. Renowned for its user-friendly interface and extensive betting options, it captivates bettors globally.
Great conversation going here! Just wanted to add that the Online Cricket ID WhatsApp Number is super handy if you’re trying to stay in touch with live match moments without constantly checking apps or websites.