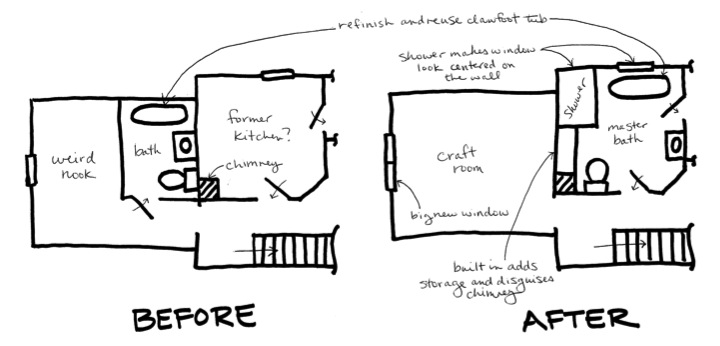
I realized that although I had finished up my master bathroom I had never put together an overall post with pictures from around the whole room. I thought I'd start by sharing the floor plan in the back portion of the upstairs when I bought the house and what I revamped it to.
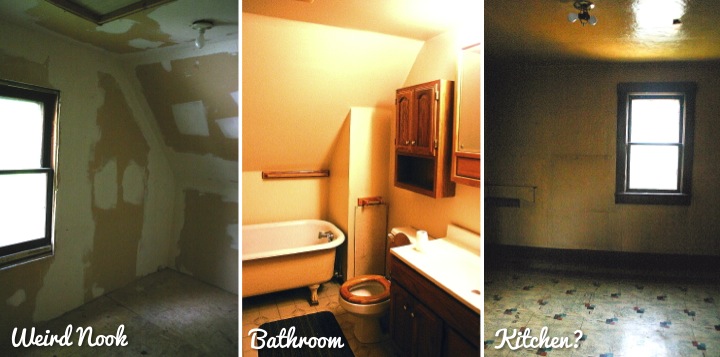
The previous owners had taken the 13-1/2' x 13-1/2' room in the back and carved out a 5' x 8' space to create a bathroom. It left a really weird nook in the rest of the space that they had drywalled but never finished. The whole thing was quite strange. The room next door was a nice size at 10' x 10' (with a little angle cut off the corner) and seemed to be used as a kitchen at some point based on pipes sticking out of the wall and some teacup wallpaper in the closet. It seemed to me that a better use of the space was to make the old kitchen room into a master bathroom which would then leave a large space in the back room for me to make a craft room.
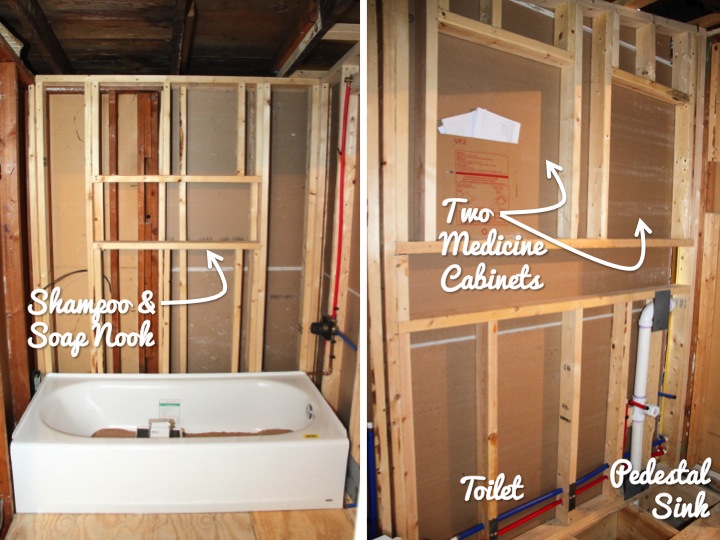
I spent a lot of time trying to figure out how to layout the new bathroom. The window was off center in the room so by placing my shower in the corner I was able to make the window look like it was centered on the wall. Most of the old bathroom was unsalveagable but I saved the old claw foot tub and placed it under the window. In one corner of the bathroom was a bump out for the old chimney. In order to make it less pronounced looking and give myself some storage I decided to put a built in in the space between the chimney and shower. I kept the door locations the same and from there it was easy to determine the location for the toilet and sink.
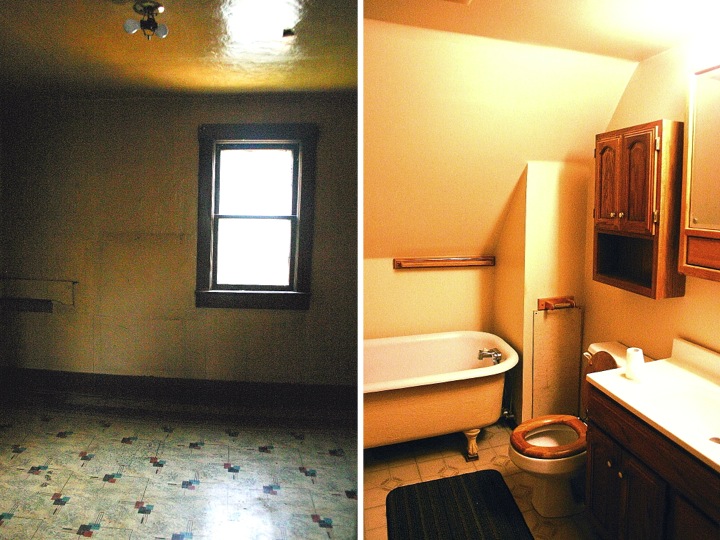
Here a few pictures of the space before. Yeah, I know that it looked like a scary old haunted house and I am crazy to have bought the place. Looking back at the old pictures encourages me because it reminds me how far my house has come even though there is a lot more left to do.
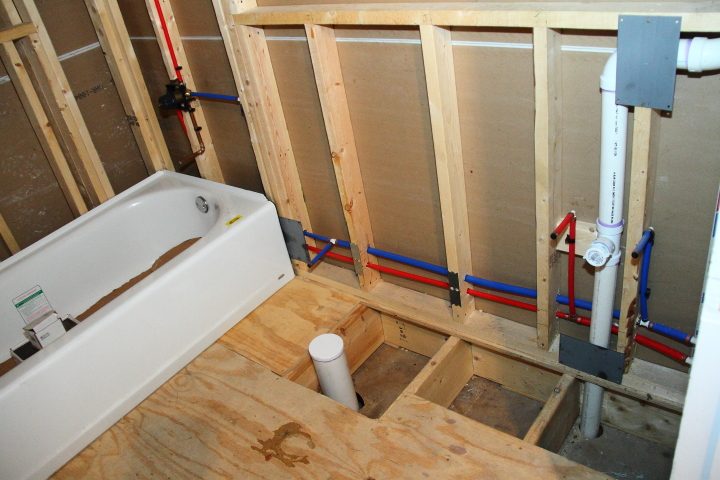
Okay, now for the fun part, the after pictures. The room was gutted to the studs with new electrical, HVAC and plumbing. Putting the room back together the bathroom was drywalled and new trim was installed including beadboard wainscoting around the room. The old linoleum was torn out and the floors were refinished. Those major renovations required me to hire some professionals for some things as well as get the helping hand of a friend for some others.
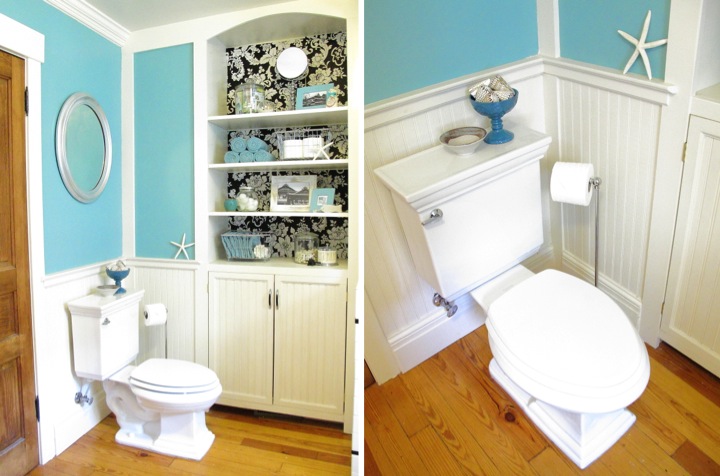
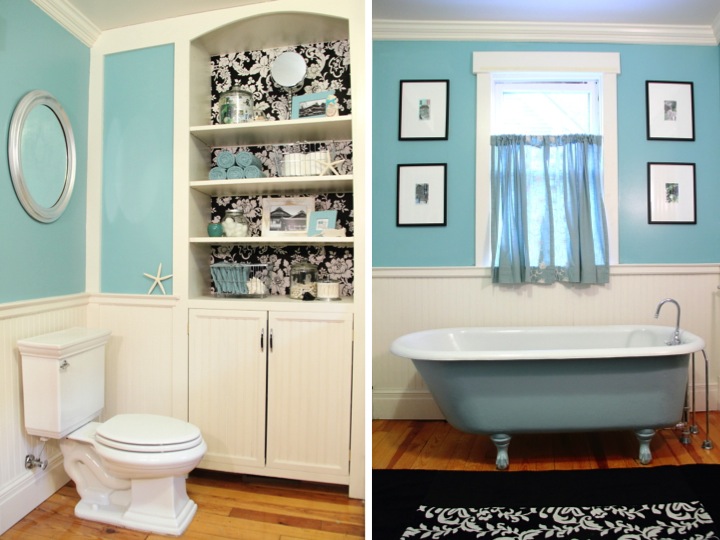
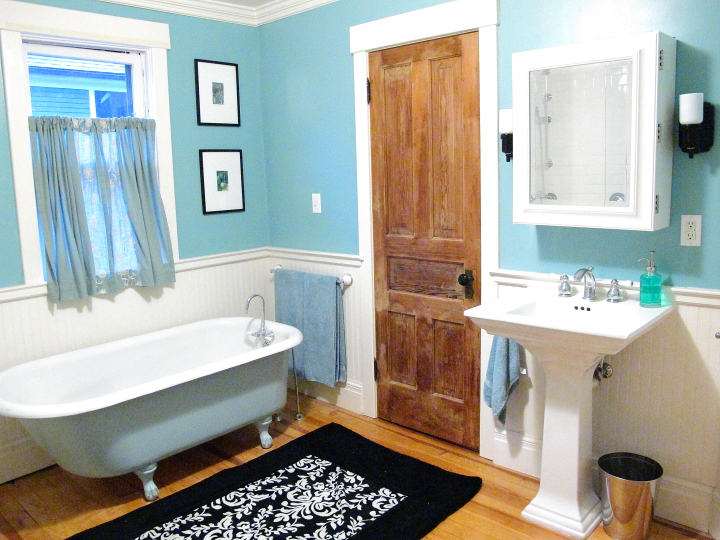
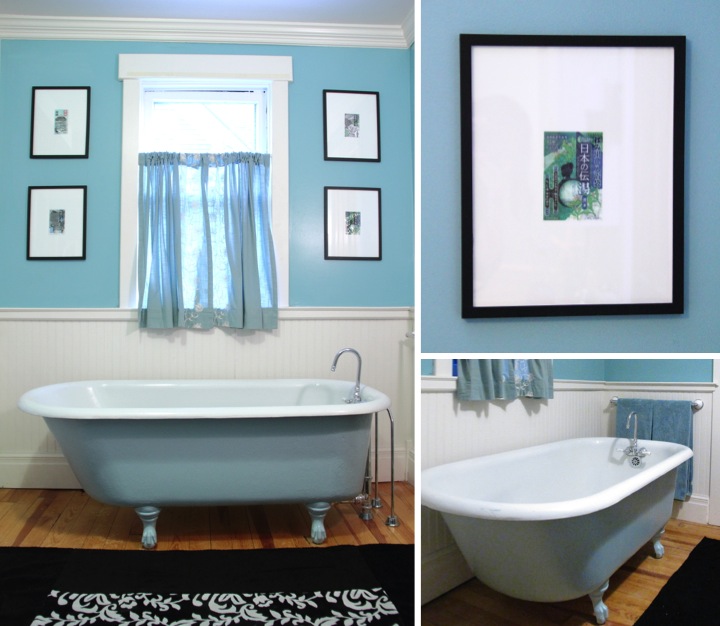
For a color scheme I thought teal and white with a few hints of black would be bright and refreshing. Since my house is over a hundred years old I wanted to keep a vintage feel to my bathroom. Also, since I lived in Japan and really enjoyed their strong culture around bathing (i.e. going to hot springs (onsen) for bathing, taking regular soaking baths at home) I included some small Japanese touches in my bathroom's decorative accents as well.
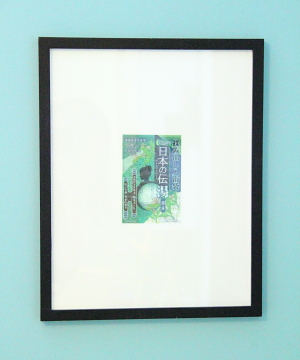
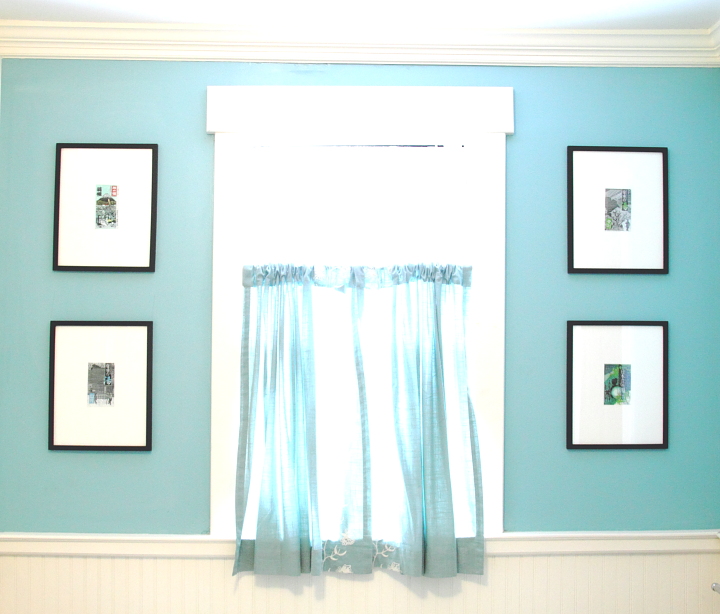
My clawfoot bathtub was salvaged from the old bathroom and while the porcelain on the inside was in great shape the outside paint was beige and chipping off. I refinished the outside with a pale teal paint and then added a new vintage style chrome faucet with white handles. On the floor in front of the bathtub I made a rug by sewing together some towels. On the walls flanking the window, I framed some pretty decorative packaging from Japanese bath salts.
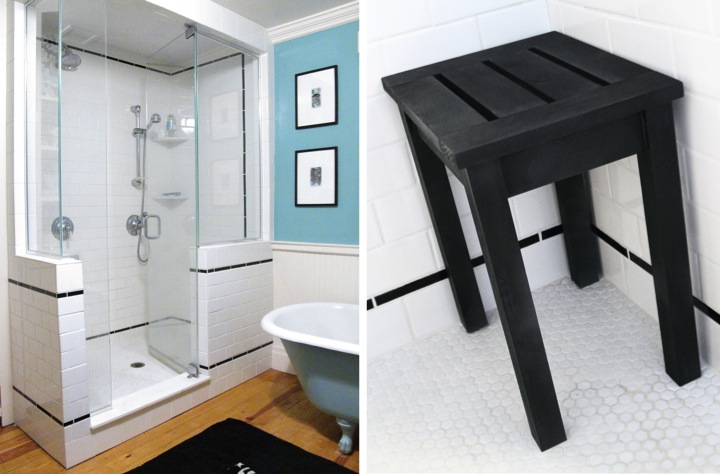
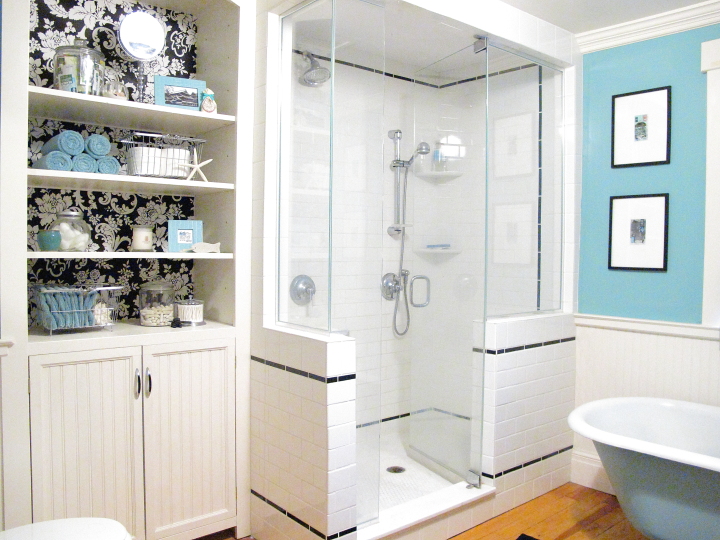
I made the shower 3 feet by 5 feet which was spacious enough for two shower heads. I also wanted it to be open so I designed it to have the knee walls with clear glass above and splurged to have custom glass installed (I think it was worth it!). With all the space in the shower I decided to build myself a little shower stool to fit in the corner.
This was my very first experience in tiling and being an engineer I was pretty anal retentive about the way I lined up the tile and wrapped the pattern around the corners. I bought a used wet tile saw from a guy off of Craig's List for $100 and it was worth every penny! I chose 3" x 6" white field tile to give a vintage subway tile look plus as an added bonus it was inexpensive. For my accent liner bars I thought that black tile was a good neutral choice so that it left me free to change up the colors in the bathroom in the future without worrying about the tile color.
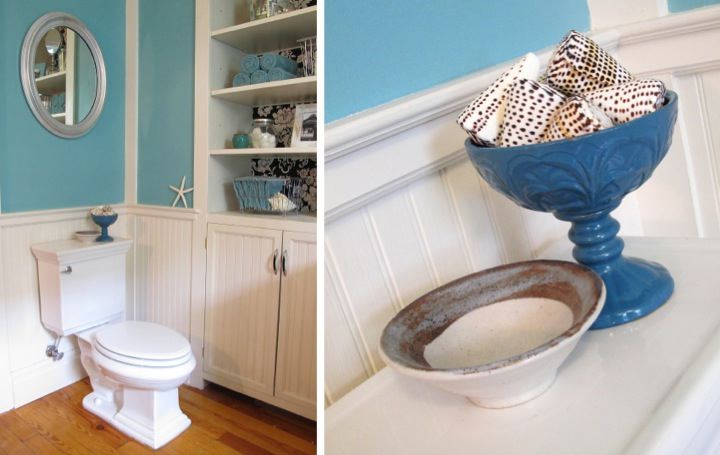
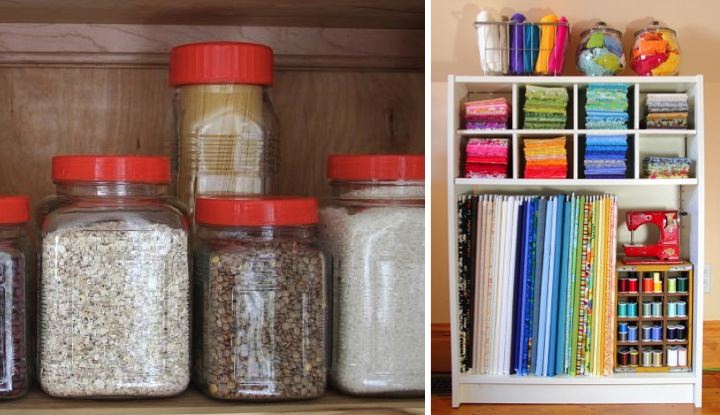
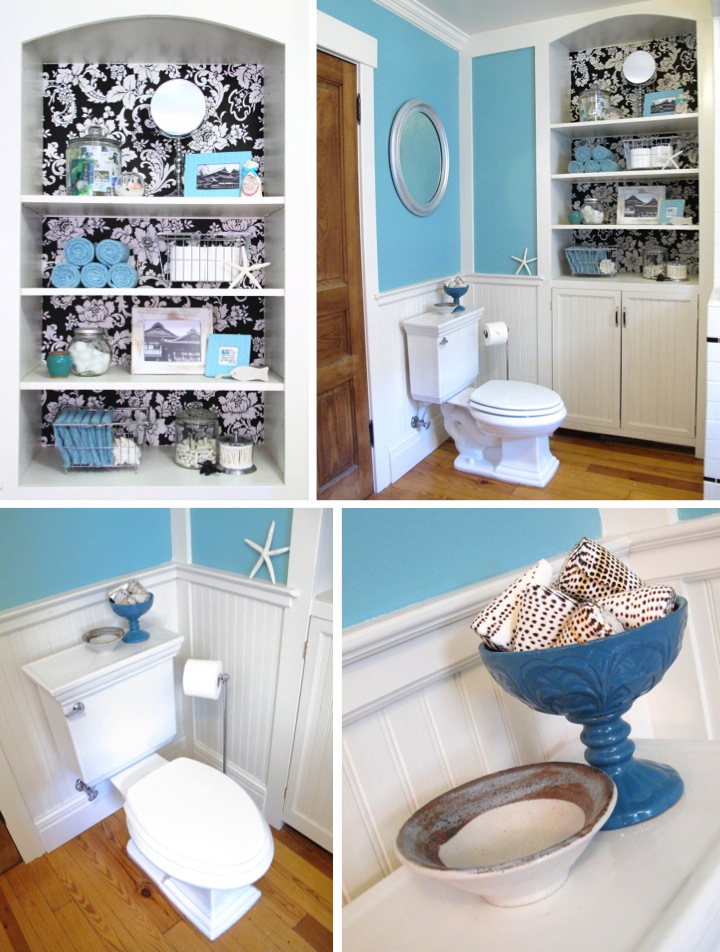
My built-in is one of my favorite parts of the room. I designed it to have open storage up top as well as some concealed storage down low. For fun I added some black and white damask patterned wallpaper to the back of the top of the built-in. I had a lot of fun arranging the shelves with practical bath items, like towels and my Japanese bath salts, and decorative items, like white coral that I picked up on a beach in the USVI and framed pictures that I took of a famous Japanese onsen.
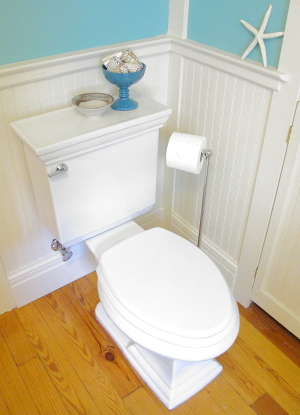
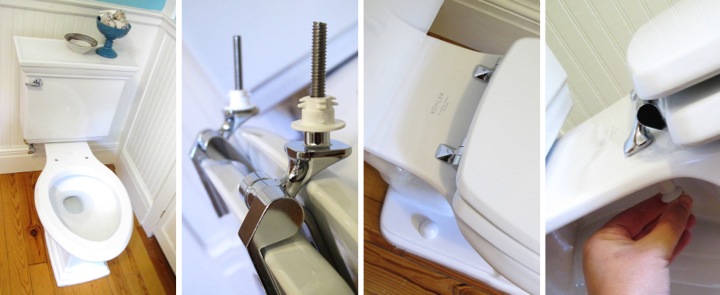
Above the toilet I made over a free mirror with some silver spray paint to tie in with the chrome fixtures in the room. On the back of the toilet I have displayed a little white bowl that I made at a pottery studio in Seto, a town famous in Japan for pottery. Seeing it every day brings back some good memories. Since space was tight and I didn't want to add holes to my beadboard, I chose to use a free standing toilet paper holder.
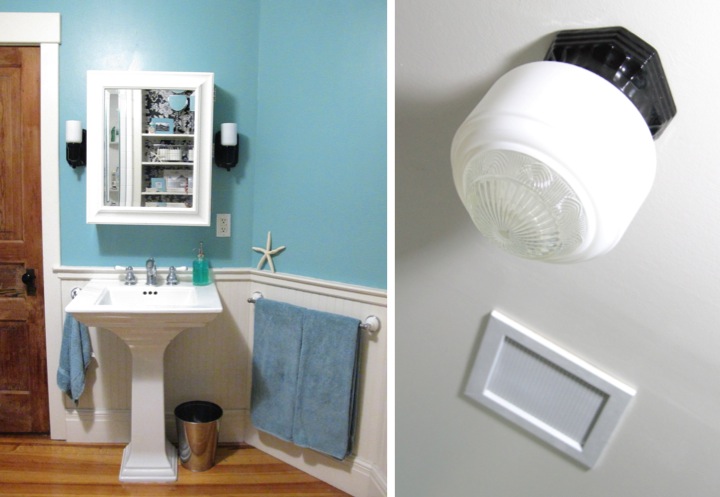
Since I had plenty of storage in the built-in I chose a pedestal sink to keep the bathroom looking open as well as maintain the vintage feel. Like the shower and tub, the new fixtures are chrome with white handles in a vintage style. I thought about building my own medicine cabinet, but then found this one at the Pottery Barn Outlet for such a great deal that I couldn't resist.
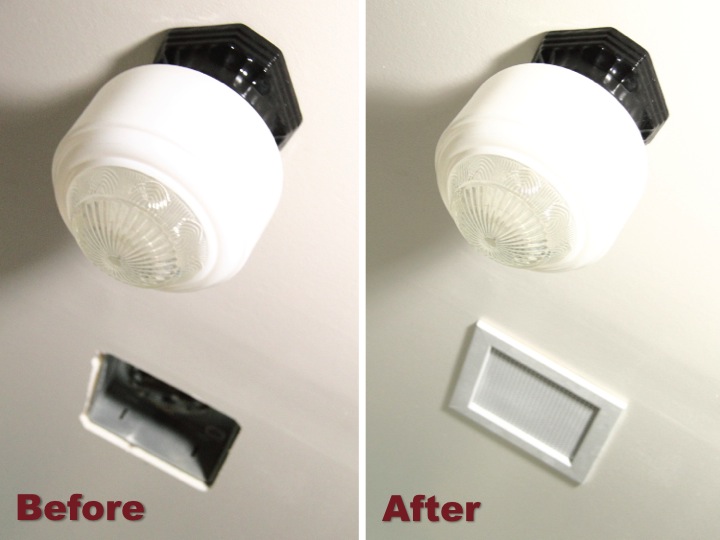
For lighting I bought a pair of black porcelain sconces that are vintage reproductions. I have a matching black porcelain ceiling fixture that I paired with a vintage glass globe that I found on eBay. I love how the globe is white on the sides and has the detailed deco pattern in the clear glass on the bottom. My ceiling fan came with a plastic vent cover that I felt didn't go with the look of the bathroom so I built my own vent cover out of wood and some perforated metal.
Inside my medicine cabinet I added some more wallpaper and then organized by using some inexpensive black and white cardboard containers. The bottom of my built-in was organized with some more cardboard containers and wire baskets. By nature I am not an organized person (some days Pigpen has nothing on me) and the little containers really help me to corral things and have some semblance of order. These shelves are by far the neatest area in my house right now. I really wish I was kidding but unfortunately I am not.

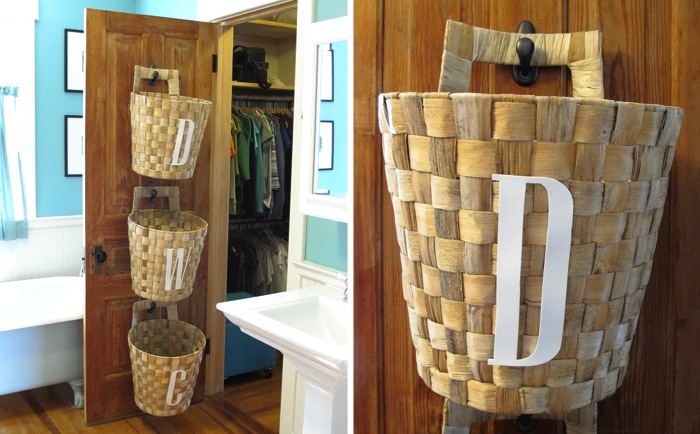
On the back of the door next to the sink (which leads to my master bedroom closet and then on to my master bedroom) I hung up and labeled baskets to sort my laundry. This has really me to keep my piles of laundry off the floor. Now when a basket is full I can just take it off the hook and down to my laundry room.
Well, there you have it, more detail than you would ever want to know about my bathroom. It has been a lot of work but I really love it and I wouldn't want to change a thing (for now that is!).
If you are curious, here is a list of sources for the room. As a disclaimer I started remodeling it back when I bought my house and many of the decorative/storage items I have had for years and years so some items are discontinued and there are a few things I where I just don't remember.
Wall Paint: Valspar Lyndhurst Duchess Blue
Trim Paint: Valspar Betsy's Linen
Bathtub Paint: Valspar Beach House
Ceiling Light Fixture: Rejuvenation Mathison Streamline Porcelain Ceiling Fixture
Ceiling Light Shade: Vintage from eBay
Sconces: Rejuvenation Adrian Streamline Wall Bracket
Shower Door: Custom by Wolverine and Moore Glass
White Shower Wall Tile: American Olean 3-in x 6-in Starting Line White Gloss Ceramic Wall Tile
Black Shower Tile: American Olean 1-in x 6-in Linea Gloss Black Ceramic Tile Liner
Shower Floor Tile: The Tile Shop Hex Matte White .75 x .75 in
Pedestal Sink: Kohler Memoirs (Base Link)
Toilet: Kohler Memoirs
Medicine Cabinet: Pottery Barn Sonoma Wall Mounted Medicine Cabinet (purchased at Pottery Barn Outlet)
Built-in Cabinet Handles: Lewis Dolin Retro Pull
Wallpaper: Norwall Black & White BK32032
Black & White Cardboard Bins: Target One Spot
Wire Baskets: Target
White Reclaimed Wood Picture Frame: Mulbury Gallery (purchased at an art fair in Australia)
Teal Leather Picture Frames: Papyrus
Black Wall Frames: Meijer
Toilet Paper Holder, Cotton Swab Container, Stand Mirror: HomeGoods
Soap Dispenser: Target
Large Starfish: Michael's
Towels: Target Room Essentials
Rug: Made from HomeGoods Towels
Laundry Baskets: Ikea Nasum


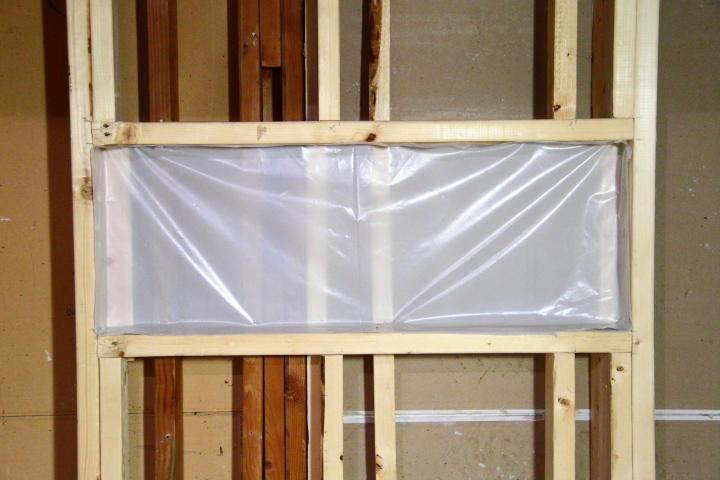
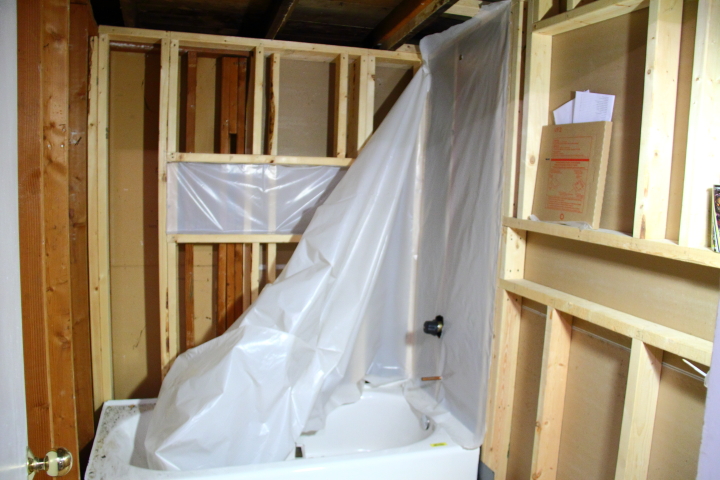
 With all of the plumbing in and the rough approval complete I set about installing a vapor barrier for the bathroom shower surround. I actually did this back in September before my crazy period of travel this fall, but I didn't have time to organize the photos and write about it until now.
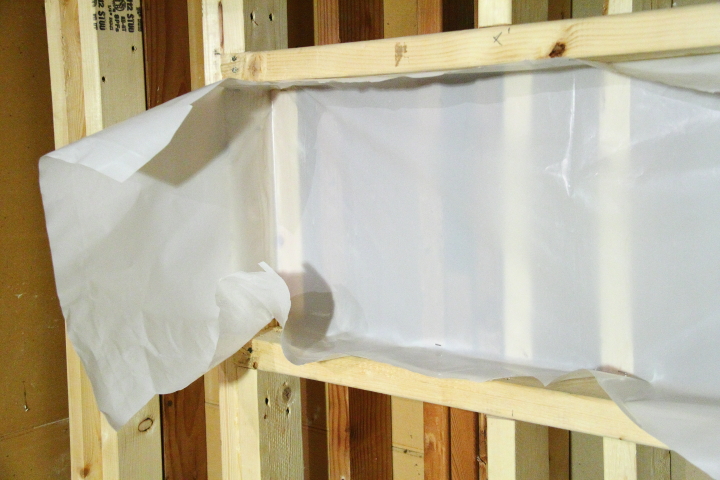


 Lisa |