Welcome

My name is Lisa and I'm a crafty girl with wanderlust working as an engineer by day. My blog chronicles projects in my home as well as pictures and stories from my travels.

Search


Instagram

Blog Index
The journal that this archive was targeting has been deleted. Please update your configuration.
Navigation

Entries in Renovations (53)

Friday
Aug302013

Plumbing in the Downstairs Bathroom

Progress is being made on the downstairs bathroom! The plumbing is in and has passed rough inspection. After the plumber passed his rough I had the building inspector take a look at things (a partial rough inspection) and he said that I can close up the floor and walls where there is no electric since the electrician hasn't been able to get in yet.

While this doesn't look like much, it has been a long time coming. As I mentioned before, I had done a little sprucing up of this bathroom before, but it wasn't until the pipes burst and opened up the walls that I discovered that it wasn't up to code in many ways.

The primary thing was that the bathroom was built on a platform to bring it up to the level of the hallway (the bathroom was in a part of the house that was a porch that was later enclosed). The joists of the platform were built parallel to the floor joists underneath and was resting on sheets of particle board. It was dangerous and I'm not sure how there wasn't a problem before.

This meant that I had to take down two walls of the bathroom as well as the platform and rebuild it all. I built a platform using 2x10 lumber with the joists on 16" centers. This lowered the floor a bit and helped with the ceiling height problem I had. Bathroom ceilings are supposed to be 6'8" throughout, but due to the slope of the ceiling I was a little short in the back. I spoke with the development official who approves all the construction permits and he said that as long as I maintained the clearance over the fixtures he could approve my plans. The slightly lower platform and moving the back wall in just a bit allowed me to do that.

For the two walls that needed to be reframed I sketched out what I wanted (exact spots for the shampoo and soap nook in the shower as well as the medicine cabinets over the sink and toilet) and hired someone else to frame it and hang the drywall on the outside to save some time.

With the plumbing and bathtub in place it is starting to look like a bathroom. The room is small so it is hard to get a full shot but here is one with my new wide angle lens.

I can't wait!


Monday
Aug262013

Michigan Racing Stripes For the Man Cave

After getting the plywood up on the ceiling and carpet pulled up from the floor in the man cave it was time to do something about the walls. Frank is a huge Michigan Football fan so there was no question that the room was going to be Michigan themed in Maize and Blue (the University's colors).

I thought that all Maize or all Blue walls might be a little overpowering so I suggesting to Frank that painting the walls white and having Maize and Blue racing stripes encircle the room would be cool. Frank thought it was a great idea so we went with it.

Here is what the room looked like before we painted:

The walls were pretty filthy so the first step was to wash it down with TSP followed by two coats of Benjamin Moore's Spanish White.

While waiting for the second coat to dry I laid down the roofing felt underlayment for the hardwood floor. I'll go into more detail about the hardwood later this week.

Once the paint was dry Frank and I taped off the stripes in the room. We made the top stripe 5" and the bottom 13" tall.

In order to get the stripes crisp and sharp we used a credit card to rub across the painter's tape to make sure it was really well adhered to the wall.

The next step was to paint Spanish White over the tape along the edges where the stripes would get painted. This is critical for getting a perfect line because any bleed through under the tape is in Spanish White which matches the wall. 

Next it was time to paint the stripes. I bought Benjamin Moore's Glimmer and Polo Blue which I thought matched Frank's Michigan football helmet pretty well.

I started with the top stripe using a 6" roller to paint it Glimmer. Two coats gave it good coverage. 

As soon as I finished the Glimmer I pulled off the top strip of tape. If you leave the tape on after it dries you risk pulling up some of your paint. I then rolled two coats of Polo Blue on the bottom strip.

I peeled off the tape and was pretty happy with the result. Most importantly, Frank loves it. I think it is going to turn out to be a really cool room once we are done. Next up hardwood flooring!

Monday
Aug192013

Paint For the Hallway (Finally!)

On Saturday I finished what I started on the hallway last weekend and finally got some paint up on the walls. First, I had to do a final sanding of the drywall compound on the section that I had drywalled. It can be easy to miss spots when you are only using your eyes so I always rub my hands over everything to make sure I have everything perfectly smooth before I prime the walls.

Here is everything before primer. I really hate doing corners but after a lot of mudding and sanding this one came out pretty well, I think.

The raw drywall had to be primed, but I decided to also prime the rest since the dark orangey red was going to be a bit tough to cover.

One trick that I learned to get really smooth walls is to lightly sand a wall that was raw drywall after you prime it. The reason is that the sanded drywall compound is really smooth, but the drywall around it that has been sanded gets a little fuzzy. Below is a picture showing that before I primed. Once you prime the wall if you give it a light sanding it knocks down the rough texture from the fuzzy drywall and makes everything very smooth.

The final step was two coats of paint on the wall. I love the grey color with blue undertones of the Nimbus Gray walls. There is no natural light in the hallway so I kept the lights on to take the photos, but that makes it hard to get good pictures. I am going to have to do some experimenting to get better shots in the hallway.

Next up in here is to add crown and put down some hardwood flooring. Longer term I plan to replace the door molding to match the rest of the house (that's why I wasn't too careful with my cutting in) and add beadboard wainscoting. For now I am just happy that I have finished walls with paint!

Monday
Aug122013

Progress on the Hallway

This was a busy weekend working around the house. I submitted my building permit to the City of Ann Arbor for the bathroom on Friday so while waiting to get it approved I did some work in the hallway. 

The east wall of my hallway was super crazy. Because the hallway was part of the house where it got expanded when the neighborhood grocery was added the wall had four jogs in it and looked crazy. I had pulled the old drywall off of the section with the different surfaces a while back but decided to attack putting it back together this weekend.

Having one bump out was unavoidable due to the existing framing in that section of the hallway. On Saturday I made a plan to sister the existing studs with 2x4s adjusted to make the wall even with the old 8"x8" post in the wall that was the farthest protruding.

I aligned the 2x4s and held them in place while Frank screwed them in and then we hung the drywall together. I like to hang my sheets horizontally since it is easier to sand a horizontal seam at waist level than a vertical seam. With the drywall hung I taped and mudded the seams, corners and screw holes and then let it all dry overnight. On Sunday I sanded everything and then put another layer of drywall compound on the wall. Here are pictures of the hallway and me after the first sanding:

Yeah, I know that I am not very good at mudding, so I use too much and have to do way too much sanding. In the end all that matters is that it is eventually smooth!

I was at a bit of a standstill at this point since it would not be dry for me to sand again until the next day so once all of the dust had settled I decided to work on the ceiling. First, I added more beadboard to the ceiling in the little nook at the top of the basement stairs in the same way that I put up the rest of the hallway beadboard.

Next I moved on to paint. My plan is for the ceiling to be Benjamin Moore's Gray Sky with Nimbus Gray on the walls and Simply White for the crown molding and door trim. Sorry for all of the primer on my hands but this is how things are when I am in project mode.

It is hard to see in this picture (you have to love lighting with work lights!) but the left side of the beadboard in this photo is Gray Sky and the right side is primed white. I love that the Gray Sky will add a little color to the ceiling and set it apart from the white trim.

Two coats of primer and a coat of paint on the ceiling and the hallway looked like this:

The hallway still looks like a hot mess but it is undeniable progress. I can't wait to get the hallway finished and painted! If only drywall compound would dry a little faster. Or, if only I was better at mudding so that the process would go faster... 

Monday
Aug052013

Fixtures for my Bathroom Renovation

Now that Frank and I are back from our honeymoon it is time for us to get serious about getting the downstairs bathroom done. I bought the fixtures for the renovation a while back and they have been hanging out in my garage taking up space.

For my sink and toilet I bought an American Standard Retrospect Pedestal Sink and a Sterling Stinson Elongated Toilet. In my master bathroom I really like that I have some flat deck space on my pedestal sink so that was a must have for my downstairs bathroom as well.

For my bathtub I bought an American Standard Princeton Bathtub. Originally I was planning on getting a cast iron bathtub but then I thought that the Americast with porcelain finish would be a nice alternative.

For the bathtub and shower fixture I bought the Delta Leland Monitor 14 Series Tub and Shower Trim with Porcelain Handle Lever which I thought had a nice classic look. For the sink I ended up buying Vintage Widespread Bathroom Faucet from Overstock configured with the white porcelain lever handles to match the shower. I love the vintage styling of the faucet and think it will look great on the pedestal sink.

My next step is to apply for my permit with the Ann Arbor building department. After having this project on the back burner for so long I am really excited to finally get going again.

Monday
Jun242013

Beadboard Ceiling for the Downstairs Hallway

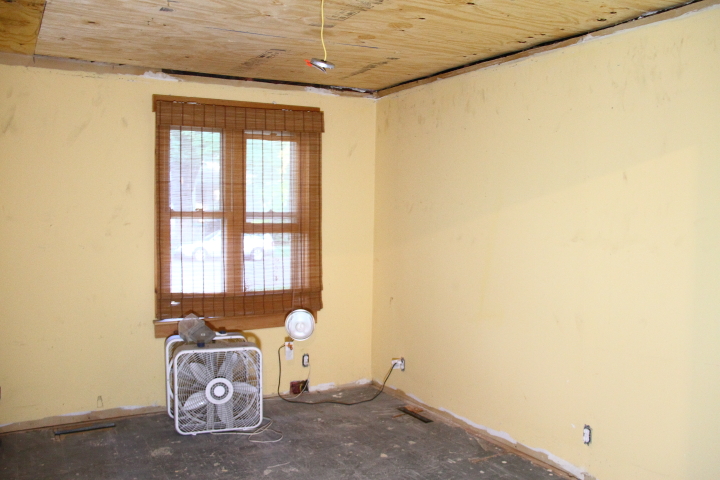
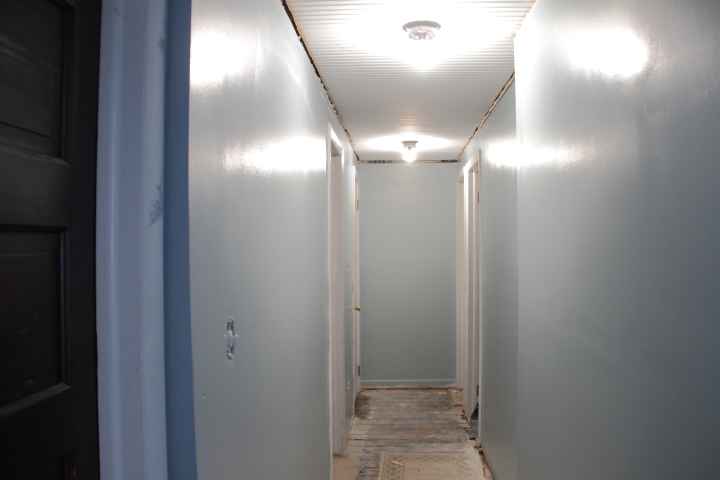
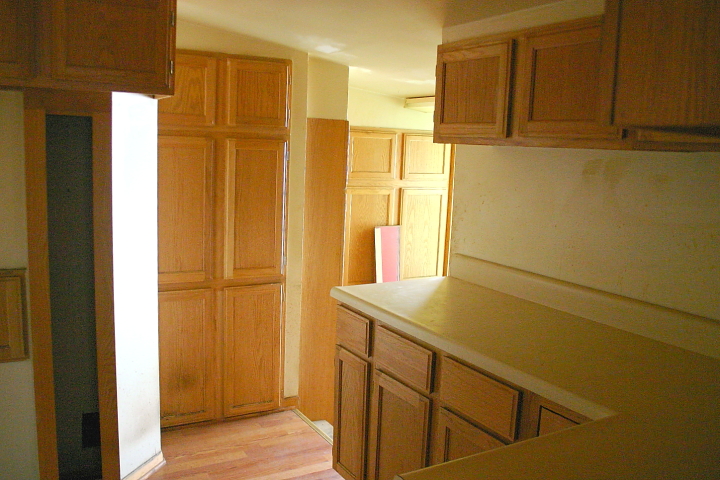
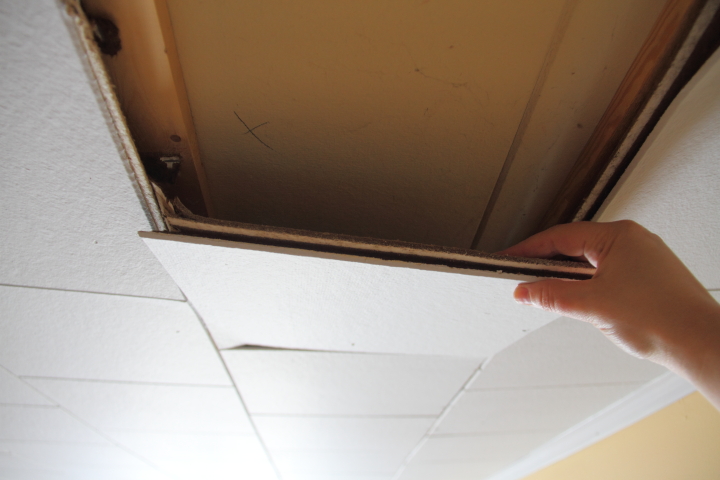
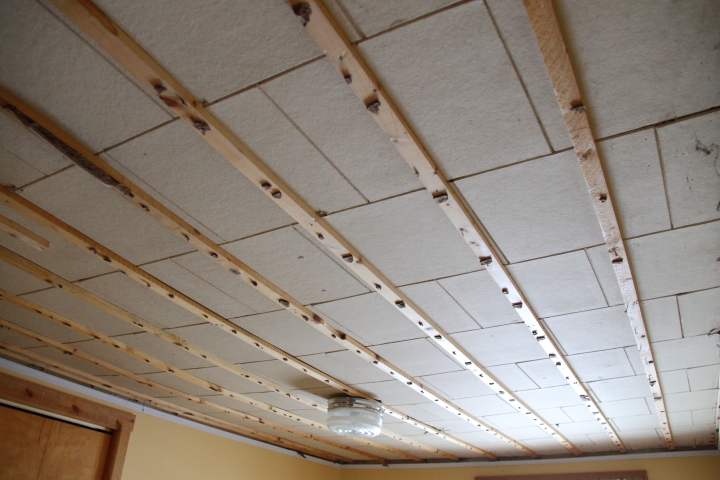
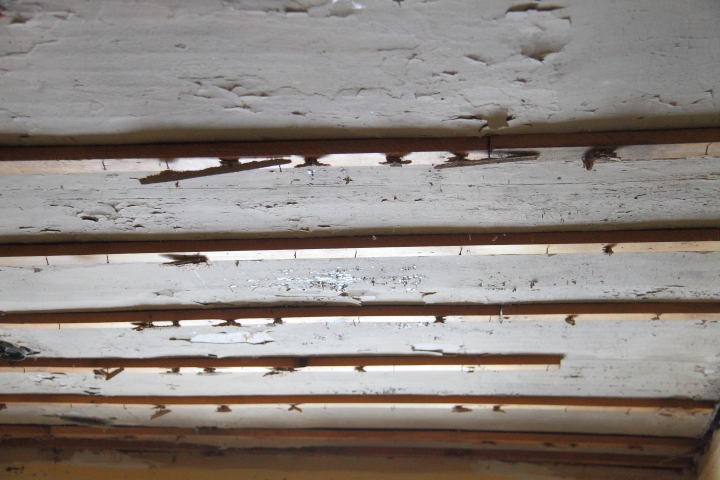
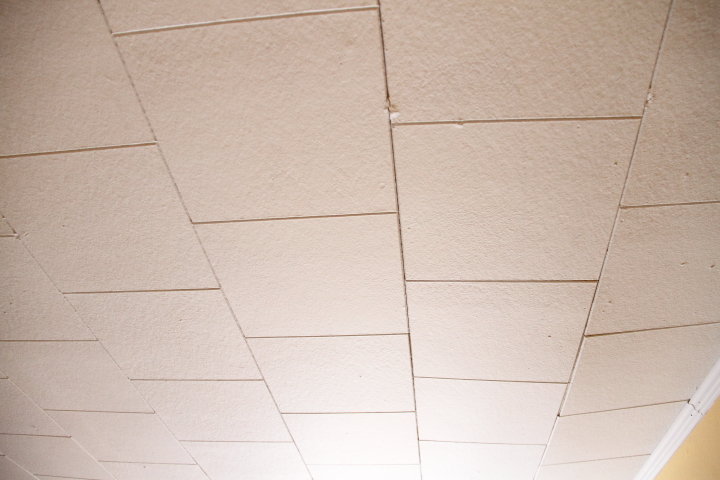
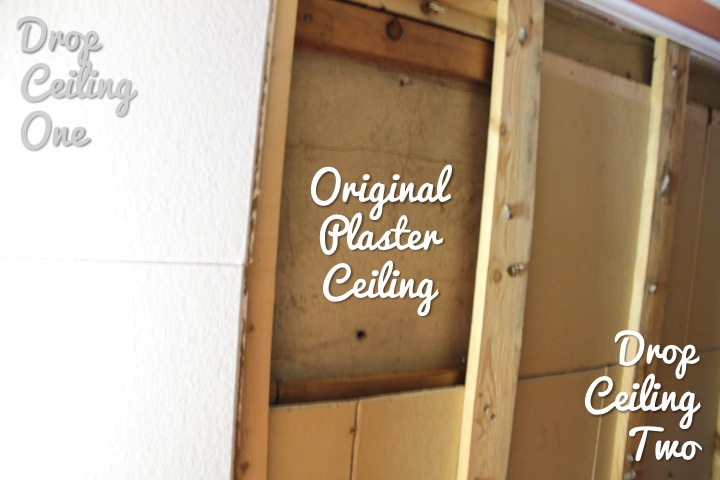
This weekend I gave a little love to a very neglected area of my house, my downstairs hallway. Like every other room on the first floor the ceiling was covered with ugly cardboard ceiling tiles. A while back I had removed them. This was no easy task because as I pulled down the first drop ceiling I found a second drop ceiling before uncovering the original crumbling plaster ceiling. After the demo work was done (I love my prybar!) I had gained a nice bit of extra headroom but then I stalled on the project and moved on to other things.

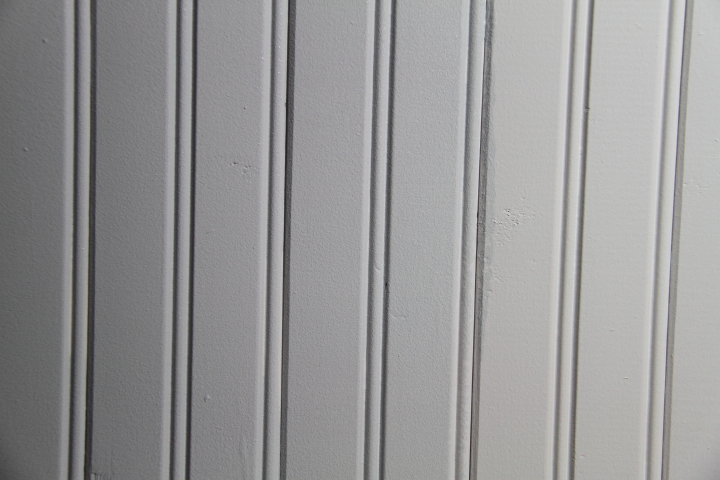
This weekend I finally got around to tackling the hallway ceiling again. I had previously decided that I wanted to put up a wooden beadboard ceiling. The first reason is that it is a pretty boring hallway with five doors along it and I thought that a beadboard ceiling would dress it up a bit. The second reason is that I hate taping and mudding drywall, especially on the ceiling so installing a beadboard ceiling instead of drywall would get me out of that.

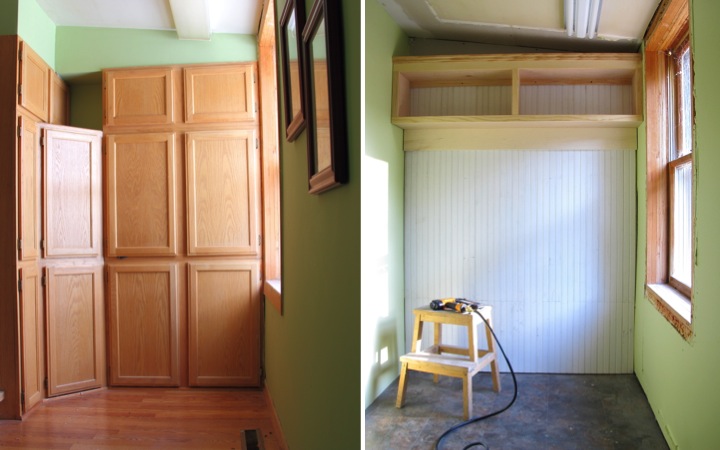
In order to put up the beadboard I needed a plywood substrate for me to nail the strips of beadboard into. Frank and I headed over to Lowe's yesterday afternoon, bought two sheets of plywood and had them rip it down to size on the store's panel saw. I didn't need it to be super accurate (I would never have one of the box stores cut down anything that required precision) and it made it much easier for hauling. Also, as a side note, if I ever become rich I want my own panel saw.

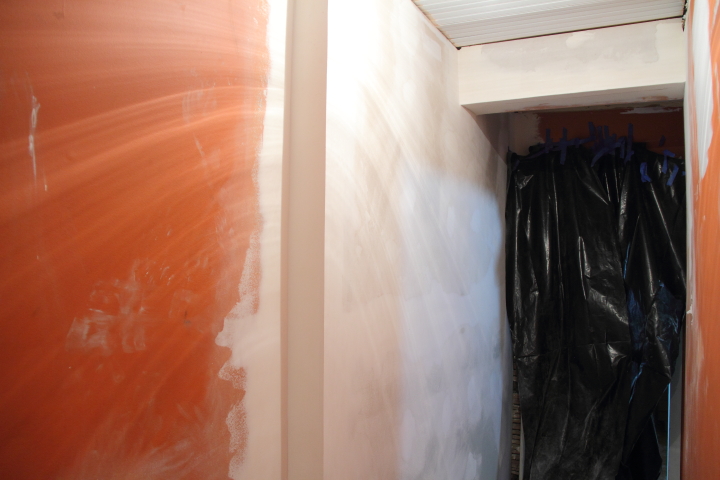
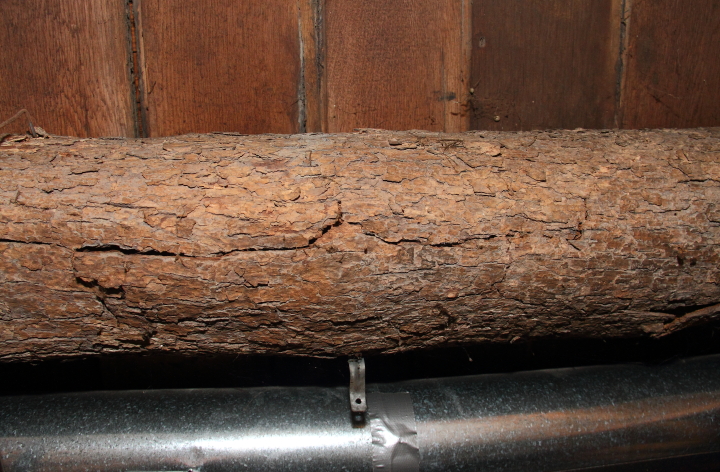
Back at home I cut out a hole for the light fixture junction box with my jig saw and then Frank and I screwed the first piece of plywood into the joists. Frank is a foot taller than me so he could just reach up to hold it in place while I needed a stool. He's lucky like that. The plywood was somewhat awkward to get up, but once it was in place I was ready to install beadboard. I apologize for the terrible pictures in this post, but there is no natural light in the hallway and I was using work lights. 

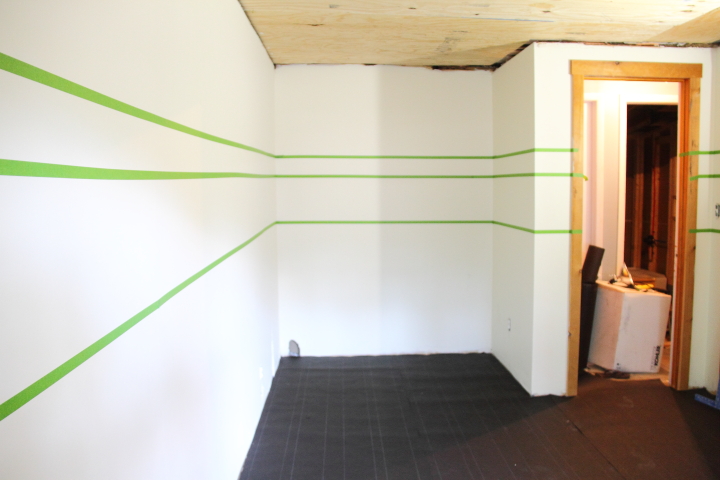
Making sure that you have the first piece square to the walls is super important because if it is off the whole ceiling will look crooked. Unfortunately, one of the joys of owning a house that is over 130 years old is that absolutely nothing about it is square. I took several measurements and got things lined up the best I could and then drew a pencil line on the plywood where I wanted to align the first piece of beadboard. I looked at the line from a bunch of vantage points in the hallway to make sure it looked like it was square to my slightly wonky walls and then put up the first piece.

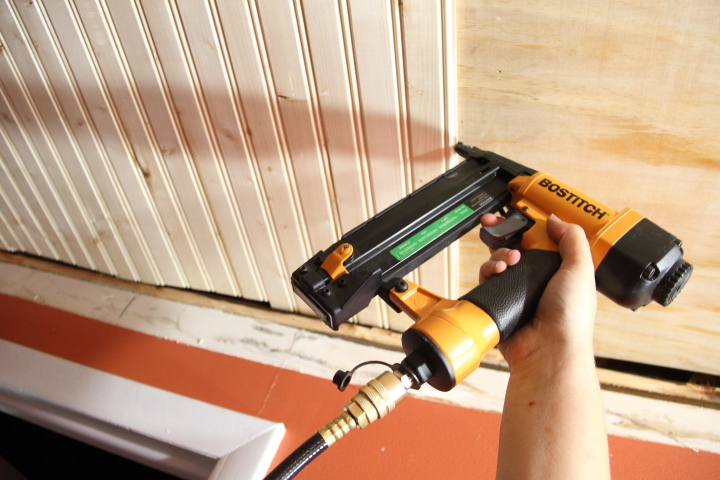
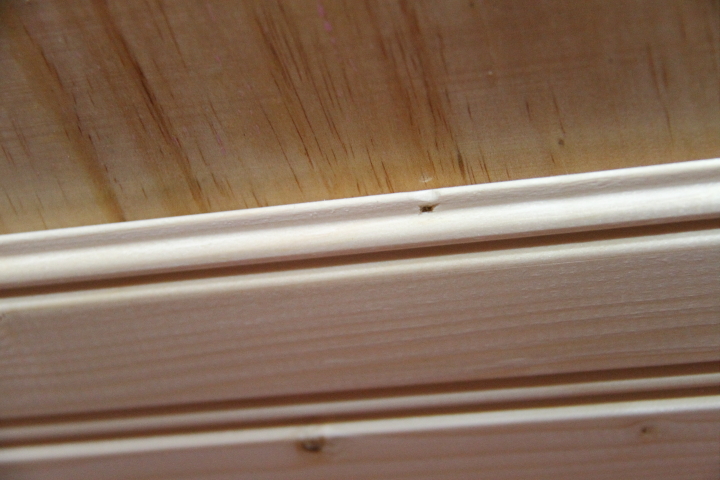
To start I aligned a piece of beadboard to the line I had drawn with the groove facing the back wall and the tongue facing me. I then used my brad nailer to nail the first piece in along the face. For all the pieces after that I slid the groove snugly into the tongue of the previous piece and then nailed it up, but along the edge of the groove at an angle. If you nail it at that spot the next piece of beadboard will cover up the nail holes so you only have to patch the holes on the face of the first piece. You have to shoot the nail at an angle because it you went straight through you wouldn't be able to slide the next piece on over the tongue. It took me a board or two to figure out where exactly I had to line up my nail gun to shoot the nail in the exact right spot but once I did I was on a roll.

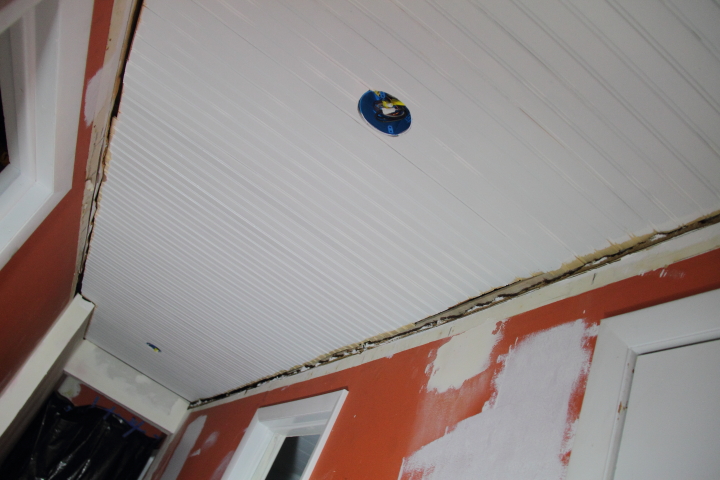
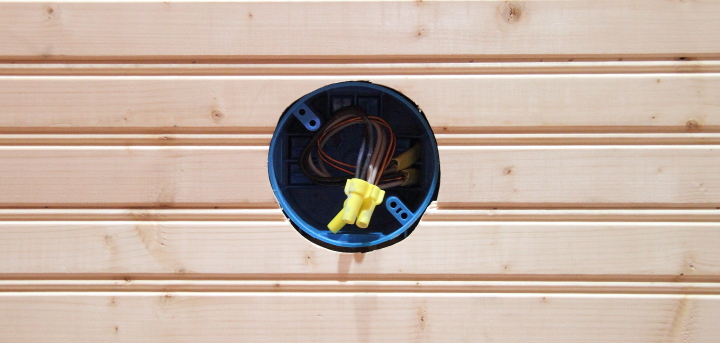
When I reached the light fixture junction box I needed an accurate way to make a fairly precise cut out. For the hole in the plywood I had just measured and cut a hole that was a bit on the large size. Having it be rough didn't matter that much for the plywood since it was going to be covered with beadboard. The beadboard hole, however, needed to be fairly spot on.

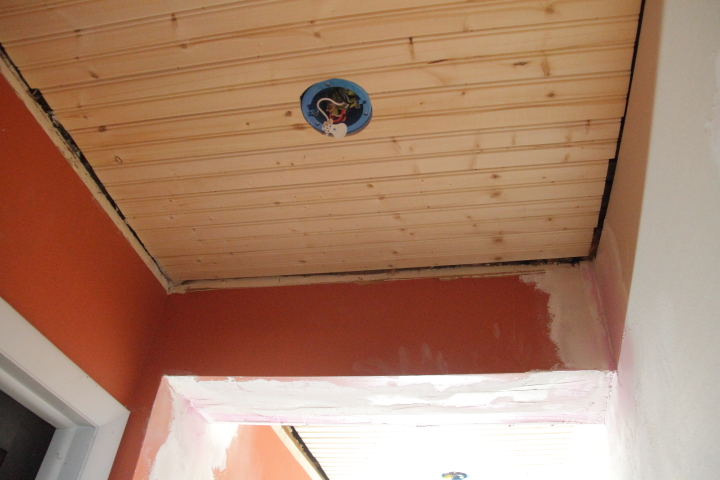
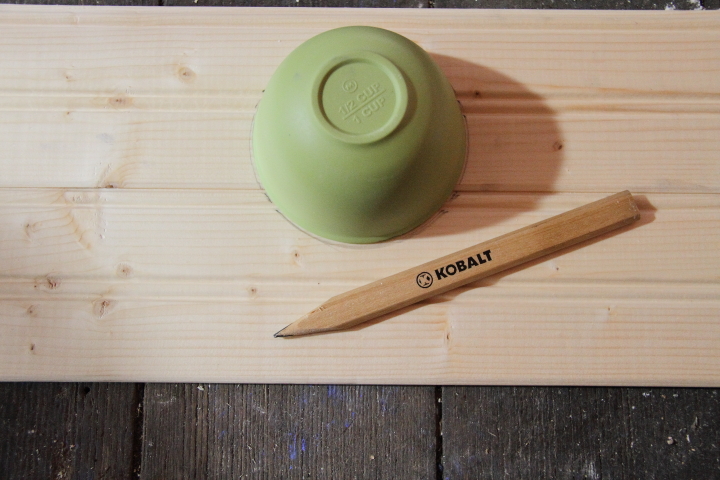
My first step was to rummage around the house to find something with the same dimensions as the junction box, which just so happened to be a little green bowl from the kitchen. I slid the first piece of beadboard that would overlap the junction box into place and lined up the green bowl over the junction box, tracing around the bowl where it hit the beadboard. I then removed the board, put it on the floor and slid in a second piece of beadboard next to it. I placed the green bowl on top, aligned it with the mark on the first board and traced all the way around it onto the second board. From there it was just a matter of using my jig saw to cut along the lines and nailing the pieces in place. It isn't perfect, but it isn't too bad and the base of my light fixture will easily cover the edges.

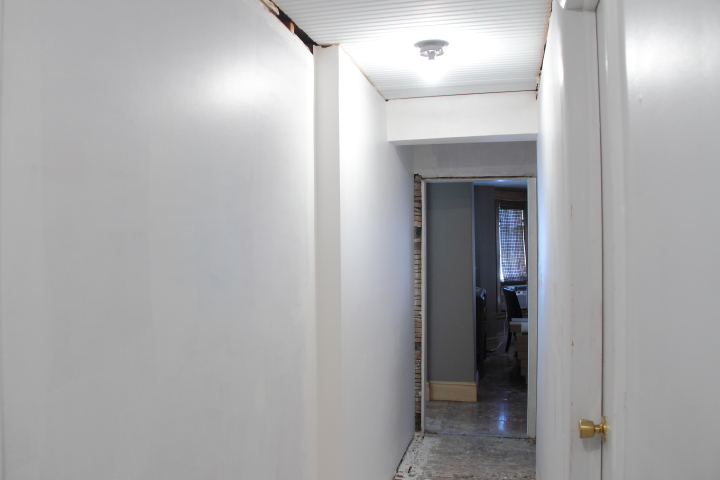
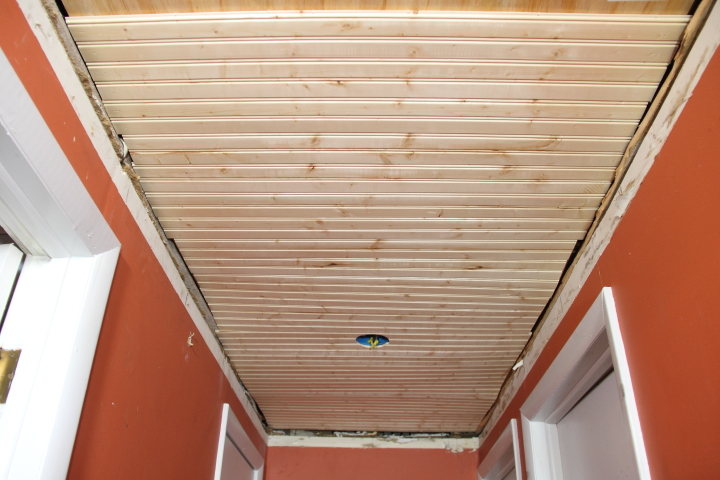
I got about eight feet of the ceiling done today. Another piece of plywood and another eight feet of beadboard and I will have it all up. So far I am pretty excited about how it is coming along. The edges look a little rough, but that is becuase I knew it didn't matter to have exact cuts since my next step is to add a thick crown molding around the top to hide where the drywall stopped because of the second drop ceiling. It may not look like much to an outsider but to me it is progress!

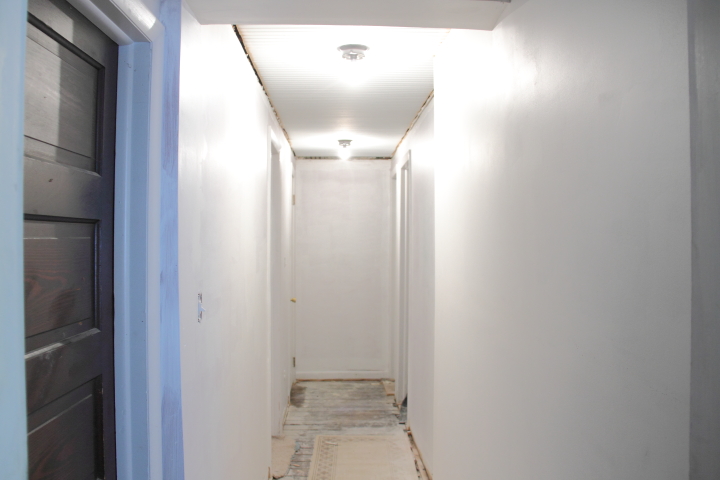
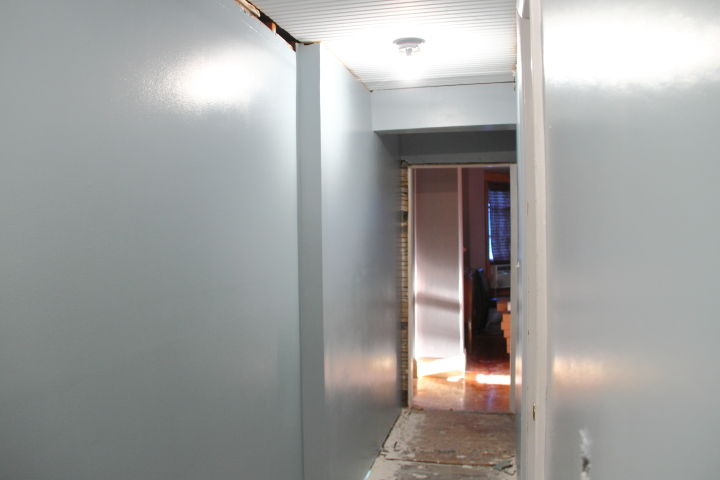
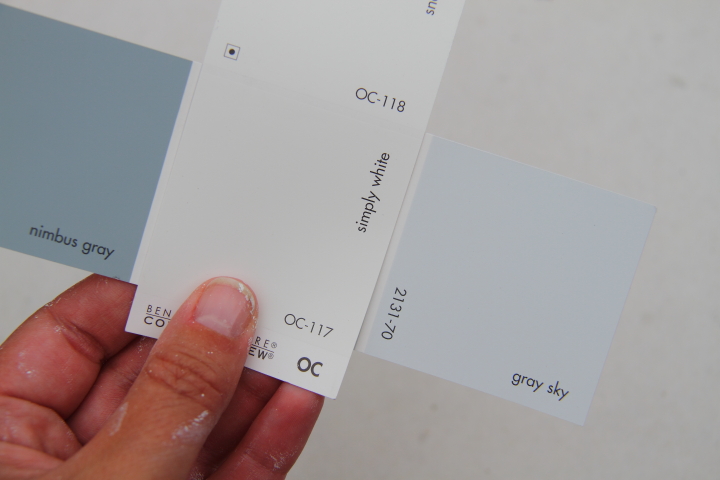
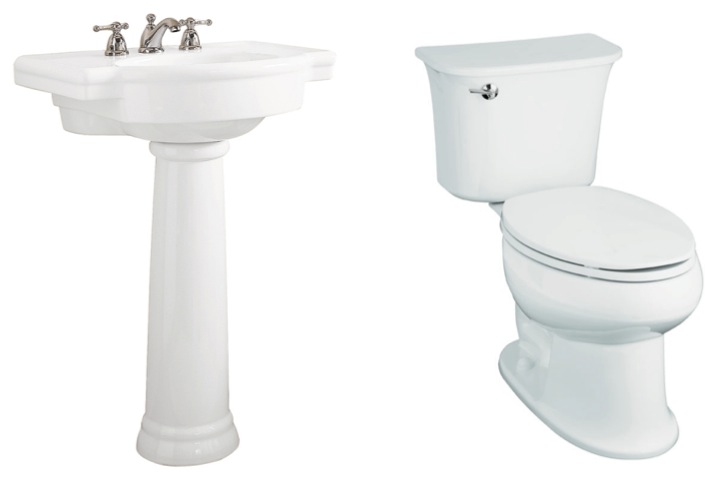
In the near term my next steps are to finish the beadboard ceiling, install crown molding, paint the walls and ceiling and hang light fixtures. Longer term, I plan to get rid of the modern looking door trim and hollow core doors and replace it all with trim to match the rest of the house and solid five panel doors like I have upstairs. I also need to figure out what to do with the floor, but that is a worry for another day...

Monday
Apr292013

Laundry Room in Progress

When I moved into my house in September of 2007 the only thing that had been updated in the house was the addition of a crazy warren of cabinets in the laundry room/back entry. There was a full kitchen's worth of cabinets crammed into the small space. I had other things to worry about, however, like evicting the racoons in the walls and getting electricty upstairs so I painted the cream walls green and left it alone for several years.

I finally got around to working on things removing the crazy waste of space cabinets and replacing the flooring in the back entry area over my Christmas break three years ago. Then last fall I taped and mudded the drywall, added beadboard to the back wall and built a storage shelf. I still need to build a shoe storage bench in that area, replace the light fixture, add trim to the window and get everything painted, but I think it will definitely be a better use of the space than before. Here is a then and now:

Back up in the laundry area I decided to keep most of the cabinets. They were not my style with the 1980s oak look, but they were in okay condition and provided some nice storage. Here is how the area looked in early 2008 after I had painted the walls but done nothing else.

I did decide that even thought I was keeping the cabinets I wanted to paint them white to match my cabinets in the adjoining kitchen. I also used oil rubbed bronze spray paint to paint the hinges and added knobs to match my kitchen knobs.

When I decided to replace the flooring I discovered that the area was built up on a second elevated floor to lift the area level to the kitchen. There was almost no headroom in the laundry room so I decided to remove the elevated floor and bring it back down to the original floor. This means that I have some exposed drywall that is in very rough shape that I need to finish now. I taped and mudded it and now I need to sand it down, repeat, prime and paint. Here is where I am at right now in the process.

I have a long way to go but I am excited to get back to working on this area of the house. Because the upper cabinets will now be a bit high over the lower cabinets due to removing the elevated floor I plan to hang a rod from them to hang clothes. I also plan to add crown molding to the tops of the cabinets plus a few other things which I think will be fun. I can't wait!

Tuesday
Feb262013

Ceiling Gutting Fun

Once I have a plan in place I tend to have a hard time sitting still. Working on the front bedroom was no exception. As soon as it was decided that we might as well finish up the front bedroom properly before Frank moves in I was itching to get started.

So I did what any girl who is bored on a Sunday afternoon would do, I started gutting the ceiling myself. I have plenty of experience with these ceiling tiles since they were everywhere on the first floor of my house. The tiles are interlocking and were stapled into furring strips. I started at a spot where the tiles were sagging and started pulling them down.

It was actually pretty quick work since the installation had been shoddy and I could sometimes pull down several tiles at once.

The surprise (there always is one with my house) was that there was another drop ceiling above the first one. Here's where things stood after the first ceiling was down.

Of course I had to keep going so I busted out my pry bar and pulled down all of the furring strips. At this point it looked like I hadn't made any progress since the second ceiling looked remarkably like what I had just taken down. 

I kept going and pulled down the second layer of tiles revealing the original lath and plaster ceiling beneath it.

At this point I decided to stop. The plaster of the ceiling was in bad shape so I didn't want to remove the second set of furring strips right now since they are helping stabilizing the crumbling plaster.

I've thought about it for a little while and I am going to leave the lath and plaster up, remove the furring strips and sheath the ceiling with 1/2" plywood. The plywood will keep my plaster stabilized and act as a substrate for the nail up tin ceiling.

I'm doing this for two reasons. First, if you have ever removed lath and plaster you know that it is a hot mess. It is super messy and super time consuming. My idea of purgatory is pulling out lath nails from studs and ceiling joists. I had to gut other rooms in the house down to the studs in order to add electrical, add ductwork, add insulation and evict the racoons who had taken up residence in my walls, but if I have a choice (and I do here) I'd rather not have to deal with it.

Second, I called the Ann Arbor building department and confirmed that if I leave the plaster ceiling in place then I do not need to pull a permit since I didn't open up the ceiling. I'm already getting 2" of headspace from removing the two drop ceilings so the additional inch that would come from removing the lath and plaster really doesn't seem worth it.

Anyway, with a few hours of work and 7 contractor bags full of debris my ceiling went from this...

...to this.

It doesn't look like progress, but things always look worse before they get better. Now that I've started I am excited to get the plywood up and start on the tin ceiling. I've got some samples of tin tiles coming in the mail this week and I can't wait!

Tuesday
Jan292013

My House Is Built On Logs

My house is old. I'm not exactly sure how old, however. On property records the city of Ann Arbor lists any house that was existing at the turn of the twentieth century as being built in 1901 so that doesn't give much clue. I did find that my house is listed in an 1892 City Directory as being owned by two laborers named Frank G. and Frank L. Schulz with a slightly different address (an additional digit was added onto the front of the addresses on my street at some point in time). It is unclear exactly when it was built but at the very least my house has 121 years of history behind it.

As an aside I am completely fascinated by how much information was displayed in that 1892 directory. You can see by the excerpt above not only is your address listed but your profession, whether you are a resident or boarder at your home, your husband's name if you are a widow and your business address if you owned a business. It is such a neat snippet of life!

Back to my house, whenever I talk about it being old in conversation I will typically say something along the lines of, "My house is so old it is built on logs." People usually think I am saying this just for effect and honestly I am a little bit because it sounds pretty cool. That doesn't take away from the fact that it is completely true. By logs, I really mean logs, as in they still have the bark on them. I remember the first time I went into the basement, looking up and and being amazed and surprised to see the log joists.

Nowadays many of the logs are obscured by the ductwork and wires running below them, but I thought I would share a few pictures. They are pretty terrible since I have about zero natural light in the basement, but I still think it is neat. Here is one of the joists holding up my living room next to one of the ducts.

Check out this cool mortise and tenon joint. (Please disregard the old non-functional wiring that I haven't gotten around to ripping out) 

In the "new" section of my house there are some huge hand hewn beams. This beam is holding up the side wing that used to be a grocery store. Clocking in at about 12" x 12" it is a monster. You don't see that kind of lumber in modern construction.

My favorite part is seeing the tool marks on the wood. It really makes me think about how old my house is and what it must have been like to originally build it. I do have to say, it also makes me feel very lucky to have power tools.

I know it may sound a little strange to love the joists in your basement, but I really do. They are such a great reminder to me about why I bought an old house, even though the headaches of remodeling can be frustrating.

Do you have any quirky features about your house that you love?

Thursday
Jan172013

Master Bedroom: Then & Now

Today I thought I would share part of my house that I haven't shared before, my master bedroom. When I bought my house it had six bedrooms. It sounds great but they were all tiny rooms and the layout was really awkward. In the back of the upstairs I reconfigured a 10'x10' room, a small bathroom and an awkward space to make a large master bathroom and a 13'x13' room which I now use as a craft room. In the front of the upstairs I decided to combine two small bedrooms to create my master bedroom. I was happy to lose a bedroom and turn my home into a five bedroom house if it meant I would have a decent size bedroom.

The two small bedrooms were a hot mess: holes in the walls, no insulation, no electrical outlets (?!?) and the light switches for the lights were outside the rooms in the hall for some odd reason. On top of that the rooms were absolutely filthy and the room with carpet had a bunch of disgusting stains. Here are a few pictures of the rooms back when I bought my house.

All the walls had to be gutted to the studs in order to add insulation and electrical because besides needing to bring the house up to code I like to be warm and plug things in. I started reconfiguring the floor plan by removing the wall between the rooms. To open things up the old ceilings were removed to expose the old attic area and I had the resulting vaulted ceiling finished and had beams added to keep the house from spreading. The space above the bathroom was then turned into a loft space overlooking the master bedroom. To bring the house up to code, I had to replace one of the windows with a larger window that met egress in case of a fire. To say it was a challenge to get it approved my the historic district committee is an understatement.

I also readjusted the closet situation. Because the house is over a hundred years old none of the rooms originally had closets so they were just oddly added in at a later date. In one of the rooms a closet had been built out over the stairway. Not only was it super awkward, but it also was not up to code since it reduced the headroom on the stairs to less than the state minimum.  Because of this the closet had to go but I saved the old five panel hardwood door, of course. 

The other closet in the upstairs was off of a room that I think may have been a kitchen, that I turned into my master bathroom. Since the second bedroom door was eliminated (again, I kept the old door) I had room to expand the closet. I then added another door to the closet so that I could enter it from my master bedroom as well as my bathroom. It makes for a nice little pass through.

Here is how my master bedroom looks today. There are a lot of things that I still would like to do and I am not sure that I am sold on the way I have the furniture arranged but I like having a lot of space. 

Over my bed is a three panel hand carved wood plaque that I brought back from Thailand. I love the detail on it. My bedspread is from Target and the pillows are from a variety of places but the brown one with the teal is special to me since it is hand appliquéd and I purchased it at the Night Market in Luang Prabang, Laos

Both of my dressers are from my great-grandmother's bedroom set that I inherited. I think they were built in the 1930s and they definitely need some TLC but I love having a little part of her in my room.

Over the tall dresser I have hung a reproduction poster that I bought in Sevilla, Spain and I have some Japanese glass fishing floats, an antique Japanese abacus and a glass jar full of sea glass from Panama sitting on top.

In the corner I have my TV which Frank finds incredibly embarrassing since it is so old. It is about as deep as it is wide and is a TV/VCR combo. I bought it used back in grad school and it seems fine to me! I bought the little cabinet that the TV sits on at a flea market in Kyoto when I was living in Japan.

The poster between the doors is from a play in college where I was the lighting designer. I also have a desk sitting on the back wall that I bought at the Ann Arbor ReUse Center awhile back for $20. I need to refinish it but haven't had a chance yet. The lamp is another item from my great grand mother and used to sit on her desk.

My favorite part about my room is the vaulted ceiling and my ceiling fan. I searched around a lot for just the right fan. Since my house is old a modern fan would look strange so I really wanted something that looked period and had four blades like early ceiling fans did. I looked high and low and then found this fan that is a reproduction of the original Westinghouse ceiling fan design. I love it! 

So there you have it, my master bedroom as it stands right now. There are so many more things that I want to do in there but I just need to remind myself that these things take time...