Welcome

My name is Lisa and I'm a crafty girl with wanderlust working as an engineer by day. My blog chronicles projects in my home as well as pictures and stories from my travels.

Search


Instagram

Blog Index
The journal that this archive was targeting has been deleted. Please update your configuration.
Navigation

Entries in Downstairs Hallway (4)

Monday
Aug192013

Paint For the Hallway (Finally!)

On Saturday I finished what I started on the hallway last weekend and finally got some paint up on the walls. First, I had to do a final sanding of the drywall compound on the section that I had drywalled. It can be easy to miss spots when you are only using your eyes so I always rub my hands over everything to make sure I have everything perfectly smooth before I prime the walls.

Here is everything before primer. I really hate doing corners but after a lot of mudding and sanding this one came out pretty well, I think.

The raw drywall had to be primed, but I decided to also prime the rest since the dark orangey red was going to be a bit tough to cover.

One trick that I learned to get really smooth walls is to lightly sand a wall that was raw drywall after you prime it. The reason is that the sanded drywall compound is really smooth, but the drywall around it that has been sanded gets a little fuzzy. Below is a picture showing that before I primed. Once you prime the wall if you give it a light sanding it knocks down the rough texture from the fuzzy drywall and makes everything very smooth.

The final step was two coats of paint on the wall. I love the grey color with blue undertones of the Nimbus Gray walls. There is no natural light in the hallway so I kept the lights on to take the photos, but that makes it hard to get good pictures. I am going to have to do some experimenting to get better shots in the hallway.

Next up in here is to add crown and put down some hardwood flooring. Longer term I plan to replace the door molding to match the rest of the house (that's why I wasn't too careful with my cutting in) and add beadboard wainscoting. For now I am just happy that I have finished walls with paint!

Wednesday
Aug142013

Let There Be (Hallway) Light

I didn't feel like sanding in my hallway last night so instead I attacked a little electrical. The hallway light fixture that I removed when pulling down the not one but two drop ceilings looked like this:

The shade that went over the fluorescent bulbs was long gone before I bought the house and the fixture was definitely past its prime. If it was in better shape it would have been cool in a Mid-Century Modern home but it was definitely an ill fit for my 130+ year old house. 

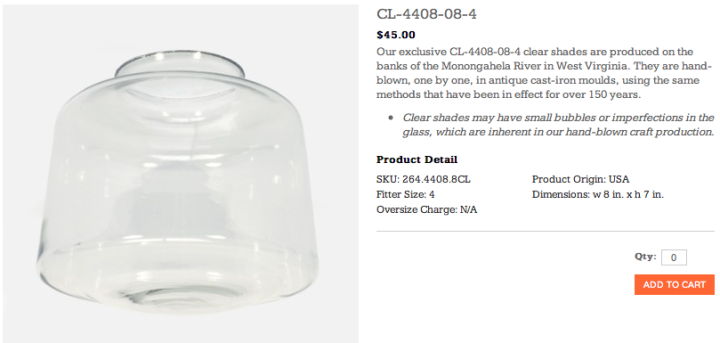
Since the hallway has no natural light I wanted to keep things as open as possible so when I found these clear glass shades at Schoolhouse Electric. I love classic shape and the fact that they are hand blown from antique molds.

Next I needed to find fixtures to go with the shades. I've been hunting around but haven't found anything that I am completely sold on. After getting the beadboard ceiling up and then painted I was was anxious to get working lights back in the hallway so I decided to use two inexpensive fixtures that I found for less than $4 each at Lowe's. Please excuse the primer on my hands; I spray painted these on Sunday after priming the ceiling.

The white was a no go for me so I quickly fixed that by taping up the bulb sockets and wiring and then giving the fixtures two light coats of oil rubbed bronze spray paint.

To spray the heads of the shade screws I poked them through a piece of cardboard so that I wouldn't get paint on the threads.

Last night with the fixtures done drying I put them up in the hallway. I love how the glass shades look and to be honest, my cheap fixtures don't look so bad for now.

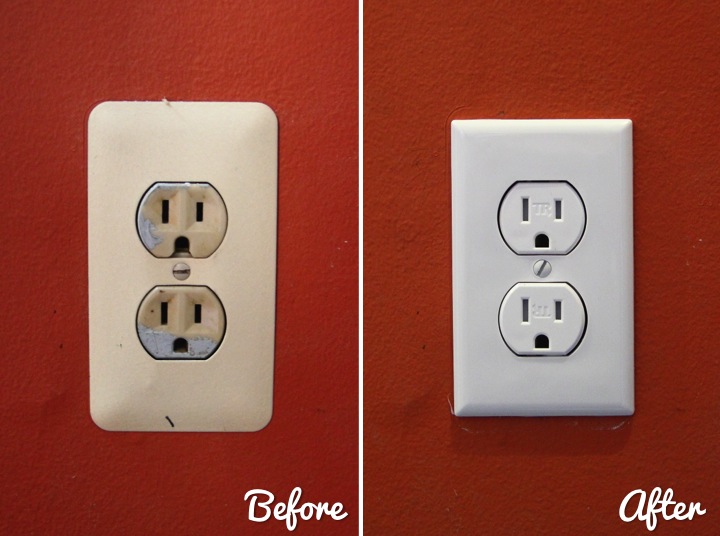
While I had the power off I also swapped out the hallway electrical outlet. The old one was very dirty and had been a casualty of some previous bad paint job. It is amazing to me how something simple like replacing old outlets with new white ones can really freshen things up.  

Monday
Aug122013

Progress on the Hallway

This was a busy weekend working around the house. I submitted my building permit to the City of Ann Arbor for the bathroom on Friday so while waiting to get it approved I did some work in the hallway. 

The east wall of my hallway was super crazy. Because the hallway was part of the house where it got expanded when the neighborhood grocery was added the wall had four jogs in it and looked crazy. I had pulled the old drywall off of the section with the different surfaces a while back but decided to attack putting it back together this weekend.

Having one bump out was unavoidable due to the existing framing in that section of the hallway. On Saturday I made a plan to sister the existing studs with 2x4s adjusted to make the wall even with the old 8"x8" post in the wall that was the farthest protruding.

I aligned the 2x4s and held them in place while Frank screwed them in and then we hung the drywall together. I like to hang my sheets horizontally since it is easier to sand a horizontal seam at waist level than a vertical seam. With the drywall hung I taped and mudded the seams, corners and screw holes and then let it all dry overnight. On Sunday I sanded everything and then put another layer of drywall compound on the wall. Here are pictures of the hallway and me after the first sanding:

Yeah, I know that I am not very good at mudding, so I use too much and have to do way too much sanding. In the end all that matters is that it is eventually smooth!

I was at a bit of a standstill at this point since it would not be dry for me to sand again until the next day so once all of the dust had settled I decided to work on the ceiling. First, I added more beadboard to the ceiling in the little nook at the top of the basement stairs in the same way that I put up the rest of the hallway beadboard.

Next I moved on to paint. My plan is for the ceiling to be Benjamin Moore's Gray Sky with Nimbus Gray on the walls and Simply White for the crown molding and door trim. Sorry for all of the primer on my hands but this is how things are when I am in project mode.

It is hard to see in this picture (you have to love lighting with work lights!) but the left side of the beadboard in this photo is Gray Sky and the right side is primed white. I love that the Gray Sky will add a little color to the ceiling and set it apart from the white trim.

Two coats of primer and a coat of paint on the ceiling and the hallway looked like this:

The hallway still looks like a hot mess but it is undeniable progress. I can't wait to get the hallway finished and painted! If only drywall compound would dry a little faster. Or, if only I was better at mudding so that the process would go faster... 

Monday
Jun242013

Beadboard Ceiling for the Downstairs Hallway

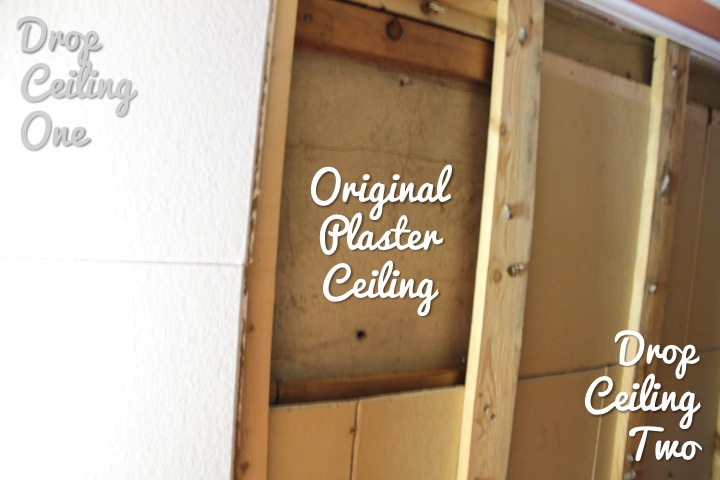
This weekend I gave a little love to a very neglected area of my house, my downstairs hallway. Like every other room on the first floor the ceiling was covered with ugly cardboard ceiling tiles. A while back I had removed them. This was no easy task because as I pulled down the first drop ceiling I found a second drop ceiling before uncovering the original crumbling plaster ceiling. After the demo work was done (I love my prybar!) I had gained a nice bit of extra headroom but then I stalled on the project and moved on to other things.
This weekend I finally got around to tackling the hallway ceiling again. I had previously decided that I wanted to put up a wooden beadboard ceiling. The first reason is that it is a pretty boring hallway with five doors along it and I thought that a beadboard ceiling would dress it up a bit. The second reason is that I hate taping and mudding drywall, especially on the ceiling so installing a beadboard ceiling instead of drywall would get me out of that.

In order to put up the beadboard I needed a plywood substrate for me to nail the strips of beadboard into. Frank and I headed over to Lowe's yesterday afternoon, bought two sheets of plywood and had them rip it down to size on the store's panel saw. I didn't need it to be super accurate (I would never have one of the box stores cut down anything that required precision) and it made it much easier for hauling. Also, as a side note, if I ever become rich I want my own panel saw.

Back at home I cut out a hole for the light fixture junction box with my jig saw and then Frank and I screwed the first piece of plywood into the joists. Frank is a foot taller than me so he could just reach up to hold it in place while I needed a stool. He's lucky like that. The plywood was somewhat awkward to get up, but once it was in place I was ready to install beadboard. I apologize for the terrible pictures in this post, but there is no natural light in the hallway and I was using work lights. 

Making sure that you have the first piece square to the walls is super important because if it is off the whole ceiling will look crooked. Unfortunately, one of the joys of owning a house that is over 130 years old is that absolutely nothing about it is square. I took several measurements and got things lined up the best I could and then drew a pencil line on the plywood where I wanted to align the first piece of beadboard. I looked at the line from a bunch of vantage points in the hallway to make sure it looked like it was square to my slightly wonky walls and then put up the first piece.

To start I aligned a piece of beadboard to the line I had drawn with the groove facing the back wall and the tongue facing me. I then used my brad nailer to nail the first piece in along the face. For all the pieces after that I slid the groove snugly into the tongue of the previous piece and then nailed it up, but along the edge of the groove at an angle. If you nail it at that spot the next piece of beadboard will cover up the nail holes so you only have to patch the holes on the face of the first piece. You have to shoot the nail at an angle because it you went straight through you wouldn't be able to slide the next piece on over the tongue. It took me a board or two to figure out where exactly I had to line up my nail gun to shoot the nail in the exact right spot but once I did I was on a roll.
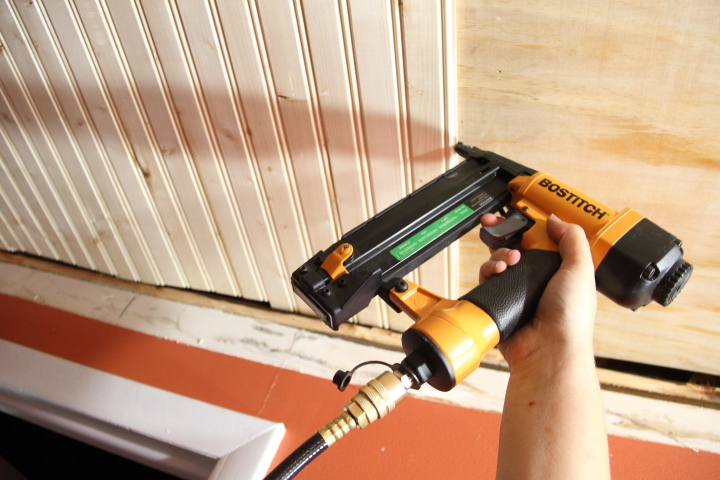
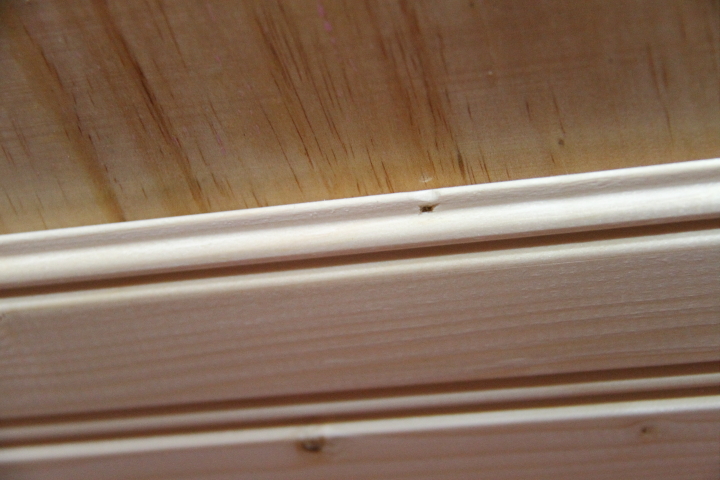
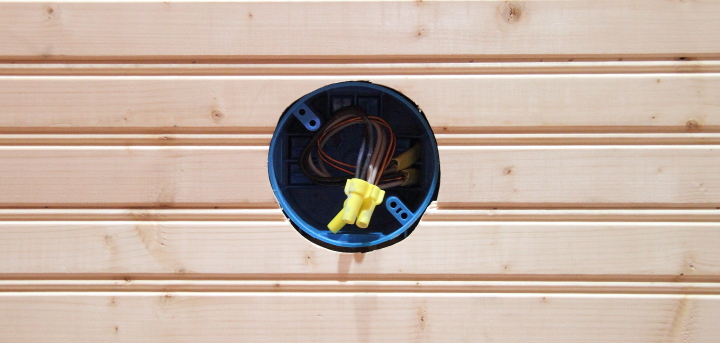
When I reached the light fixture junction box I needed an accurate way to make a fairly precise cut out. For the hole in the plywood I had just measured and cut a hole that was a bit on the large size. Having it be rough didn't matter that much for the plywood since it was going to be covered with beadboard. The beadboard hole, however, needed to be fairly spot on.

My first step was to rummage around the house to find something with the same dimensions as the junction box, which just so happened to be a little green bowl from the kitchen. I slid the first piece of beadboard that would overlap the junction box into place and lined up the green bowl over the junction box, tracing around the bowl where it hit the beadboard. I then removed the board, put it on the floor and slid in a second piece of beadboard next to it. I placed the green bowl on top, aligned it with the mark on the first board and traced all the way around it onto the second board. From there it was just a matter of using my jig saw to cut along the lines and nailing the pieces in place. It isn't perfect, but it isn't too bad and the base of my light fixture will easily cover the edges.

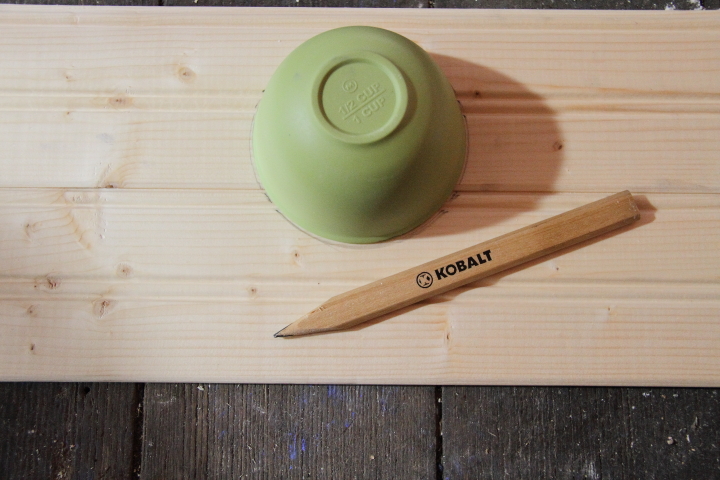
I got about eight feet of the ceiling done today. Another piece of plywood and another eight feet of beadboard and I will have it all up. So far I am pretty excited about how it is coming along. The edges look a little rough, but that is becuase I knew it didn't matter to have exact cuts since my next step is to add a thick crown molding around the top to hide where the drywall stopped because of the second drop ceiling. It may not look like much to an outsider but to me it is progress!
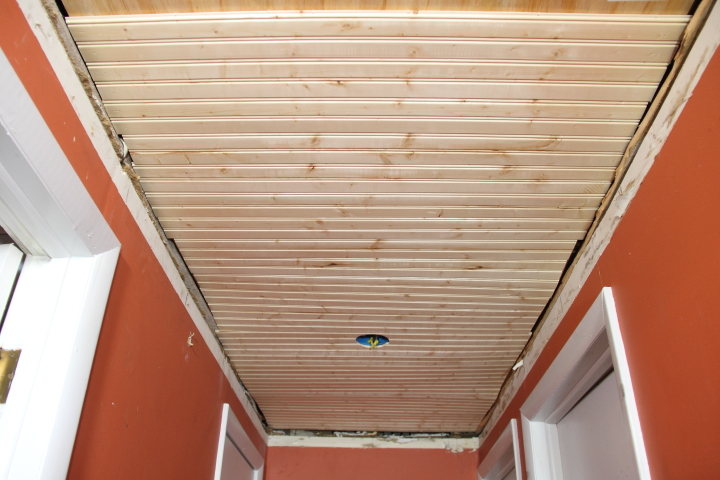
In the near term my next steps are to finish the beadboard ceiling, install crown molding, paint the walls and ceiling and hang light fixtures. Longer term, I plan to get rid of the modern looking door trim and hollow core doors and replace it all with trim to match the rest of the house and solid five panel doors like I have upstairs. I also need to figure out what to do with the floor, but that is a worry for another day...