


Painting & Installing Beadboard For My Back Entry
Picking up from where I left my back entry, on Sunday I sanded down all the mudded seams and screw holes. The trick for me to make sure it is perfectly smooth is to check it by running my hand over the wall to find any imperfections. After I was done I ran a tack cloth over the wall to remove any dust. 
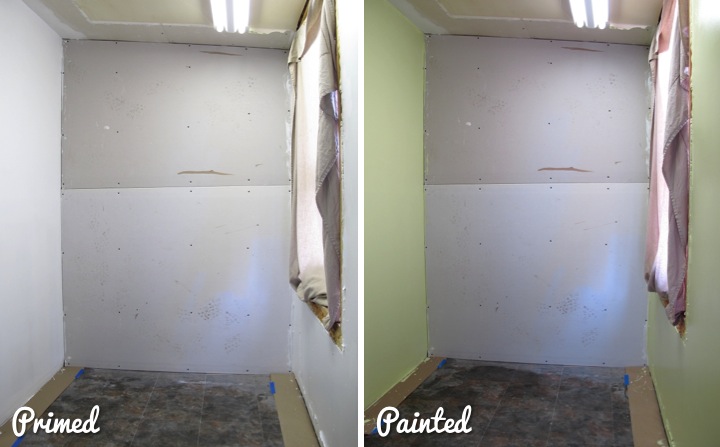
I primed the walls with Kilz and then followed up with two coats of Valspar Soothing Aloe. I really like how cheerful and bright the color is. It's a shade or two lighter than my kitchen making a nice transition between the rooms.
I have to repair and paint the ceiling still from where I took out the soffit, but since the ceiling flows through to the laundry area which also needs some ceiling work I am going to do that all at the same time later.
On a side note, don't you just love the old tablecloth I have hanging in the window? I need something to keep the sun from beating on me while I am working back there and I don't want anything that I would care about ruining. Is it ugly? Definitely, but it is serving a needed purpose.
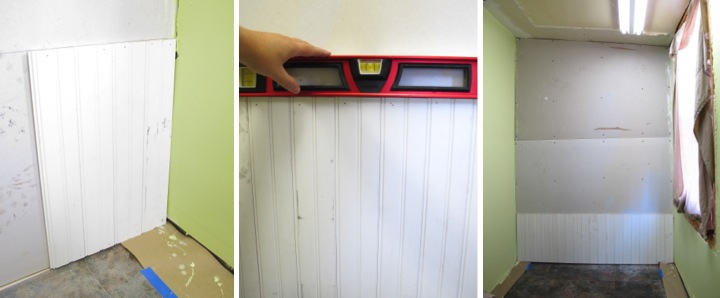
With the side walls painted it was time to attack the back wall. At my local Habitat for Humanity ReStore I had picked up two large bundles of primed pine beadboard for just $10 about a year ago. I knew it would be perfect for the back wall. It was a little scuffed up, but in great shape so once it is painted I think it will look great.
The height of the beadboard was 48" so I had to be strategic about cutting it so that seam lines would fall behind trim pieces and be hidden. For the bottom course of boards I trimmed everything to 19" which would fall right under the trim piece on top of the bench I planned to build.
With my house over a hundred years old nothing is square so I figured out the highest point on the floor, measured up 19" and then used a level to mark a level line across the wall from that point. I set my first piece of beardboard against the corner aligned with my mark and then checked it was plumb vertically as well with my level. Getting the first piece level and plumb was very important otherwise the whole wall would be off.
With the first piece in position I tacked it to the wall at the top and bottom with my brad nailer where the holes would later be covered by trim. I slid the next piece into the notch, tacked it down and repeated until I had spanned the whole wall. Every five or six boards I would double check that I was staying level by placing my level on top.
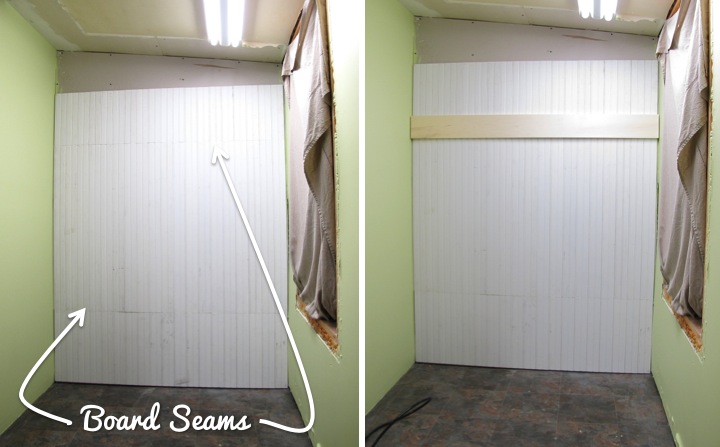
With the first course done I put up a second course in the same way that was 43" tall followed by a final course that was 14" tall. Originally I had planned to take the beadboard up the entire back wall but I decided against it so I will need to finish the little bit of exposed drywall when I fix the ceiling.
After finishing up the wall I put up a piece of 1x6 that the hooks will hang from. My shelf will go right on top of it and getting a 1x6 level is much easier than the shelf so I started by hanging the 1x6. I did it by measuring up from the floor in the middle where the top of the piece needed to be and then tacked it with one brad nail. I then set my level on top and nudged it around the brad (which acted as a pivot point) until it was level and then tacked down the rest of the board. If you look closely at the pictures below you can see that this trim piece completely hides the top beadboard seam.
It feels good to get a little traction on a project that I have been putting off. There is still a long way to go, but it is starting to look like something now. Next up is to build a shelf up top and then a shoe bench down low.
Are you tackling a project you had put on the back burner for a while? What have you done to make a more your back entry more functional?
If you are interested, read about my ideas to transform this little nook in my back entry into a useful space here: Plans For My Back Entry
 Lisa | 4 Comments | Share Article | Email Article | Print Article
Reader Comments (4)
Looking good. Your details about hanging the bead board, excellent instructions (you can tell you are an engineer). I like the look of bead board.
Today's P.O.D. photo - beautiful rugged country - what a view.
Thank you, Mary-Lou! Yeah, my engineering dorkiness tends to come out when I am building things...
lavanshort e3d3fd1842 https://community.nextelectriccars.com/checkclearhighmon
jaemekadla e3d3fd1842 https://socialstud.ro/zecembfullful