


Building A Storage Shelf For My Back Entry
With my beadboard installed and the trim board for my hooks in place I was ready to get building. I decided to tackle the shelf first since that would be easier to install without the bench in the way. 
For my shelf design I planned it together with my bench so that I could cut everything but the bench top and face framing pieces from a single piece of plywood. Also, the width of my space is a little strange and the shelf couldn't be too deep because of my window location. If you were going to make this yourself, you would need to adjust your measurements according to your space, but here was the cut list that I used.
3/4" plywood ripped to 7-7/8" wide
- 2 @ 60-1/2" (top, bottom)
- 3 @ 12" (sides, middle support)
Pine 1x2
- 1 @ 60-1/2" (bottom face frame)
- 3 @ 11-1/4" (vertical face framing)
- 2 @ 28-3/4 (shelf supports)
Pine 1x4
- 1 @ 60-1/2" (top face frame)
Pine decorative trim
- 1 @ 60-1/2" (top face frame accent)
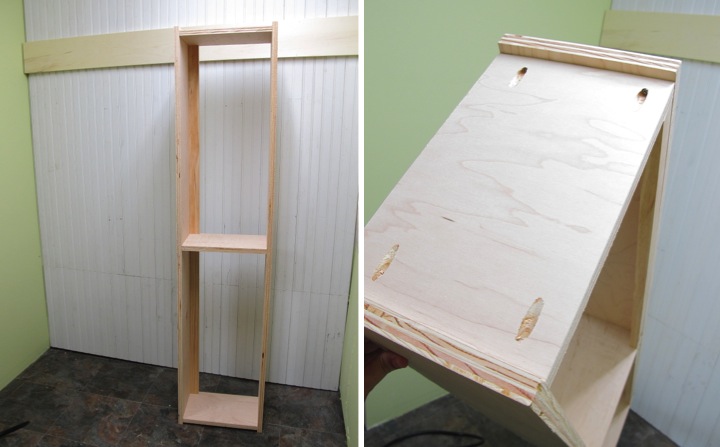
I started by making the box of my shelf out of the plywood. I countersunk screws into the top and bottom to attach the middle support. I offset the sides by 3/8" from the end so that the amount of face framing extending past the support would match the middle piece. I attached the sides using pocket holes on the outside since that wouldn't be seen.
On the back I attached 1x2 supports which help to keep the shelf square since there is no back. They also provide me with a way to attach my shelf to the wall studs.
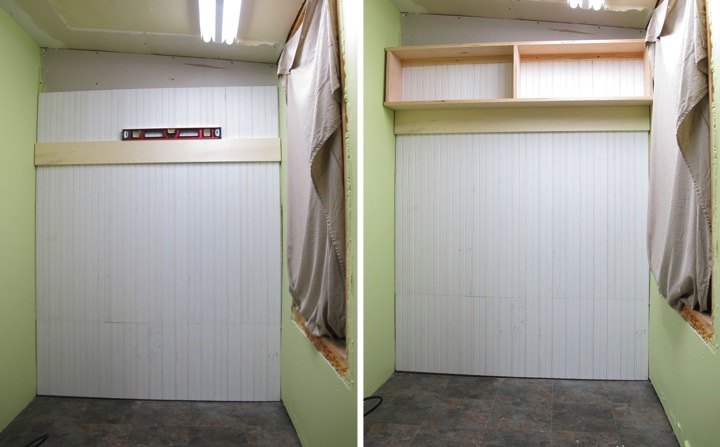
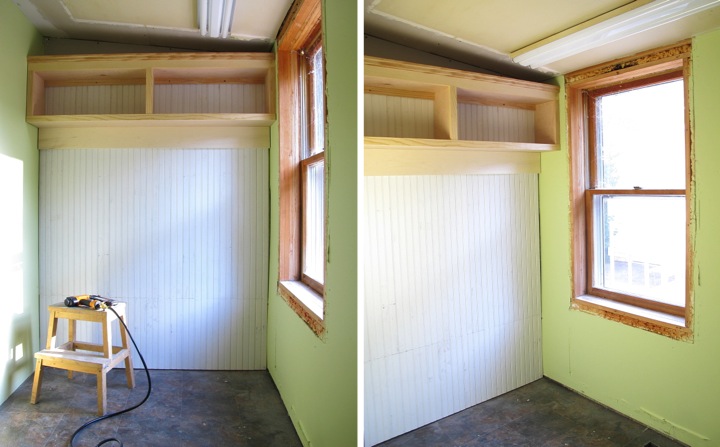
With the box built it was time to hang the shelf. Before I had installed the beadboard I wrote down the measurements of my stud locations based on where the drywall screws were located. I used a countersink bit to predrill holes in the supports in the correct locations. I just lined up the shelf along the top of the 1x6 trim piece that was already level and used 2" screws to attach the shelf to the studs.
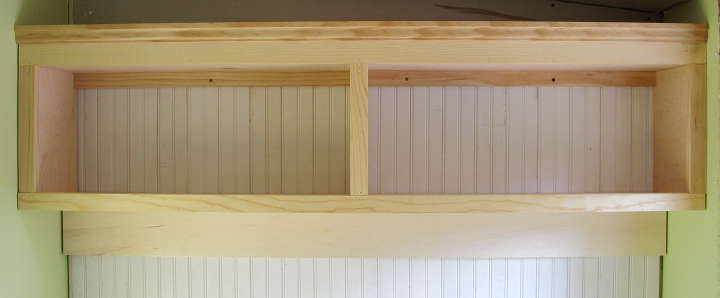
I double checked the shelf was level and then set about framing the face. I attached the bottom first then the vertical pieces and added the 1x4 along the top last. For some added interest I also attached some trim along the top that I also plan to use for my bench.
I think the shelf turned out cute and I can't wait to prime and paint it and add the coat hooks. I plan to do the finishing work at the same time as the bench so I need to build my bench first though.
Here is where I now stand with my back entry to-do list:
- Mud, tape, and sand the seams and screw holes on the unfinished drywall
- Prime and paint walls
- Back the wall with beadboard and add hooks
- Build a storage shelf and install
- Build shoe bench and install
- Paint the bench, beadboard and shelves white
- Replace light fixture
- Repair ceiling and paint
- Replace the window trim
- Add baseboards
- Sew a cushion for the bench
- Sew curtains for the window
There is lots left to do but it feels good to be crossing some items off the list. Have you been building anything for your home lately? Did it turn out like you expected?
 Lisa | 4 Comments | Share Article | Email Article | Print Article
Reader Comments (4)
Looking good ..................... I am in such awe of your building/carpentry skills. P.O.D. - the city looks so futuristic.
Thank you, Mary-Lou! I'm not that great at building things, but a little wood filler and sanding makes up for a multitude of imperfections.
In the vast sea of educational blogs, The Learning Hub shines as a beacon of insightful content and valuable resources. With a dedication to excellence and a passion for learning, this blog has become a go-to destination for educators, students, and parents alike.
Discover how market mapping in recruitment , enhances talent acquisition strategies, helping businesses identify top talent and stay competitive.