Welcome

My name is Lisa and I'm a crafty girl with wanderlust working as an engineer by day. My blog chronicles projects in my home as well as pictures and stories from my travels.

Search


Instagram

Blog Index
The journal that this archive was targeting has been deleted. Please update your configuration.
Navigation

Entries in Gifts (36)

Wednesday
Apr112012

Baby Quilt for Audry's Little Lady

Like the baby quilt I made for my friend, Susan, I also made this quilt for Audry while I was living in Japan back in the Spring of 2009. Since Audry's style is a little more modern I was inspired by some quilts I saw online at West Elm to make this baby quilt for her little girl.

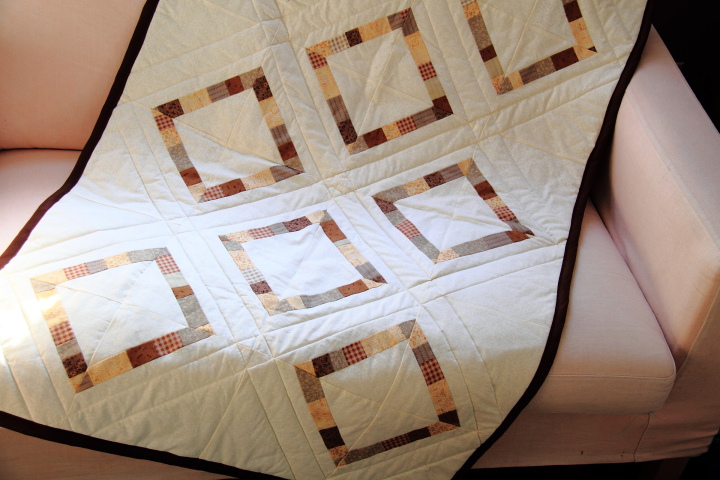
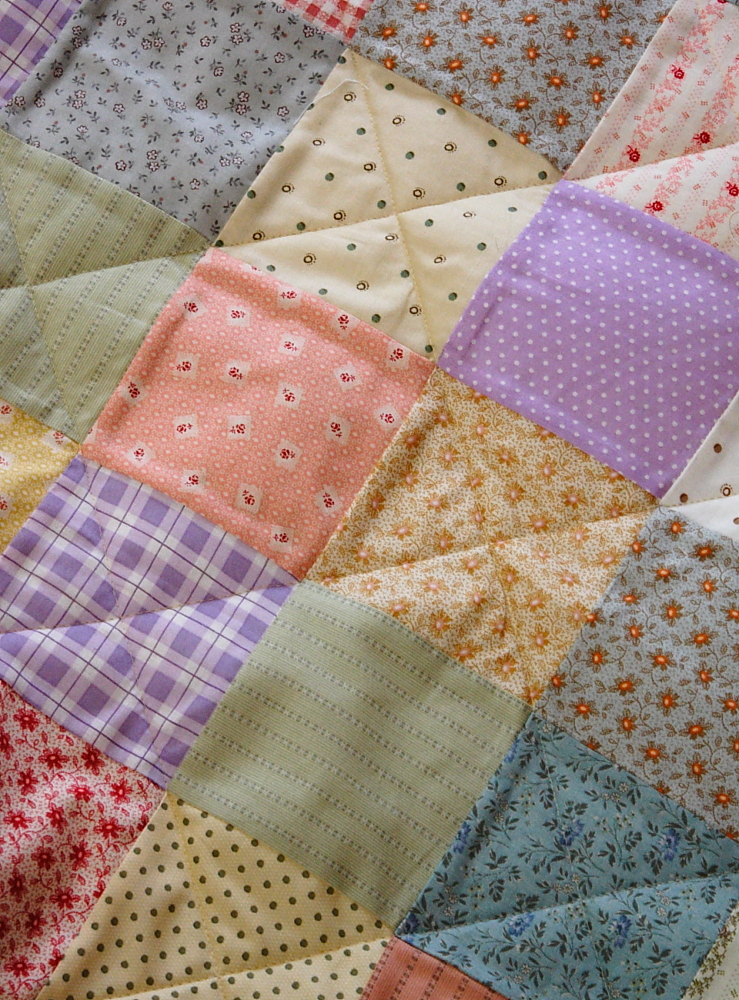
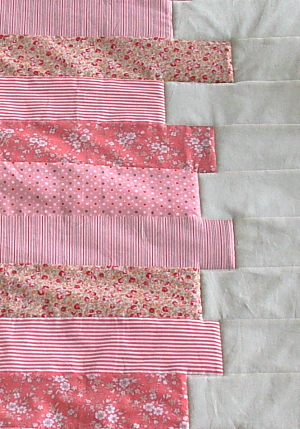
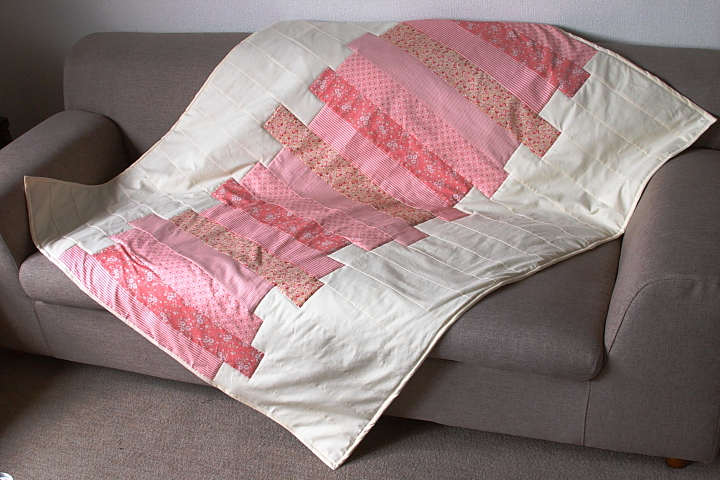
To make the quilt I chose five fat quarters in different patterns of pink fabric and sewed a strip of 24" wide cream fabric on either side of the fat quarters. I then cut 3-1/2" strips from the resulting pieces I had made. 

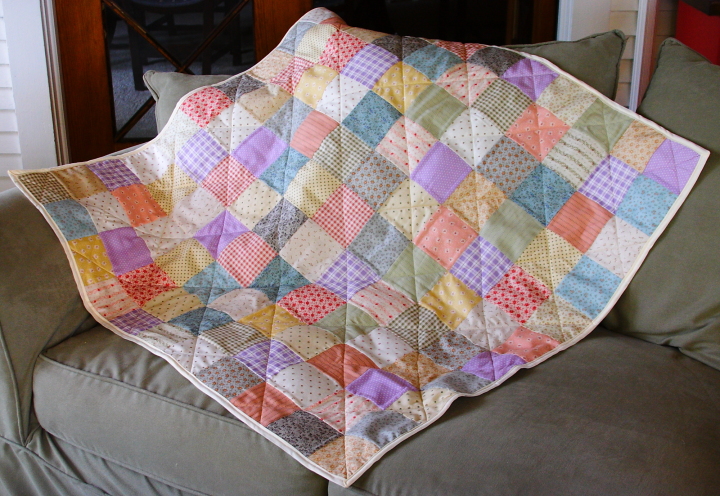
To make the quilt top I then arranged 18 of the strips, staggering the way they lined up to make a fun pattern. Once I had everything the way I liked I sewed the strips together and then trimmed the excess cream fabric off so that the quilt top was a nice rectangle. It came together fast and was probably the simplest design I've ever used for making a quilt.

I finished the quilt with a pink backing fabric and cream binding. I think that the end result was a cute quilt that works with Audry's style. Now I need to get finishing the quilt that I have started for her little boy...

If you are interested, check out some of my other quilts: Baby Quilt for Vanessa's Little ManBaby Quilt for Susan's Little LadyBaby Quilt for Carla's Little Man

Monday
Apr022012

DIY Drink Coasters

As a part of a wedding shower gift for my friend, Kristen, I decided to make drink coasters. I had purchased some bar related items from her wedding registry and thought this would be a nice compliment to the gift.

To make the coasters I used white twill fabric, 3/8" navy grosgrain ribbon and white thread. I wanted the coasters to be 4" square so I started by cutting two 5" squares from my twill (4" plus 1/2" seam allowance) for each coaster.

I cut four 5" lengths of ribbon for each coaster and pinned them to the top of a twill square 1" from the edge. To tack the ribbons in place I sewed around the twill 1/4" from the edge and removed the pins. I then pinned a second twill square to the beribboned square with right sides together. I sewed around the edges with a 1/2" seam allowance leaving a 2" gap for turning the coaster right side out. After I finished sewing I clipped the corners and ironed the seams flat before turning it right side out. I ironed the coaster again and then finished it by using a blind stitch to close up the gap.

The fun thing about the coasters is that if you are using them for wine glasses you can slide the ribbons around the base of the glass and the coaster will stay attached to the glass. For wine glasses with a smaller sized base my pattern would need to be tweaked to place the ribbons closer to each other and for larger ones the ribbon should be a little farther apart. Cheers!

Thursday
Mar222012

DIY Covered Papered Box

After making the puzzle for my grandma's birthday I decided to cover the puzzle box lid to finish off the gift.

I started by placing the box lid on top of a piece of face down scrapbook paper. Using a marker I traced the outline of the box and then extended the top and bottom lines to the edge of the paper. I cut along the extension lines to the edge of the box outline and then coated the whole back of the paper with a glue stick.

To wrap the lid I placed it back over the lid outline making sure that the paper was well adhered. Next I folded up the top and bottom, wrapping the excess paper around the sides of the box. I then folded up the sides and added a little extra glue in any areas that needed it. Once I was finished wrapping the box I used my scissors to trim off the paper that extended beyond the box lid edge.

To complete the project I put the puzzle pieces back into the box, placed the covered lid on top and tied it all up with a bow and a tag. 

Monday
Mar192012

DIY Puzzle Birthday Gift for Grandma

My grandma loves doing puzzles so this year for her birthday I thought I would make her a puzzle with a Happy Birthday message on it. Since her birthday is just after Frank and I get back from Italy I made this before we headed off on our trip and mailed it to her with strict notices on the outside of the box not to open until her birthday.

To make my puzzle I started by buying a kid's puzzle for a dollar from the Target One Spot. I liked this puzzle because the wide rectangle shape would work well with adding my message to it. 

When I got home from Target I covered a board with butcher paper and then put together the puzzle. I then took it outside and using light coats of matte spray paint I painted the puzzle white. Because of the colorful design it took five coats before it was completely white.

I let the puzzle dry over night and then started adding my design with pink and teal markers. To add the word "Grandma" I used pencil transfer. I printed the word out on a piece of paper and then lightly penciled over the areas of the letters on the back side of the paper. I then put the paper right side up in the position I wanted and traced the outline of the letter which caused a light graphite transfer onto the puzzle. From there I went over my pencil guidelines with dark pink marker and then filled in the letters with light pink. I used a teal marker to write "Happy Birthday" and "Love Lisa" and then used the pink and teal markers to make a border to finish it off.

I think the puzzle turned out cute and it was fun to make. At only a hundred pieces this is a much smaller puzzle than Grandma usually works but hopefully it is still fun for her. Happy Birthday, Grandma!

Tuesday
Mar132012

Bunting Happy Birthday Card

I made this card for a dear family friend whose birthday is this month. Of course, me being me, I am behind on everything and I sent out her present a week late, but I hope she will forgive me. Since spring is in the air I wanted to make something bright and cheery so I thought a simple card decorated with bunting would be fun.

For the base of the card I used white cardstock with a faded lined paper design on it. To make the bunting I made a little template out of chipboard and then cut out the flags from some brightly colored origami paper I bought at a hyaku-en shop (Japanese version of a dollar store). I folded the tabs on the flags over some black and white string and taped them to secure them. Once I had all the flags attached to the string, I mounted them on the card with foam tape to give the flags a little dimension. I coated the back of the remaining string with craft glue, arranged the string in loops and then trimmed the excess off once the glue had dried. To finish off the card I wrote "Happy Birthday" on the flags.

Happy Birthday, Georgene! You are such a special part of my life and I am so lucky that you adopted me as part of your family.

Monday
Jan232012

Wire Nail Michigan Map Art

My friend, Pam, is moving from Michigan to Minnesota this week. I love having her live down the street from me and although I am excited and happy for her I am sad for me and really going to miss her.

I wanted to make her something to remind her of the Mitten State and all of her friends and family here as a going away present. After thinking about it for a bit I came up with this idea to make a map of Michigan with wire nails and embroidery thread.

To start, I took a 12" x 12" piece of 1/4" plywood and spray painted it black. I then downloaded a map of Michigan from the internet and resized the image so it was approximately 8" x 8". I taped the paper to my plywood and then hammered wire nails (3/4 x 18 size) into the plywood following the map outlines. Due to the spacing I used some of the map detail was inevitably lost (sorry, Old Mission Peninsula!) but it still is unmistakably the Mitten State.

Once I had completed the wire nail outline I gently ripped the paper from around the nails. I think the nails alone look pretty neat and may use that for another project sometime. 

With the paper removed it was time to start adding the embroidery thread. I tied a knot on one of the nails and then started looping the thread around each nail. I learned the hard way that you have to keep the thread taut at all times otherwise you run the risk of the thread coming off the last few nails. I went around the outline three times with the thread before tying it off. I dabbed a little Fray Check on the knots to make sure they wouldn't come undone and then snipped the tails once the Fray Check had dried.

Pam really enjoyed the gift and I like how it turned out so much that I think I am going to make something for my house using some sort of variation of this.  

Thursday
Jan192012

Baby Quilt for Carla's Little Man

I caught a bad bug this past weekend while I was working in Pasadena so since I came home on Monday evening I haven't really been feeling up to working on projects. While I am under the weather I thought I would share a baby quilt I made last year for my friend, Carla, who was my roommate my senior year in undergrad.

Carla's son's nursery was decorated with a Classic Winnie the Pooh theme complete with a mural on the wall. I used the soft yellows and browns to match for the color pallette for the quilt.

To start I cut 1-1/2" wide pieces of yellow and brown scrap fabric in lengths from 1-1/2" to 3". I then joined the pieces together to make a very long 1-1/2" wide strip. As a foundation for the blocks I cut 24 squares that were 10-1/2" x 10-1/2".

To make the quilt I needed 16 of what I'll call Block A to go around the outside of the quilt and 8 of Block B for the center of the quilt. To make Block A I lined up a ruler on the diagonal of the square and measured up 3" from one corner and marked it with a disappearing ink quilting marker. I then cut off a triangle that went through that point, saving the cut-off triangle. I reassembled the block by sewing a section of the brown and yellow strip to the block, adding the cut-off triangle back on, and them trimming the resulting block back down to 10-1/2" x 10-1/2". To make Block B I did the same thing as Block A but instead of just adding the yellow and brown stripe in across one corner I did it for two opposite corners on the block.

Once I had made all the blocks I joined them in the following rows: Row 1: A, A, A, A, A, A; Row 2: A, B, B, B, B, A; Row 3: A, B, B, B, B, A; Row 4: A, A, A, A, A, A.  In order to make the blocks form the squares you need to flip the orientation of every other block but if you lay it out it is easy to see how it works. I then joined the rows together, used some tan fabric for the back, quilted it with a straight, diagonal pattern between the squares and finally bound the edges with dark brown fabric.

Carla and her husband loved the quilt and even sent me some cute pictures of their son with the quilt in front of his Winnie the Pooh mural.

Thursday
Jan122012

Baby Quilt for Susan's Little Lady

As I am in the midst of making baby quilts for several friends (it seems I am at the age where all my girlfriends are having little ones) I started reminiscing about the first baby quilt I made which was for my friend, Susan, and I thought I would share it.

I was living in Japan at the time and was heart broken that I wouldn't be able to go to Susan's baby shower. Missing things like that was one of the toughest parts about living in Japan. 

Even though I couldn't be there she was in my thoughts and I wanted to make something special for her so I decided to try to make a quilt. I had made baby blankets before but piecing a quilt top was something new for me.

In the craft area of Jusco (Japanese store sort of like K-mart in the US) there wasn't the huge selection of fabrics like Jo-Ann's back at home but I did find a bundle of pre-cut 4" squares in pastel yellow, blue, pink, and green. Susan's daughter's room was going to be lavender so I hunted around to find a few other lavender fabrics that I could cut into additional squares to throw in the mix. 

To make the top I simple joined the 4" squares into strips and then joined the strips together. I used some of my lavender for the back, quilted it with a straight, diagonal pattern and finally bound the edges with cream fabric.

Susan's daughter is now three years old and I love that she still has the quilt in her room. Since they live in Washington DC I only get to see them about once a year or so, but it means a lot to me that she has this gift from me with her still. 


Wednesday
Dec282011

Canned Goods for Christmas

This year for Christmas I gave canned goods that I made at the end of the summer and early fall. I made cinnamon applesauce, pickled tomatoes with rosemary, and spearmint orange jelly. The last two are from recipes from Better Homes and Gardens Special Interest Publication Canning which I picked up at my grocery store last summer. I love canning and it seemed like a perfect gift to give this year.

To make the tags I cut 3/4" x 2-3/4" strips of cardstock. clipped the corners on one end to make a tag shape and used my 1/8" hole punch to create a hole for threading. I then wrote the contents of each jar on the tag.

For the cinnamon applesauce, I embellished the tag with some sticks of cinnamon and tied the tag to the jar with twine for a rustic look. To cut the small pieces of cinnamon I scored the stick with a serrated knife and then snapped off the piece.

To decorate the pickled tomatoes with rosemary I used red ribbon to attach the tag to the jar. I then hot glued some rosemary that I had dried from garden this summer to the back of the tag.

On the spearmint orange jelly, I used my hot glue gun to add an orange leaf to the back of the tag and a dried kumquat slice to the front. I then tied the tag to the jar with a lime green ribbon. To make the dried kumquat slices I cut some kumquats into 1/4" slices and then baked them on a cooling rack (not a cookie sheet - they will stick!) at 250 F (125 C) for about half an hour.  

Of course even though I have given away a lot of canned goods this year, I still have plenty left for myself. In fact I couldn't help but keep all of my vanilla pickled sweet cherries. Is that bad?

Monday
Dec262011

Christmas Flowers

As a hostess gift for a Christmas Eve dinner I was attending I made this simple flower arrangement.

To begin, I bought green pom pom mums and a bag of cranberries at the grocery store. I wrapped a wide piece of coordinating green ribbon around a narrow glass vase, tucking under the end and using a glue gun to secure it. I then added a red ribbon over top which I tied into a bow in the front. 

After trimming the mums down to the desired length I arranged them in the vase. To add some extra color to the arrangement I then carefully added cranberries around the stems of the mums.

The arrangement turned out to be bright and festive and since I could make it with items from the grocery store and ribbons I had on hand it was easy and inexpensive as well.