Thursday
Jul052012
Picture of the Day: Goat at Black Rocks
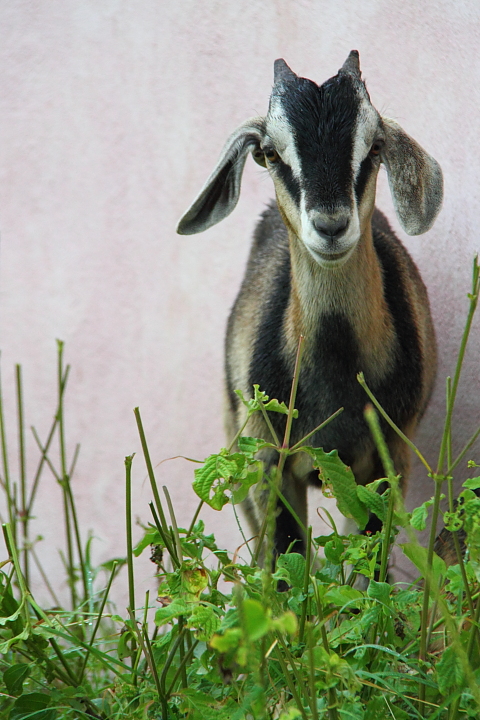
Black Rocks, St. Kitts
7.03.2011
 Lisa | Post a Comment | Share Article | Email Article | Print Article

My name is Lisa and I'm a crafty girl with wanderlust working as an engineer by day. My blog chronicles projects in my home as well as pictures and stories from my travels.

Black Rocks, St. Kitts
7.03.2011
Lisa | Post a Comment | Share Article | Email Article | Print Article 
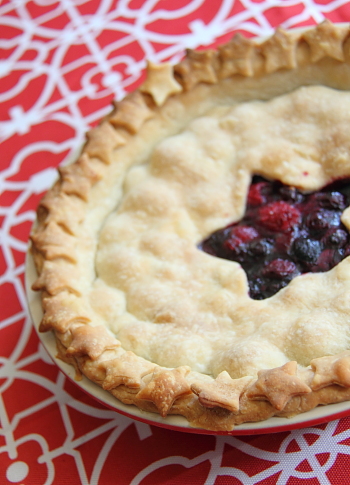 Happy Fourth of July! Although it is blisteringly hot and humid here in Michigan I felt compelled to make a pie this morning to bring to the Independence Day get-together that I am going to this afternoon. The first reason is that so many wonderful berries are in season and just begging me to bake with them. The second reason is that pie is delicious.
I love making mixed berry pies with all sorts of fruit combinations: strawberries, black raspberries, blueberries, rasperries, blackberries... you get the picture. It is a great and delicious way to use up whatever fruit you have on hand. Today I paired some blueberries and raspberries since it makes a festive color combination. The pie smells delicious and I am having some serious will power issues not cutting into it before I head to the party.
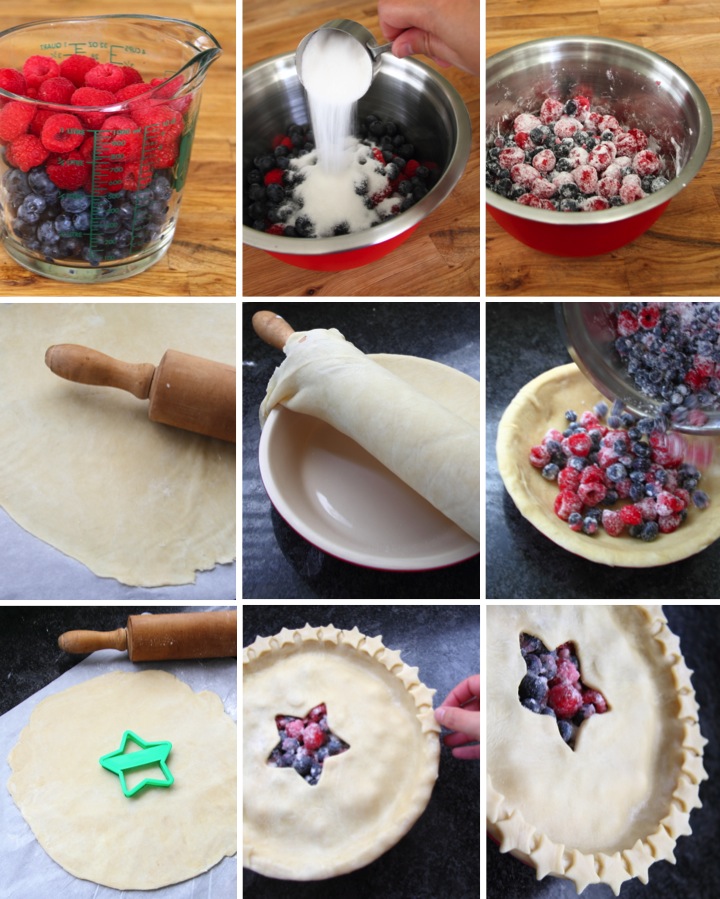
Ingredients List
- 4-5 cups berries (depending on the size of your pie pan)
- 2/3 cup sugar
- 3 tablespoons cornstarch
- Double pie crust pastry
Directions
- Toss the berries with the sugar and cornstarch to coat and let sit for at least fifteen minutes
- Roll out half of the pastry and line the bottom of a pie plate with it, trimming off excess
- Roll out remaining half of the pastry
- Add berries to the pie plate and then top with pastry
- Trim excess pastry, crimp the edges and cut vents in top crust for steam to escape
- Bake for 45-55 minutes at 375° F until the crust is golden and the filling is bubbling
Tips and Tricks
- I make my own crust (I'll share the recipe in another post) but you can also use store bought
- To make your pastry easier to deal with, keep it in the refrigerator until you are rolling it out
- To prevent your crust from browning too much, wrap it in tin foil for the first 25 minutes of baking
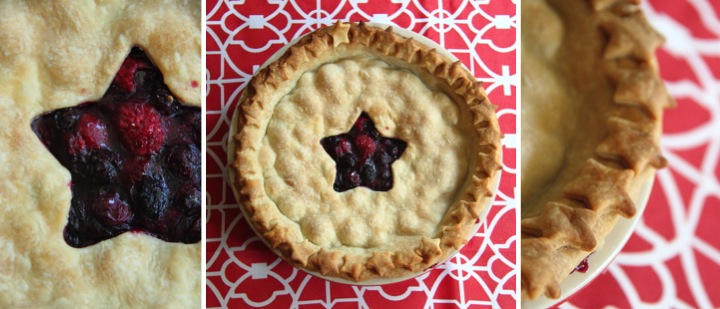
- Part of the fun of making pie is being creative with the vents on your top crust. I love making a woven top, but since today is Fourth of July I used star shaped cookie cutters to make my vent. Any large vents should be made before you place your top crust on your pie
Lisa | Post a Comment | Share Article | Email Article | Print Article 
Halong Bay, Vietnam
08.13.2011
Lisa | 7 Comments | Share Article | Email Article | Print Article 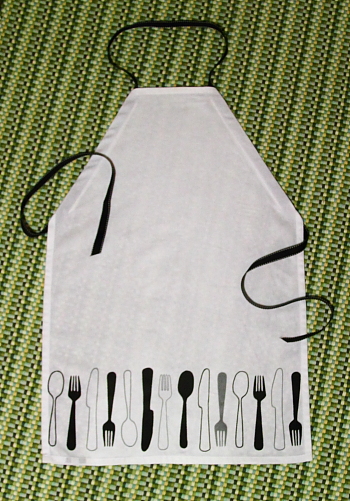 A special little lady that I know is turning ten so I decided to make her an apron for her birthday since she loves to cook and help out her mom in the kitchen.
As I was trying to figure out what fabric to use I happened to see this cute tea towel and I thought it would be perfect to turn into the apron. The tea towel is made from durable twill and I love the graphic silverware motif along the bottom.
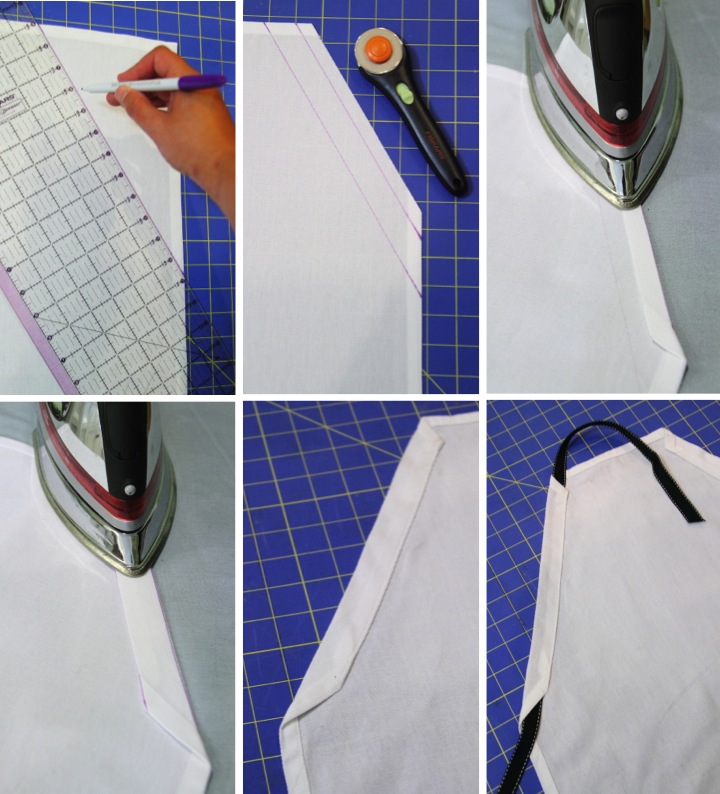
I started by measuring 6" in from the top of the towel and 10" down on each side and used a disappearing ink marker to draw a line between the marks. I drew a parallel line 1" (my ribbon width plus a little extra for my seam) from the original line and then used my rotary trimmer to cut off the excess 1/2" past the second line.
I placed the tea towel right side down on my ironing board and then ironed over the edge along the outermost line. I then folded over the edge again, ironing along the inner line. I pinned it down and then sewed 7/8" of an inch from the folded edge which gave me a channel for my ribbon. I then repeated the same step for the other side. When I was finished I used some water to rinse away the marking guidelines that I had made.
I cut 7' of ribbon and threaded it from the bottom of one channel up to the top and then from the top of the other channel back down. This gave me a loop to go over the neck and then ties for around the back. I trimmed the ribbon on an angle and then used a dab of fray check to make sure it wouldn't unravel.
The measurements that I used worked for the dimensions of my tea towel and the size of the little lady I am making this for. If you are trying this, you may need to adjust according to your needs to make things proportional. Also, my ribbon is grosgrain and seems to stay in place, but if you use something more satiny that is slippery, you may want to add a stitch or two to keep the ribbon in place or knot the ends of ribbon so it doesn't slide out.
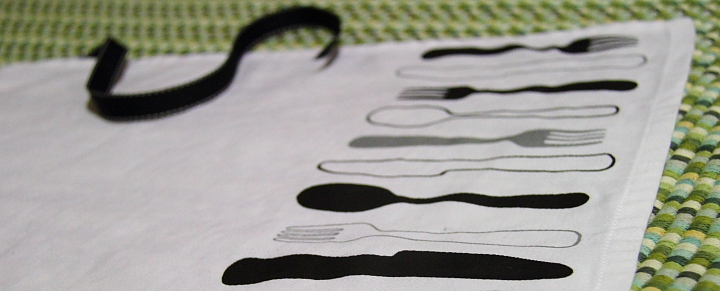
The project was really easy to make and I think it turned out cute. I hope that the birthday girl likes it!
Lisa | Post a Comment | Share Article | Email Article | Print Article 
Sydney, New South Wales
Australia
11.2010
Lisa | Post a Comment | Share Article | Email Article | Print Article 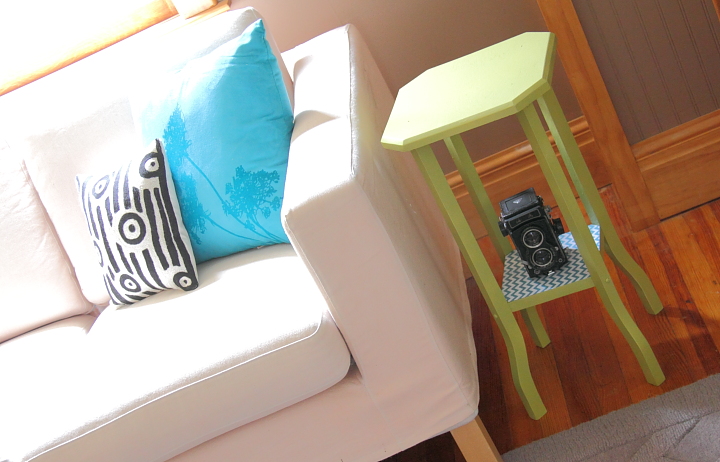
On Saturday I dropped off two donation boxes at the Ann Arbor ReUse Center full of household goods that I had purged from my home. While I was there I couldn't resist looking around a bit and I picked up a cute but very battered little end table for $5. 
I have wanted a table to go on the end of my love seat in my living room for a while, but I needed something with a small footprint since I don't have much space. I think the little table I found was meant to be a plant stand but it is just the right size for my purposes. The height is great and now I have a spot for guests to place a drink when I am entertaining at my home.
The table was sturdy and the wood was in good shape, but the cream paint finish was grungy and quite poorly applied. I cleaned up the table and gave it a coat of spray primer followed by two light coats of spray paint in Spring Sprout.
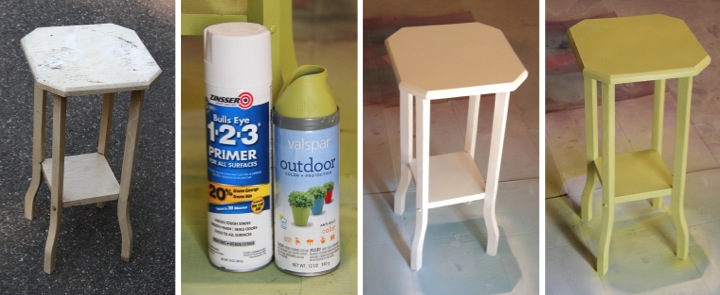
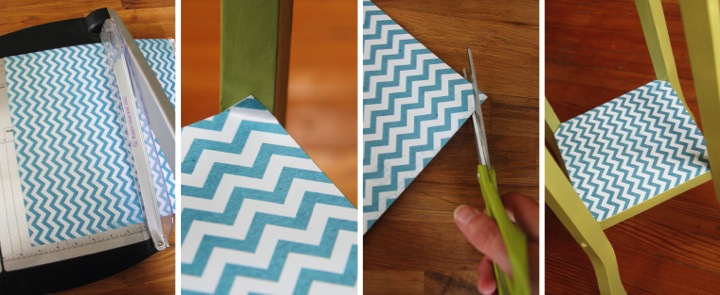
Once I let the table dry for a day I decided to add some paper to the bottom shelf for fun. I measured the shelf and then cut a piece of teal chevron scrapbook paper down to a square of the right size. The shelf attaches to the legs at an angle so I needed to trim off the corners to make the paper fit. I placed the paper on the shelf and then folded the paper up where it hit the leg. This gave me a guideline for trimming the corners and ensured a perfect fit.
I think that the table turned out really cute and I can't beat the price of less than $11 ($5 table + $4.98 spray paint + $0.89 paper). It looks really bright and cheerful now.

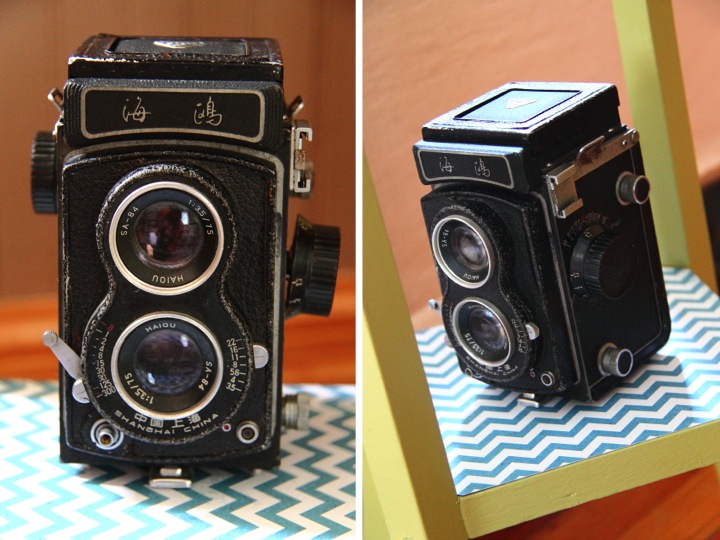
The table fits wonderfully next to my love seat. I thought that the little shelf would be the perfect place to display the vintage camera that I picked up at a little flea market in Shanghai, China. It isn't in working order but when I saw it I couldn't resist buying it, loving taking photos as much as I do. My favorite part about it is that it actually has markings on it indicating that it was manufactured in Shanghai.
Have you made over anything recently? Are you up to any spray painting? I think I must spray paint something once a week. It's a compulsion I tell you!
This post is linked to the "Thrift It Challenge" on Our Fifth House.
Lisa | 6 Comments | Share Article | Email Article | Print Article  tagged Home, Treasures From My Travels
Norton Simon Museum
Pasadena, California
United States
12.2010
Lisa | Post a Comment | Share Article | Email Article | Print Article June wasn't my best month for tackling my 2012 New Year's resolutions of purging and organizing my home and finishing up projects around the house. Between my vacation to Panama, a work trip and then a weekend away at a friend's cottage I was out of town a lot. I am happy with what I managed to accomplish while I was home, though. 
Resolution 1: Purge & Organize
I met my goal of having a volume of at least one trash cart (between my recycling and regular trash) out on the curb on garbage pick-up morning every Monday in June, except when I was in Panama. Here's my breakdown:
- June 4: 1/2 full trash + 1/2 full recycle = 1 total
- June 11: Nothing (In Panama)
- June 18: 3/4 full trash + 1/2 full recycle = 1-1/4 total
- June 25: 1 full trash + 1 full recycle = 2 total
Yesterday I also dropped off two large boxes to donate to the Ann Arbor ReUse Center. Purging is a slow process for me but I am trying.
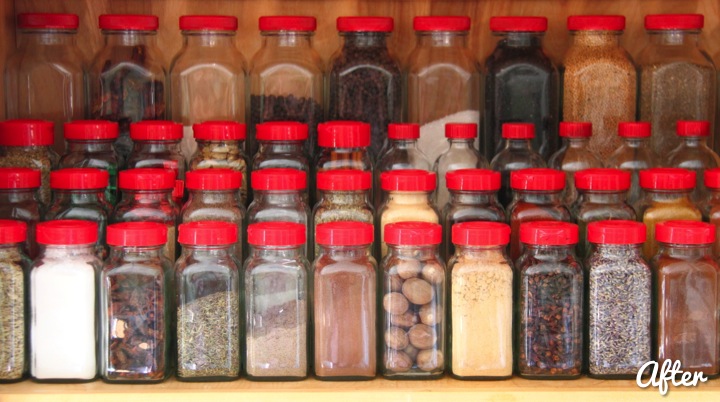
On the organizing front I didn't do much other than organize my spices. It is a nice little improvement that I am enjoying. It makes finding what I need when I am cooking much easier.
Resolution 2: Finish Up Projects
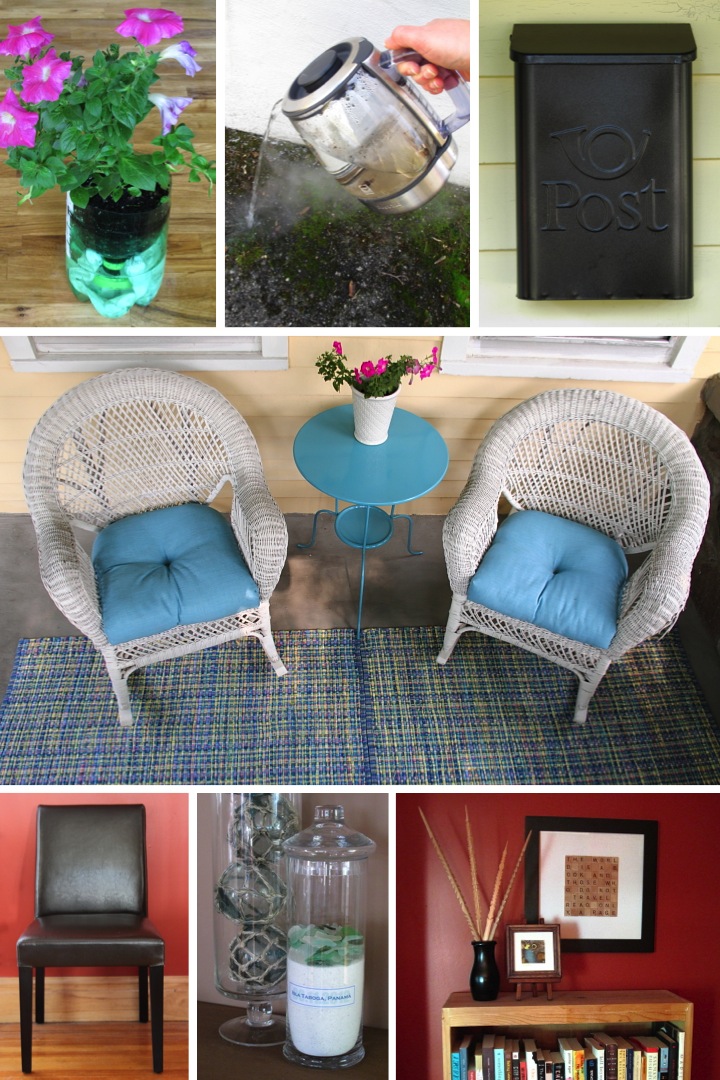
With the summer weather I was inspired to tackle a bunch of little projects on my front porch including making a self watering planter and sprucing up the outdoor table, hanging a new mailbox and putting a new rug out front. Also outdoors I managed to finally eradicate the moss from my driveway. Almost a month later I am happy to report that it still hasn't come back!
Inside the house I worked on a few home decor projects like finally using my Scrabble tiles to make some wall art and making a souvenir display from sea glass I picked up along the beach in Taboga, Panama. My favorite thing this month that was checked off my to-do list was that after several years of pining for new dining room chairs, I finally found a great deal on a set of eight.
How are you coming along on your New Years Resolutions? Did you finish up any big projects in June?
Lisa | Post a Comment | Share Article | Email Article | Print Article 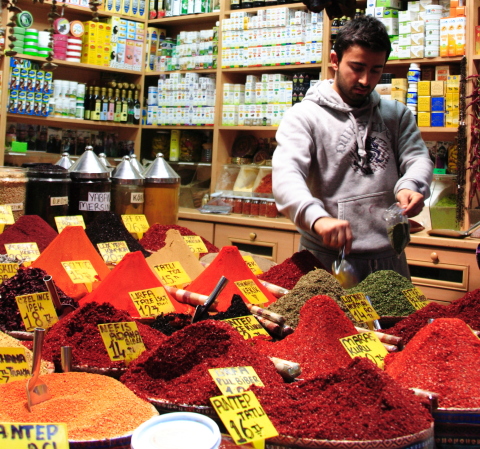
Istanbul, Turkey
11.28.2009
Lisa | Post a Comment | Share Article | Email Article | Print Article 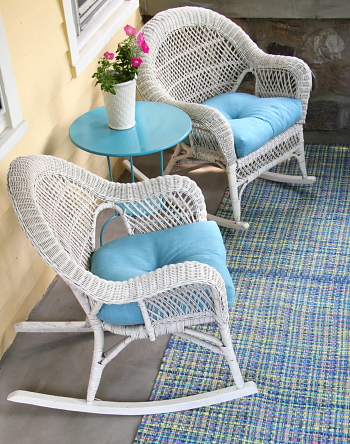 As I was sorting through things at my house I rediscovered a pair of 30" x 50" woven rugs.
When I lived in California I would frequently stop by the Crate and Barrel Outlet Store in Berkeley for some fabulous deals. I picked up these rugs for a ridiculously cheap price (around $10, if I remember correctly). After I moved to Michigan I didn't really have a place where they fit in my house so they have just been sitting packed away. 
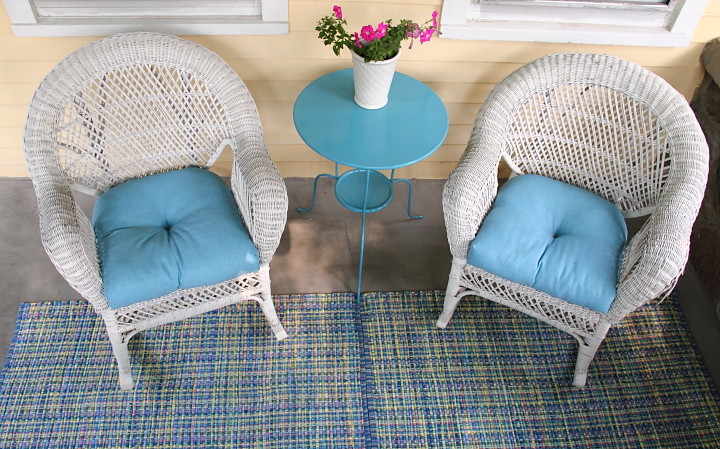
When I stumbled upon them again I thought that they would be perfect on my front porch. The weave has a royal blue with teal, yellow and pink which really ties together all of the colors I have out front. They aren't meant to be outdoor rugs, but they are sheltered from the elements by the porch roof and since I already had them and wasn't using them I figured I have nothing to lose.
I decided to make a runner out of the rugs. To attach them together I used the marvel of modern life: duct tape. Is there anything you can't use duct tape for? It really is amazing...
I flipped one of the rugs face down and adhered a piece of duct tape along the edge, overlapping half of the tape on the rug. I then flipped it right side up and then aligned the edge of the second rug so that they butted up together snuggly. I pressed the rug firmly into the tape and then flipped them upside down once more. I added some cross pieces of duct tape to ensure they wouldn't pull apart. After that I flipped the rugs right side up again and I was done.
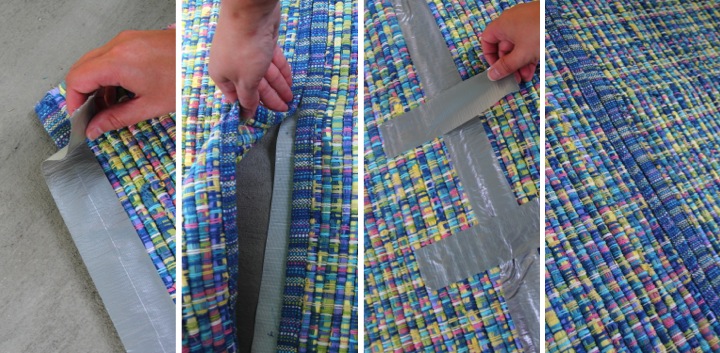
You can see the edges of the rug since the edge binding is a little different, but the rug pattern is so busy I don't think it is very noticable. I think the rug looks great and really makes the porch a cohesive space.
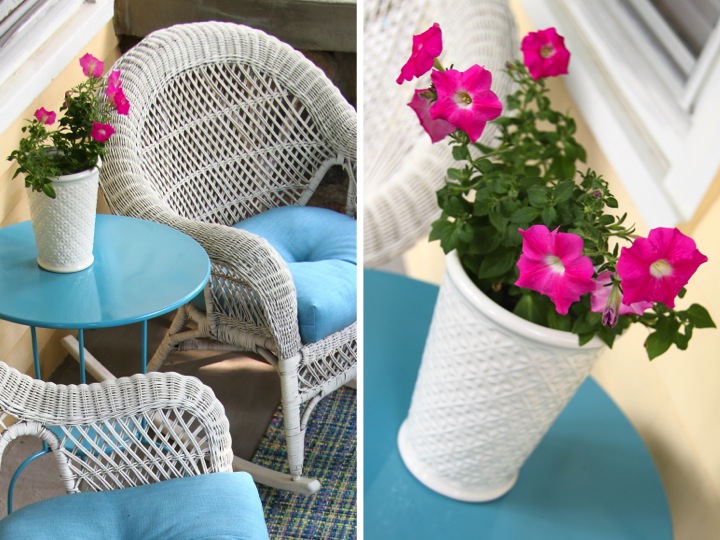
While I was out on my porch taking pictures I thought I would give an update on my self watering planter that I made using a soda bottle. Two weeks later in ninety degree heat, my petunia is thriving. It has been blooming nonstop and I couldn't be happier. I checked on the water in the resevoir today and it was a little low so I added some, but that is all the maintenance I have had to do.
I decided to switch out the pot I had set the planter inside. I found this white pot on clearance at Target for $6 and liked that it wasn't as tall as the pink tin I had originally used. I think it looks more balanced now.
I love spending time on my front porch and this latest update makes it feel even more cozy and welcoming to me. Have you been hanging out on your front porch this summer?
Lisa | 2 Comments | Share Article | Email Article | Print Article