Making A Child's Apron from a Tea Towel
A special little lady that I know is turning ten so I decided to make her an apron for her birthday since she loves to cook and help out her mom in the kitchen.

As I was trying to figure out what fabric to use I happened to see this cute tea towel and I thought it would be perfect to turn into the apron. The tea towel is made from durable twill and I love the graphic silverware motif along the bottom.
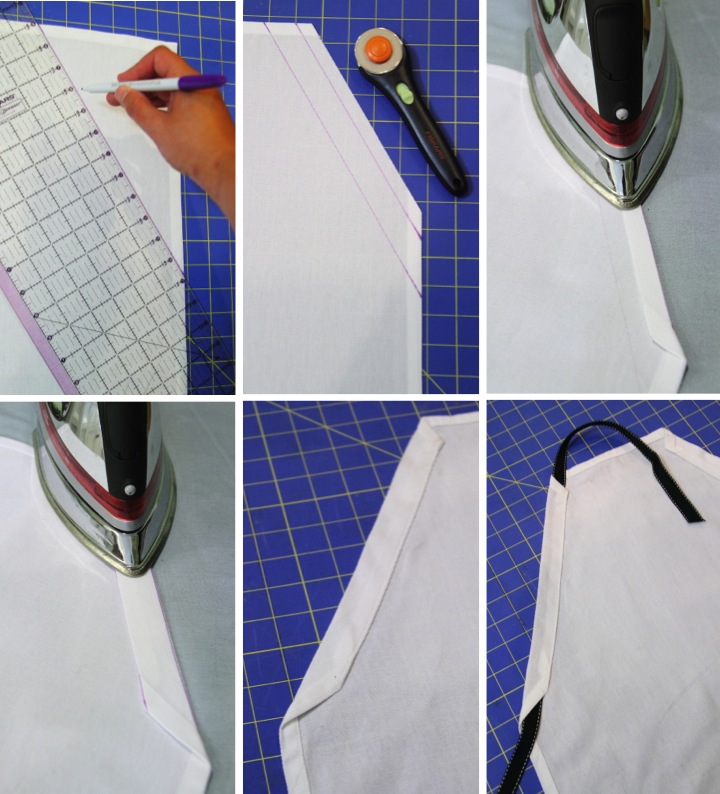
I started by measuring 6" in from the top of the towel and 10" down on each side and used a disappearing ink marker to draw a line between the marks. I drew a parallel line 1" (my ribbon width plus a little extra for my seam) from the original line and then used my rotary trimmer to cut off the excess 1/2" past the second line.
I placed the tea towel right side down on my ironing board and then ironed over the edge along the outermost line. I then folded over the edge again, ironing along the inner line. I pinned it down and then sewed 7/8" of an inch from the folded edge which gave me a channel for my ribbon. I then repeated the same step for the other side. When I was finished I used some water to rinse away the marking guidelines that I had made.
I cut 7' of ribbon and threaded it from the bottom of one channel up to the top and then from the top of the other channel back down. This gave me a loop to go over the neck and then ties for around the back. I trimmed the ribbon on an angle and then used a dab of fray check to make sure it wouldn't unravel.

The measurements that I used worked for the dimensions of my tea towel and the size of the little lady I am making this for. If you are trying this, you may need to adjust according to your needs to make things proportional. Also, my ribbon is grosgrain and seems to stay in place, but if you use something more satiny that is slippery, you may want to add a stitch or two to keep the ribbon in place or knot the ends of ribbon so it doesn't slide out.
The project was really easy to make and I think it turned out cute. I hope that the birthday girl likes it!

 Tuesday, July 3, 2012 at 6:13AM
Reader Comments