Welcome

My name is Lisa and I'm a crafty girl with wanderlust working as an engineer by day. My blog chronicles projects in my home as well as pictures and stories from my travels.

Search


Instagram

Blog Index
The journal that this archive was targeting has been deleted. Please update your configuration.
Navigation
Tuesday
May212013

Wedding Dress Shopping at the Brides Project

Frank and I are getting married in two months so it seemed high time that I get myself a wedding dress, especially since his little nieces already have their dresses for the wedding. I did a little searching online for dress shops in Ann Arbor and stumbled upon The Brides Project. They have a small store where they sell donated wedding dresses at discount prices with the proceeds going to the Cancer Support Community of Greater Ann Arbor. It seemed like a wonderful opportunity for me to get a lovely dress while also supporting a great cause so I booked an appointment last weekend for Frank's mom and I to check it out.

The Brides Project shop was small but packed with beautiful dresses. For the time that we booked we had the whole place to ourselves with a volunteer who helped me find and try on dresses. It was really fun searching through the racks with Frank's mom and I tried on a ton of dresses.

I loved the cute tags that read "I Do/I Donate" and all of the hangers that were hand painted with different messages about cancer prevention, treatment and support.

It was such a fun, low stress experience that was exactly what I wanted for dress shopping. In a little over an hour we had found a wonderful dress that I am excited to wear this summer. 

If you are looking for a wedding dress in Southeast Michigan, I would definitely recommend taking a look at The Brides Project. They are open by appointment only and schedule by two hour blocks, dedicated to only one bride at a time. I had a great experience and will likely donate my dress back to The Brides Project after my wedding.

Monday
May202013

Owl Baby Quilt for Haneen's Little Man

On Saturday night I went to a baby shower for my friend, Haneen, who is expecting a little boy. I decided to make her a baby quilt and wanted to create something bright and fun. When I stumbled across Forest Life in Retro by Michael Miller I knew it would be perfect to use in the quilt with its vibrant colors and whimsical animals.

With the Forest Life fabric as my inspiration I quickly sketched out a quilt design of a simple patchwork of squares broken up by a strip across the top. For an extra touch I decided I wanted to add an applique patterned after the owls in the fabric. 

I started by digging through my fabric scraps and fat quarters picking out some reds, oranges, yellows, greens and one aqua pattern. Along with some of the Forest Life print, I cut 49 5"x5" squares from my scraps that I had chosen. I arranged them into rows of 7 squares and then joined 2 rows for the top and 5 rows for the bottom of the quilt.

I then cut 2 strips of a coordinating striped fabric at 2" plus a white strip at 5-1/2". I completed joining the quilt together with the two rows of squares on top followed by one of the striped strips, the white strip, the second striped strip and finally the seven rows of squares on the bottom.

With the base of the quilt complete I was ready to make the owl applique. I picked out an owl and branch that I liked from the fabric and then photo copied them, enlarging by 200% to make a pattern.

I used the freezer paper method to make the applique. Using my photo copies as a pattern, I cut out the owl, branch and three leaves from freezer paper with shiny side of the paper face down. I then laid the freezer paper, shiny side face up on the wrong side of the fabric I was using and trimmed the fabric to 1/4" around the freezer paper. Folding the edges of the fabric around the pattern I ironed the fabric to the freezer paper, cutting slits in the fabric when necessary to ease around the edges. 

I placed my applique pieces on the quilt and used my iron again to temporarily tack the pieces in place and then used a blind stitch to permanently attach them. Once the appliques were sewn onto the quilt I turned the quilt over, carefully cut away the center of the area behind the applique and then pulled the freezer paper out.

I basted the quilt top to the batting with the Forest Life print for the quilt back and then quilted it with a straight pattern on either side of the seams.  I completed the quilt by adding brown binding around the edges.

Haneen really liked the quilt and I hope that her little man enjoys snuggling in it. 

This was my first time doing a freezer paper applique and it was really easy and fun, plus I think it turned out cute. I will definitely have to try it again sometime.

If you are interested, check out some of my other baby quilts: Alphabet Quilt, Pastel Patchwork Quilt, Neutral Diamond Quilt, Pink Stack Quilt and Doll Bed with Bedding and Patchwork Quilt

Monday
May202013

Picture of the Day: Terraced Walls at Machu Picchu

Machu Picchu, Peru
11.2007 

Friday
May172013

New Curtains for the Living Room

With Frank and I getting married in two months we have been working through combining his things with mine at my house. One of the big items under consideration is what to do with the TV.

I have only ever owned one TV, a TV/VCR combo that I bought used over ten years ago that is up in my bedroom. Frank, however, is a man of electronics and felt that I should join the rest of humanity that has a TV built in this century in their living room. Compromise won the day and Frank's enormous TV (by my standards, he thinks an 80" TV would look much better) moved into the living room but I got to put it on a cute sideboard that I had instead of Frank's glass and metal TV stand. 

The only problem is that with super couch taking up a large area of the living room there is only one wall to put the TV on, which happens to have two windows on it. I tried a bunch of things like centering the TV between the windows and centering it on the window to the right but everything looked awkward.

I decided that the best solution would be to hang curtains all along the wall. I looked around a bit and found three great options from the Target Threshold line that I brought home. Since Frank is going to be living here, too, I decided to start getting his opinion on decorating matters around the house and asked him about the curtains.

I ruled out the navy curtain with cream embroidery on the left right away since it was a more purple hue than the rug and really clashed. I was partial to the middle one but Frank hated it. He said that it looked like a really bad shower curtain and that he wouldn't wish that curtain on his worst enemy and then proceeded to make jokes about the curtain for the next few days.

That meant the curtain on the right was the clear winner. It is navy blue with some thin stripes of shades of blue and white running across it. The fabric is a nice heavy weight and the curtain is fully lined with white light blocking fabric. Curtains can be pricey and these seemed to be a great quality for the price.

The store only sells the curtains in 84" lengths, but I was able to order them online in 95". I used a brushed silver drapery rod and four panels to create my wall of curtains.

I really like how it turned out and it is a good step in the right direction, I think. I still have a lot to do, like some wire management, finding a solution other than a kitchen stool for the cable box and figuring out how to balance out the TV being off center on the wall.

I also got another set of curtains for the window that is over the couch. Having done this is giving me the itch to paint the walls (I want to go with a lighter color to balance out the dark curtains) but there are other larger projects that need to come first. My house is a never ending project but I love it.

Just for fun, and to look back at how far things have come, here is a photo of this same spot in demo mode about a month after I bought my house. Plaster and lathe removal, I do not miss you...

Thursday
May162013

Picture of the Day: Ancient Brick Column Construction at Pompeii

Pompeii, Italy
3.21.2012 

Wednesday
May152013

Blackberry Rhubarb Pie

I love just love rhubarb and found some beautiful stalks at the grocery so I decided to pair it with some blackberries to make a pie for Mother's Day. Rhubarb is pretty tart so I added a good bit of sugar to offset it in the pie filling. I think that the rhubarb and blackberries made a great combination and it was a big hit with everyone at Mother's Day dinner.

Ingredients List
- 3 cups rhubarb, cut into 1/2" cubes
- 3 cups blackberries
- 1 cup sugar
- 3 Tbsp. corn starch
- 1/2 tsp. salt
- Double pie crust pastry

Directions
- Cut the rhubarb and place it in a bowl with the blackberries
- In a separate small bowl stir together the sugar, corn starch and salt
- Pour sugar mixture over rhubarb and blackberries, tossing filling to coat the fruit
- Roll out half of the pastry and line the bottom of a pie plate with it, trimming off excess
- Roll out remaining half of the pastry
- Add filling to the pie plate and then top with pastry using lattice crust or other vented style top
- Bake for 20 minutes at 425° F, turn heat down to 350° F and back another 35-40 minutes until the crust is golden and the filling is bubbling 

Since I was making this pie for Mother's Day I decided to used a heart shaped cookie cutter to cut vents in my top crust before putting on top of my pie. For the edges I simply pinched the two crusts together.

Tips and Tricks
- I make my own crust but you can also use store bought
- To make your pastry easier to deal with, keep it in the refrigerator until you are rolling it out
- To prevent your crust from browning too much, wrap it in tin foil for the first 20 minutes of baking

If you are interested, check out my apple pie recipe, my mixed berry pie recipe, and my recipe for making pie crust from scratch

Wednesday
May152013

Picture of the Day: Paper Lanterns at the Temple of Literature

Temple of Literature (Văn Miếu)
Hanoi, Vietnam
8.14.2011

Tuesday
May142013

Cherry Blossom Viewing at the Osaka Mint Bureau

Cherry blossom season is a very special time in Japan. Culturally, cherry blossoms have been treasured for centuries and in the spring it is very common for people to travel to visit places famous for their blossoms.

One of those places is the Osaka Mint Bureau (造幣局, Zoheikyoku), famous for having a path near the Yodo River lined predominantly with yae-zakura (八重桜). Yae-zakura are double-flowered cherry trees (i.e. have more than five petals) and typically have a later blooming season than other cherry trees in mid to late April. 

The cherry trees were originally transplanted from the Todo clan's residence to the Mint Bureau early in the Meiji Era. In 1883 the Director-General of the Mint Bureau at the time suggested that the viewing of the cherry blossoms should be shared with all of Osaka and the annual tradition of the Torinuke (通り抜け) was born. Torinuke means pass-through in Japanese and refers to the cherry-tree tunnel that visitors walk through to admire the lovely cherry blossoms.

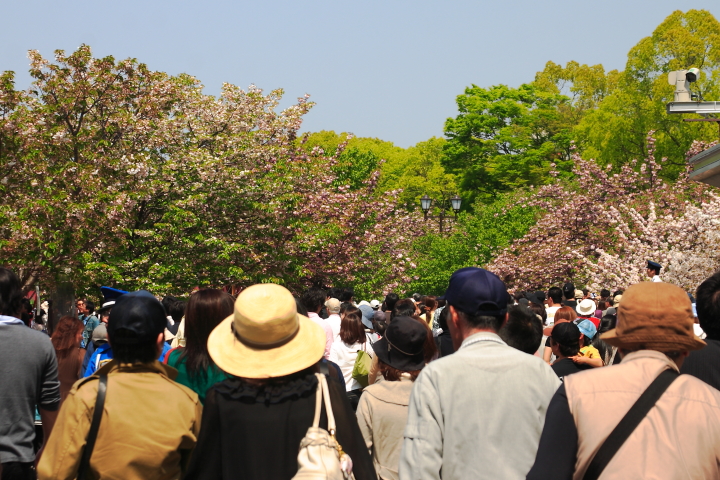
Every year for only one week in April the Mint Bureau opens up its path for cherry blossom viewing and people flock there from all over Japan to take in the beautiful flowers. In April 2009 when I visited, the Mint Bureau was celebrating its 126th season with over 600,000 people enjoying the 348 cherry trees from 126 varieties.

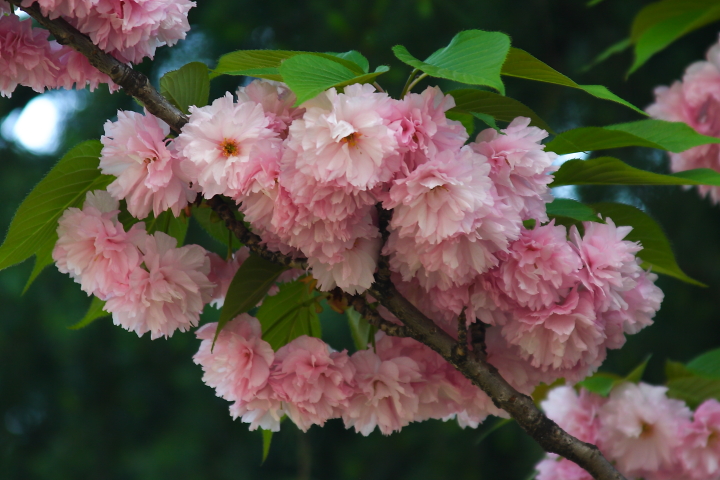
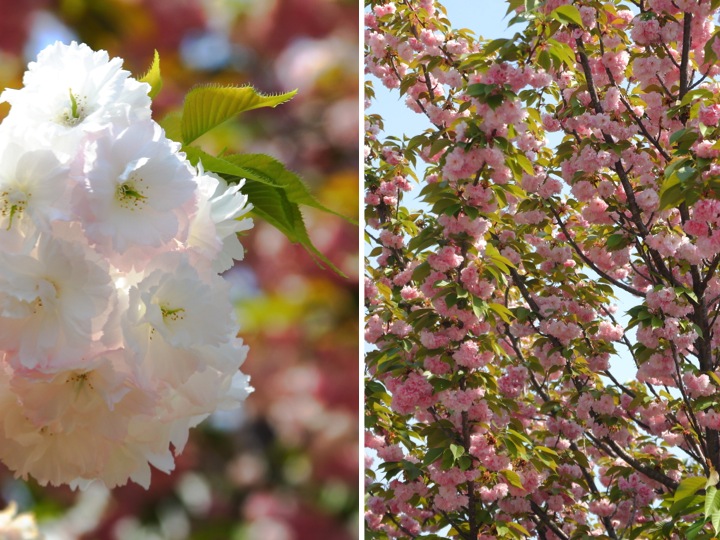
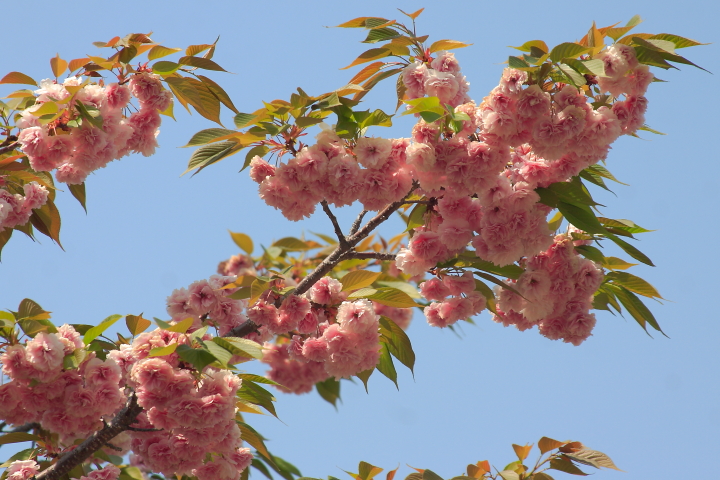
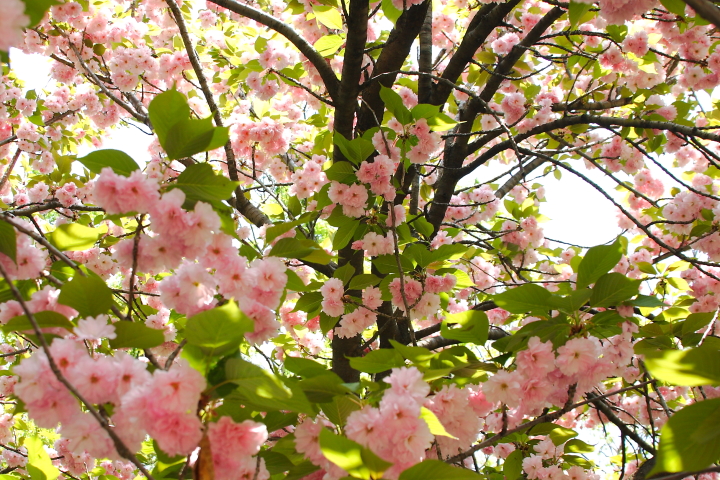
The yae-zakura were gorgeous with very showy blossoms in shades of pink and white. It was quite spectacular to see all the trees in bloom.

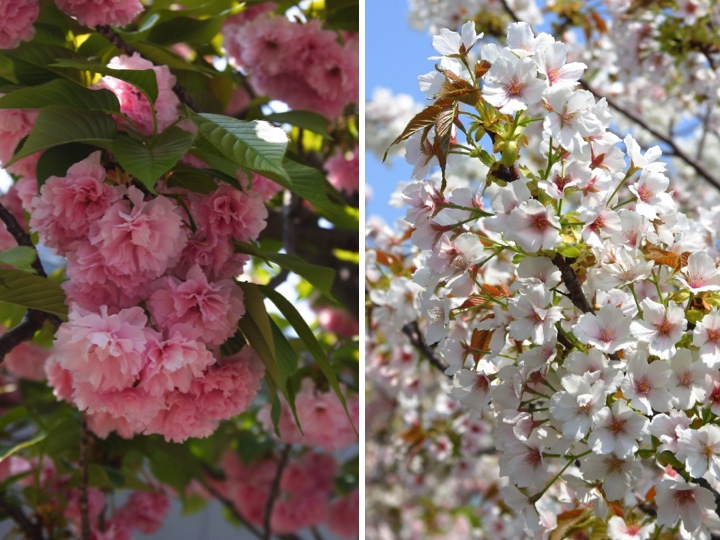
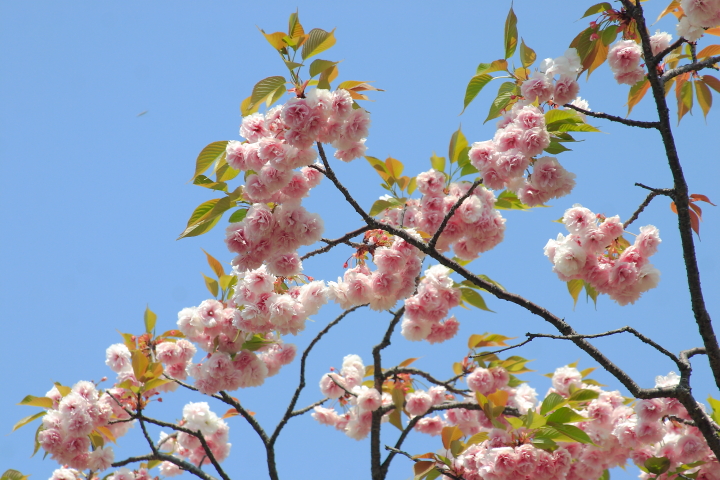
In the photo on the right below is one of the few trees that I saw at the Mint Bureau that had blossoms with a single row of five petals.

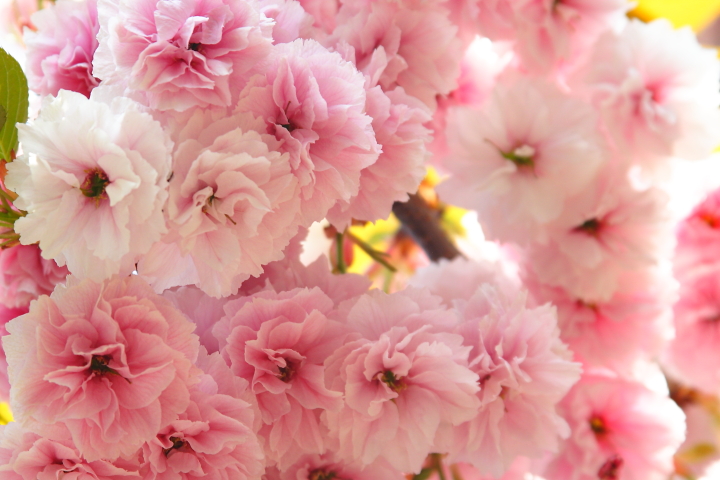
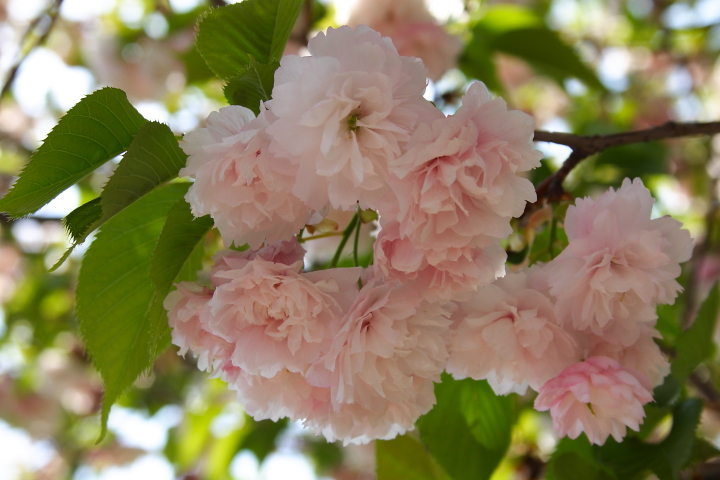
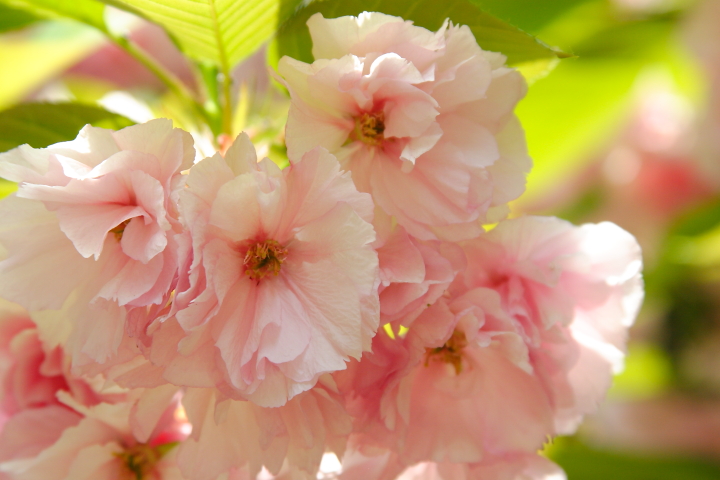
Every year the Mint Bureau picks a blossom of the year. In 2009 when I visited the blossom of the year was the Hirano Nadeshiko (平野撫子) which has beautiful, large pink flowers. The name originates from the fact that the cherry tree is found in Hirano Shrine in Kyoto and the petals of the blossoms have a serrated edge that resembles a dianthus flower (Nadeshiko in Japanese). 

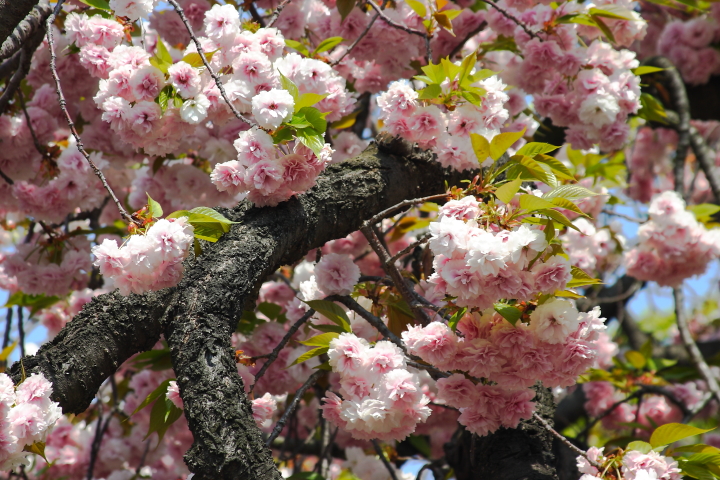
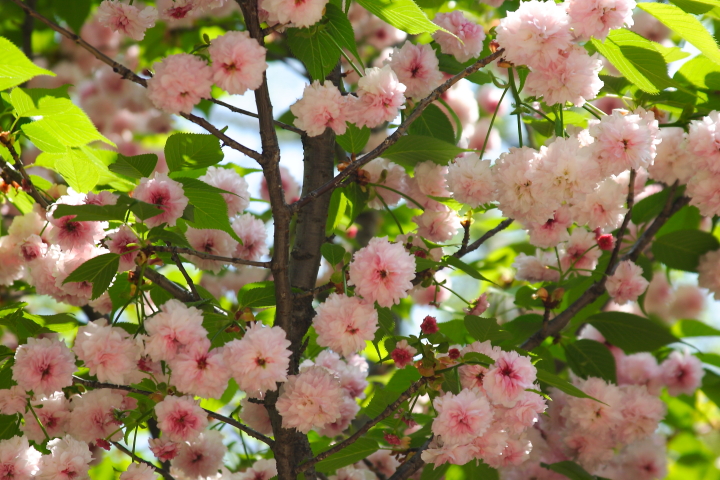
I continued walking along the path, stopping to look at each unique tree, marvelling at the amazing cherry blossoms.

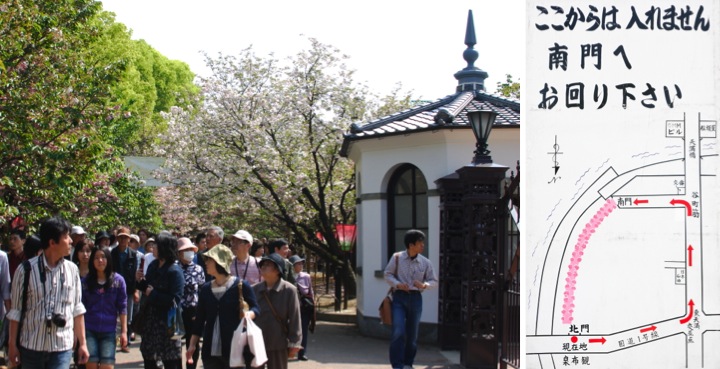
I should back up and mention at this point that when I had arrived at the Mint Bureau, I had a little trouble finding the entrance because I did not realize that you cannot go in the North Gate. As an American I am used to being able to walk around in any direction I would like, but in typical, efficient Japanese fashion you can only walk the path from south to north. To be honest, it was a madhouse full of throngs of people and the only thing that kept it reasonably sane was the fact that everyone was walking in the same direction.  

After my experience, as I exited from the North Gate I couldn't help but take a picture of a little sign that read 「ここからは入れません。 南門へお回りださい。」which means "You cannot enter from here. Please go around to the South Gate." I loved how the sign was complete with a map directing you back around to the proper entrance.

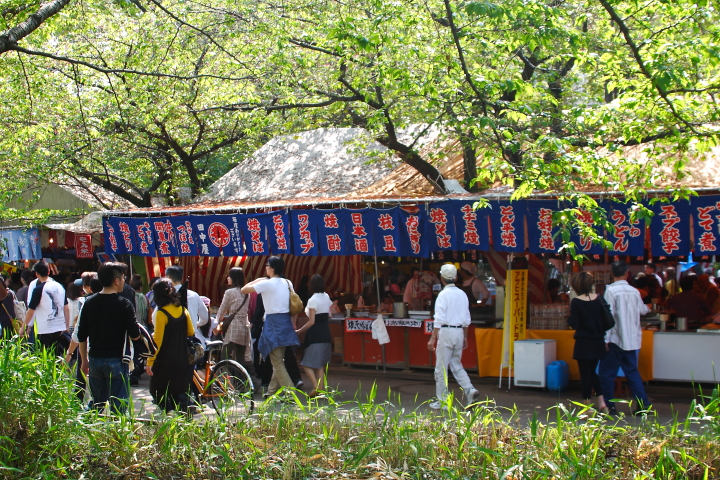
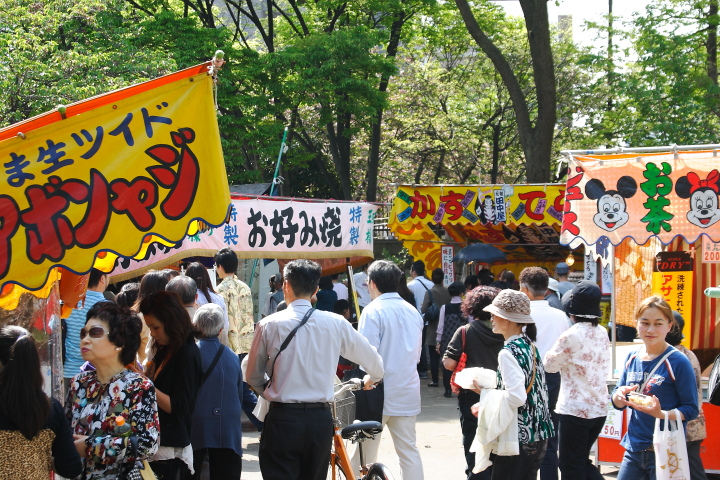
Upon exiting the Mint Bureau, I headed toward a park path right on the river that was lined with yatai (屋台). Yatai (literally meaning "shop stands") are mobile food stands and are very popular at festivals or special events. An individual food stall will typically specialize in a particular food like okonomiyaki, ramen, takoyaki, etc.

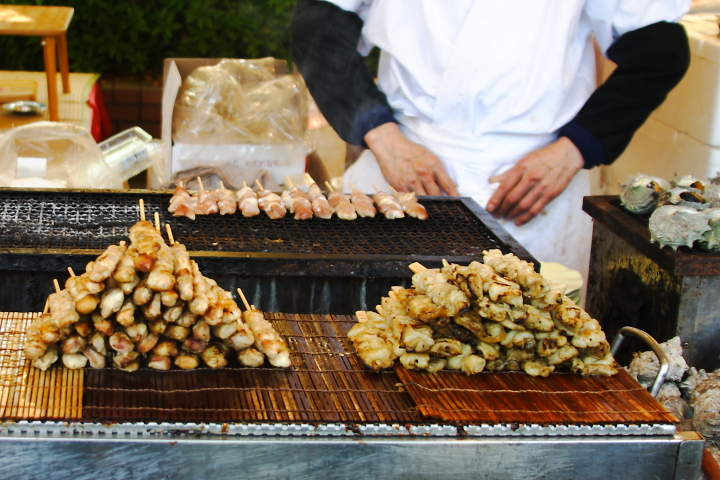
I particularly like kushiyaki which are grilled skewers. I was pretty hungry from walking around all morning so I bought two chicken skewers (yakitori) from a little stand for a snack.

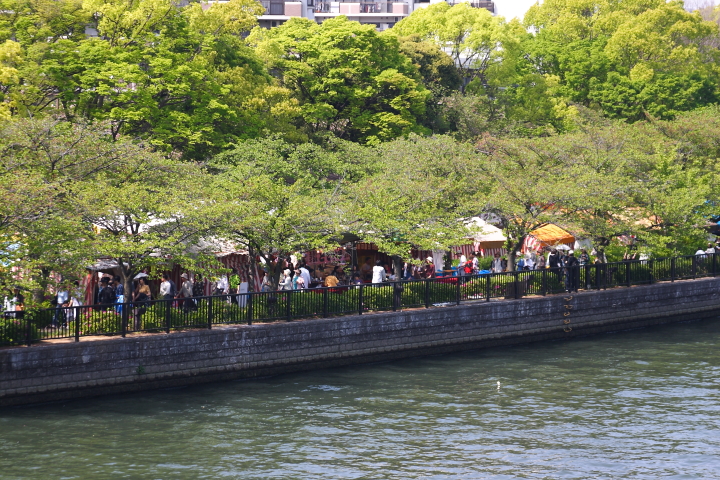
As I headed back over the Yodo River for some more sightseeing in Osaka, I had one last view looking back at the yatai stands lining the river with the Mint Bureau beyond. 

Seeing the cherry blossoms at the Mint Bureau was really beautiful and I would definitely recommend it if you are in Japan on the week that it is open. Admission is for seeing the cherry blossoms is free. If you go keep in mind that you have to enter from the South Gate and that the Mint Museum is closed for the week of cherry blossom viewing.

The closest train stations, Temmabashi (Tanimachi Line on the subway), Osaka Tenmangu (Tozai Line) and Temmabashi (Keihan Railway), are all about 15 minutes walk from the Mint Bureau. For particulars about hours and which week in April the Mint Bureau will be open for cherry blossom viewing, please check the Osaka Mint Bureau website.

Tuesday
May142013

Picture of the Day: Canal Boat Ride in Bruges


Bruges, Belgium
6.12.2004 

Monday
May132013

Coconut Cream Cheese Icing

For Mother's Day yesterday I brought the desserts for the dinner gathering we had with Frank's family. Since Frank's mom absolutely loves coconut, I decided that for one of the desserts I would make would be a chocolate cake with coconut cream cheese icing.

For the cake I used Ina Garten's Beatty's Chocolate Cake recipe. It makes an awesome, moist cake and is one of my very favorites. Be warned, however, that if you make this cake that because it is so light it is a little on the fragile side. If you make it you definitely need to line the bottom of the pans with parchment paper as the recipe states in order to get the cake to release without sticking. One time when I was out of parchment paper I just buttered and floured the pan and had some issues getting the cake to release properly.

For the icing I used my coconut cream cheese icing recipe. Due to the flaked coconut in the icing, you can't get the icing to be super smooth on the cake, but it is so delicious that it doesn't really matter. I will always choose taste over aesthetics any day with my baking.

Once the cakes were cooled I iced the two layers of chocolate cake with the coconut cream cheese icing and then topped it with some more flaked coconut for fun.

Frank's mom really loved the cake and it was a big hit with everyone at dinner yesterday. It is definitely a combination I will make again. 

Ingredients List
- 1 (8 ounce) package cream cheese, softened
- 1/2 cup butter, softened
- 1 tsp. vanilla extract
- 4 cups powdered sugar (about 1 lb.)
- 2 Tbsp. coconut milk
- 1-1/2 cups flaked coconut 

Directions
- Cream butter, cream cheese in mixer with vanilla extract
- Mix in powdered sugar one cup at a time
- Stir in coconut milk to achieve desired consistency
- Fold in flaked coconut with spatula 

Tips and Tricks
- To achieve the desired consistency, if the icing is too thin add more powdered sugar and if it is too thick add more coconut milk
- You can add a teaspoon of coconut extract if you want to intensify the coconut flavor
- Because of the cream cheese in the frosting it is best to keep the iced cake in the refrigerator until serving