Monday
Jun032013
Picture of the Day: Bell at Brimstone Hill Fortress

St. Kitts
7.03.2011
 Lisa | Post a Comment | Share Article | Email Article | Print Article

My name is Lisa and I'm a crafty girl with wanderlust working as an engineer by day. My blog chronicles projects in my home as well as pictures and stories from my travels.

St. Kitts
7.03.2011
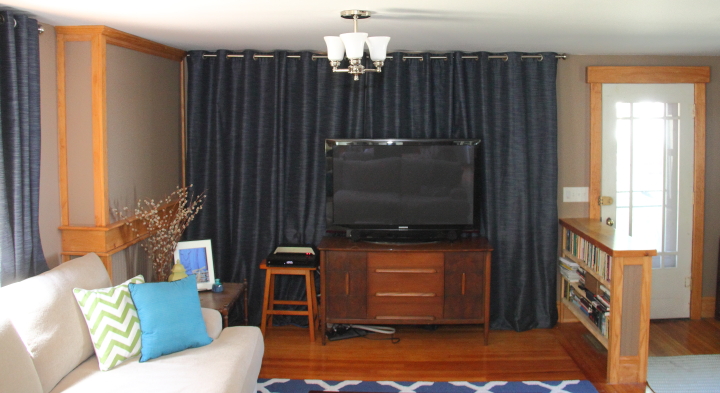
Lisa | Post a Comment | Share Article | Email Article | Print Article When I last shared my living room I had put up curtains behind the TV on my old sideboard, but needed a solution to store all of Frank's electronics since stacking them on a stool wasn't doing it for me. I decided to build a cubby that would sit on top of the sideboard to house all of the electronics.
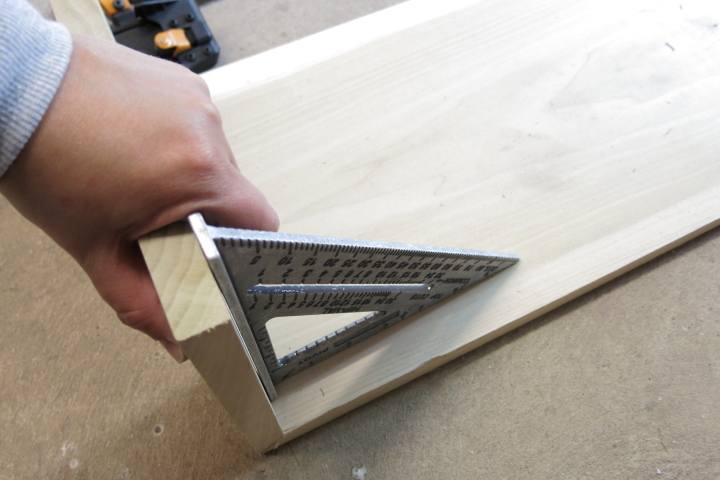
I made this project using one 1x12 and one 1x2 boards. I started by cutting a top piece and two side pieces from the 1x12. I cut 45 degree mitered ends on the top board and also on one end of each of the side boards.
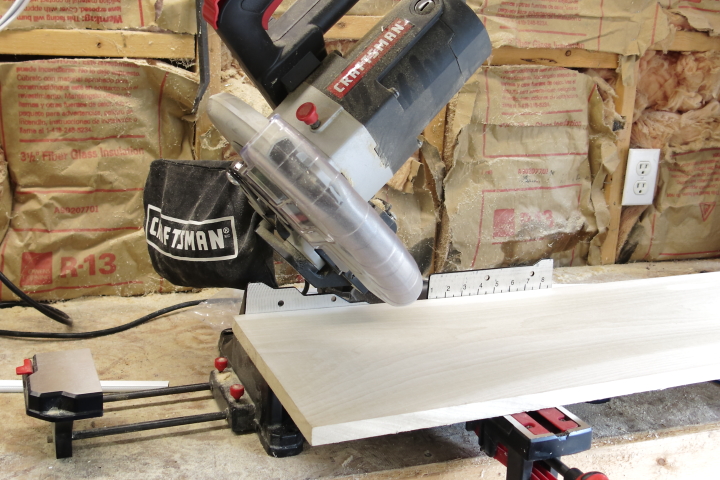
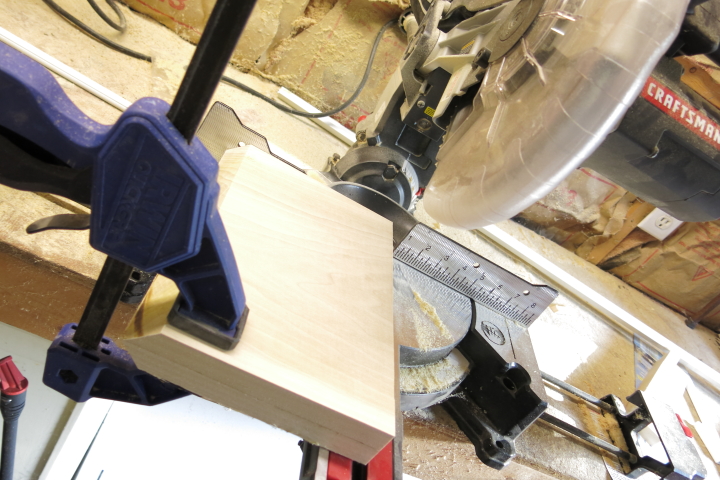
Because I like to do things quick and easy I cut the side boards a bit long, clamped them together and cut the square ends at the same time so they would be the exact same height.
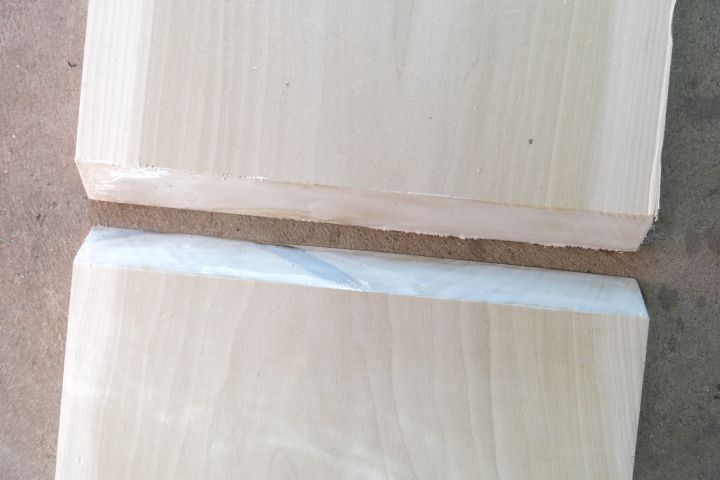
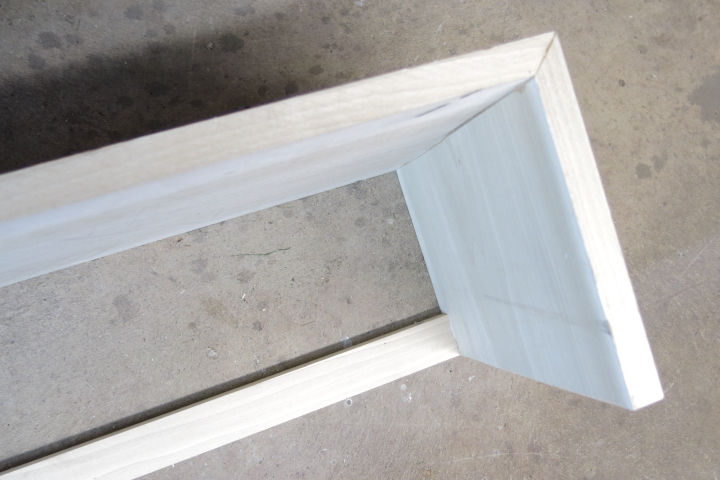
I started to assemble the cubby by spreading some wood glue on all of the mitered ends.
I laid the top upside down, put the sides in place and used my speed square to make sure it was all square. I then attached the sides using my brad nailer.
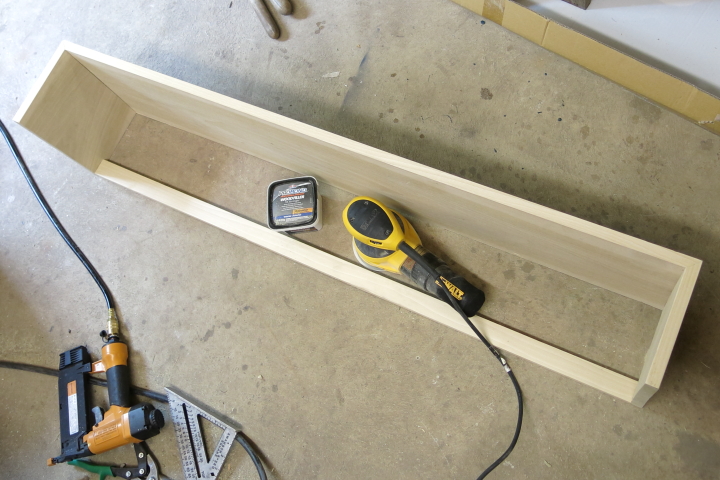
In order to make sure that the cubby stayed square I attached a back brace from the 1x2. I cut it to fit and attached it with wood glue and my brad nailer. I didn't want a solid back beacuse I wanted the electronic cords to be easy tucked down behind the sideboard.
I used some wood filler to cover the holes from the brad nailer and then sanded the whole piece down smooth.
To complete the cubby I wiped it down with a tack cloth and stained it using a mixture of cherry and walnut stains that I custom mixed together to match the sideboard. After it was complete I put it in place under the TV and tucked all of the electronics inside the cubby.
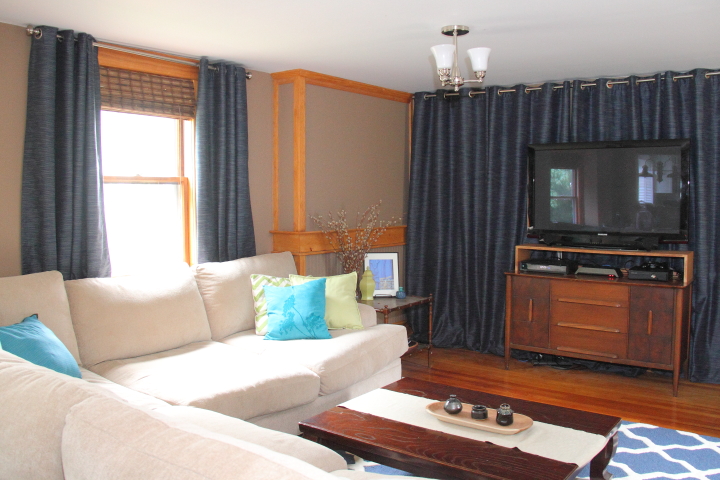
Unfortunately, while the stain is a good color match to the sideboard it is a little lighter in shade. I'm debating about whether I want to darken it up a bit more or just leave it as is.
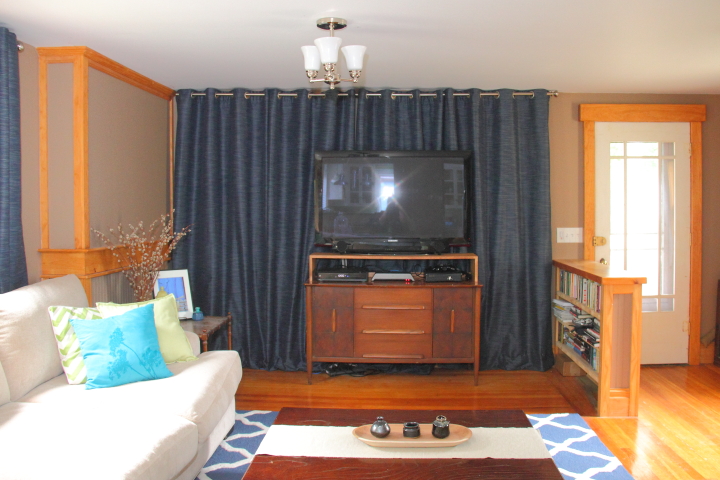
I still need something to place on the left side of the wall to balance having the TV off center, but the room is starting to come together.
Lisa | 7 Comments | Share Article | Email Article | Print Article 
Cartagena, Colombia
3.11.2013
Lisa | 1 Comment | Share Article | Email Article | Print Article  Lake Pukaki
South Island, New Zealand
9.19.2005
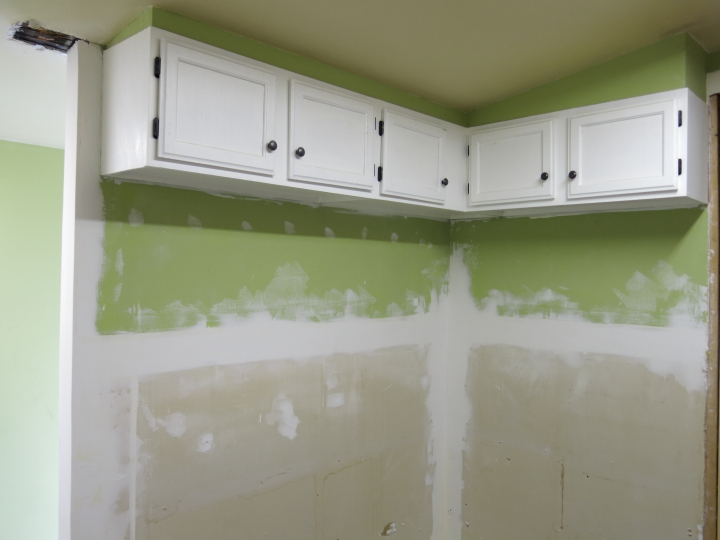
Lisa | 2 Comments | Share Article | Email Article | Print Article Over the holiday weekend I made some progress in my laundry room. I last shared a picture of the room where it looked like this: 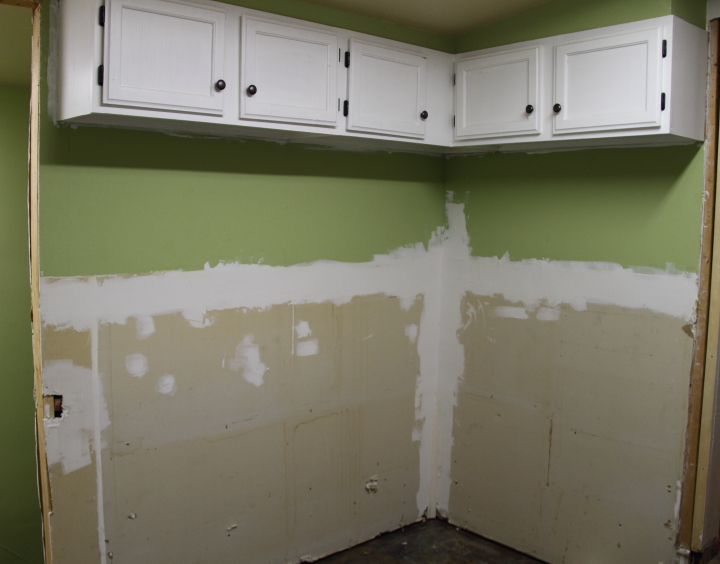
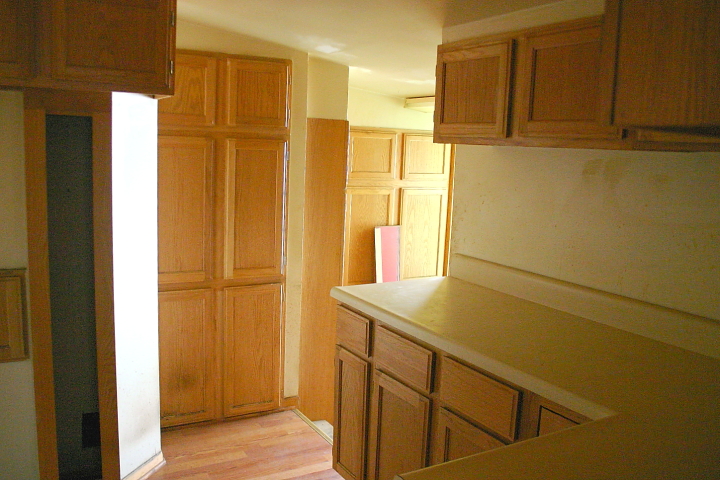
The previous owners had redone this area of the home at some point and it had been a crazy warren of cabinets. Also, they hadn't left enough room to properly turn the corner and go out the back door. The little wall that the cabinets were on was not load bearing so I had previously decided to shorten the wall back the the next stud. This meant that now I needed to drywall the raw edge of the wall. Below is a picture of the laundry room from when I first bought my home showing the strange layout.
Let me preface this by saying that I am by no means an expert at taping and mudding, but if I can do this anyone can. First, I evened up the raw edges of the end of my exposed drywall with my rotozip since I had made a bit of a mess with my sawzall when I first cut back the wall. Next, I cut a piece of drywall to size and attached it to the end of the stud with drywall screws. I also secured the ends of the existing drywall to the stud since it was not well attached. Using a drywall screw setter when driving in the screws makes a little dimple in the drywall so that the screw head is set below the surface of the drywall so that you can cover it with mud later.
Instead of using traditional metal corner bead I like to use paper-faced corner bead. I think it is easier to install since you don't need to nail it in place. You simply apply drywall compound along both sides of the corner and then press the paper-faced corner bead into the mud with the metal side facing in. For a good result, you need to make sure that the corner bead is firmly set in mud along the whole corner on both sides. Any excess drywall compound that has squeezed out when you embedded the corner bead you can clean up by running a putty knife along the tape which also helps make sure it is firmly secured. Once it is dried, you apply another layer of drywall compound over it, sand it smooth once it is dry and repeat again.
As I said before, my mudding skills leave a little to be desired, but I can make up for it with my sanding. To get my corner perfect I had to do three rounds of mudding and sanding, but it was worth it in the end.
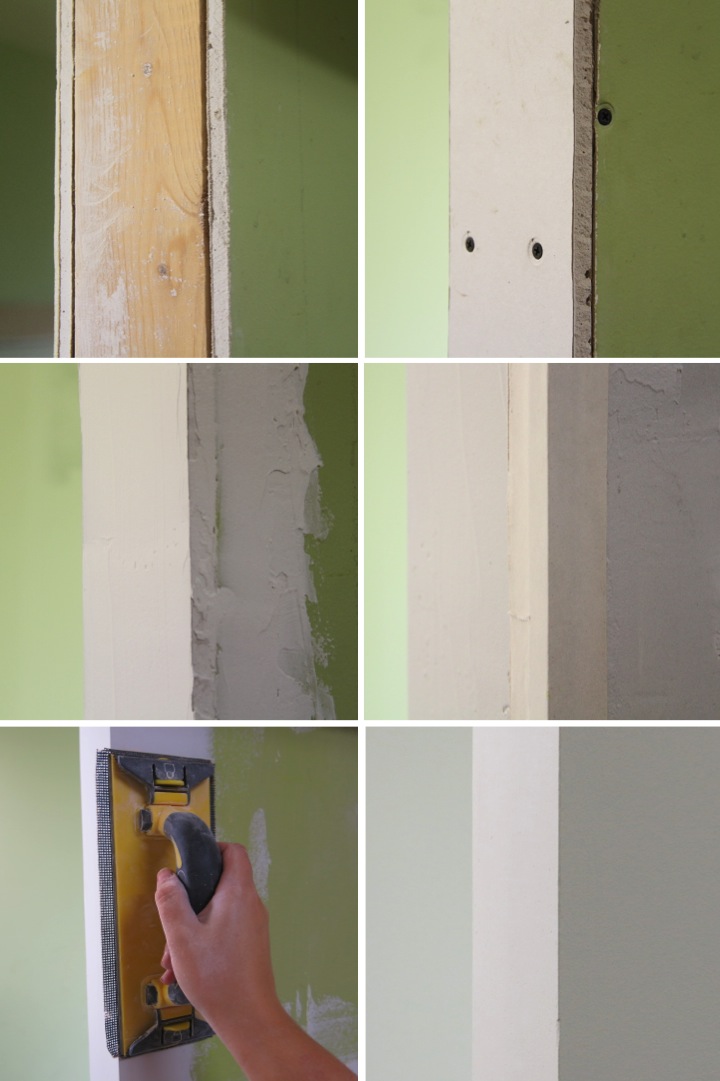
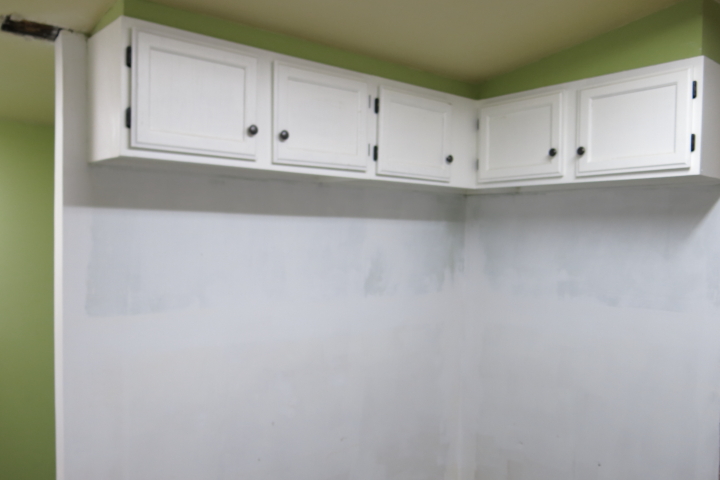
With everything finished up my wall now looked like this:
I didn't patch the ceiling spot where I had cut back the top plate because the drywall I had was too thick and I figure I will repair and paint the ceiling all at one time when I swap out the fluorescent lights.
I primed the whole area and then gave the wall a light sanding once the primer was dry. When you prime the walls, you'll notice that the area that has been mudded is really smooth, but the area with raw drywall can have some fuzzy texture. Sanding the primed walls knocks down the fuzz and ensures a smooth finish.
I then finally put on two coats of a pale green paint and the corner is ready for me to reinstall the base cabinets.
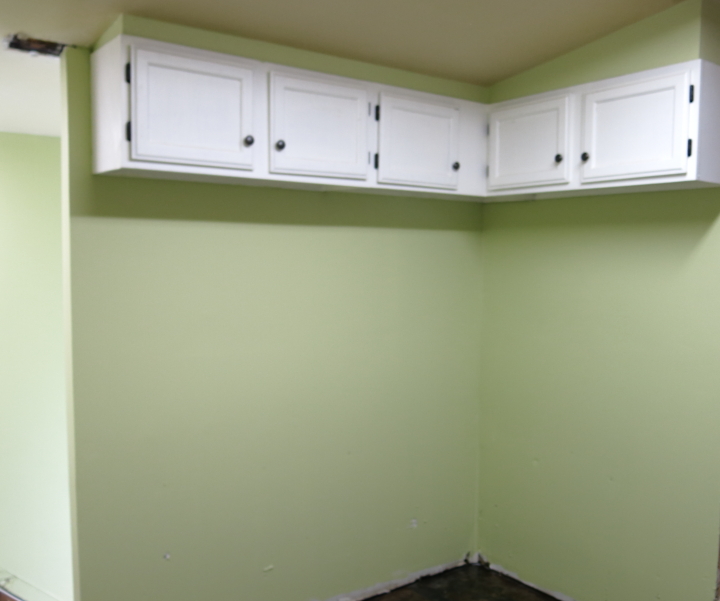
I've still got a long way to go but progress feels good! I'm getting excited as the room is starting to come together...
Lisa | 1 Comment | Share Article | Email Article | Print Article 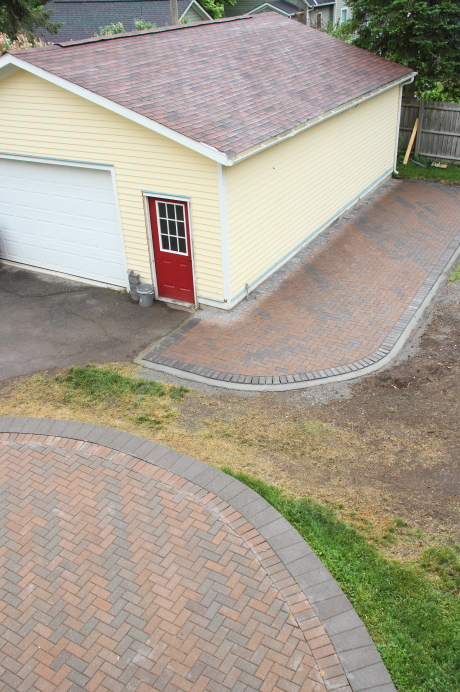 After getting the stump removed from my backyard I moved on to my next step of my backyard plans for this summer, having a patio put in along the side of the garage.
I like to do a lot of things around my house, but I decided to hire out the patio and pergola. When I was a struggling student my time was worth nothing so I would always do everything myself. As I've grown older my time has become valuable, especially as I always have more on my plate and ideas in my head than I have time to do.
In determining if I want to tackle a project myself I consider whether I will save money doing it myself and if it is something I think I will have fun doing. If the answer to both is no then I will hire it out.
Regarding the patio, I did a lot of research for the first patio I had put in on the back. When I calculated the costs for me, including equipment rental, I wasn't going to save money and it would have taken me all summer which meant I would have had to delay other projects that I was excited about working on. I ended up hiring a local landscaper and within a week the back patio was complete, allowing me to enjoy it all summer.
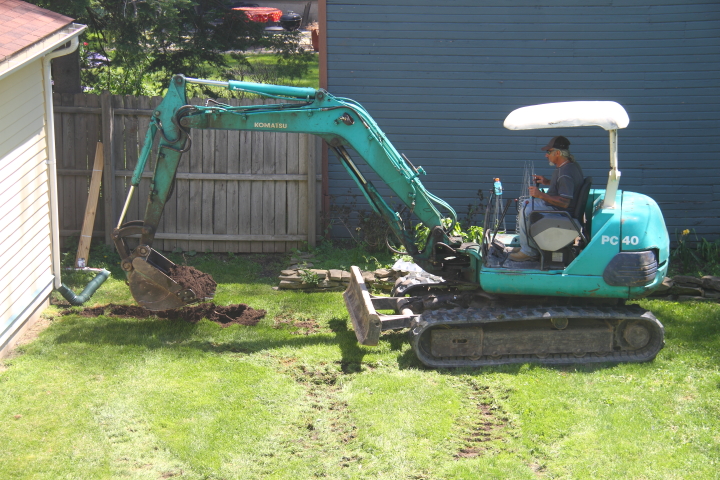
For this second patio, I hired the same contractor to have matching pavers laid down along the side of the garage. They started by excavating along the side of the garage. Some of the excess dirt was used to help even out the grade of the backyard.

They then put down a base of crushed stone and fine gravel to create a flat, stable base for the patio. After lots of tamping and leveling the surface was ready for the pavers.
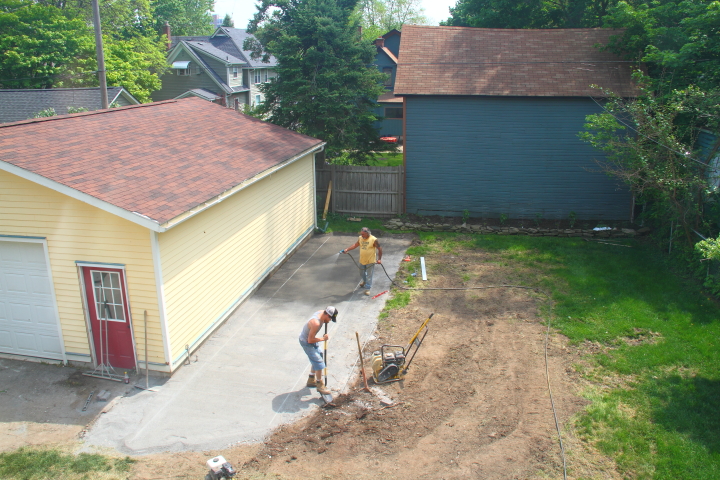
The pavers were put in using a herringbone pattern for the field and then a concrete border was put in to stabilize the patio and keep it anchored. After brushing sand into the cracks between the pavers the patio was complete.
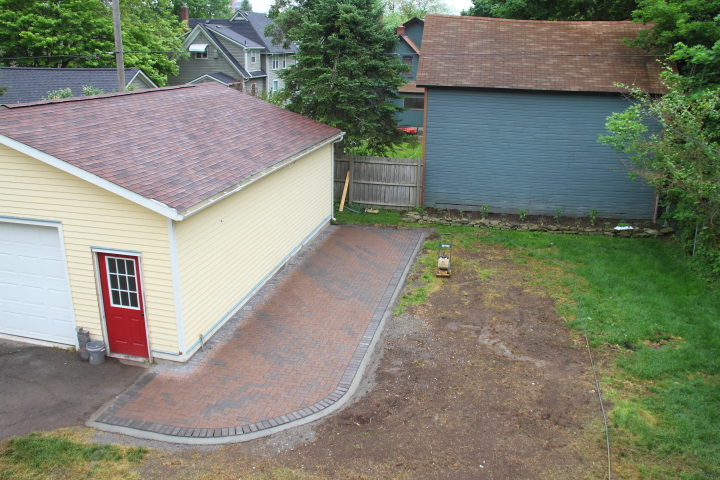
I love how the patio turned out and it is huge, extending 10 feet out and nearly 40 feet deep. Next up is the pergola and then repairing the lawn. I'm really excited about how the backyard is shaping up and I think it will make a fun space to spend the summer.
Lisa | 32 Comments | Share Article | Email Article | Print Article  Positano, Italy
3.22.2012
Lisa | Post a Comment | Share Article | Email Article | Print Article  National World War II Memorial
Washington D.C., United States
3.25.2005
Lisa | Post a Comment | Share Article | Email Article | Print Article 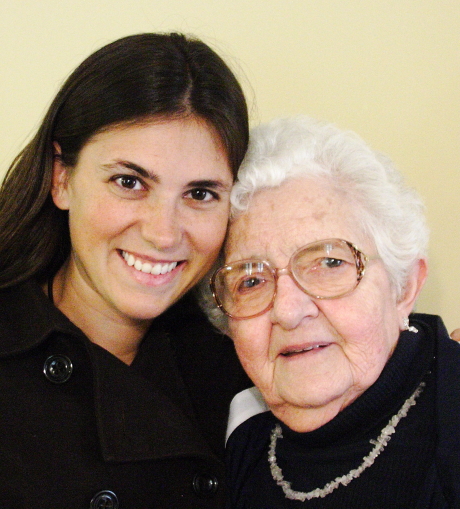 This past week has been a tough one. My beloved Aunt Dorothy passed away after 88 years of filling the world with love and making it a better place.
Truth be told, Aunt Dorothy isn't biologically related to me, but I've known her since I was born and she has been like a grandma to me throughout my life. Her love knew no bounds and she deeply loved not only her family, but also people like my sister and I who she adopted as her own.
Some of my earliest memories were of sitting in her lap and playing with the beautiful brooch necklaces she wore. She and Uncle Milty (her husband) watched me when my parents were at the hospital when my sister was born. I have great memories of playing at Aunt Dorothy and Uncle Milty's house when they lived in Cleveland and visiting them in North Carolina after they moved there. Growing up, Aunt Dorothy was always there providing love and support.
As I got older, she also set a wonderful example for me as a woman to aspire to be like. Through her life she taught me that you should always keep learning and that you can always keep redefining your life. How many women born in 1925 do you know that took a computer programming class?
She retired no less than three times. She was always on the go so she would get bored being retired and end up working again, always making herself indispensable wherever she went. The final time she retired was not much different as she then started volunteering at a hospital.
She truly defined the term "young at heart." Her collection of teddy bears was legendary. She was always on the move and had a quite a lead foot while driving. Watching her tear off down the street in her car always made me smile. She was also a talented piano player and organist. Up through her early eighties she would volunteer to play piano for sing-alongs at a retirement home, often times for people younger than her.
Aunt Dorothy has always been such a constant in my life that that right now I can't really imagine a world without her in it anymore. What is certain is that I have been incredibly lucky to have known Aunt Dorothy and to have had her be a part of my life.
Lisa | 8 Comments | Share Article | Email Article | Print Article  Forbidden City
Beijing, China
11.2008
Lisa | 1 Comment | Share Article | Email Article | Print Article 