Welcome

My name is Lisa and I'm a crafty girl with wanderlust working as an engineer by day. My blog chronicles projects in my home as well as pictures and stories from my travels.

Search


Instagram

Blog Index
The journal that this archive was targeting has been deleted. Please update your configuration.
Navigation
Saturday
May112013

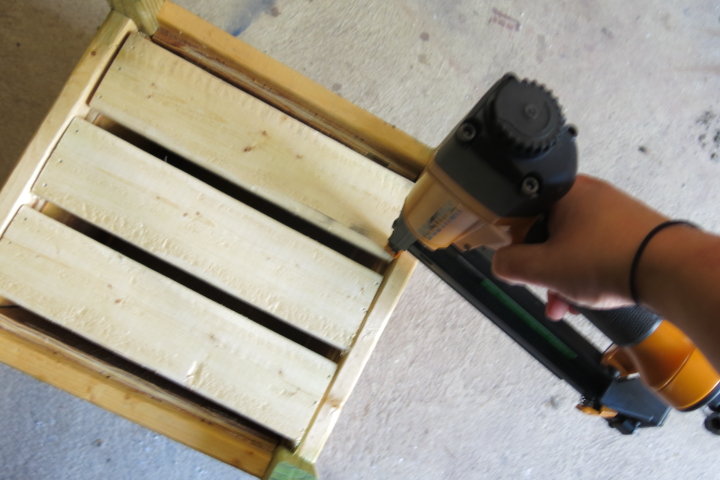
Stump Removal: Take Two

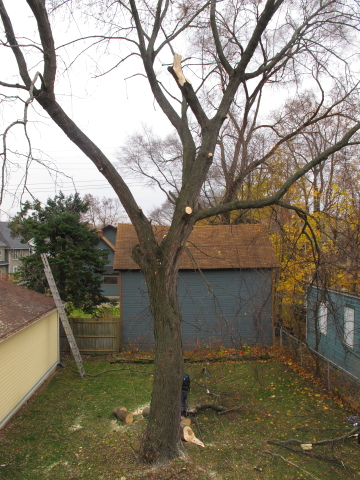
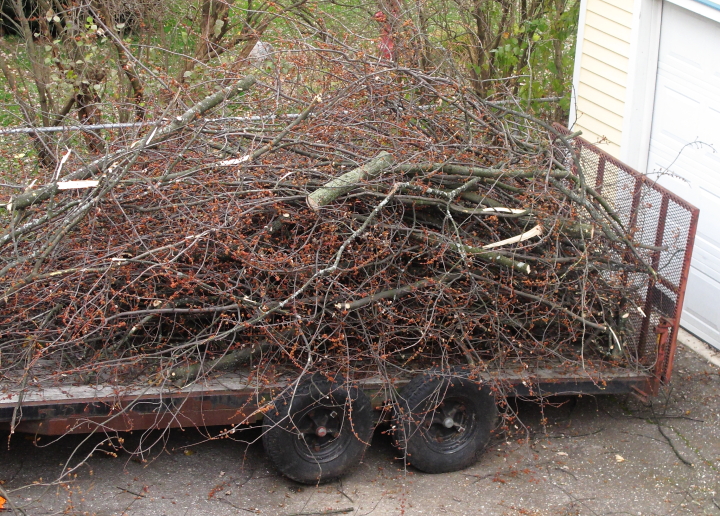
Earlier this week I wrote about taking down the large white maple in my backyard, but still needing to deal with the remnants of the stump. I have been planning to add another patio to my backyard so when I was speaking with the guy that I had put in my previous elevated patio on the back of my house I asked him if he had any recommendations about getting rid of the stump once and for all. He did, I made an appointment and as of the morning the stump is now happily gone!

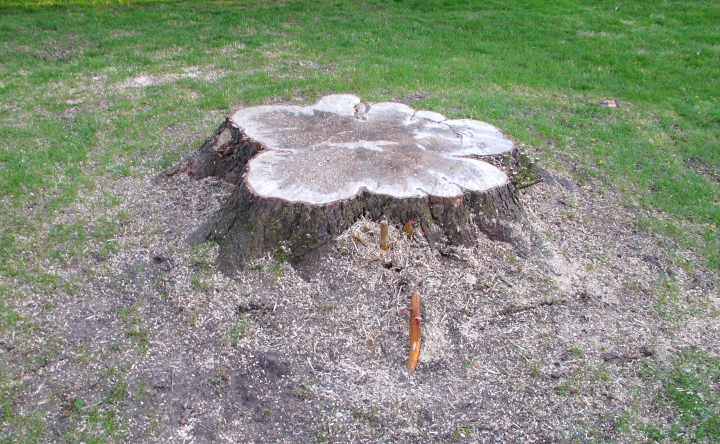
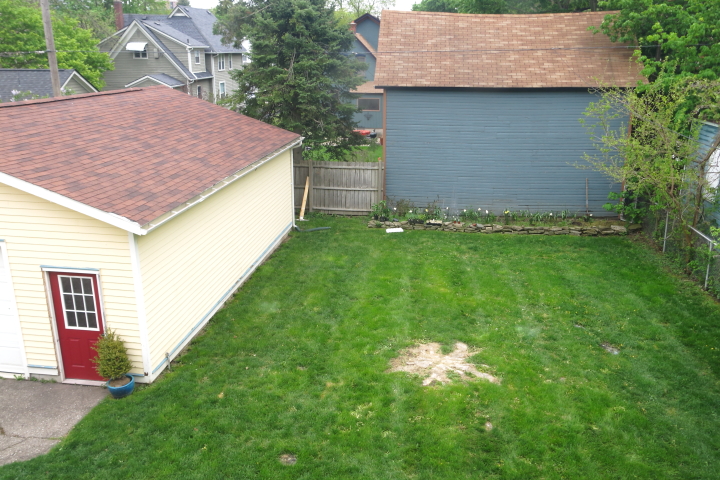
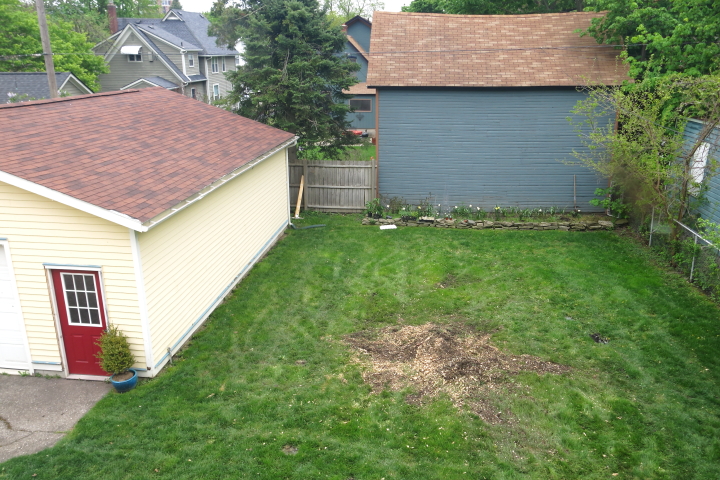
Here is the view of my backyard from my upstairs window at 7:55 this morning with the remnants of the stump still making a little hill in the middle of my back yard.

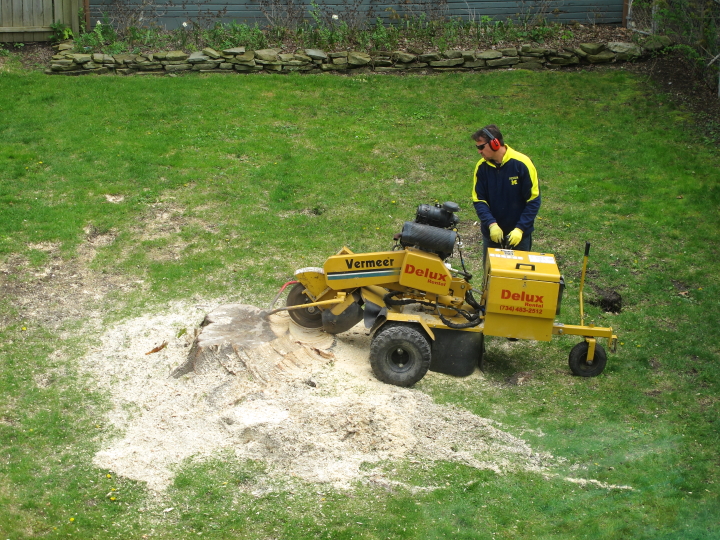
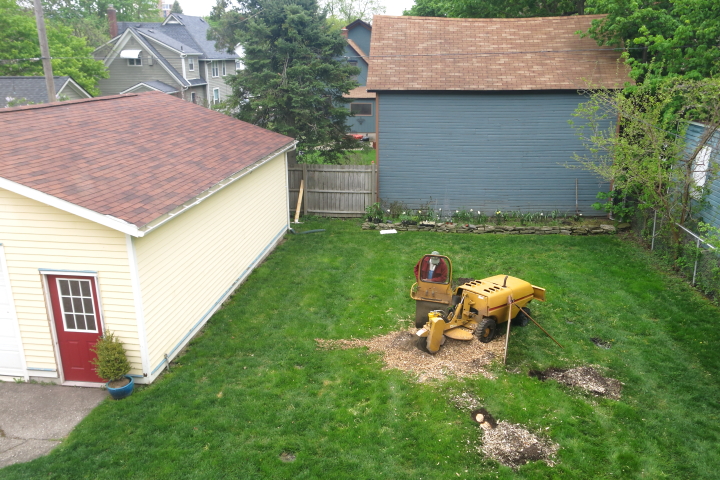
By 8:10 the stump and the surrounding roots which has also reached the surface were on the way to annihilation.

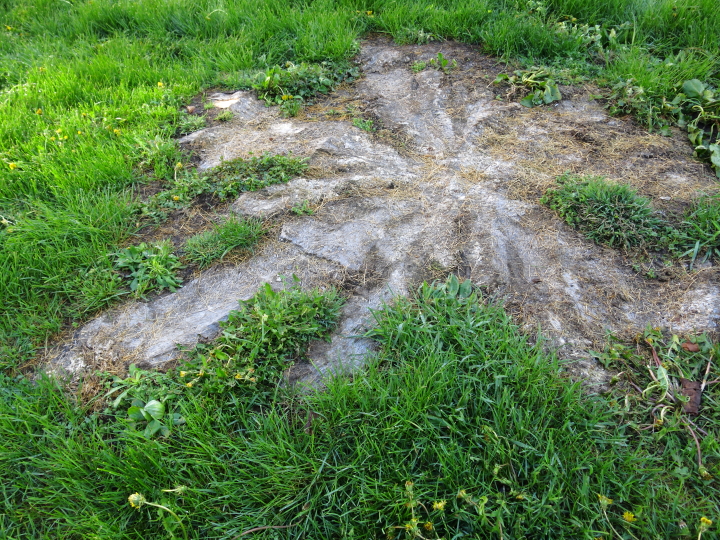
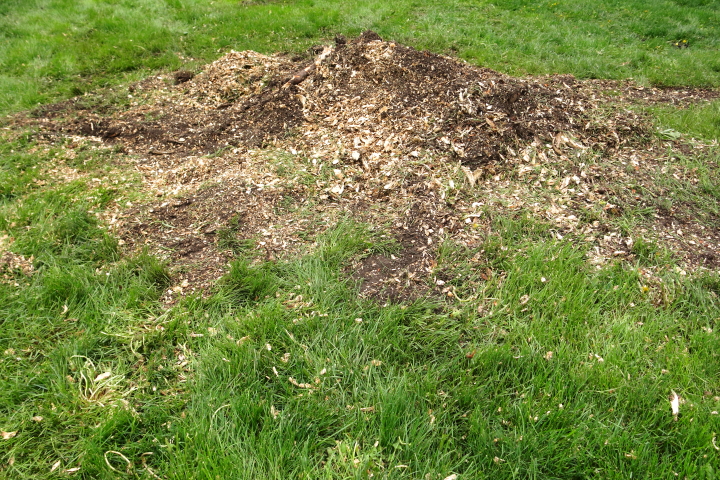
By 8:45 the stump was ground down to about 5" below the surface of the grass so that we can reseed or sod and have a flat lawn. In place of the stump we have a sizeable hill of wood chips and dirt. 

I am so excited and happy to have the stump gone and I can't believe I didn't have it taken care of earlier. My plans for the the backyard are now to fix the lawn in the area where the stump was and add a large patio to the side of the garage with a pergola over it. The garage is 32 feet deep and I think I'm going to make the patio 10 feet wide so it will be quite sizeable and a great place to relax this summer. Below is my poorly drawn rendition of what I am planning.

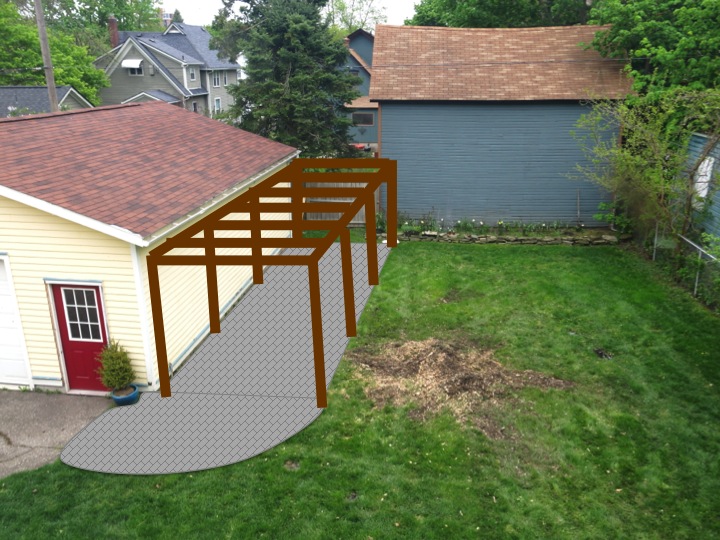
I'm planning to grow wisteria to climb up the pergola which will add a bit of shade to the backyard now that the maple tree is gone. The patio and pergola will also balance out the space between the side of my garage and my neighbor to the rear's garage. I'm really looking forward to making some more steps to completing the backyard and have a chance to enjoy it this summer.

Saturday
May112013

Picture of the Day: Great Ocean Road Outside of Lorne

Lorne, Victoria, Australia
12.30.2009 

Thursday
May092013

Picture of the Day: View From Marina Cay


Marina Cay, British Virgin Islands
11.26.2012 

Wednesday
May082013

Square Beadboard Garden Planter

With spring here I have been wanting to spruce up my front yard and I had an inkling to try building a garden planter for myself for my front porch steps. On my Yard and Garden Pinterest board I had pinned a few planters that I drew some inspiration from. I liked the beadboard sides from the planter I pinned from Plow and Hearth and the legs that raised the planter off the ground that I pinned from the Simply Planters

After doing a little sketching I came up with a design that I liked that also fit the space that I was planning on putting the planter on my front steps. I have shared my supply and cut list, but it would be very easy to resize the dimensions if you wanted to make a bigger planter.

Supply List:
1 - 2x2 @ 4 feet long
1 - 1x2 @ 8 feet long
1 - 1x3 @ 8 feet long
1-1/4" pocket hole screws
Brad nails
Wood glue

Cut List:
4 - 9" x 9" pieces of beadboard for sides
8 - 1x2 @ 9" for side supports
3 - 1x3 @ 9-3/8" for bottom slats
4 - 1x3 with 45° mitered ends @ 9" (measured from short side), 14" (measured from long side) for top 
4 - 2x2 @ 11-1/2" for legs

To start I put some wood glue on the back of the side supports and attached one to the top and bottom of each piece of beadboard.

I aligned the top support flush with the top of the beadboard and the bottom one I overhung by 3/4" which left me space to attach the bottom slats later. I then clamped the supports to the beadboard while the glue dried.

Next, I used my Kreg Jig to drill pocket holes on both sides at the top and bottom of each side beadboard piece. For two of the sides I attached the legs with pocket hole screws, aligned flush with the top.

I then attached the two remaining sides to one of the sides with legs using pocket hole screws.

I then attached the last side to complete making the box of the planter.

To make the top I put some wood glue on the mitered ends, clamped it all together into a square and then used my nailer to add a few brad nails to tack it together.

After the glue dried, I used a bit more wood glue and my nailer to attach the top to the planter box.

I then flipped the planter upside down and attached the bottom slats with some wood glue and my nailer. I left spaces between the slats for drainage.

I used wood filler to fill in the nail holes and imperfections and then sanded the whole piece smooth.

I wiped the planter down with a tack cloth and then painted it with a few coats of Valspar's Duramax Paint and Primer in Everglade Deck.

Once the planter was dry I was excited to get planting but I didn't have any potting soil so I just placed a potted calla lily in the planter for now. Before I do put potting soil in the planter I plan to line the bottom with some landscaping fabric so that water can drain out between the slats but the soil wouldn't fall through.

I'm really happy with how my planter came out and think it will add a little fun to my front porch. With this turning out successfully, I think I will have to make a second one to have a matching pair.

Note: I am posting as part of the Pinterest Challenge hosted by Young House Love, Bower Power, Sparkle Meets Pop and Red Bird Blue. If you posted anything for the challenge, please share your link with me!

Wednesday
May082013

Picture of the Day: Statue at Onsen-ji in Gero Onsen

Gero Onsen, Japan
4.13.2013 

Tuesday
May072013

Goodbye Tree

When I bought my house there was an enormous tree in the middle of my backyard. While I love the two large trees in my front yard, this tree was not doing much for me.

My main problem with it was that it was not healthy and was continuously dropping large branches into the backyard and the roof of my garage. I was nervous that it would eventually do some damage to my garage or even worse to my house and I wanted to get it removed.

From a secondary standpoint, my backyard had effectively no sunlight because the tree was so large it shaded everything. The yard was constantly full of debris dumped down from the tree and I had a hard time getting the grass to grow decently.

Getting a large tree taken down is no inexpensive task. I got a few quotes and then found a guy that would do it for half the price, but didn't grind down the stump. I figured that I could find someone to grind down the stump for much less so in November of 2011 I had the tree removed.

I had fun periodically taking a peek at the progress from my upstairs back bedroom. There was a ton of branches and wood, filling up their trailer a few times over. After two days my tree was finally gone.

At the end, I was left with this very large stump, smack dab in the middle of my back yard.

I hired a guy to grind down the stump for a great price in April 2012 and was excited to reclaim my yard.

Unfortunately, he finished up while I was out and he left it so that it was a little higher than the grass around it. I was unhappy with that because if I covered it with dirt and grass it would make a little hill in the middle of my backyard which I definitely didn't want.

I was really frustrated, so much so that I just left it alone all last summer and didn't deal with it. This summer I need to get it addressed. My backyard is not very evenly graded so I may just try to take care of everything at one time, but I am not sure.

On the positive side, I do love how opened up my yard is without the tree and the backyard grass has become much more lush. Eventually, I will make it something respectable back there...

Tuesday
May072013

Picture of the Day: Plaza de los Coches

Cartagena, Colombia
3.08.2013 

Monday
May062013

Sprinklers for My Garden

This past weekend was gorgeous, so Frank and I spent most of our days outside working on the yard. While Frank tackled the grass and some much needed garage cleaning I worked on prepping and planting the herb garden on the side of the house.

The picture to the left is what my herb garden looked like as of Sunday night, but it took me two afternoons to get it there. The perennials in the back had come back beautifully, but I had a lot of cleanup to do.

I cleaned out the brush, tied back the perennials and roto-tilled the areas around the existing plants and the empty area up front. I also flipped up each of the stones in my border to pull the weeds and grass that had grown up between them. I love the stone border that I put in a when I made the garden, but it is really labor intensive to keep looking clean and neat. By the end of the day on Saturday I finally had a clean slate to work with. 

Below is what I was faced with on Saturday after we had brunch before I got it all cleaned up. It was such a mess that I was really discouraged when I started but I am so glad that I tackled it this weekend.

After getting everything tidied up I was tired, but made a run to Lowe's to get mulch and some other items so I could get busy on Sunday.

One of the things I wanted to do before planting anything new was lay down some sprinklers. I had put out sprinklers last year but after I had laid everything down so they stuck out and looked a bit ugly. Also, the hoses that I had used were too long for the space so I wanted to make some hoses that were a custom length for the spacing of my sprinklers.

I cut lengths of hose from an old hose that I had and then it was simple to make the hoses using replacement couplers and a screwdriver.

I untightened the screws on the collar of the coupler and slid it on the end of the hose.

I then pushed the coupler firmly into the end of the hose.

I slid the collar back up over the coupler and tightened it back down with a screwdriver.

It is super easy and takes only about a minute to do for each end. In a little over five minutes I had my three custom length hoses complete.

With my hoses done I attached them to my sprinklers and laid them out in the garden. I used some small rocks that I had to weigh down the sprinklers to make sure they wouldn't shift around with the water on.

I turned the water on to check the connections and everything worked great with no leaks. I then dug some shallow trenches to bury some of the hoses.

After I planted the rest of the garden and added mulch you can barely even see the sprinklers anymore. This is a much better look than last year.

It didn't take much effort to hide the sprinklers, just a little advanced planning and I think it is so worth it. Later this week I'll share some details about what I planted. I'm looking forward to a bountiful summer of herbs!

Monday
May062013

Picture of the Day: Carvings of Figures at Angkor Wat

Temples of Angkor, Cambodia
8.18.2011 

Wednesday
May012013

Picture of the Day: View Along the Road Between Sorrento and Positano


Amalfi Coast, Italy
3.22.2012