Monday
Jun172013
Picture of the Day: Pink Shells and Sand on Palm Beach

Palm Beach, Barbuda
Antigua and Barbuda
7.04.2009
 Lisa | 1 Comment | Share Article | Email Article | Print Article

My name is Lisa and I'm a crafty girl with wanderlust working as an engineer by day. My blog chronicles projects in my home as well as pictures and stories from my travels.

Palm Beach, Barbuda
Antigua and Barbuda
7.04.2009
Lisa | 1 Comment | Share Article | Email Article | Print Article 
Tat Kuang Si Park, Laos
8.15.2011
Lisa | Post a Comment | Share Article | Email Article | Print Article 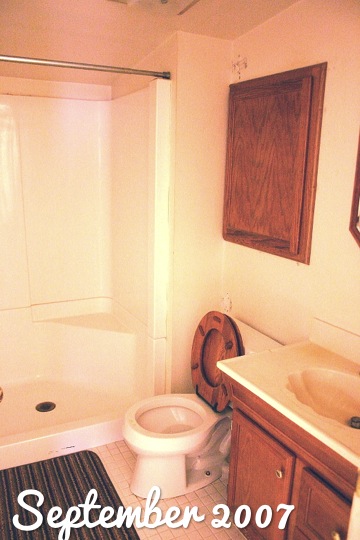 When I moved in to my house back in September 2007 the small downstairs bathroom was functional, even though it was ugly. It had a small fiberglass shower, an oak toilet seat and an acrylic shell shaped sink, which wasn't exactly what I would choose for a house over 130 years old.
While I was gutting and remodeling the main part of the house I lived in one of the bedrooms in the side wing and used this bathroom. Although I didn't tackle remodeling the bathroom at that time, I did make some cosmetic changes for around $150 just to freshen things up.
I patched holes in the walls and painted them pale blue. The 1980s oak medicine cabinet and vanity were primed and painted white and a new mirror was hung above the sink. I hunted around at the Ann Arbor ReStore a few times until I found a used sink that I liked and would fit the dimensions of my vanity for only $20. I then replaced the sink faucet, toilet handle, toilet seat and added some hooks, a towel bar and a white waffle weave shower curtain to the bathroom. I finished the room off with some red accents to break up the blue and white, like red towels and vintage reproductions of drawings of red coral. For almost no money it was pretty presentable until I had time to get around to remodeling it.
My bathroom remained like that until January 2010. Over the winter holidays I went to Australia to hang out with some of my friends that I had made during my time living in Japan. Beside me, two people from from England, a girl from France and a girl from Japan had made the trek to visit our Australian friends. We had an awesome time catching up and enjoying traveling around together.


When I arrived home from my vacation late at night, exhausted from the time change and my long flights, I discovered that my heat had gone out and my pipes were all frozen. Darn Michigan winter! I turned off my water main, slowly warmed up my house and crossed my fingers that the damage to my pipes wouldn't be that bad. Needless to say, despite being exhausted I did not sleep that well that night.
The main area of the house that had been gutted and fully remodeled with copper pipe faired quite well. I only had to replace my pot filler in the kitchen and one of the shower controls in the master bathroom. I was so relieved that I didn't have to open up any walls.
The downstairs bath was another story. It had PVC pipes and when I turned on the water to that area of the house I could hear water gushing in the walls, which meant major work had to be done. I didn't have time to deal with it then so I just let it sit broken with the water disconnected until the next winter when I decided to tackle it during my time off over the winter holidays. Unfortunately, I never took any photos of the bathroom after the little makeover, but I did grab these two pictures after I had cleared the room before I started opening up walls.
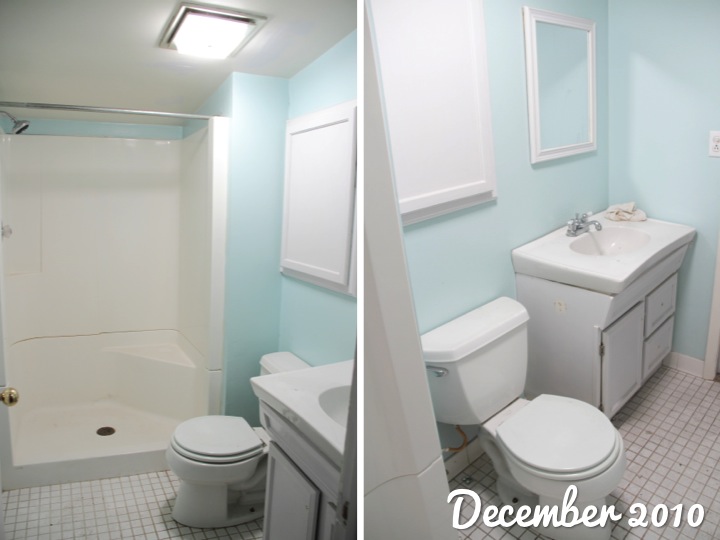
My original plan was just to open up the walls to fix the plumbing. As I got into it, however, I realized that the PVC was smashed to smithereens and other things needed fixing in order to bring the bathroom up to code. I soon realized that I was going to need to pull a permit and demo and redo the whole bathroom. The problem, however, was that due to certain structural areas of the house it was going to be really hard to bring the bathroom up to code. I finished demoing the bathroom so that I could see exactly what I was working with and make a plan to submit to the building department.
This is where I stalled. I was having trouble getting around how to bring the room completely up to code without raising my roof and honestly it wasn't a super huge priority since I lived alone and my master bathroom was great. So I casually worked on some plans while I let the carcass of the former bathroom sit empty. Now, however, is a different situation. With getting married and Frank moving in this summer, having a second bathroom has now become a priority. I've been working on some plans and am getting ready to finally pull a permit and tackle this downstairs bathroom this summer. Wish me luck!
Lisa | 8 Comments | Share Article | Email Article | Print Article 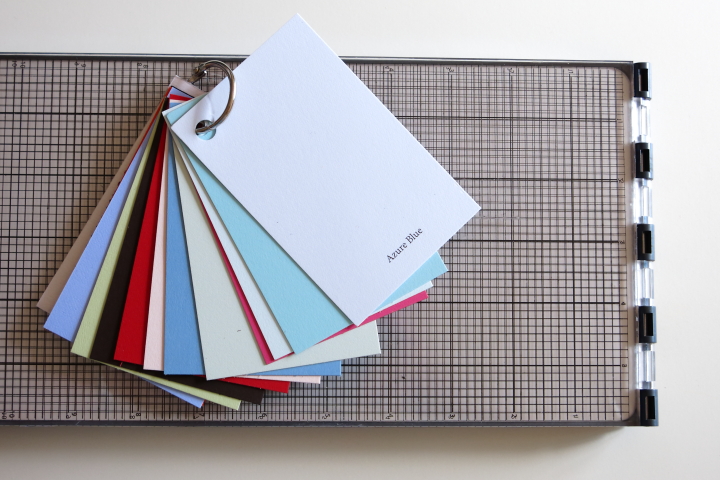
With only a month and a half until Frank and I get married, I have been working on some wedding preparations before the big day. I really love the look of letterpress invitations so when I came across the Lifestyle Crafts L Letterpress Combo Kit I thought it would be fun to buy one and try making letterpress invitations myself.
I did a little research and found that people got good results with the L Letterpress Machine with custom plates from Boxcar Press following the Boxcar Press tutorial. I've been having fun learning about a lot of new things in designing the invitations since both letterpress printing and using Adobe Illustrator are new to me. I've been ordering paper samples for both envelopes and letterpress paper and finally settled on what I'd like to use. I'm also just about finished with my design to send off to Boxcar press to have my letterpress plate made. I don't want to share much of the design until after I am done and my guests have already received their invitations, but I will definitely post about it after they have been completed and sent out.
Lisa | 4 Comments | Share Article | Email Article | Print Article 
Florianopolis, Brazil
5.29.2007
Lisa | Post a Comment | Share Article | Email Article | Print Article 
Lindbergh Bay, St. Thomas
US Virgin Islands
7.01.2010
Lisa | Post a Comment | Share Article | Email Article | Print Article 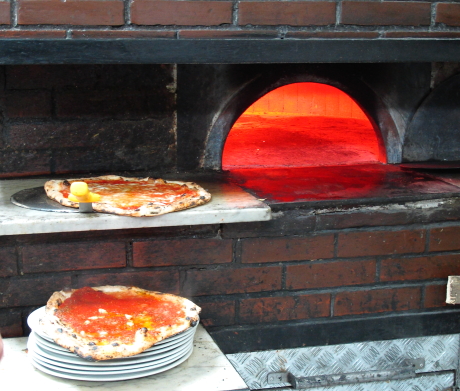 When Frank and I were visiting Italy last spring we ate a lot of delicious pizza during our trip but out of all the places we visited our favorite was L'Antica Pizzeria da Michele in Naples.
The restaurant is run by the Condurro family who have been making pizza in Naples since 1870. Known by many as the "the Sacred Temple of Pizza” Da Michele is an old fashioned, no frills establishment serving up amazing Neopolitan pizza.
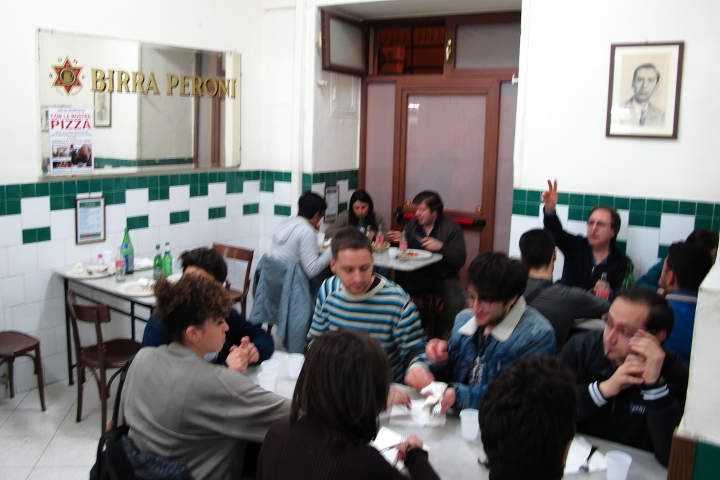
When we arrived there was a long line of locals outside Da Michele so Frank and I knew it had to be good. We waited until our number was called and were seated at a table with two locals. One of the guys spoke some English from having spent time in New York and we ended up having a great time talking to them as we ate. They even recommended the place that we ate at the next night, Trattoria da Nennella, which was amazing.
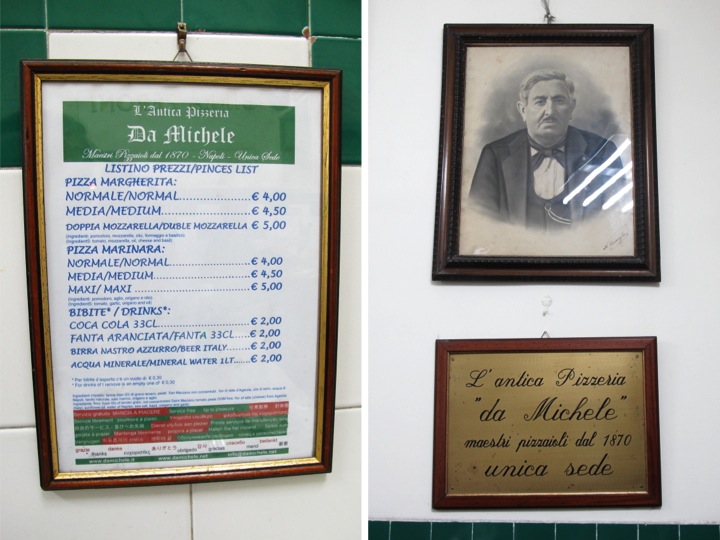
The simple menus were framed and hung on the walls at the tables. Da Michele only serves two types of pizza, Margherita (tomato, mozzarella, oil, cheese and basil) and Marinara (tomato, garlic, oregano and oil). A few drink options rounded out the menu and that is all that Da Michele needs to provide a great eating experience for its patrons.
Frank and I both decided to get Pizza Margherita, with doppia mozzarella (double mozzarella) of course. The pizza was completely worth the wait with delicious sauce and a perfect crust. Da Michele could easily charge more for their pizza and drinks and their refusal to do so makes the restaurant even more of a gem.

After Frank and I got back to the U.S. we often talked about how we wanted a pizza oven someday. It seemed a far off wish since building a brick pizza oven would be both time consuming and expensive. A few weeks ago, Frank stumbled upon the KettlePizza online so he ordered it, deciding to see if that could make our backyard pizza-making dreams come true this summer.
The KettlePizza is a big cylinder that sits between the base and top of a charcoal kettle grill. After starting the charcoal or wood fire, you place a pizza stone on the grate and let the heat build up on the grill. Frank found using his infrared thermometer that the temperature of the stone could reach up to 1000 degrees Farenheit.
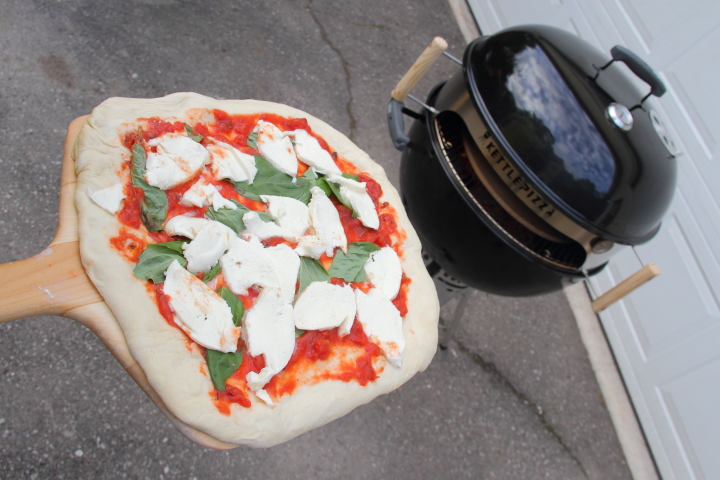
Through a little experimenting, Frank found that the trick to having the pizza work out well was not to make it too large and dust some cornmeal on the bottom so that it was easy to remove the pizza from the peel when placing and removing the pizza from the stone. For the future, Frank wants to get another pizza stone to place on the top grate to concentrate more heat over the top of the pizza for the toppings.

Frank has made pizza twice now with some delicious results (the crust is amazing!) and I am looking forward to more pizza in our backyard throughout the summer.

I have no affiliation with KettlePizza and am recommending it because we purchased it for ourselves and enjoyed using it. In the spirit of full disclosure, I provided an affiliate link, which means that I may get a commission if you decide to purchase anything from Amazon through my link.
Lisa | 5 Comments | Share Article | Email Article | Print Article  Westminster Abbey
London, United Kingdom
6.2005
Lisa | Post a Comment | Share Article | Email Article | Print Article 
Healesville Sanctuary
Melbourne, Australia
1.01.2010
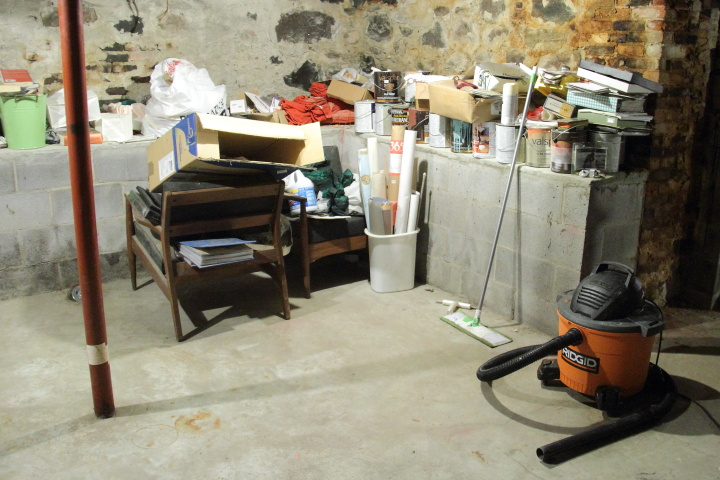
Lisa | Post a Comment | Share Article | Email Article | Print Article This past week there was a bit of unwanted excitement at the house when part of the basement flooded. Frank and I spent a yucky hour cleaning up with the wet vac and throwing damaged things away.
With things initially under control we had to figure out what happened to fix it. Because it was during a rain storm in Ann Arbor, our first thought was that maybe the city's storm sewers were having an issue but the city confirmed there was no issue. It turned out that our sewer line out to the street had a bit of a blockage due to roots which we paid to get it cleared out. Ah, the joys of owning an old house...
The basement flood brought to the forefront a larger issue, which is that I need to clean up and organize the basement. I have made it no secret on this blog that I have a problem with wanting to keep everything and having trouble letting things go. Living in a five bedroom house with a four car garage as a single woman has enabled me to keep way too much because I have a ridiculous amount of space for one person.
With Frank moving in (I can't believe it is less than two months until we get married!) it is high time that I stop using the basement as a general dumping ground. I need to purge a bunch of stuff and get the remainder organized so that Frank has room for storing his things as well. This past weekend I spent a good chunk of time in the basement doing just that. After spending a ridiculous amount of money on plastic storage tubs and removing 17 contractor bags of things I decided to get rid of (good-bye college electromagnetics class notes and faded red roman shades) the main room in the basement is starting to look presentable.
Here is where things looked right after we had cleaned up from the flood:
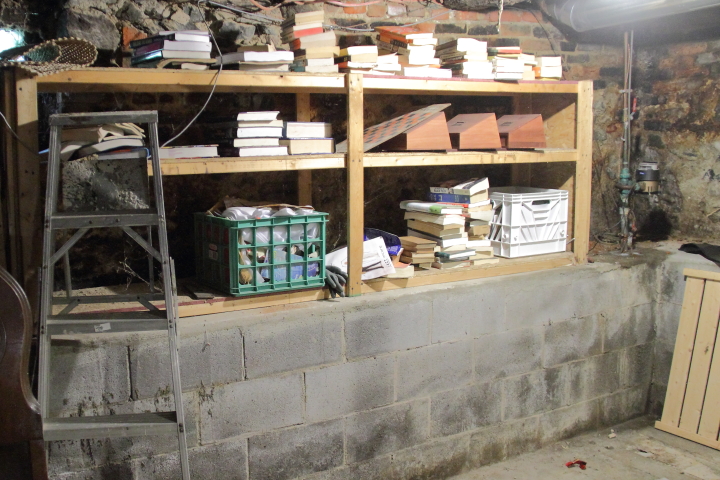
Here is the same corner after my weekend of work:

I started by sorting things that I wanted to keep into plastic bins, labeling them with some painter's tape and a Sharpie. I have a bin for every phase of my life like high school, college, grad school, etc. and am limiting myself to one bin of memorabilia for each.
Below is another corner of the basement before I started purging:
Here is that same shelf as it is right now:
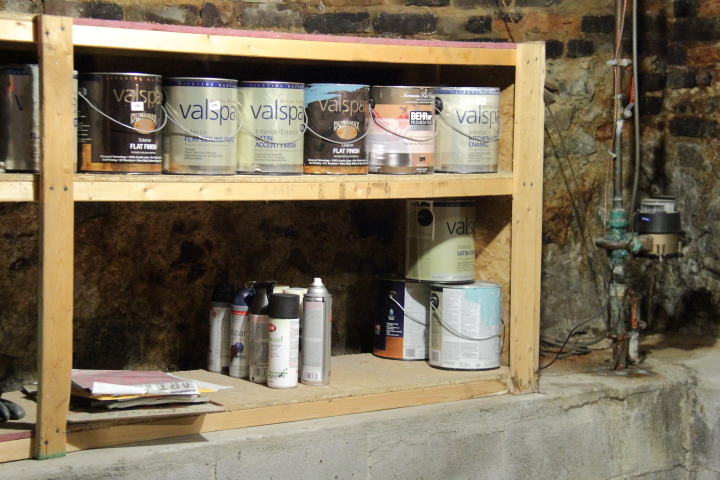
I thought that this would be a good spot to store my paint cans. I have most of my tools stored in the garage, but living in Michigan I can't store my paint out there otherwise it will freeze in the winter.
All in all, it wasn't the most fun weekend (I'd much rather be building or making something) but it was necessary and I made a significant dent into getting the basement in order.
Have you had any basement water issues? Do you have your basement well organized or is it more of a catch all like mine has been?
Lisa | 7 Comments | Share Article | Email Article | Print Article 