Welcome

My name is Lisa and I'm a crafty girl with wanderlust working as an engineer by day. My blog chronicles projects in my home as well as pictures and stories from my travels.

Search


Instagram

Blog Index
The journal that this archive was targeting has been deleted. Please update your configuration.
Navigation

Entries in Wedding (8)

Tuesday
Jul222014

Jefferson Market and Our Wedding Cake

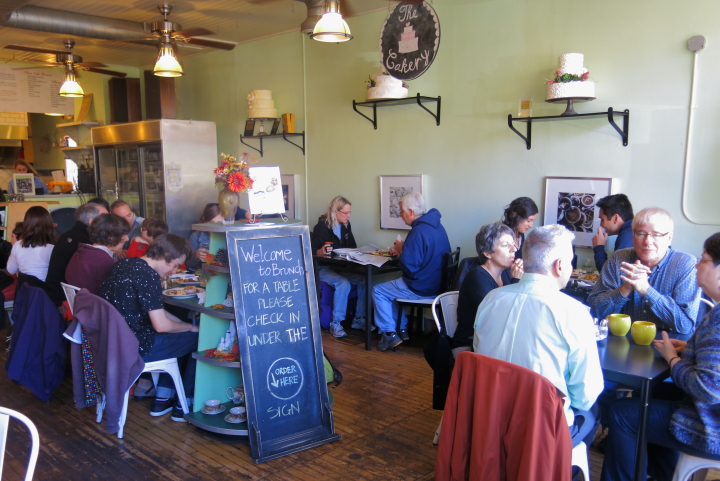
One of the things that I love about my neighborhood is Jefferson Market. It is a little bakery around the corner from my house, a throwback to the days when the neighborhood was peppered with small businesses among the homes. 

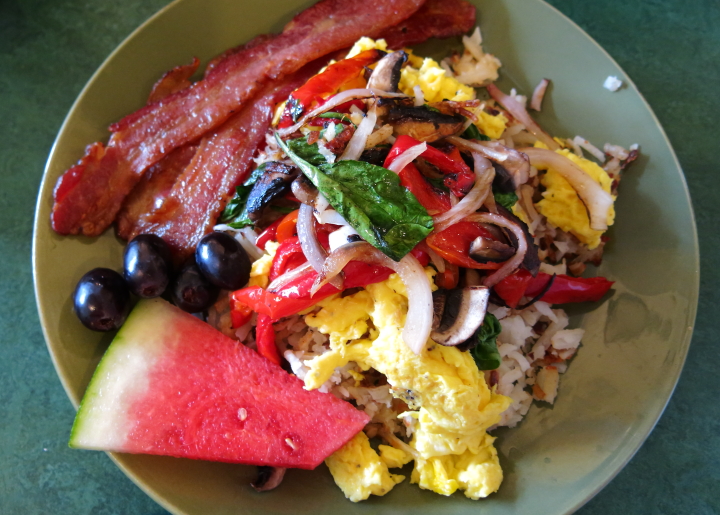
On Saturdays and Sundays Jefferson Market is open for brunch from ten until one. People from all over the neighborhood pour into the small bakery and seating both inside and outside quickly fills up. Frank always gets the same thing when we go, a Mount Rushmore Plate (a fantastic hash brown and egg scramble) with a side of bacon.

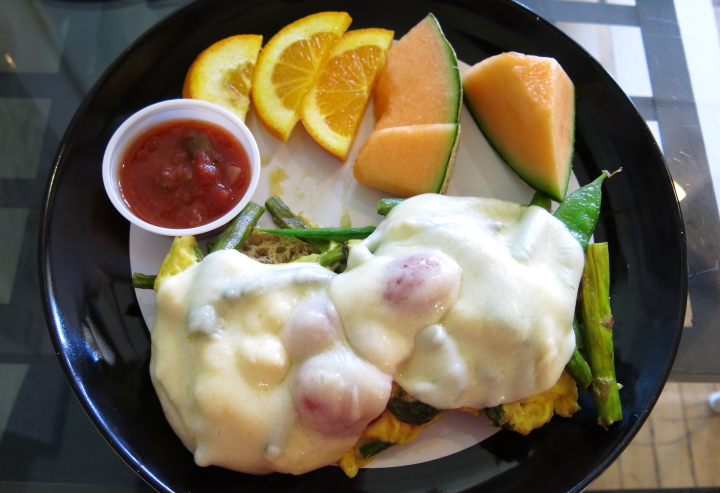
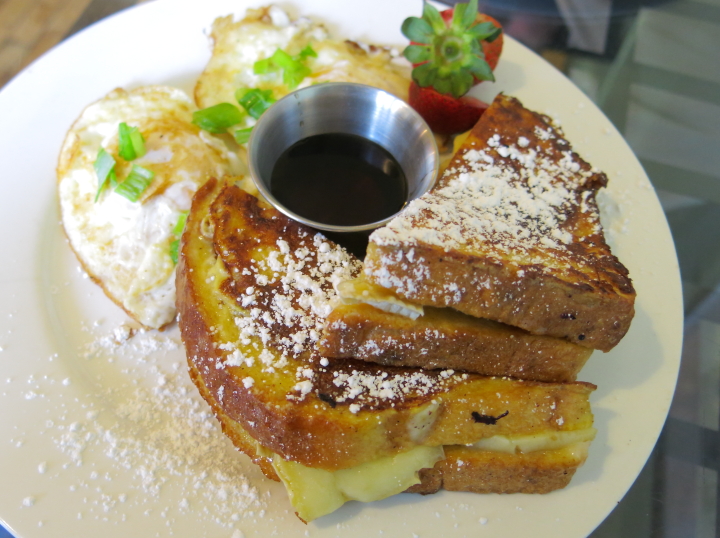
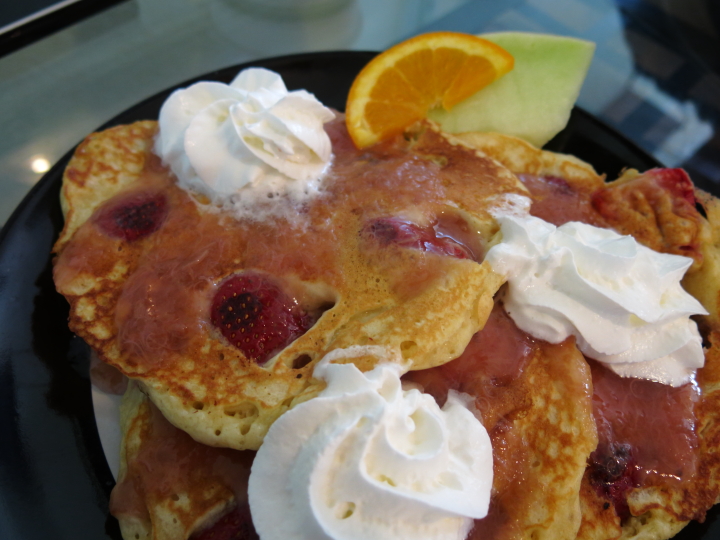
I, however, usually opt for one of the specials. Every month there are two new specials, one savory and one sweet. I've enjoyed everything from brie stuffed French toast to strawberry rhubarb pancakes to root vegetable hash.

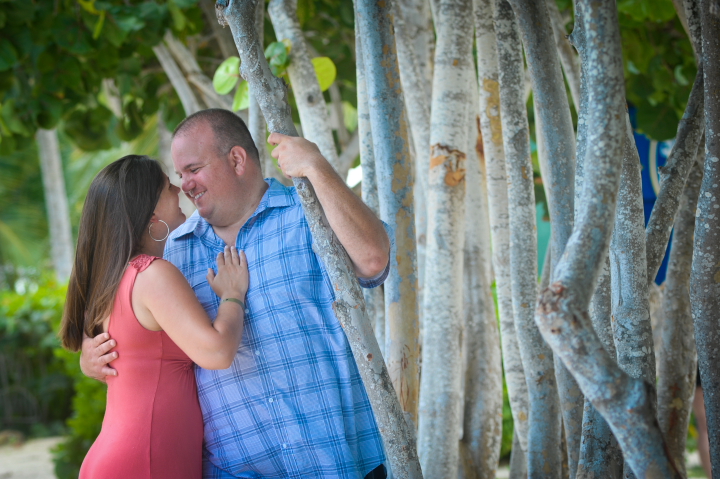
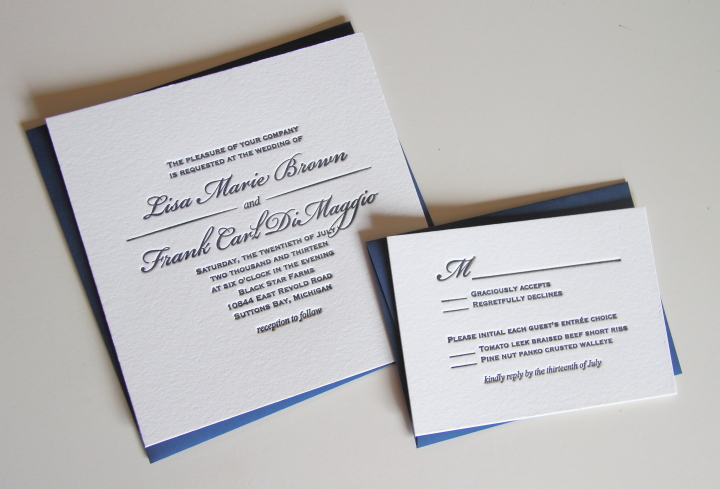
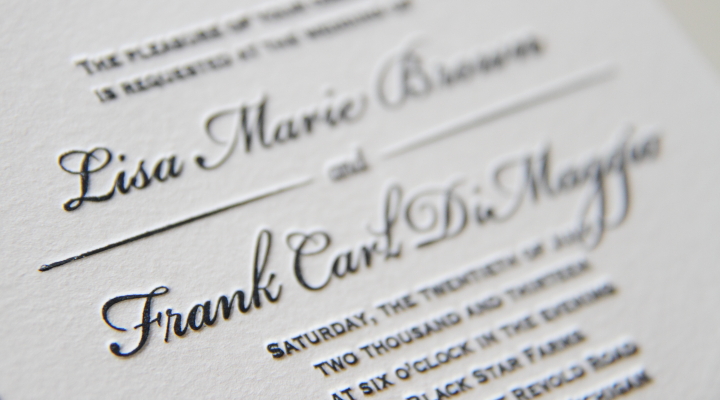
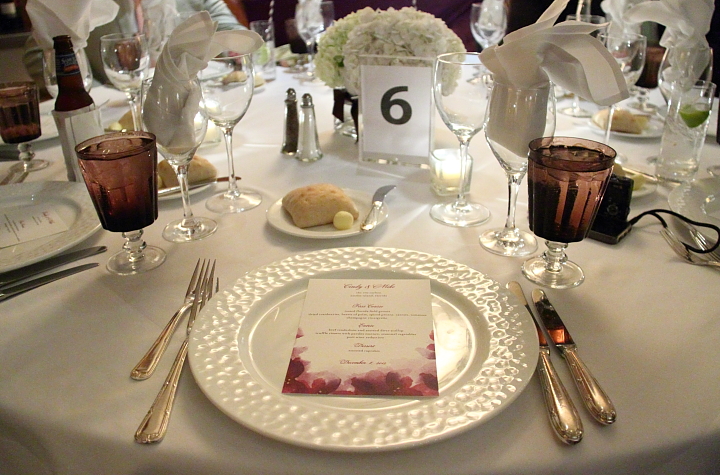
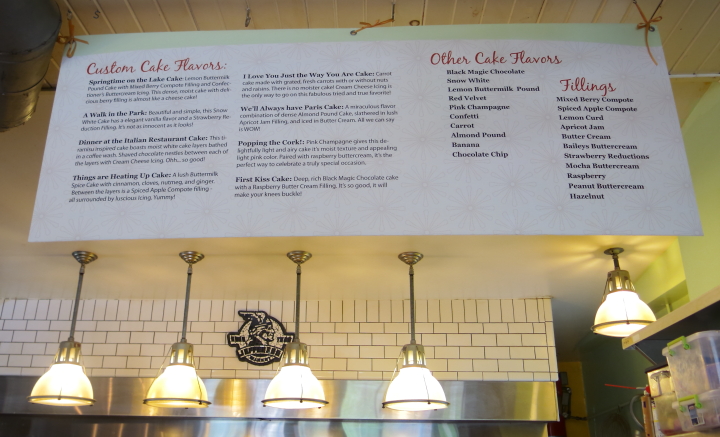
When Frank and I got married last year we decided that of course we should order a cake from Jefferson Market. They offer a fantastic selection of cake flavors and fillings.

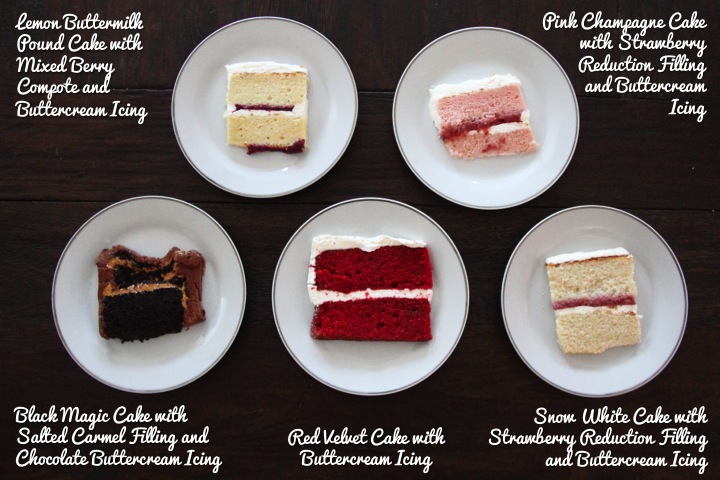
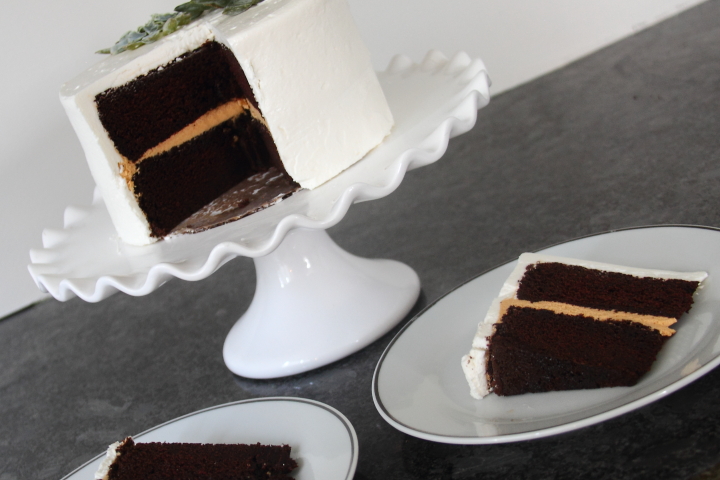
We tried a bunch of samples and really enjoyed them all, finally settling on black magic cake with salted caramel filling and buttercream icing. 

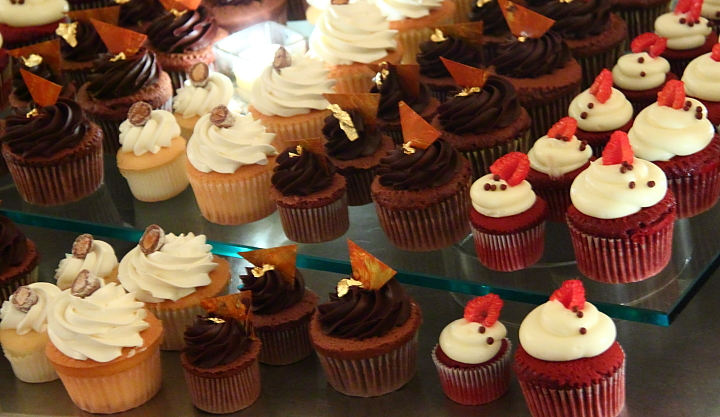
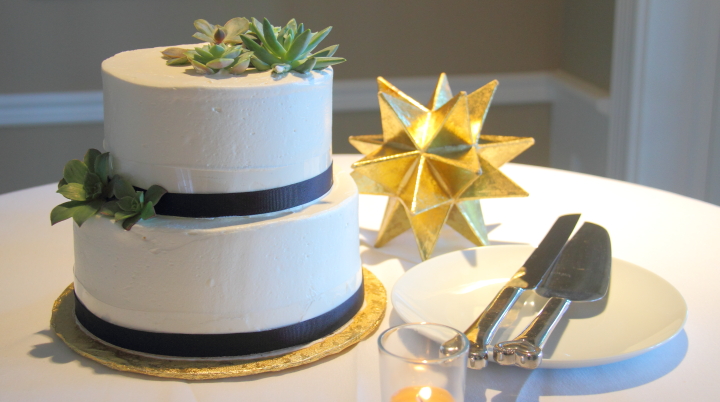
I ordered the cake and dropped off a few succulents and some navy ribbon for them to decorate the cake. When I picked up the cake I quickly snapped the picture of it below and they helped me pack up the cake for the drive up north.

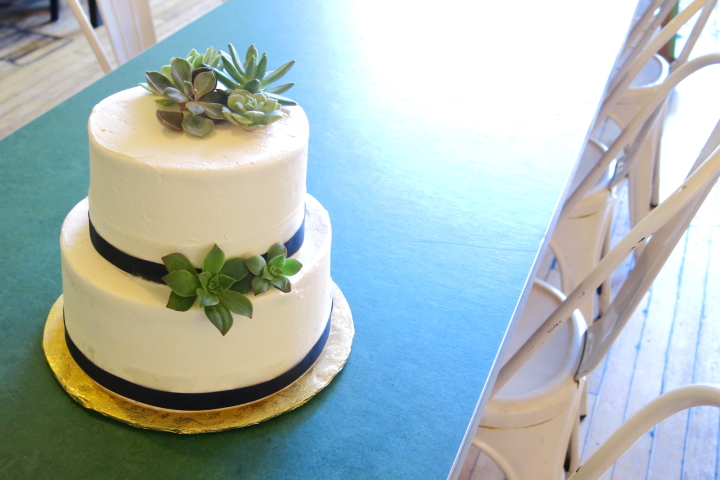
Unfortunately, this is the best picture that I have of the cake at our reception, which is a shame, but it was really delicious and everyone loved it.

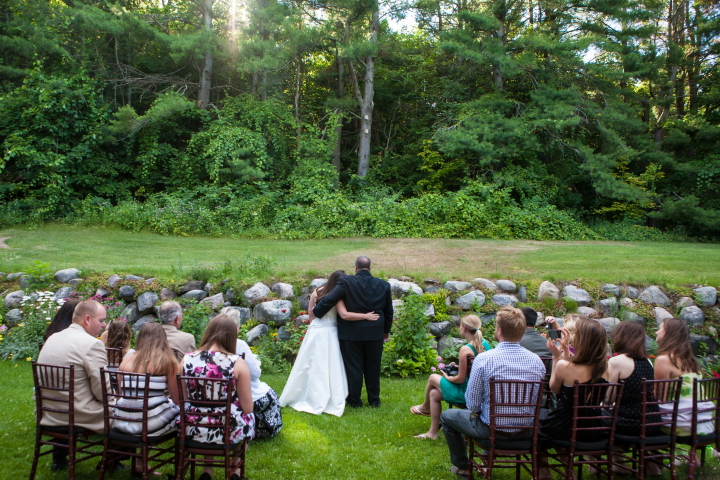
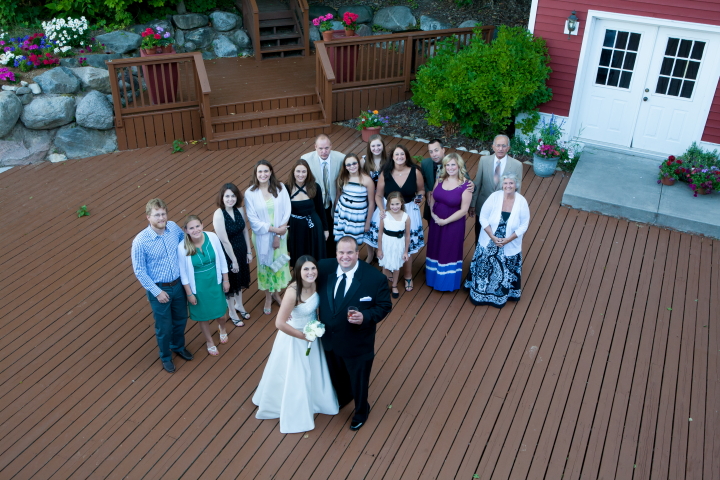
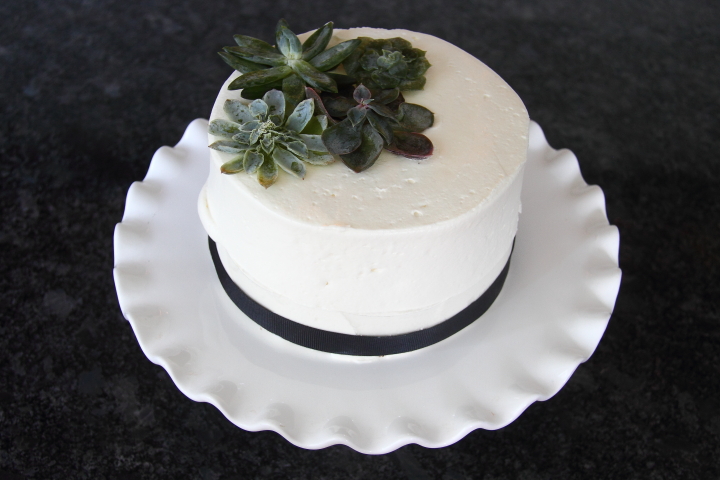
Since we had a tiny wedding of only fourteen guests, we served the bottom tier at the wedding and took the top tier home to freeze for our anniversary.

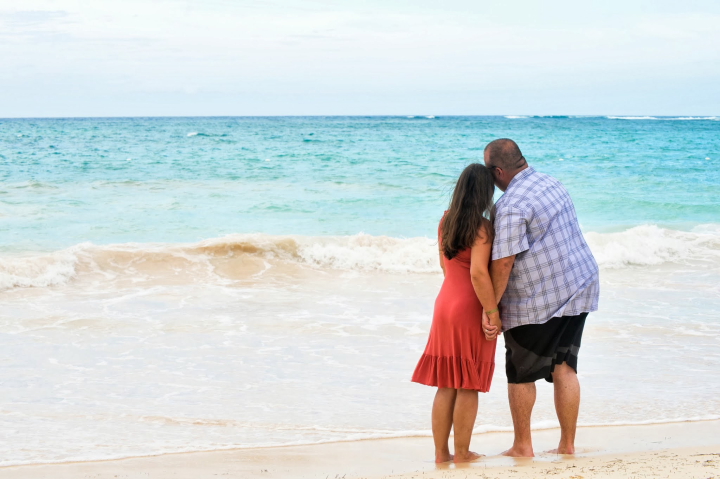
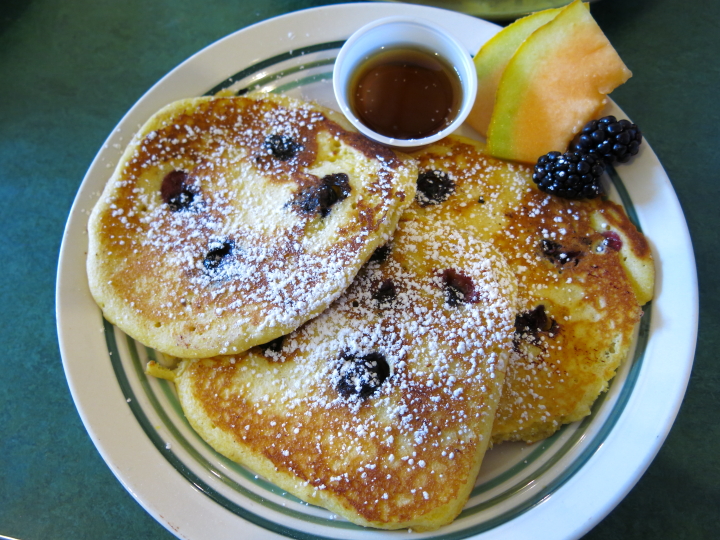
This past Sunday marked a year since our wedding so of course we started the day by heading over to Jefferson Market for brunch. I got one of the specials, banana walnut pancakes, while Frank ordered his standby Mount Rushmore plate with a side of bacon.

We didn't do much the rest of the day due to the fact that on my flight home from Japan on Friday I had managed to contract a nasty cold, but we did thaw out our wedding cake and enjoy a slice of it together in the evening. Honestly, I was pretty surprised that it tasted so good after a year in the freezer. 

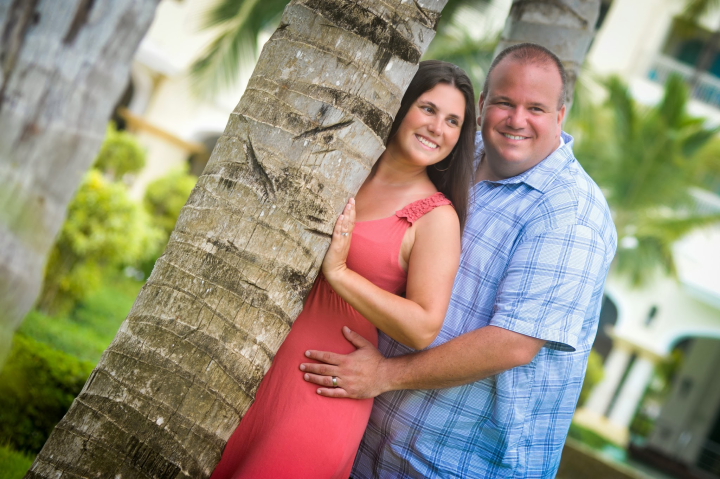
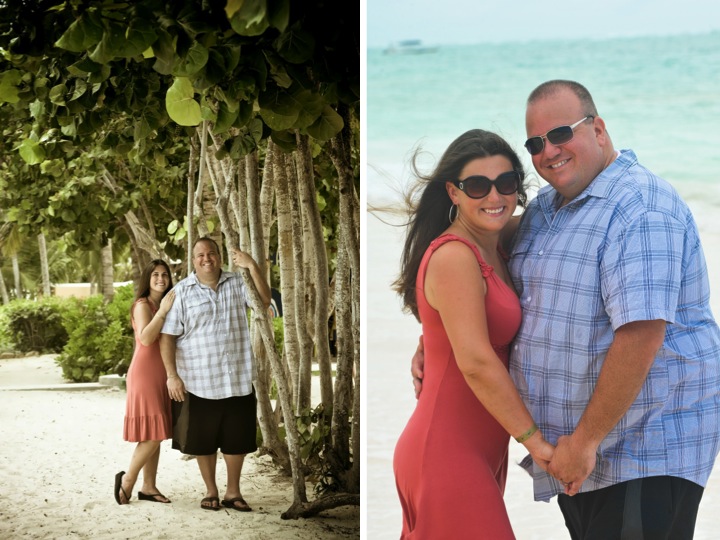
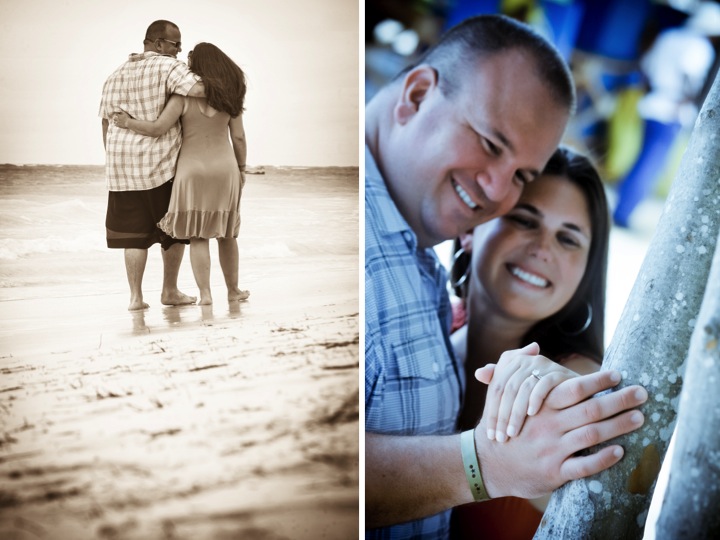
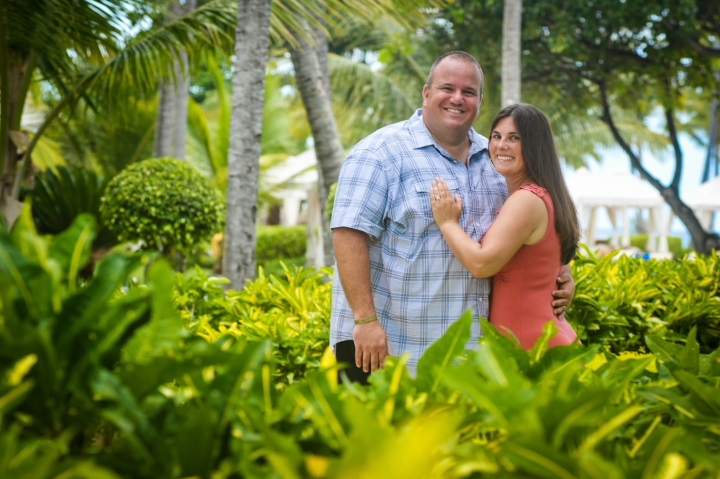
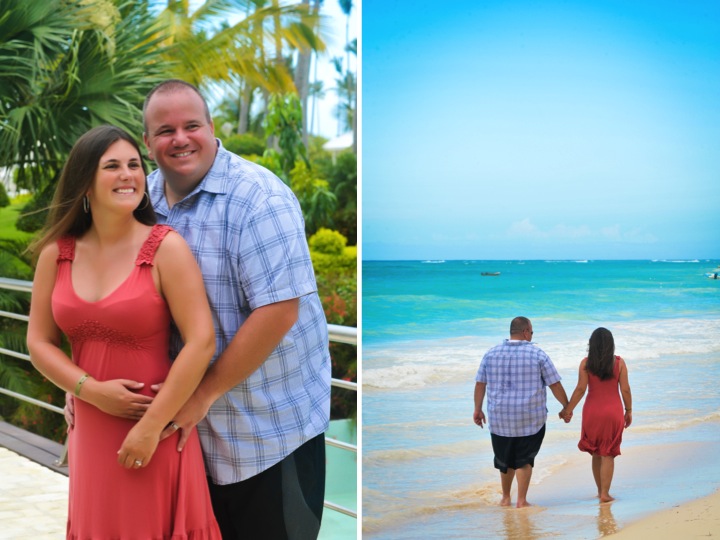
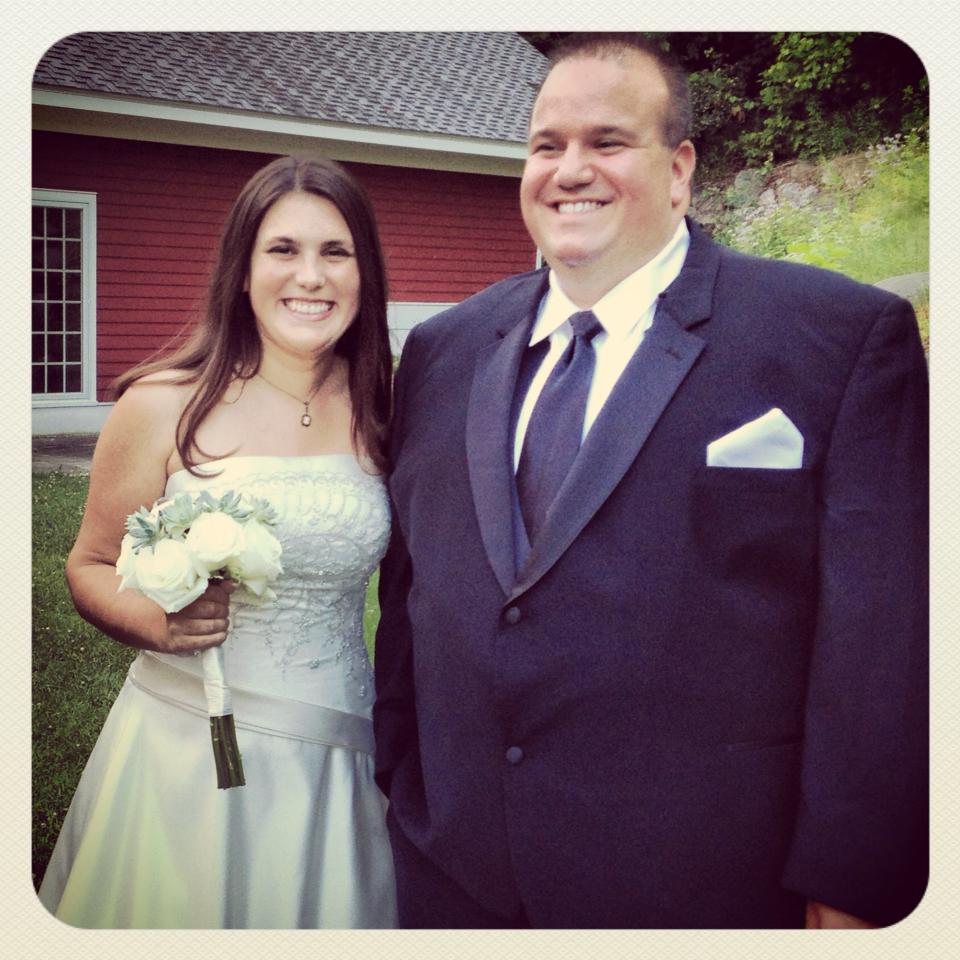
I can't believe that a year has past since Frank and I got married. Among other things it has been a busy year for us traveling: Domincan Republic for our honeymoon, New York in the fall, Arizona and Atlanta over the winter break, Las Vegas in January, Florida to see my grandparents and go to Tigers Spring Training in February, Indianapolis for the NCAA Regional Final, our extended trip to see Norway, Sweden, Denmark, Estonia, Finland with a stop in Amsterdam this spring plus several business trip for us both including Japan, Chicago, Las Vegas and Seattle for him and twice to Japan plus Charleston, LA, Arizona, Kentucky and Northern Michigan for me. While we've had a ton of fun traveling together we've also enjoyed our time at home going to our favorite places and working on our home renovations. We both love living in Ann Arbor and taking full advantage of all the amazing things our little town has to offer together. The year has flown by quickly for us and I hope that we have many more like this one ahead...

Monday
Nov182013

Wedding and Honeymoon Pictures 

After waiting for three and a half months I finally got our wedding photos from our photographer. Apart from the long wait I am so disappointed in the quality of the photos which for the most part look like snapshots from a friend instead of professional photos. There are a handful of photos that are great, particularly the three I've posted but overall there is a lot of poor composition, visual clutter and bad lighting in the photos. The thing that makes me the saddest is that there aren't any formal photos of Frank and I on our wedding day that I love.

As someone who loves photography I've been pretty bummed about the wedding photos, but Frank being the awesome guy that he is helped me put things in perspective. We had an awesome wedding day that was relaxed and fun and I wouldn't trade one bit of that day to have better pictures. I had been waiting for my professional photos to include them in my posts about some of my handmade wedding details on the blog, like my flowers and favors, but as it turns out I shouldn't have bothered waiting and I will start posting those soon.

While we don't have the greatest wedding photos we did luck out in the honeymoon photo department. The resort we stayed at for the second half of our honeymoon, Iberostar Grand Hotel Bávaro, had a professional photographer and he would take people out for half an hour to take some pictures. Frank wasn't so keen on doing it but I talked him into it and I think in the end even he will admit it was a good idea. I love all of the the photos and have posted a few of my favorites below.

Now I just need to figure out which one of the honeymoon photos to frame for our house...

Thursday
Jul252013

Welcome Baskets for our Wedding Guests

One of the things that I wanted to do for our wedding was to prepare welcome baskets for all of our guests. I made up a fun girl themed basket for each of Frank's (and now my) three nieces and then made grown-up baskets for the rest of the wedding guests.

For the nieces (who Frank and I refer to as the Niecelets) I made up a basket in each girl's favorite color of purple, yellow and pink.

I had found the metal baskets at Target in the One Spot a while back. They were all hot pink so I used some spray paint to turn one purple and another one pink. When spray painting metal mesh like these baskets I have found it is important to spray it upside down, right side up and from different angles in order to get coverage over the whole mesh.

To assemble the baskets I crumpled a few sheets of white tissue paper to place in the bottom and then layered the goodies in the basket on top. I had a lot of fun shopping for the color coordinated items for the girls. Here is what each of the baskets contained:

- Flower lei
- Flip flops
- Glow in the dark bracelets
- Water bottles with twisty straws
- Dried Berry Cherry Blend from Traverse Bay Fruit Co.
Double Dark Chocolate Cherry Boomchunka Cookies from Cherry Republic
- Jump rope
- Stuffed animal
- Spiky, wiggle ball
- Three flavored lip glosses

On the front of each basket I wired some nylon flower and butterfly embellishments to dress up the baskets a bit more for fun. I thought they turned out really cute.

For the adults I decided to go with a cherry theme since Northern Michigan is famous for their cherries. In fact the Traverse City airport, which our out of state guests flew in to, is called the Cherry Capital Airport.

I found the baskets in the organization aisle at Meijer. They are woven onto a metal frame so I knew they would be strong enough to support the drinks that I had in the basket. Each of the baskets contained the following:

- Cherry postcard from Cherry Republic
Michigan's Traverse Bays and Mackinac Island Guide Book 
- Greetings from Traverse City postcard
- Bottle of water
- Dried Berry Cherry Blend from Traverse Bay Fruit Co.
- Double Dark Chocolate Cherry Boomchunka Cookies from Cherry Republic
- Henry Weinhard's Black Cherry Cream Soda
- Small tube of 30 SPF sunscreen
- Cherry Almond Oatmeal Soap from Cherry Republic
- Sparkling Cranberry Cherry Juice

To assemble everything I put a layer of white crinkle cut paper on the bottom of the basket and then nestled all of the items inside. I wrote notes to all of our guests and put their names on the outsides of the envelopes using fonts that matched our wedding invitations.

I put together the Niecelet baskets in advance, but since the car was going to be full of wedding items I left the seven adult baskets unassembled so that I could pack everything in a way to save space. Because I did a dry run at home to see how I would put everything together it only took about ten minutes to assemble the baskets once we got to the Inn. I was really happy with how the baskets turned out and all of our guests loved them.

Tuesday
Jul232013

We're Married!

Frank and I got married on Saturday! We had a tiny wedding (only 16 people including ourselves) and everything turned out wonderfully. The wedding was at Black Star Farms in Suttons Bay and it was the perfect venue for us. We not only had the wedding and reception there but we and all of our guests also stayed at the Inn. It was really great because we all got to spend a lot of time together and have a relaxing, fun weekend.

Everyone arrived at different times on Friday and several of us walked up to the tasting room for wine tasting, which is complimentary for guests at the Inn. Frank and I ended up later buying a bottle of the pear and the apple brandy as mementos of our wedding.

From 5:30 to 6:30 we enjoyed a wine and cheese reception at the Inn and then we all headed to Traverse City for an 8:00 dinner at the Towne Plaza. The food was fantastic and everyone had a great time chatting and getting to know other guests that they hadn't met before. After dinner we ended up hanging outside on the verandah behind the Inn chatting until late before calling it a night. 

On Saturday we had a wonderful breakfast at the Inn and then while the guys went off on a fishing charter for the day the ladies headed for a little sightseeing at Sleeping Bear Dunes National Lakeshore followed by lunch in Glen Arbor.

At 4:30 my girlfriends and sister did my hair and makeup and we had fun getting ready together. At 6:00 we had our ceremony in a pretty grassy little area behind the inn. It was short, but meaningful to us and it couldn't have been more perfect. We took pictures while we had cocktails and appetizers and then had dinner at 7:30. We all sat at one long table and it was so much fun to be able to have conversations going that involved all of our guests. We had to leave the reception room at 10:00 but then we all changed and headed to the lounge/bar area of the Inn and hung out for a few more hours.

On Sunday morning we had breakfast at the Inn and then said our goodbyes as everyone left for the airport or packed up into cars to drive home. It was really a fantastic weekend for us and just what Frank and I had envisioned for our wedding celebration. I'm not one to be very lovey-dovey in public but I will say that Frank is pretty much the most super awesome person on the planet and I feel like the luckiest lady alive to get to spend my life with him. Now I'm ready for our honeymoon!

Thursday
Jul112013

DIY Letterpress Wedding Invitations 

I love how letterpress looks so I really wanted to try making my own letterpress wedding invitations. I looked at my local paper/bookbinding shop to try to do a traditional class where you set your own type, but nothing was available in the time frame I needed. I did a little searching around on the internet and came across an at home option with the Lifestyle Crafts Letterpress Combo Kit. At first I was a little discouraged since the reviews weren't so great, but I found that some people had success using modifications with a tutorial from Boxcar Press.

With renewed enthusiasm, I decided to go for it and ordered a custom letterpress plate from Boxcar Press. My first step was to create a design for my invitation and reply card on Adobe Illustrator. For fonts I used Bickham Script Pro for our names, Times New Roman in italic for "and" and "reception to follow" and Copperplate for the rest of the wording. 

Since you pay for the total area of the design and there is a minimum size I decided to fill up the blank spaces with other words like "Happy Birthday" and "Thank you" as well as some cute icons for later use in card making. Honestly, I realized after getting my plate I could have packed things together a little more tightly than I did. Ordering the plate was super easy. I simply created a log-in and uploaded my Adobe Illustrator file. They also take PDF and EPS files as well. Below is a portion of the plate that I received with my invitation on the top right and the reply card on the bottom right.

I used a regular scissors to cut apart the elements from each other. The reply card is on the left and my invite is on the right.

Next, I pulled the blue film off the plate to expose the sticky backing on my invitation plate. I saved the blue film to reapply after I was done. The letterpress kit is basically two hinged acrylic boards that you crank through a die cut machine. I aligned my plate on the top board using the grid lines.

Next I inked my plate. This was a bit tricky. I choose to order deep navy blue rubber ink from Boxcar Press.  Honestly, it was expensive but now I have a lifetime of navy ink since it comes in a two pound can. I also liked the fact that rubber ink was slow drying to make clean up and printing easier.

When printing you need to use a very, very small amount of ink so you should have two acrylic pieces, one to work some ink until it is soft with an ink knife and the other to roll out with your brayer. I had the one that came with my kit and then I used the back of one of my quilting templates for the other one. Honestly, the piece of acrylic that came with my kit was ridiculously small and I would have saved myself some headaches if I had used something larger since I barely had any room to hold it. The brayer that comes with the kit is also so small that is it absurd. I got a 6in soft rubber brayer and was very glad that I did. 

I took a small amount of ink from my can, mixed it until it was smooth on my first acrylic piece with my ink knife and then transferred a very small amount onto the second acrylic piece. I then rolled it out with my brayer until I had a very, very light coating of ink on the brayer.

With my brayer loaded with ink, I very lightly rolled it over my letterpress plate. I used some of the polymer plate strips that came with my plate for roller bearers as the Boxcar Press tutorial suggested, but honestly I found that I got better results by hand inking it.

It definitely took some time to get the hang of exactly how much ink I needed to get a nice impression. The picture below is with my plate inked with a bit too much ink, but unfortunately I didn't take a picture with it inked the right amount. To make sure that I got good impressions, after each print I wiped the plate clean with a dry cotton rag before reinking.

After the plate was inked I put my paper on the bottom board of the letterpress bed.  I splurged and bought Crane's Lettra Pearl White 220lb Cover. It is hard to show in pictures but it is amazingly thick and beautiful and I felt it was definitely worth it. Instead of using gage pins to align my paper on the letterpress bed I just aligned it with the sides (since the paper was the full width of the bed) and the trimmed down the top and bottom afterward. I was only making ten invitations so that method seemed easier for me, but if you were making a large quantity you may want to do something different.

With the paper in place I carefully flipped the top of the letterpress over the bed.

I then put the letterpress bed into the Epic Six and turned the crank which pushed the letterpress bed through the machine.

After trimming it down to size my invitation was complete. I then used the same process to print my reply cards.

To finish things up I bought 6" x 6" Navy Square Invitation Envelopes for the invitations and 3-5/8" x 5-1/8" Navy Invitation Envelopes for the reply cards. I kept things simple and used a white gel pen to address the envelopes before popping them in the mail.

I really love how my invitations turned out and to me it was worth the time and effort. Honestly speaking, figuring out how much ink gave a good print was a bit fussy and time consuming but once I had that down it was fairly quick to crank them out. It is definitely something that I would try again for a special occasion.

Tuesday
Jun112013

Wedding Invitation Preparations

With only a month and a half until Frank and I get married, I have been working on some wedding preparations before the big day. I really love the look of letterpress invitations so when I came across the Lifestyle Crafts L Letterpress Combo Kit I thought it would be fun to buy one and try making letterpress invitations myself.

I did a little research and found that people got good results with the L Letterpress Machine with custom plates from Boxcar Press following the Boxcar Press tutorial. I've been having fun learning about a lot of new things in designing the invitations since both letterpress printing and using Adobe Illustrator are new to me. I've been ordering paper samples for both envelopes and letterpress paper and finally settled on what I'd like to use. I'm also just about finished with my design to send off to Boxcar press to have my letterpress plate made. I don't want to share much of the design until after I am done and my guests have already received their invitations, but I will definitely post about it after they have been completed and sent out.

Tuesday
May212013

Wedding Dress Shopping at the Brides Project

Frank and I are getting married in two months so it seemed high time that I get myself a wedding dress, especially since his little nieces already have their dresses for the wedding. I did a little searching online for dress shops in Ann Arbor and stumbled upon The Brides Project. They have a small store where they sell donated wedding dresses at discount prices with the proceeds going to the Cancer Support Community of Greater Ann Arbor. It seemed like a wonderful opportunity for me to get a lovely dress while also supporting a great cause so I booked an appointment last weekend for Frank's mom and I to check it out.

The Brides Project shop was small but packed with beautiful dresses. For the time that we booked we had the whole place to ourselves with a volunteer who helped me find and try on dresses. It was really fun searching through the racks with Frank's mom and I tried on a ton of dresses.

I loved the cute tags that read "I Do/I Donate" and all of the hangers that were hand painted with different messages about cancer prevention, treatment and support.

It was such a fun, low stress experience that was exactly what I wanted for dress shopping. In a little over an hour we had found a wonderful dress that I am excited to wear this summer. 

If you are looking for a wedding dress in Southeast Michigan, I would definitely recommend taking a look at The Brides Project. They are open by appointment only and schedule by two hour blocks, dedicated to only one bride at a time. I had a great experience and will likely donate my dress back to The Brides Project after my wedding.

Tuesday
Dec112012

Beautiful Details from Cindy's Wedding

This past weekend I went to Amelia Island in Florida to join Frank in going to the wedding of one of his college friend's, Cindy. The whole wedding weekend was full of beautiful special touches and I thought that I would share a few of them here.

On Friday night Mike and Cindy hosted an amazing rehearsal dinner. The food was wonderful but the highlight for me was the s'mores. They had wrapped up graham crackers, chocolate and marshmallows in little cellophane bags and tied them closed with baker's twine and a cute little tag that read "S'mores, Y'all." There were Adirondack chairs set out around fire pits outside and you could relax, toast your marshmallows and make some s'mores. It was really a wonderful and fun idea.

On the morning of the wedding Cindy had arranged a trolley tour for the guests. The trolleys were really cute and decorated for the holiday season. We went to historic Fernandina Beach and the trolley driver explained all sorts of interesting facts about the town and its history. We then had two hours to walk around the town and grab some lunch before heading back to the hotel.

The wedding location was beautiful, set on the lawn in front of the Ritz Carlton Amelia Island overlooking the sand dunes and the ocean. It was a foggy day which made for a romantic ambience. As an added touch Cindy thoughtfully provided pashmina wraps with the programs for the ladies since it was a little chilly outside. Cindy's dress was amazing and she looked like a princess. The ceremony was truly lovely, with adorable flower girls and ring bearers and touching readings. Cindy and Mike looked truly gorgeous and happy together.

After the ceremony was a wonderful cocktail hour. At the tables around the outside bar Cindy had set out these really neat butterfly jars which tied into the ceremony. They looked real and the butterflies inside would flit around every once in a while making it really believable, but they were actually battery operated with super thin wires and a battery under the lid of the mason jar. They looked lovely and definitely had us fooled for a while into thinking they were real.

Inside at the cocktail hour they had a lady who was hand rolling cigars for the wedding guests. It was really cool to watch her process as she worked.

There was also a fun photo booth set up with a variety of silly props like big glasses, colorful bowties and fake mustaches. It would take four pictures and print out for the guests with the wedding information along the bottom.

At the reception the table settings were lovely. I especially liked the purple jewel toned water glasses which were a unique touch.

For dessert, there were the most amazing cupcakes. I thought it was neat that they were offered in both full and mini sized in case you wanted just a bite. The red velvet with cream cheese frosting one was really quite amazing.

At the end of the evening we all went outside and were given long sparklers. We lit them and made a tunnel of light for Cindy and Mike to run through as they left the reception. It was really beautiful and a fun way to send them off.

Frank and I had such a wonderful time at Cindy and Mike's wedding. It was fun to catch up with several of Frank's college friends and be a part of Cindy and Mike's special day. I'm sure that the two of them will be blessed with a long and happy life together. Congratulations, Cindy and Mike!