Saturday
May052012
Picture of the Day: Grote Markt (Grand Place) in Brussels
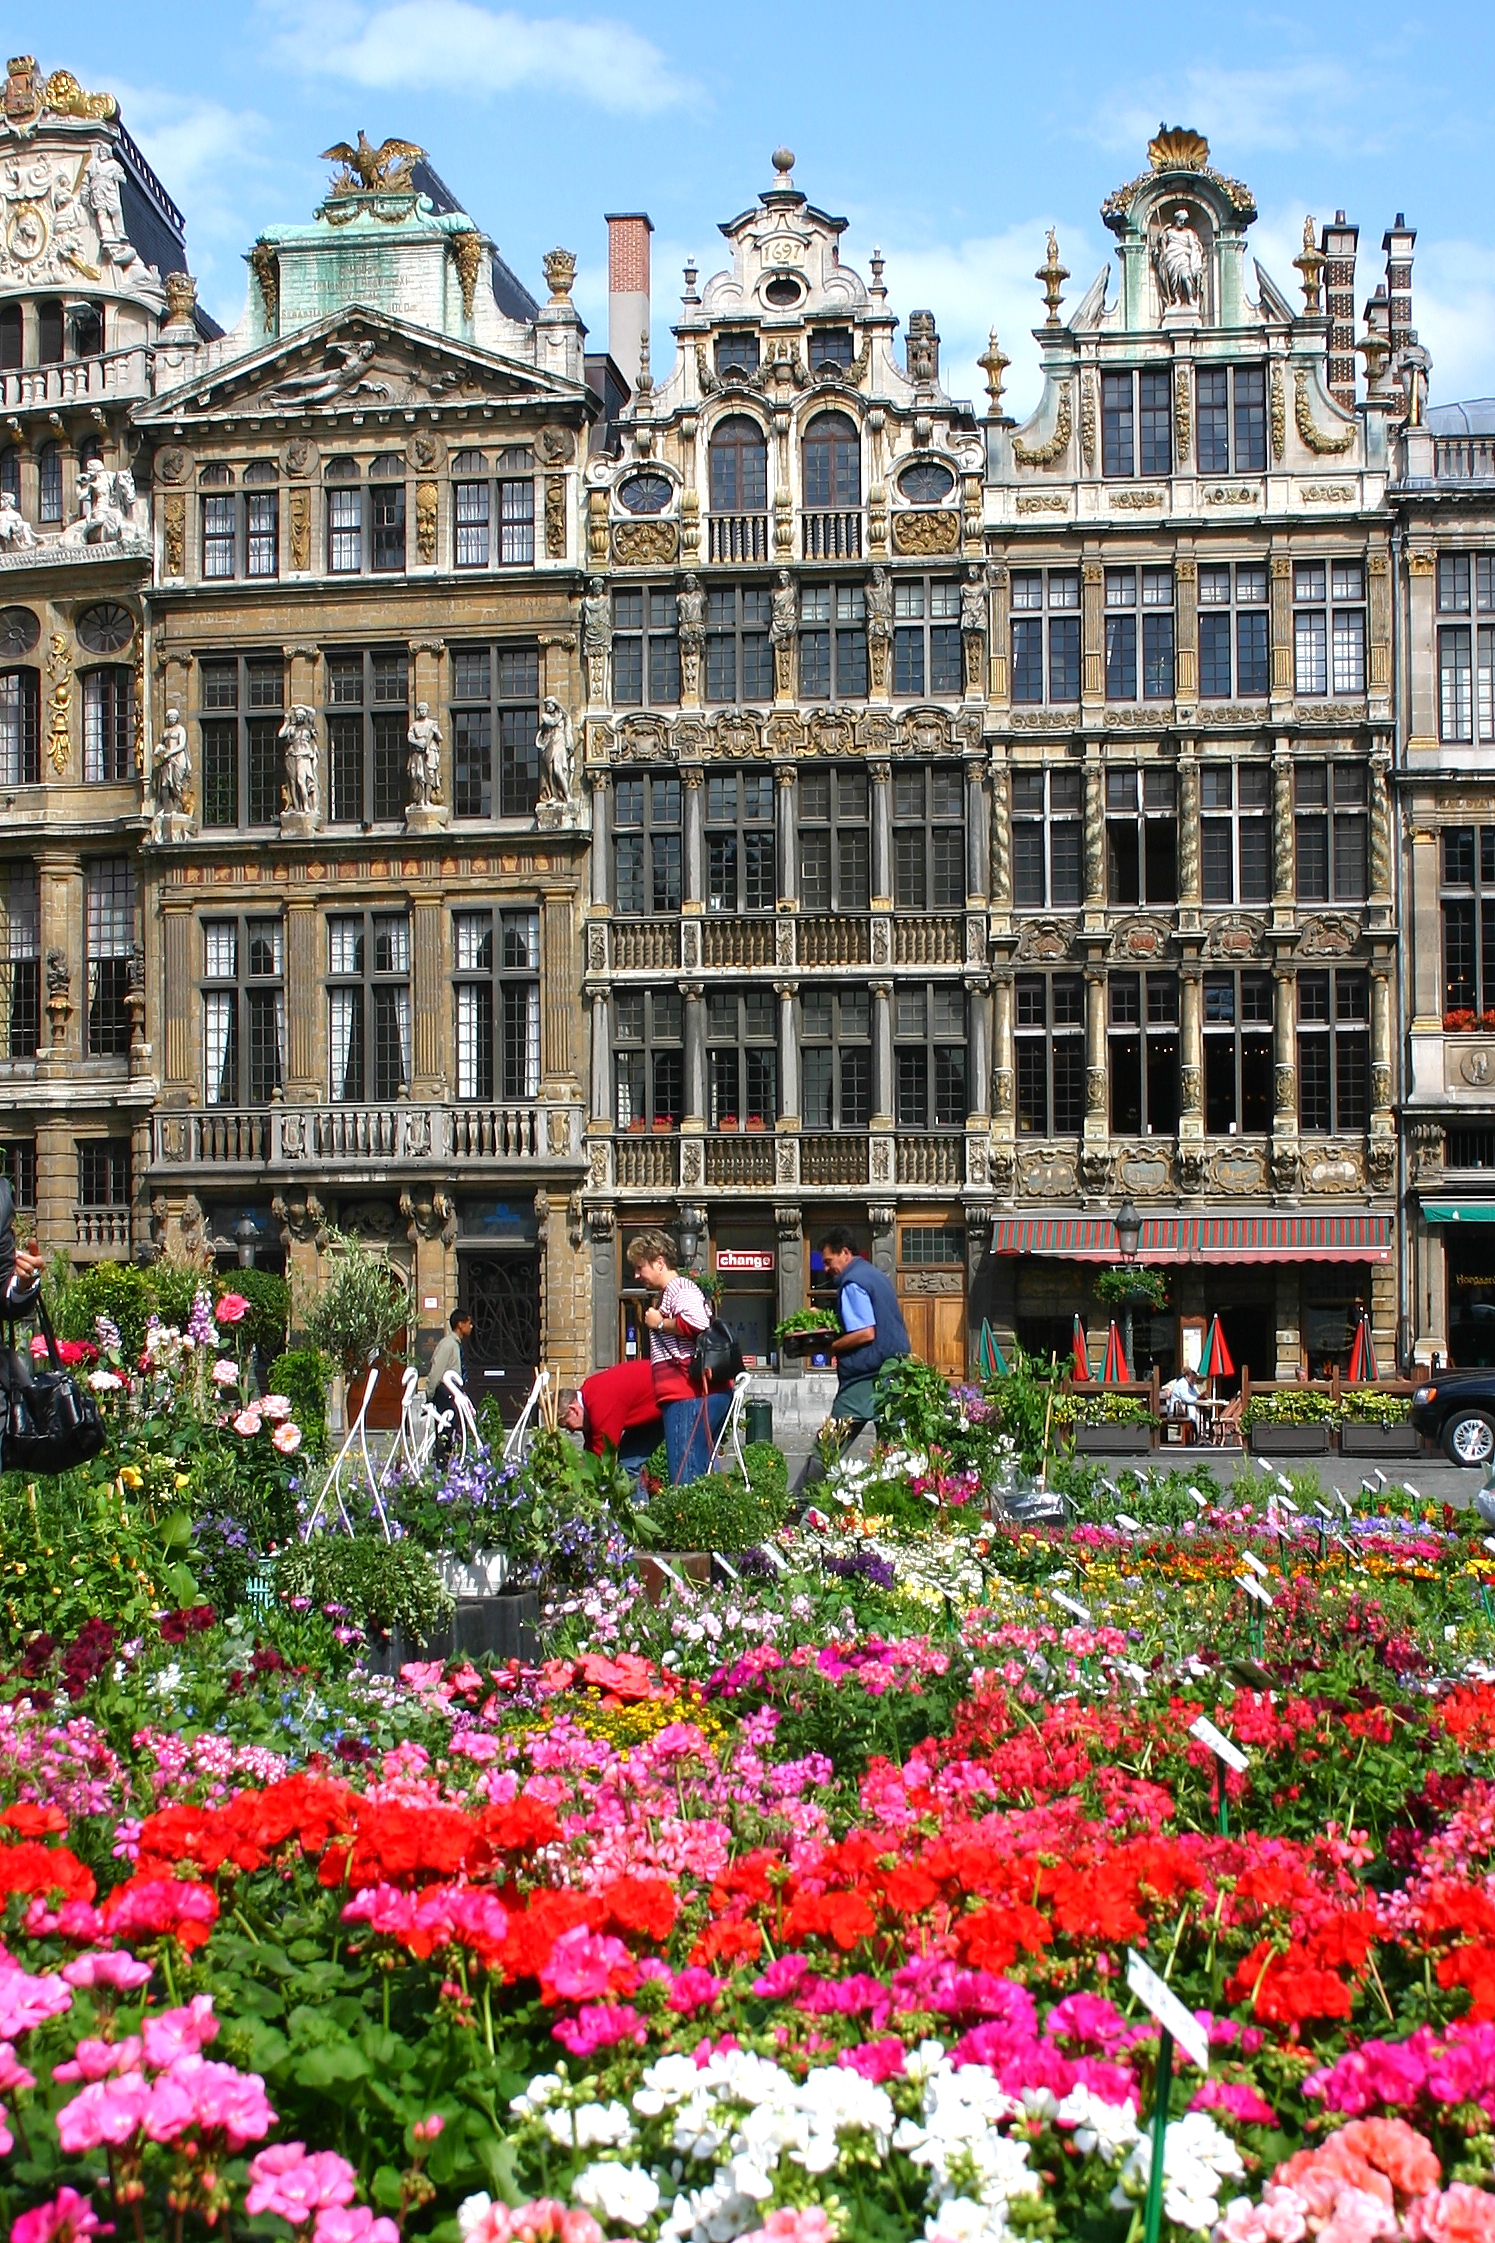
Brussels, Belgium
06.2004
 Lisa | Post a Comment | Share Article | Email Article | Print Article

My name is Lisa and I'm a crafty girl with wanderlust working as an engineer by day. My blog chronicles projects in my home as well as pictures and stories from my travels.

Brussels, Belgium
06.2004
Lisa | Post a Comment | Share Article | Email Article | Print Article 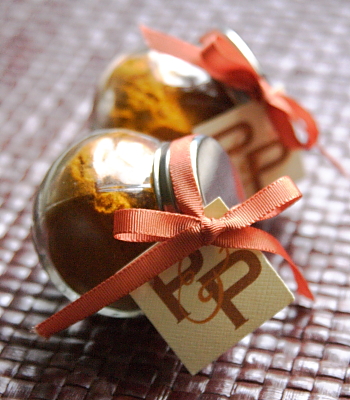 After sharing the wedding flowers I made for the small wedding reception for my friends, Pam and Pete, that I hosted at my house a few years back I thought I would also share the wedding favors.
We had Indian food catered and so I thought little jars of curry powder would make a nice favor. I got little spice jars from Cost Plus World Market and filled them with curry powder that I had bought in bulk.
To decorate the jars I made little P&P tags on my word processor, printed them out and trimmed them into squares. I punched a hole in the corner and then tied on the tags with a pumpkin colored ribbon.
The favors were super easy to make and inexpensive, too. Everyone thought they were cute and the curry powder was a useful gift as well.
Lisa | 2 Comments | Share Article | Email Article | Print Article 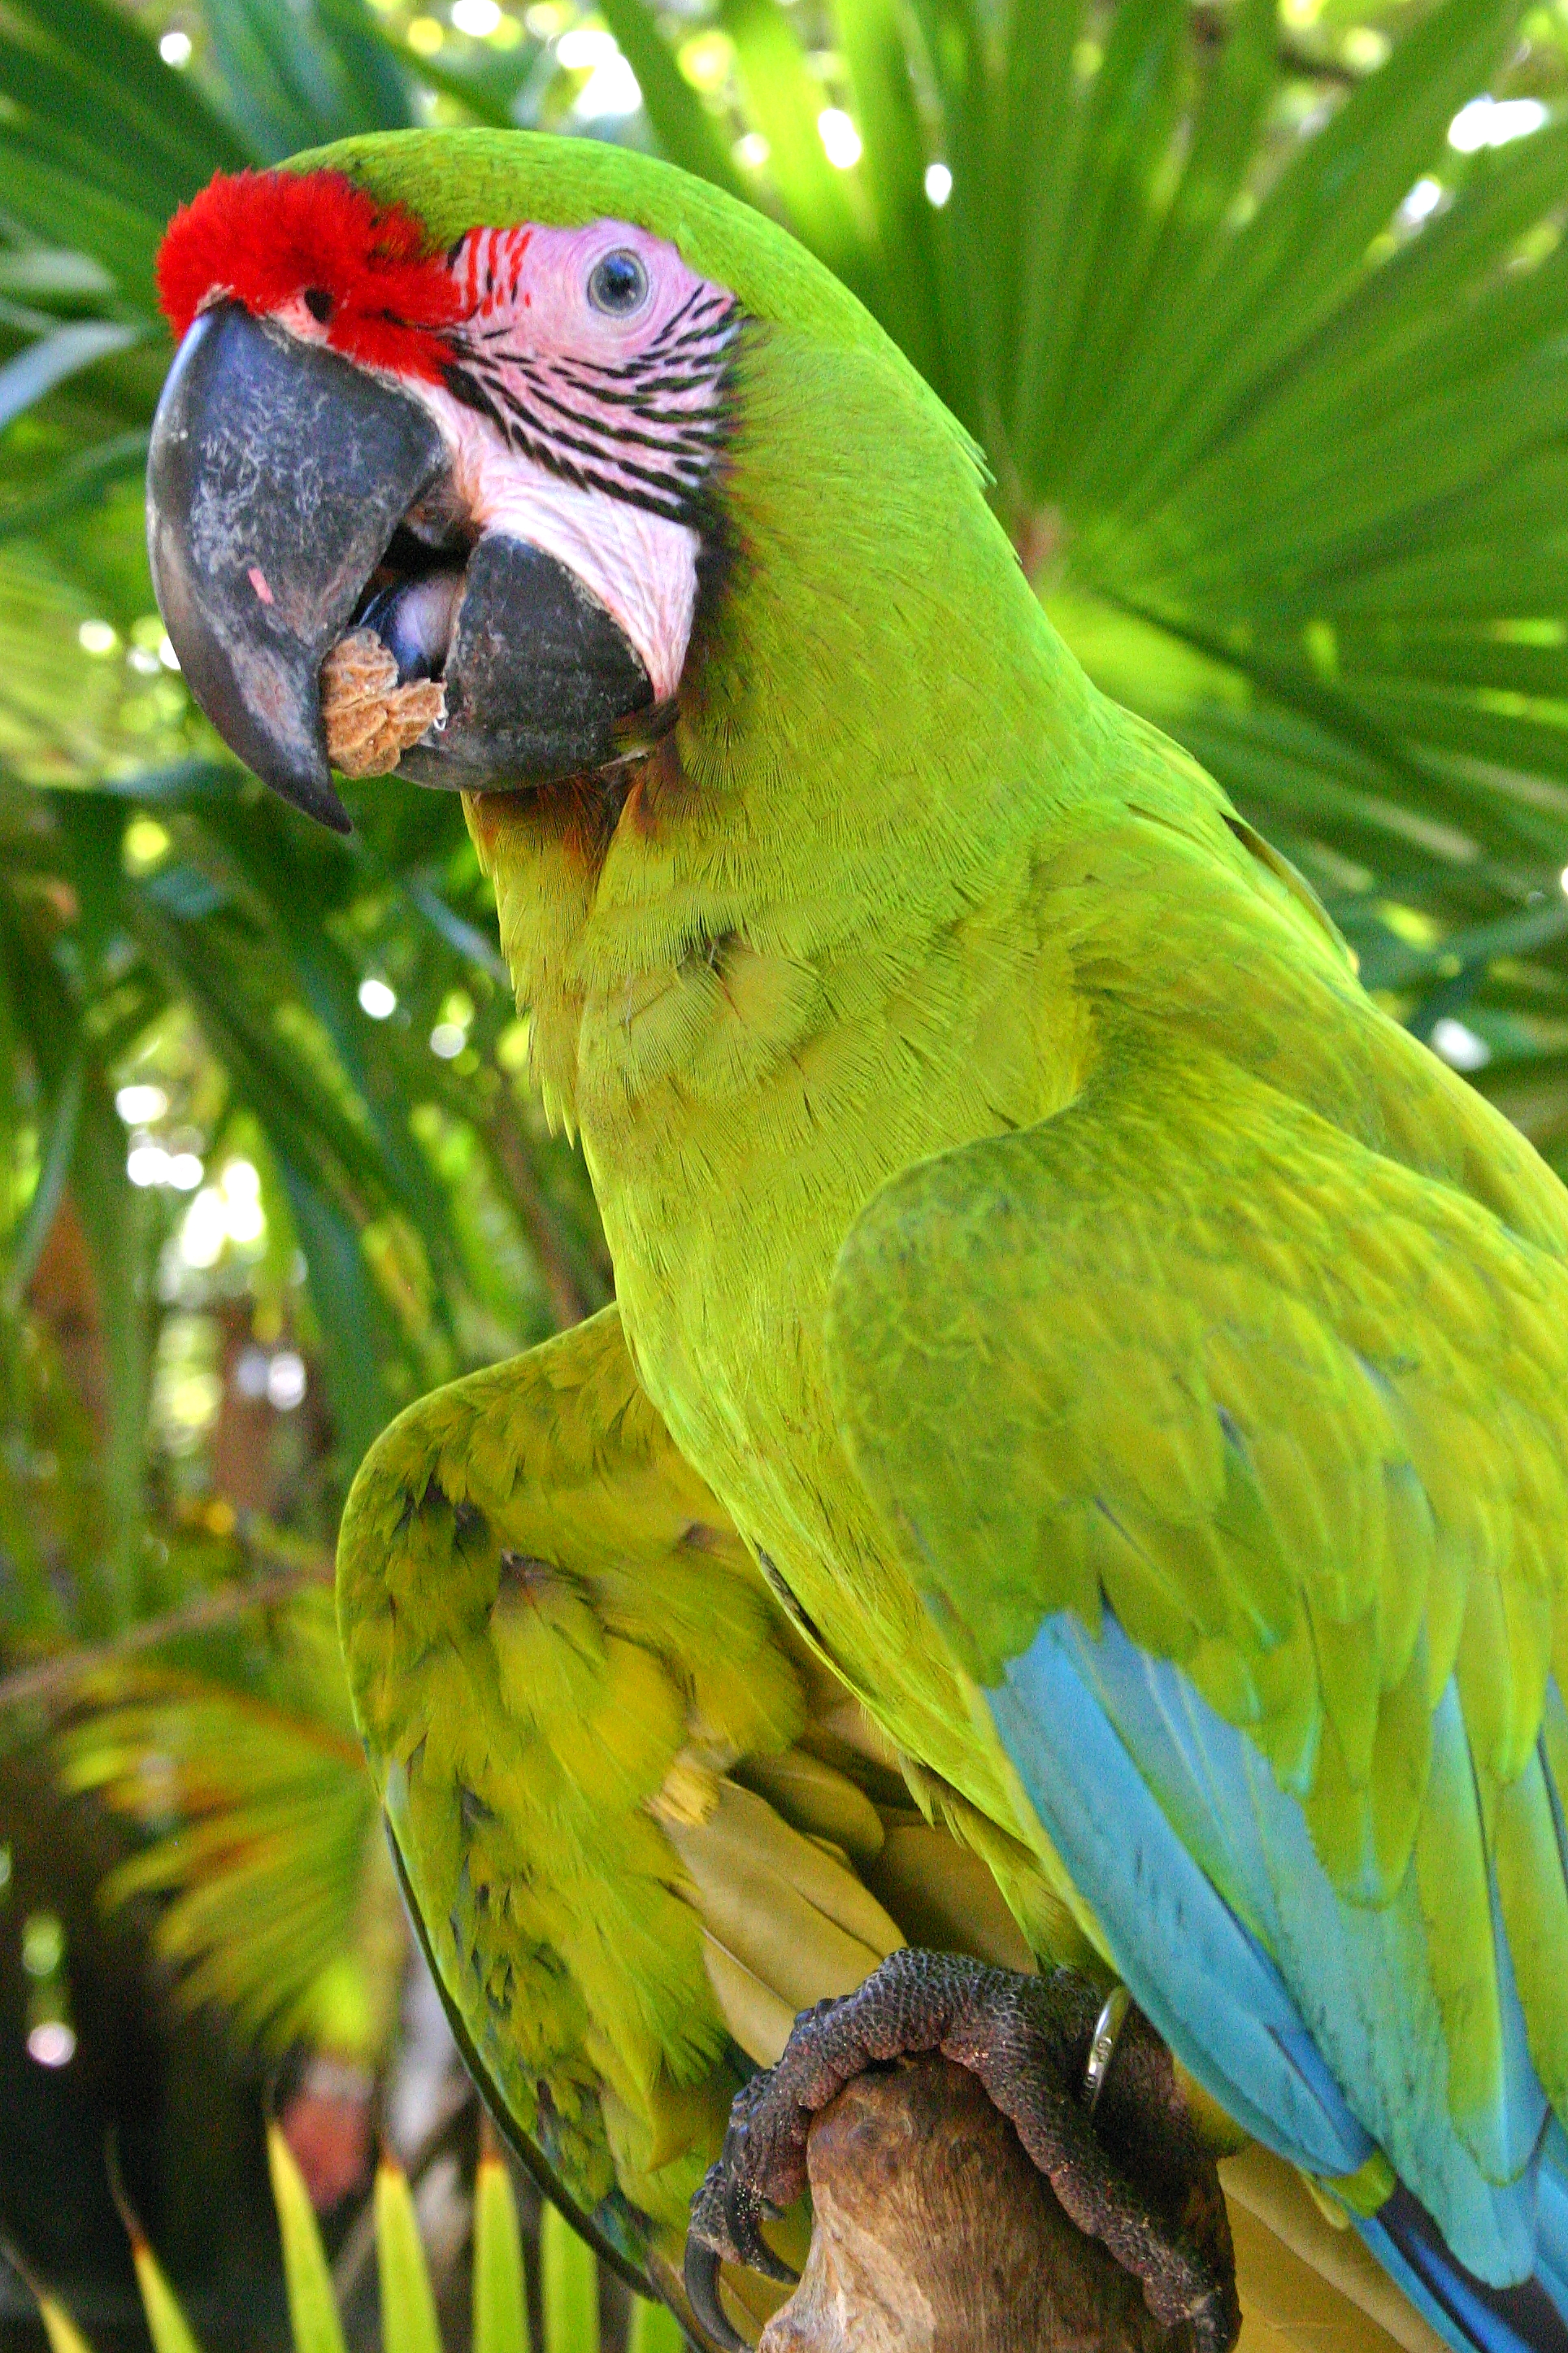
Roatan, Honduras
11.2004
Lisa | Post a Comment | Share Article | Email Article | Print Article  When the weather is gorgeous and the skies are blue it really isn't so hard to take some beautiful vacation photos.
If the weather isn't cooperating with your travel plans, however, it can be a little more challenging to capture great photos on a dreary day. Here are a few practical photography tips to make the best of the weather and get some lovely shots on your trip.
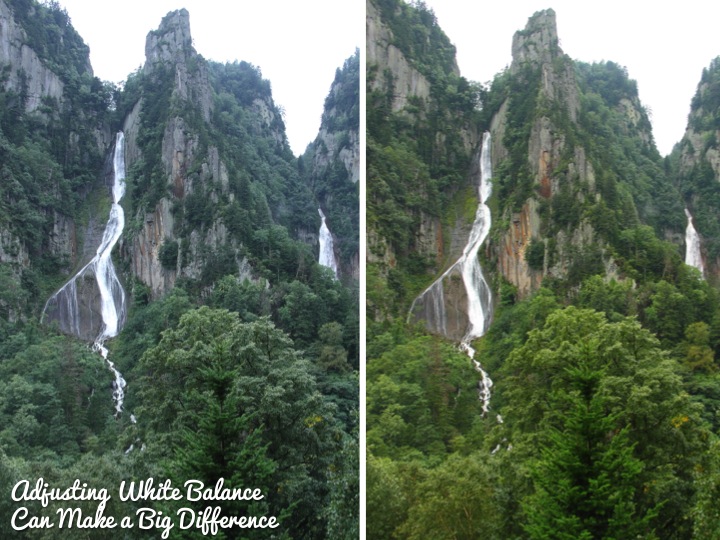
Adjust your white balance
Gloomy or cloudy weather can give a cold feeling to your photos if you don't have the white balance set properly on your camera. Find out how you can adjust it on your camera and either manually set it or put it in cloudy mode. Personally, I always shoot in raw with my camera because I love the flexibility of being able to tweak the white balance on my photos after the fact. Having the right white balance can really affect the quality of your picture.
Limit the amount of blank sky
Capturing a large expanse of sky that is filled with a vibrant sunset or interesting clouds set against a backdrop of blue can make a lovely photo. A picture that is predominately blank, white sky, however, is not so interesting. There is no rule that says the horizon line needs to be in the middle of your photo so try tilting your camera down a bit to minimize the empty space. Another trick is to like up tall things, like trees or buildings, in the foreground your picture to fill up the expanse. You can also try tilting the frame a bit to play around with the composition to find a way to minimize blank sky.
![]()
![]()
Creatively add color
Grey days can result in photos that seem to have no color in them. Avoid drab photos by actively trying to add color in. Look around for a patch of flowers, a brightly colored door, colorful umbrellas or a tree with bright foliage and then move around until you can find a composition of your subject that can include it. For me this often means a lot of crouching or standing on tip toes so I can line things up, but it is worth it.

Focus on details
One nice thing about overcast weather is that you don't have harsh shadows caused by bright sunlight. The diffuse light makes it a perfect time to take photos of details of things, especially items like carvings which have a lot of depth and could get swallowed up in shadows.

Embrace the weather
Don't fight the weather. It is part of your experience on your trip so embrace it. Take pictures of people with brightly colored umbrellas and raindrops on leaves. Using puddle reflections can also provide fun pictures. Dark, angry, stormy skies make a lovely backdrop for great photos. Also, be on the look out for rainbows after the rain subsides.


Best of luck for wonderful weather on your next trip! Happy travels!
Lisa | 5 Comments | Share Article | Email Article | Print Article  Kruger National Park, South Africa
07.29.2004
Lisa | 2 Comments | Share Article | Email Article | Print Article  When I want to brighten up my home with flowers I love buying grocery store carnations to make a simple arrangement. I just made one to display on the console table in my guest room and I thought I would share how easy it is to do it.
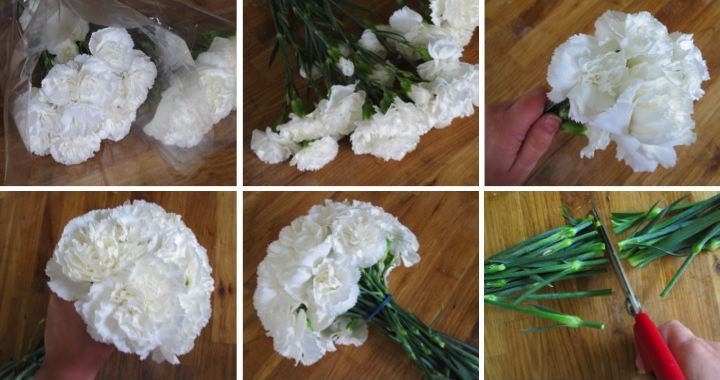
Depending on the size of arrangement I want to make I use two to three bunches of carnations. I like to try to find bunches that have slightly different shades of flowers to give the arrangement a little more depth. 
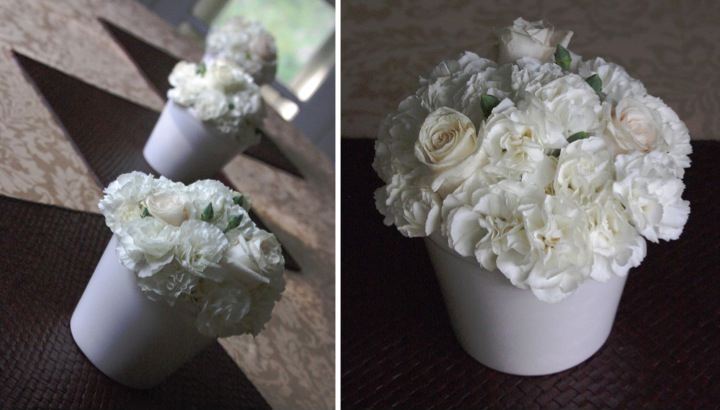
After opening up the bunches, I start to gather up stems in my hand, arranging them as I go to form a tight puff of flowers. Once I have built up the bouquet to the size that I would like I secure them close to the flowers with a rubber band and then trim the stems to fit in my vase. I always use an opaque pot or vase, but if you wanted to use a clear vase you could disguise the rubber band by tying a pretty ribbon over it.
I like this arrangement for two reasons. First, I can make it in about five minutes and I don't need any special flower arranging items, like frogs. Second, the carnations can last several weeks if taken care of which means pretty flowers in my house for a long time with little effort and little money. You can't beat that!
A few years ago when my friends, Pam and Pete, got married I hosted a small reception for them at my house. For the flowers I did a variation on this arrangement, just adding in a couple of white roses and the carnation buds into the mix. It made for a pretty table without breaking the bank.
Lisa | 1 Comment | Share Article | Email Article | Print Article 
Istanbul, Turkey
11.27.2009
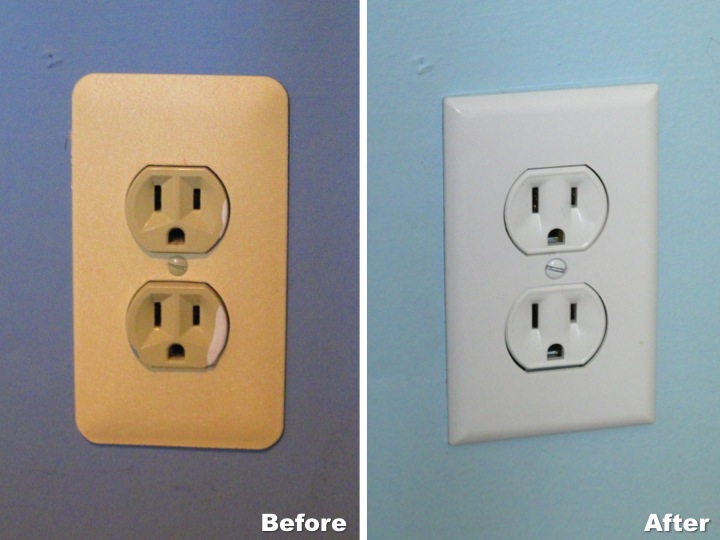
Lisa | Post a Comment | Share Article | Email Article | Print Article After I repainted my guest room on Saturday I decided that something needed to be done about the old, ugly outlets in the room. They were a yucky tan color with metal cover plates and just looked dirty and old. Since I already had the covers off due to painting I figured it was an opportune time to replace them.
Replacing an outlet is really simple, but due to the fact I don't want anyone to hurt themselves by misunderstanding what I might write, I'll let you look it up from professionals instead of giving the details here. I will say one thing, however. The most important thing is to make sure that you kill the power before you start. I am a little paranoid so I cut the power with my house's main circuit breaker instead of just the circuit I am working on. No shocks for me, thank you very much!
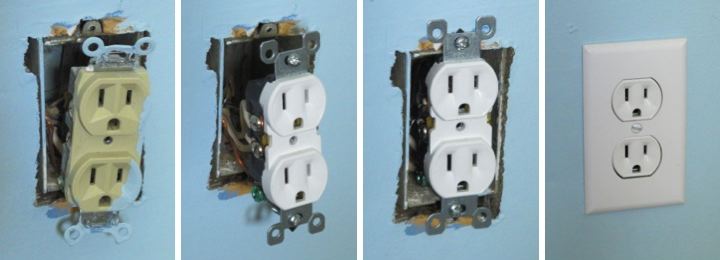
It took me about five minutes to swap out each outlet with a new white outlet and a new white cover plate. It is just a little detail but I think it definitely helps make the room look cleaner and more updated.
Lisa | Post a Comment | Share Article | Email Article | Print Article 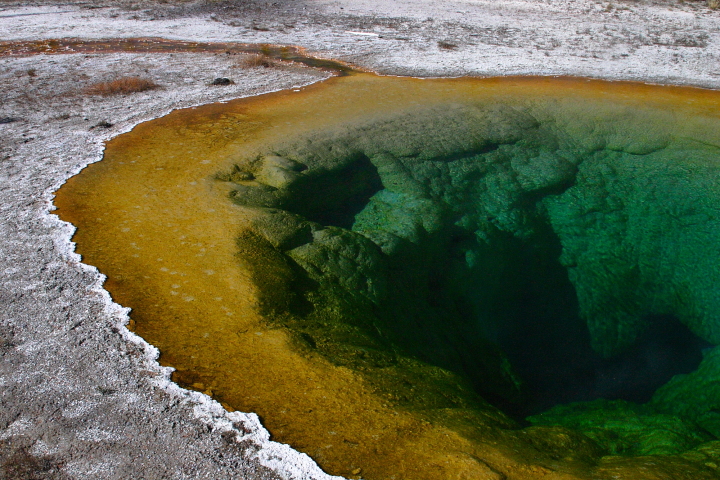 Yellowstone National Park
Wyoming, United States
09.26.2005
Lisa | 1 Comment | Share Article | Email Article | Print Article 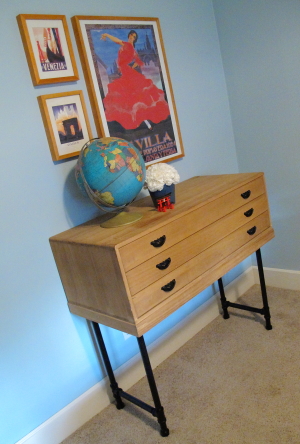 I love the little tansu chest that I bought for my apartment while I was living in Japan, but at only 14" high it has been hard to incorporate into my home in the U.S. without it looking like a piece of doll furniture.
To solve my problem I decided to try to turn it into a console table. I wasn't able to find wood with the fine grain to match the chest for legs so I decided to match the black metal pulls instead. 
While I was trying to figure out what to do I remembered seeing a DIY Industrial Cart on Ana White's site that used pipes between the shelves which inspired me to use pipes for the legs.
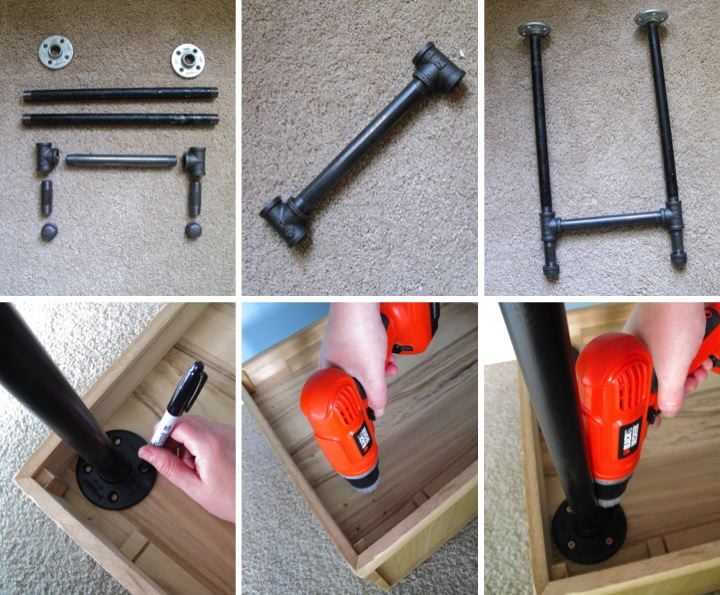
I chose to use 3/4" black pipe which I thought would be sturdy enough to support my light chest. To start I threaded two tees onto each end of a 10" nipple. On the bottom of each tee I threaded a 3" nipple followed by an end cap. On the top of each tee I threaded an 18" pipe topped by a flange. I repeated the same process for the second set of legs.
Once I had the legs assembled I gave them a coat of tinted primer followed by two coats of matte black spray paint. After they were thoroughly dried I flipped my chest upside down and lined up the legs where I wanted them to be on the bottom of the chest. I marked where the flange holes would be and then pre-drilled holes for my screws. I then put the legs back on the chest and screwed them on to complete the transformation into a console table.
Comparing how short and out of place the tansu chest looked before, to how it has now become a piece of featured furniture in my guest room makes me really happy. I think elevating the chest has made a world of difference. The legs are quite sturdy and as an added bonus with the chest raised up I now have easy access to the outlet on the wall which was previously hidden.
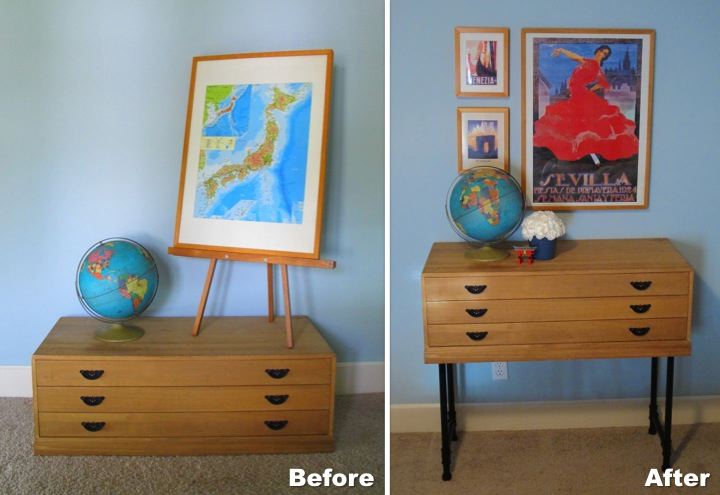
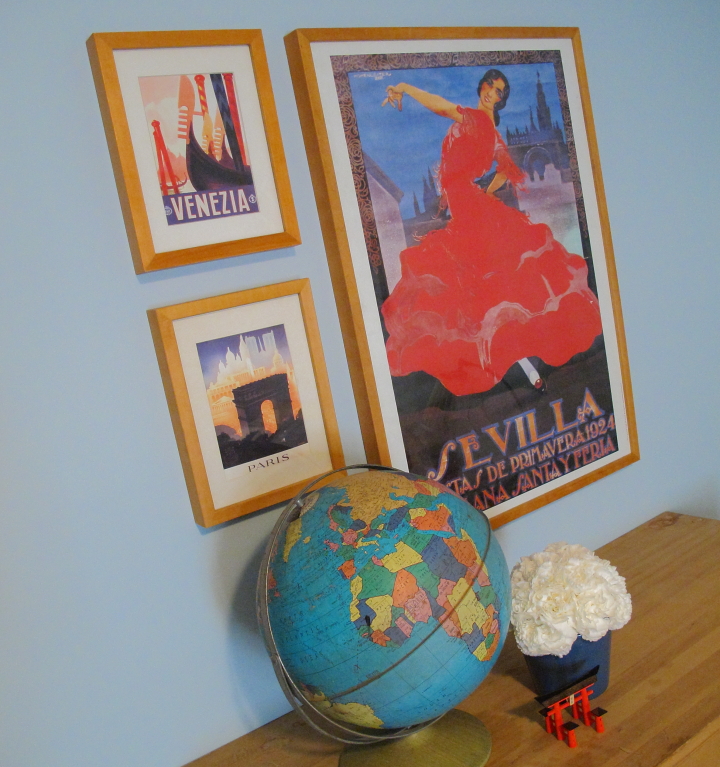
After the console table was done I had a bit of fun decorating. I picked up the Sevilla, Venezia and Paris prints and poster during my travels and framed them in Ikea Ribba Frames. I have had the tin globe for several years and actually used for the photo in my banner. The tiny red torii gate is a souvenir that I bought while visiting Miyajima in Japan. I finished my display off by arranging a bouquet of carnations in a little blue pot.
With this transformation I have one little corner of my guest room feeling cozy and welcoming. Now I need to get on doing something about the ugly bi-fold doors on the closet and making a headboard.
Lisa | 5 Comments | Share Article | Email Article | Print Article 