Monday
Oct152012
Picture of the Day: Yellow Leaves Along Torch Lake

Torch Lake, Michigan
10.11.2008
 Lisa | Post a Comment | Share Article | Email Article | Print Article

My name is Lisa and I'm a crafty girl with wanderlust working as an engineer by day. My blog chronicles projects in my home as well as pictures and stories from my travels.

Torch Lake, Michigan
10.11.2008
Lisa | Post a Comment | Share Article | Email Article | Print Article 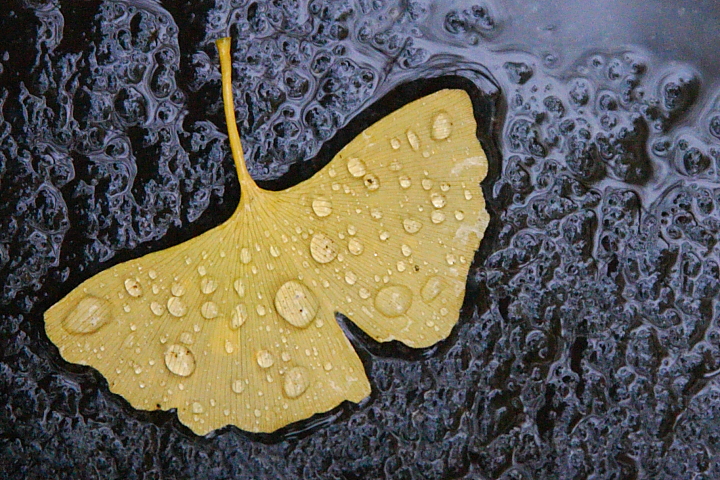 Narita, Japan
11.2008
Lisa | Post a Comment | Share Article | Email Article | Print Article 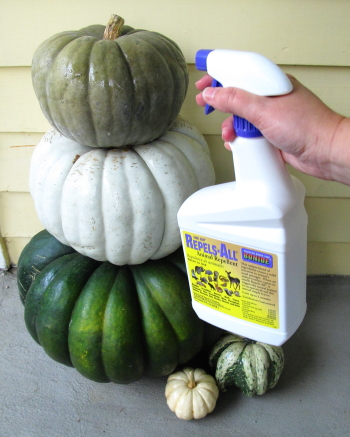 Most of the time I love that my neighborhood is home to a bunch of little animals. Watching a bunny hop across my backyard through my kitchen window as I am watching dishes gives me a warm feeling inside.
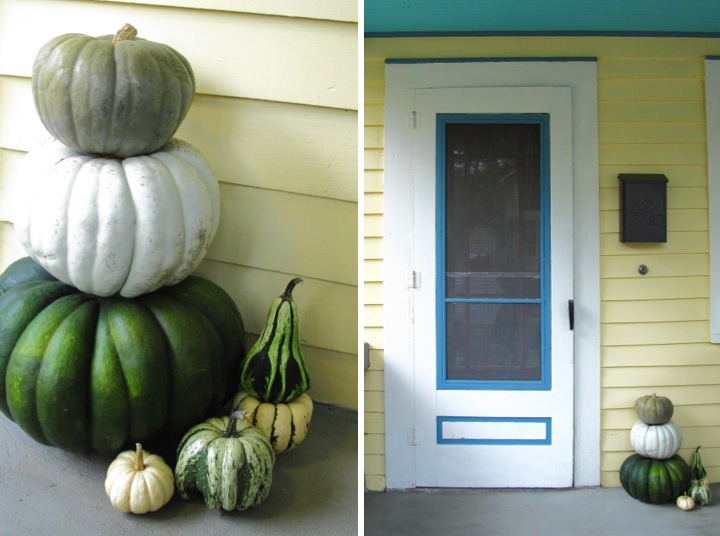
On the downside, these cute little critters tend to like to munch on things that I am growing in my garden. Additionally, whenever I put pumpkins and gourds out on my front porch, within a day or two nibble marks start showing up on them. 
This year I thought I would try something new by spraying some animal repellent on the pumpkins. I decided to buy some Bonide Shot-Gun Repels-All Animal Repellent since it is all natural and not poisonous to animals. I don't mind the animals hanging out in my yard, I just don't want them to chew on my pumpkins. I sprayed the Repels-All on my pumpkins and gourds and let it dry. Like all animal repellents, it has a pretty strong smell which dissipated after a little while.
It has been a few days now and so far I haven't seen any evidence of little critters snacking on my pumpkins so I am pretty ecstatic. Finally, I can decorate my front porch with pumpkins and have it look cute for more than a day or two.
If you try this yourself please note that I don't have children or pets, so if you do please read the instruction labels to make sure that you use it safely with no issues. Also, I have no affiliation with Bonide Shot-Gun Repels-All Animal Repellent so all opinions are my own, however if you do buy it through my Amazon link I will get a small amount of compensation since I am an Amazon Associate.
Lisa | 4 Comments | Share Article | Email Article | Print Article 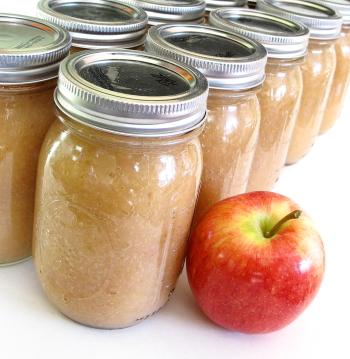 After yesterday's post about how you can prepare your own applesauce it's time to delve into canning it. Successful canning is all about keeping things hot and sterile. If you are new to canning The National Center for Home Food Preservation website is a wonderful resource sponsored by the government for explaining proper and safe methods as well as answering questions about preserving food. I would highly recommend reading their basic canning information.
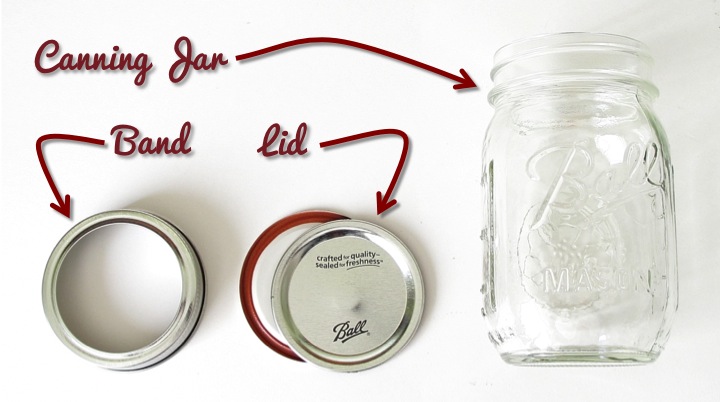
To begin with you need proper canning jars with lids and bands. Mason jars with a single piece lid or bail jars look super cute but are not appropriate for safe canning. You can reuse jars and bands after cleaning them, but you cannot reuse lids because the sealing surface (gasket) will have already been compressed from the first time it was used. If you use a lid again you won't be able to guarantee a proper seal which could lead to the food spoiling.
Some basic tools are also required for canning. For applesauce because it is high in acidity we can use a boiling water canning method which requires a large pot and jar rack. You can buy a water-bath canning pot with a jar rack pretty inexpensively (about $20). I actually have two canning pots, one which I use for preparing whatever food I am going to can and one for the jars. The jar rack comes with the canning pot and sits in the bottom of the canner. It keeps the jars from sitting on the bottom of the pot so that the boiling water can flow underneath them. It also allows you to raise the jars up so that loading and unloading jars is easier.
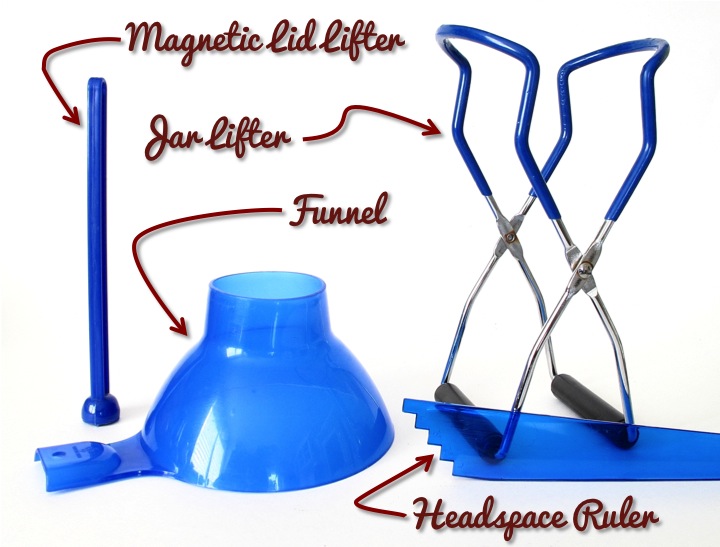
A few more tools are needed to get started. In order to grab the jars out of the boiling water a jar lifter is essential. It clasps around the neck of the jar so that you can pull it out securely and not worry about slipping. A magnetic lid lifter is just a long stick with a strong magnet on the end which allows you to pull the rings and lids out of the water. A funnel helps you pour your applesauce into the jars without making a complete mess. A headspace ruler has notches on in in 1/4" increments so that you can measure the headspace (distance between the top of what you are canning and the rim of the jar). Headspace is specified in each recipe and is important. If you leave too little you may have difficulty getting a seal and if you leave too much you could have some discoloration on the top of your food. These tools are generally sold as a canning utensil set which runs a little over $10.
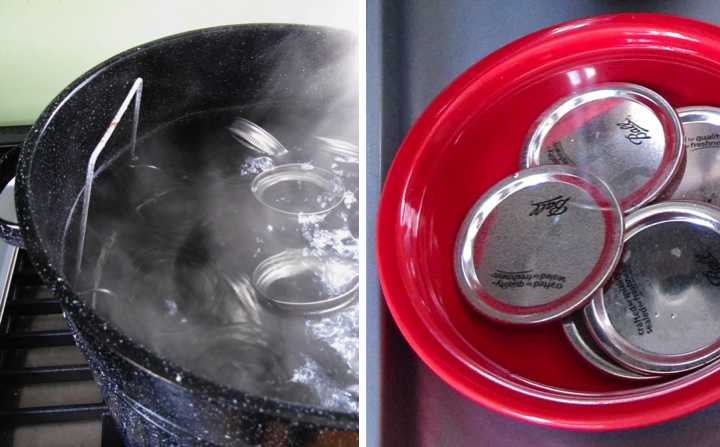
Now that we've covered the background, let's start canning. First you need to thoroughly clean your jars. You can wash them with hot soapy water or run them through the dishwasher. To sterilize the jars place them in the canner, cover them with water and bring it to a boil, boiling for at least ten minutes (longer if you are above sea level). I also boil my bands in the pot. My general process is that after I put whatever I am canning on the stove to cook I start boiling my jars. After the ten minutes has elapsed I turn the heat down to a simmer on the jars, keeping the water and the jars hot. The jars need to stay hot so that when you pour your hot liquid into the jars they won't break.
Lids should not go in the boiling water which could compromise the gasket which makes the seal. Instead after washing them, place them in a bowl of hot, but not boiling, water until you are ready to use them.
After you have prepared the applesauce it is important to keep it hot while you are in the process of filling the jars. A simple way to do this is to put it in a pot on the stove over medium heat.
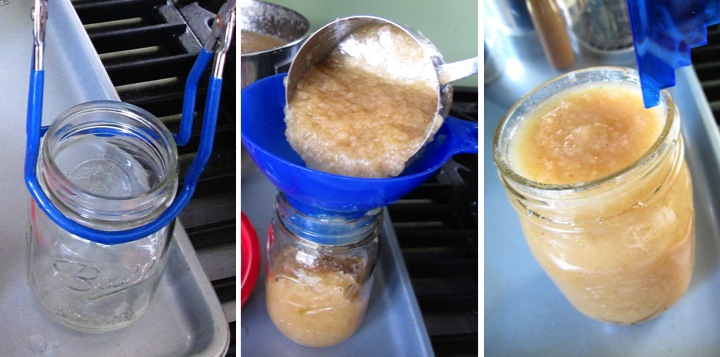
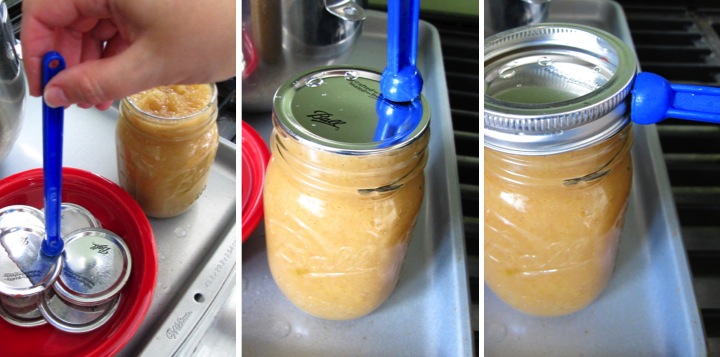
To start filling the jars, pull a hot jar from the water using the canning jar lifter and place it on your work surface. Place your funnel in the jar and ladle in applesauce, leaving 1/4" of headspace (distance between the top of the applesauce and the rim of the jar). Use the headspace ruler to scrape against the inside of the jar to release any air bubbles and then check your headspace. If you spilled any applesauce on the rim, use a cloth to wipe it off so that you have a good surface for your seal.
Using the magnetic lifter, pull a lid out of the hot water and place it on top of the jar. Pull a band from the simmering water in the same way and place it on top of the lid. Screw down the band over the jar.
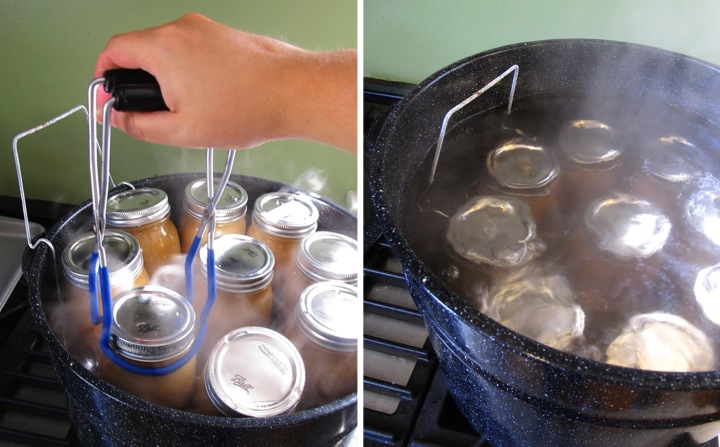
The jar of applesauce is now ready to go back into the canner using the jar lifter. Once you have filled all of your jars, lower the jars into the water with the jar rack. Make sure that you have at least one inch of water covering the top of the jars. Place the lid on the canner and turn the heat on high to boil the water.
Processing time starts from when the water begins vigorously boiling. If you are at sea level (altitudes less than 1000 feet) then you will need to process pint jars for 15 minutes and quart jars for 20 minutes. If you are at a higher altitude check the NCHFP processing times for applesauce. The water must remain boiling for the entire processing time, otherwise you need to bring the water back to boiling and restart the processing time. If the water level appears that it will drop to less than an inch over the jars, add additional boiling water.
Once processing is complete, turn off the heat and remove the lid of the canner. Let the jars sit in the hot water for five minutes before pulling them out with the jar lifter. Place the jars with an inch between them and allow then to cool undisturbed for at least twelve hours.
As the jars cool and seal you will probably hear them making a little pop sound. After they have completely cooled you should check your seals by pressing on the top of the lids. If the lid springs back after you lift your finger, your jar did not seal. If your jar did not seal, place it in the refrigerator and eat the applesauce within the next few days.
The sealed jars no longer need the bands and can be stored without them. If you do want to keep the bands on it is a good idea to loosen them a bit so they won't get stuck on. Properly sealed applesauce can be safely stored for a year.
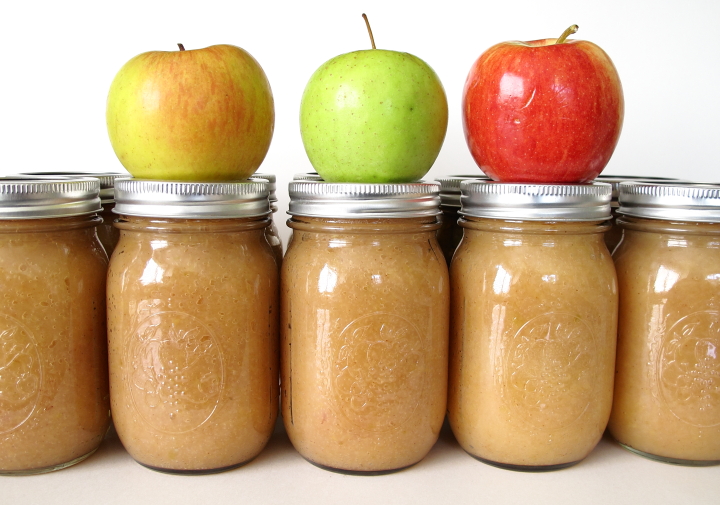
Now you can sit back and enjoy your beautifully canned applesauce and have the taste of fall all throughout your winter. Happy canning!
If you are interested in canning, check out Homemade Applesauce Part 1: Cooking & Sieving
Lisa | Post a Comment | Share Article | Email Article | Print Article 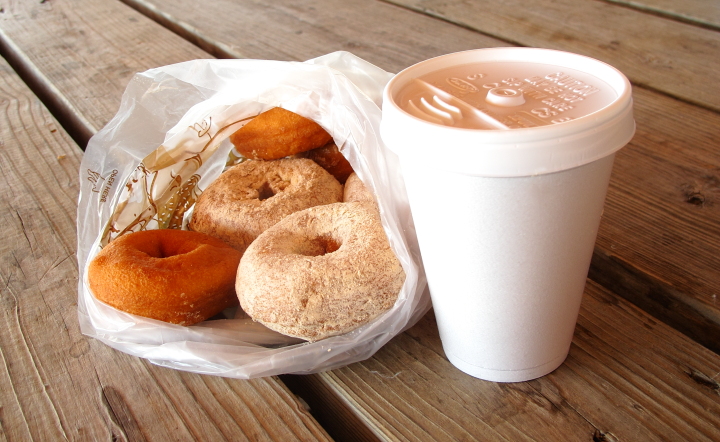
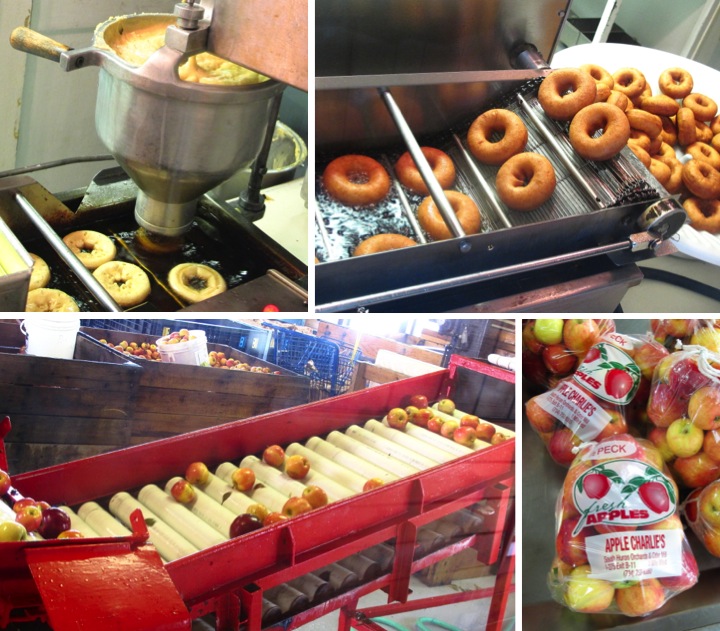
Autumn in Michigan means that it is cider and doughnut time. There are several cider mills in the area and visiting a few of them throughout the fall is one of my favorite traditions of the season. 
This morning Frank and I headed to Apple Charlie's which is the cider mill that he went to as a kid. We were both hungry so we made a beeline straight for the cider and doughnuts getting a variety of both plain and cinnamon sugar dusted doughnuts. Nothing tastes like fall more than hot apple cider and it was delicious.
Warm and full, we then took a look around the cider mill. There were the typical activities for kids of hay rides and an area to pet animals. They also had windows where you could peek in and see the doughnuts and apple cider being freshly made. Delicious!
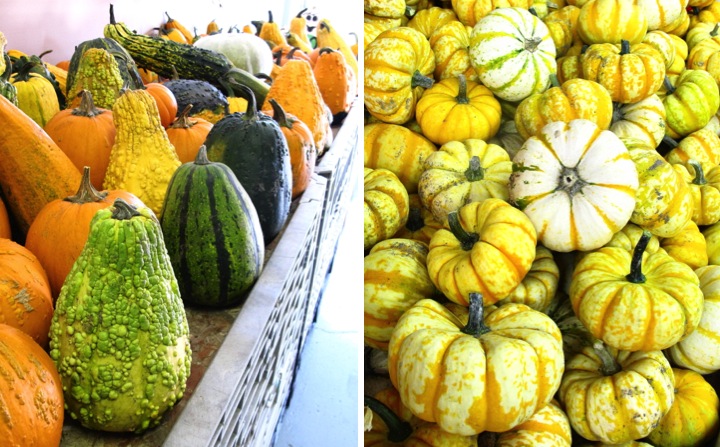
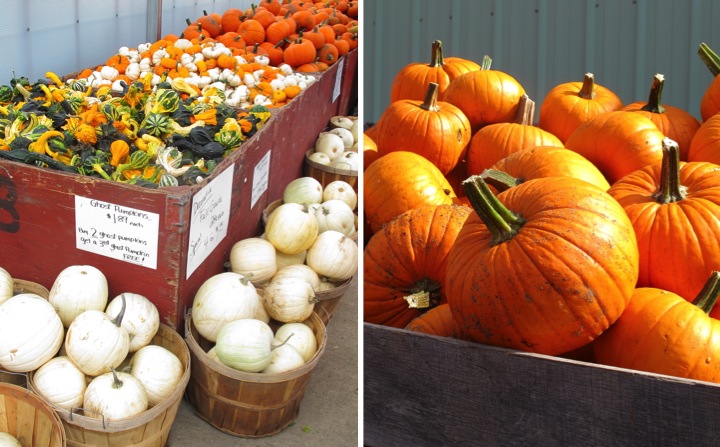
We also took a look at all of the pumpkins and gourds they had for sale. I especially love all the bumpy ones and the colorful little minis.
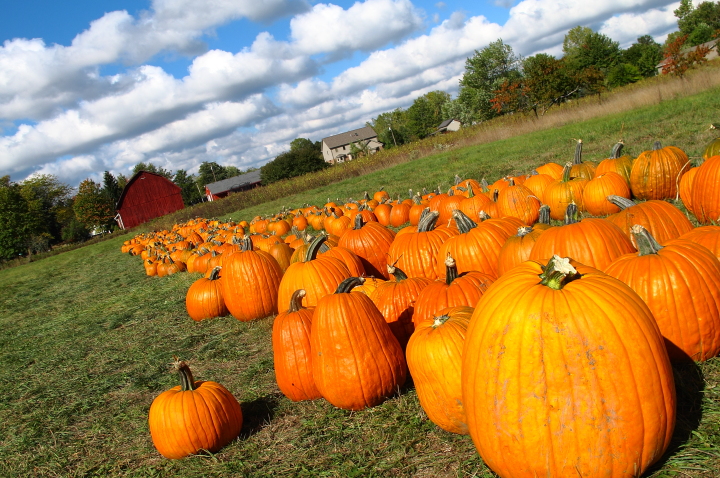
On our way out we took a little stroll through the pumpkin patch. It was such a gorgeous morning with the sun shining and the bright blue sky full of puffy clouds.
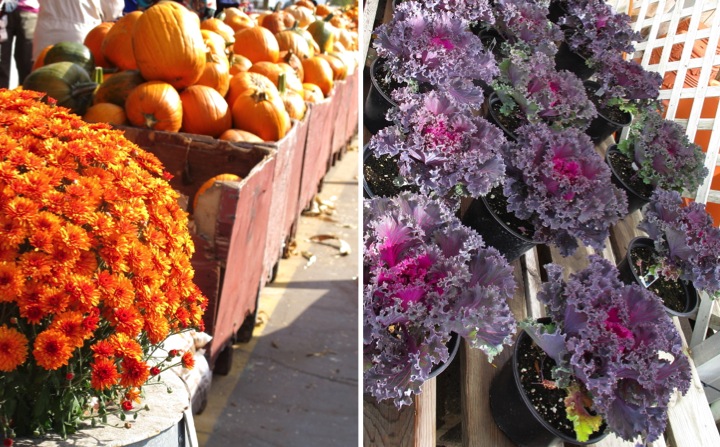
After Charlie's we headed over to Block's Stand & Greenhouse. Block's is an amazing place full of wonderful deals on seasonal plants and produce. In the spring I buy most of my garden plants there and then in the summer and fall they have amazing produce. I really have no idea how they can sell things so cheaply. My biggest problem is that I have to contain myself from over buying and letting things go to waste.
I couldn't resist getting a variety of apples to make some applesauce as well as some cucumbers for pickles. The apples were between $0.89 and $0.99 per pound depending on the variety and I got an enormous basket of pickling cucumbers for $5.99. I can't grow things that inexpensively.

On the pumpkin front I bought six nice sized pie pumpkins to make puree for fall recipes as well as some fun decorative pumpkins and gourds for around the house.
Last but not least I bought two enormous pots of mums as well as some beautiful purple flowering kale to plant out front. Depending on how mild the fall is I have had luck with some of my fall plantings lasting until the end of November. It's nice to have some color outside as long as possible before winter sets in.
After coming home I am now surrounding with bags of fruits and vegetables that I need to can or freeze as well as a bunch of plants that need to get in the ground. So much for a relaxing Sunday!
Do you love cider and doughnuts? What fall traditions do you have where you live? Do you have any plans for canning or planting this fall?
Lisa | Post a Comment | Share Article | Email Article | Print Article 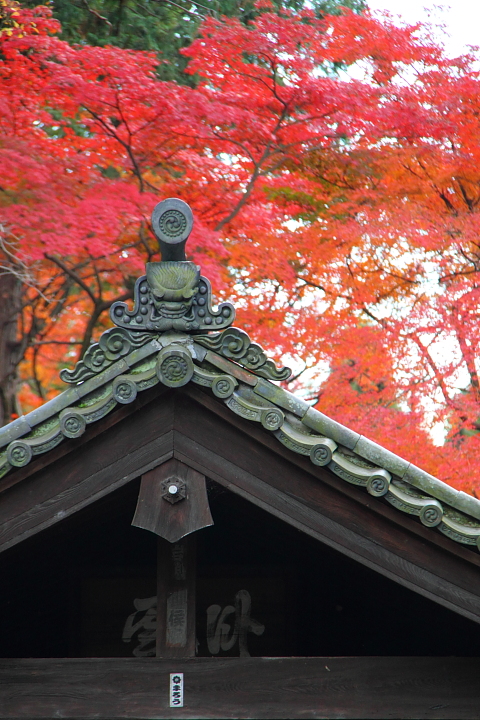
Tofuku-ji
Kyoto, Japan
12.04.2011
Lisa | 3 Comments | Share Article | Email Article | Print Article 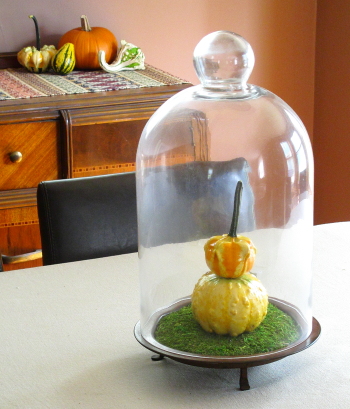 Autumn has hit Ann Arbor with a vengeance. It seems like just yesterday we were dealing with late summer temperatures in the nineties. The last few weeks have become downright chilly and I even had frost on my car yesterday morning.
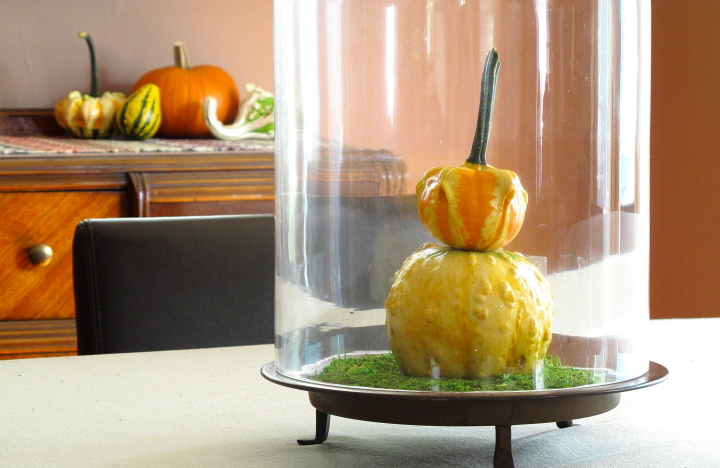
In embracing the change of seasons I decided to do a little decorating on my dining room table. I have a large glass cloche that I have on my table with a vase under it usually and so I thought I would change out the display with a stack of little gourds on a bed of moss. 
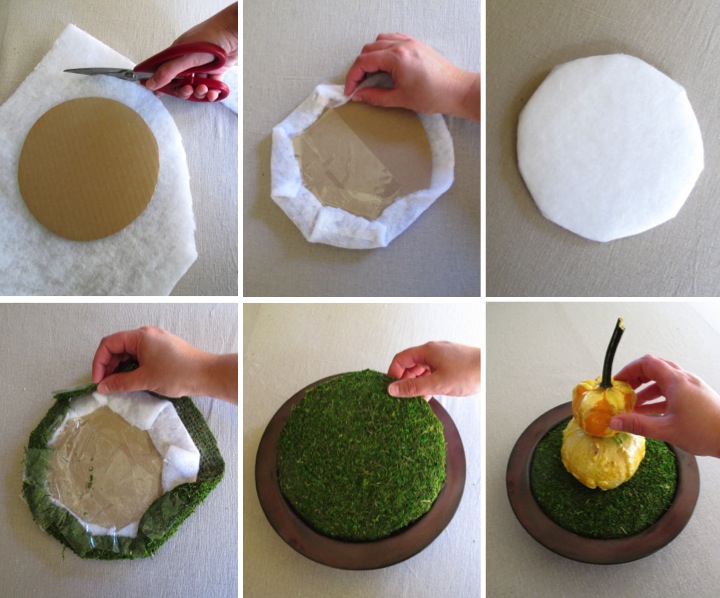
A few months back I found an old pillar candle holder for a dollar at the Ann Arbor ReUse Center which I thought would make the perfect base. I cut out a circle of cardboard a little smaller than the inside of the candle holder. I then cut a scrap piece of quilt batting and a piece of craft moss about an inch bigger all around than the cardboard circle. I wrapped the batting around the cardboard circle, attaching it on the back with packing tape. I could have alternatively used my glue gun, but my craft room is a mess and I couldn't find it.
I then wrapped the cardboard circle with the moss, securing it with packing tape just like the batting. I then slipped the moss covered disc into the candle holder for a perfect fit. After stacking a few gourds and placing the glass cloche over top, my simple fall table centerpiece was complete.
It was super easy to make and I had everything on hand already except the moss and the gourds which made it inexpensive as well.

I am happy with the way it makes my dining room looks festive to welcome the fall season. Now I just need to get myself some cider and doughnuts...
If you are interested in some of my other fall projects, check out how to make a pumpkin vase, how to make pumpkin puree from fresh pie pumpkins and my recipe for curried apple pumpkin soup.
Has autumn started where you live? Have you been doing any decorating for fall?
Lisa | 3 Comments | Share Article | Email Article | Print Article  Kiyomizu-dera
Kyoto, Japan
12.04.2011
Lisa | Post a Comment | Share Article | Email Article | Print Article 