Welcome

My name is Lisa and I'm a crafty girl with wanderlust working as an engineer by day. My blog chronicles projects in my home as well as pictures and stories from my travels.

Search


Instagram

Blog Index
The journal that this archive was targeting has been deleted. Please update your configuration.
Navigation

Entries in Cake Decorating (20)

Thursday
Jul052012

Easy Blueberry Topped Mini Cupcakes

Frank and I are headed to his friend's family cottage for a few days on the lake so I wanted to bring a fun treat with me to share. Everyone loves cupcakes so I decided to make some chocolate mini-sized ones with buttercream icing.

I didn't have a lot of time to make them, but wanted them to be cute. Things taste better if they are cute, wouldn't you agree?

I had some blue mini cupcake liners on hand plus some leftover blueberries from the pie I made yesterday that did the trick.

I baked the cupcakes in the blue mini liners and then made the frosting while they cooled. Using a large start tip I piped the icing on each cupcake and topped it with a juicy blueberry. The cupcakes were quick, easy and delicious: just how I like things!

Thursday
Jul052012

Buttercream Icing Recipe

I love cake. Not only is cake tasty delicious by itself, but it is a wonderful vehicle for one of my favorite things: frosting. I'm particularly partial to buttercream icing. It's whipped up butter and sugar with a little flavoring. What could possibly be better than that?

This recipe is based off of the Wilton buttercream icing recipe that my grandmother taught me to use when I first started decorating cakes. The Wilton recipe calls for a using mixture of half shortening and half butter, but I prefer to use all butter for my frosting. It makes the icing a little more cream colored, but I am all for sacrificing a little prettiness in the name of taste.

I love homemade buttercream icing because it is nice and sweet without having the sickeningly sweet taste that store bought frosting can have. It is also super simple and easy to whip up a batch and it keeps well in the fridge. To use it after you have refrigerated it, just let it warm up a bit and then whip it up again by hand or with a mixer. I always have bags of powdered sugar and sticks of butter on hand because you never know when you may need some icing.

Ingredients List
- 1 cup butter
- 1 tsp. vanilla extract
- 1 tsp. almond extract
- 4 cups powdered sugar (about 1 lb.)
- 2 Tbsp. milk 

Directions
- Cream butter in mixer with vanilla and almond extract
- Mix in powdered sugar one cup at a time
- Stir in milk to achieve desired consistency

Tips and Tricks
- I use butter so this recipe has a slight cream color instead of a true white. I don't mind because I prefer the taste, but if you want a true white icing you can substitute Crisco and butter flavoring
- To thin icing for spreading on a cake add 3-4 extra tablespoons of milk

Saturday
Mar172012

Royal Icing Recipe

My grandma passed on this royal icing recipe to me. It is a pretty standard recipe and she used it to make roses for wedding cakes that she made and sold out of her home kitchen. When I was little I was absolutely mesmerized by the way she would turn out the roses so quickly and methodically.

With my baking I don't have much need for royal icing roses, so instead I typically use this recipe for icing sugar cookies. I pipe an outline onto my cookie with stiff icing and then flood the design with thinned icing. It is a really easy way to make pretty designs on your cookies.

Another fun thing you can do is pipe royal icing into lacy designs on wax paper and then attach the designs to your baked goods once they are dry. The decorations are quite fragile, though, so it is always wise to make spares in case you break a few.

Ingredients List
- 1 lb. powdered sugar
- 3 egg whites
- 1/2 tsp. cream of tartar
- Food coloring (optional)

Directions
- Put powdered sugar, egg whites and cream of tartar in a mixing bowl
- Beat for 10 minutes for icing to achieve desired consistency
- Tint icing with food coloring if desired

Tips and Tricks
- Royal icing can dry out quickly start crusting over so using plastic wrap to cover the top of the icing with the plastic completely covering the surface of the icing
- If the icing is too thin, add more sugar; if it is too thick, add a bit of water or more egg whites
- If you are leery of using egg whites, there are recipes that use meringue power instead 

Thursday
Feb162012

Japanese Going Away Cake 

My friend, Don, is moving over to Japan so I am bringing in this cake that I made to work today as part of his going away celebration. If his time there is anything like my time living in Japan it is going to be a life changing experience and I am excited for him.

I started by making a two layer 8" round yellow cake and icing it with buttercream icing that I had tinted light blue. I then rolled out some green fondant and cut out a map of Japan's four main islands to put on the right side of the cake. I marked where he was moving to with a little icing dot on the map and wrote on the cake in Japanese 「ドンさん、行ってらっしゃいお元気で」which means "Bon Voyage, Don. Take care." This was my first time piping in Japanese so it's a little messy but I think it turned out okay. Plus I've discovered over time that while I can be a perfectionist about things, no one else cares as long as the cake tastes good.

To finish up the cake I piped a line and some dots for a border around the top and used stars for a border around the bottom. Although I am going to miss having Don in town I am sure that he is going to have a wonderful experience living in Japan and I truly wish him the best of luck. 

If you are interested, check out some of my other cake posts here: Cake Decorating Blog Posts

Tuesday
Feb142012

Valentines Day Mini Heart Cupcakes

Happy Valentine's Day! Last night I made these mini cupcakes to give to Frank today for Valentine's Day. Since it was a week night I wanted to do something simple but festive so I made little candy hearts to top the cupcakes for decoration.

While my cupcakes were baking I melted some red candy melts in a squeeze bottle on low heat in the microwave. I laid out a sheet of wax paper on my work surface and drew hearts on it with using the melted candy. If you have to use too much pressure to get the candy to come out of the bottle, just pop it back into the microwave for a few more seconds. Conversely, if it is coming out too easily and making a mess, a little time in the refrigerator will get the candy to the right consistency.

When I am making candy designs like this I like to make extras in case I don't like how some turn out or some break. Any that you don't use you can melt down to use again or you can just eat them like me. Also, I did mine free hand but if you want a little more consistency or have a more elaborate design, draw or print out your design on paper. You can then place the paper under the wax paper and just trace your design. 

The hearts will firm up pretty quickly, but if you want to speed up the process placing them in the refrigerator will do the trick. Once the hearts are completely cooled you can just peel them off the wax paper.

To decorate my cupcakes I iced the top with buttercream icing using a #18 star decorating tip and then placed one of the candy hearts on top. I think they look cute and I hope that Frank likes them.

Is anyone else making some sweets for their sweet? What kind of homemade treats do you like best?

Saturday
Feb042012

Snowflake Birthday Cake

Yesterday evening we celebrated seven birthdays with friends that occurred over the span of six weeks with a night out in Ann Arbor. We started with some drinks at Mike and Sylwia's place and I brought a cake that I made because in my opinion no one is ever too old to enjoy birthday cake. Also, I like any excuse that I can come up with to make a cake.

I had a request for yellow cake from one of the birthday boys, Don, so I made a yellow cake with buttercream icing. Despite our unseasonably warm winter with lack of snow this year I decided on a snowflake themed cake for the winter birthdays. It was simple and quick to decorate which was important since I didn't have a lot of time after work on Friday to make the cake before we were all meeting up.

I iced the cake with pale teal and then decorated the sides with snowflakes and large, white nonpareils. I wrote out the names of all seven birthday honorees around the outside edge in a deeper shade of teal with "Happy Birthday" in the middle. With some small snowflake filler on the top and a border of dark teal stars around the bottom the cake was complete. Yum! 

Tuesday
Jan032012

2010 Season Michigan Wolverines Tailgate Cakes

Today is the whole reason Frank and I went on this roadtrip to New Orleans; today is the Sugar Bowl! In honor of the Wolverines I thought I would share some of last season's tailgate cakes since I already shared the OSU game cake and the rest of this season's cakes.

Starting from the left is the cake from the 2010 Iowa game which had a carnival theme. To make the carnival tent I used a 6" round pan and a small wondermold pan for baking the cake. I iced the cake with buttercream and used fondant to decorate the carnival tent. I molded the footballs from dark chocolate and topped the cake with a tiny flag with a block 'M' of fondant on a lollipop stick.

Grafitti was the theme for the 2010 Michigan State game so I iced my cake with white buttercream and then iced on rust colored rectangles to make the cake look like a brick wall. To make the grafitti block 'M' I painted the design with diluted food coloring gels on fondant and then cut it out after it dried. I really enjoyed this theme and even made a grafitti T-shirt to wear by painting a design on a white shirt.

The 2010 Illinois game tailgate had a Thanksgiving theme so I made a pumpkin cake and used marshmallow fondant to make a cornucopia with block 'M's pouring out. As an added touch I covered the sides of the cake with walnuts.

Go Blue! Beat the Hokies! 

Monday
Dec052011

2011 Season Michigan Wolverines Tailgate Cakes

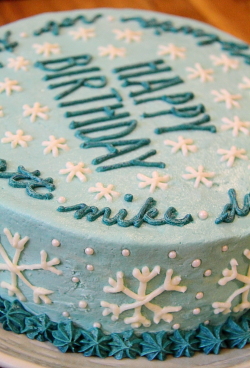
In honor of Sunday night's announcement that Michigan is going to the Sugar bowl, I thought I would share a few of my favorite cakes that I made over the course of the season for the tailgate that I am a part of.

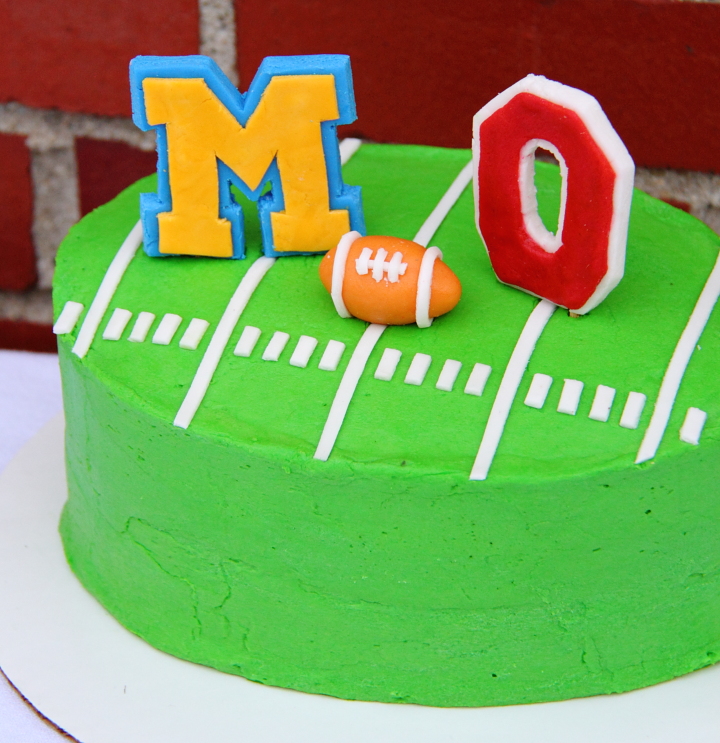
I already posted the Ohio State cake for the final game of the regular season, but here are the rest of the 2011 home game cakes.

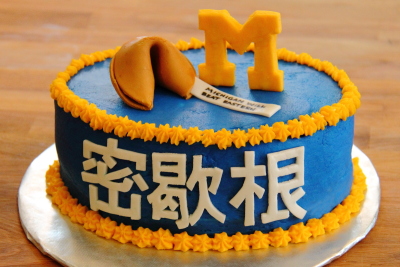
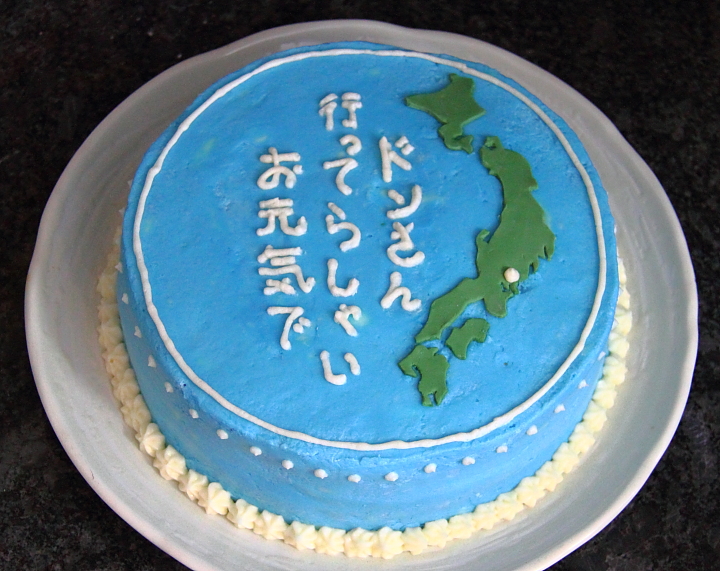
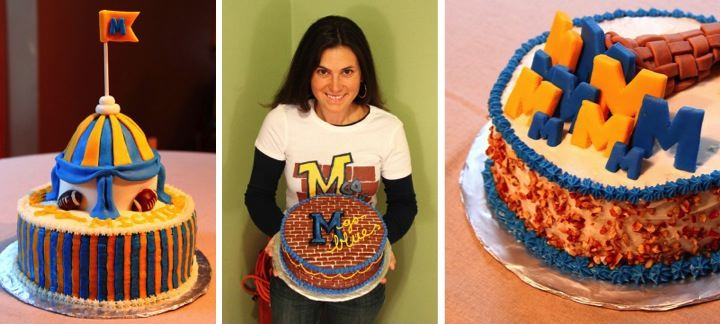
The picture to the left is from the Eastern Michigan game.  The tailgate theme was Far Eastern so I used fondant to cut out the Chinese characters for Michigan to put on the front of the cake. To top it off I made a fondant fortune cookie and used a food write to write "Michigan will beat Eastern" as the fortune.

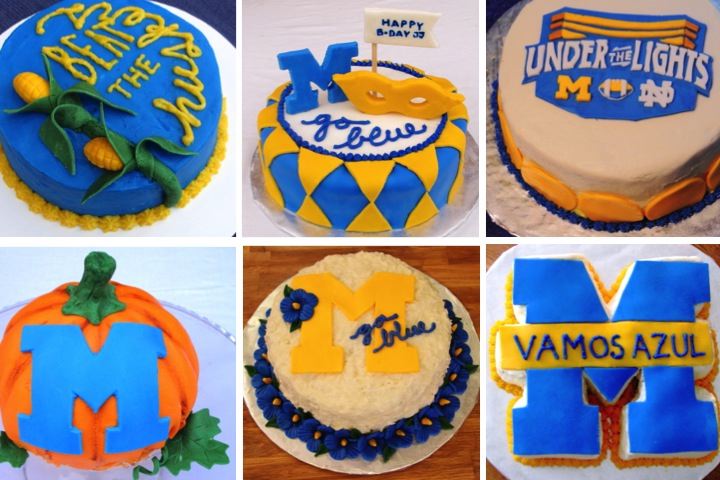
For the collage below I'll describe the cakes top to bottom, left to right.  For the Nebraska game I decorated the cake around their mascot by making corn stalks out of fondant and writing "Beat the Huskers" across the top of the cake.

The Minnesota tailgate had a Mardi Gras theme so I made a doberge cake and decorated it with a harlequin pattern and a mask.

The first ever homegame at Michigan Stadium played at night was the Notre Dame game and there was a lot of memorabilia being sold with the "Under the Lights" logo emblazoned on it.  I thought the logo looked neat and recreated it out of fondant for the top of the blue velvet cake.

The Purdue game was on Halloween weekend so I made a pumpkin cake shaped like a pumpkin. I used some brown edible glitter to give the cake some dimension, made the stem and leaves out of green fondant and finished it off with a big block M on the front. 

For the Luau themed tailgate for the Western Michigan game I made a pineapple cake with coconut cream cheese icing. I completed the cake with a block M on the top and a border of blue hibiscus flowers made of fondant.

The San Diego State game had a Mexican theme so I cut my cake into a block M shape and wrote "Vamos Azul" across the banner (Go Blue in Spanish).  

Making the tailgate cakes is a lot of fun for me and gives me a nice excuse to bake.  I'm sad that the regular season is over but I am excited about heading down to New Orleans for the Sugar Bowl. Go Blue!
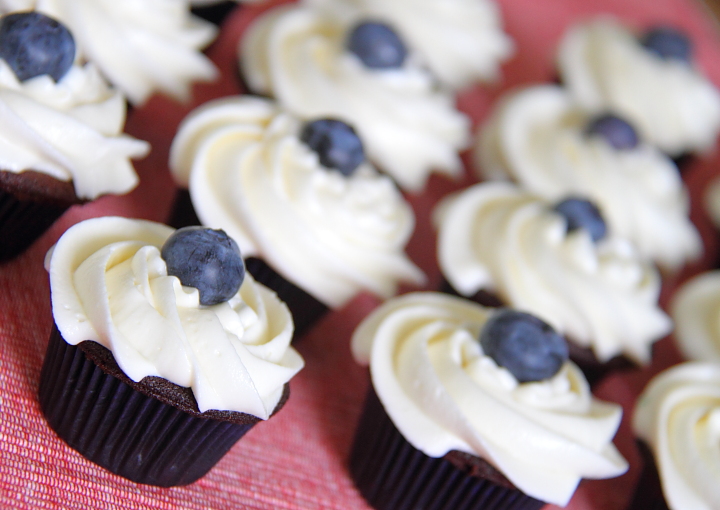
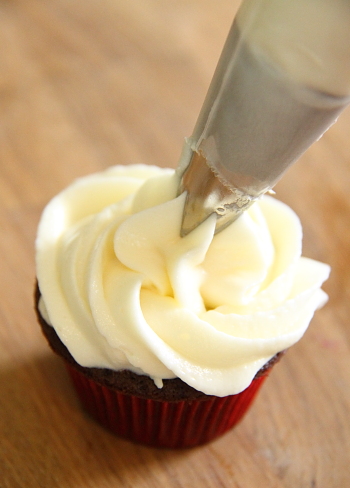
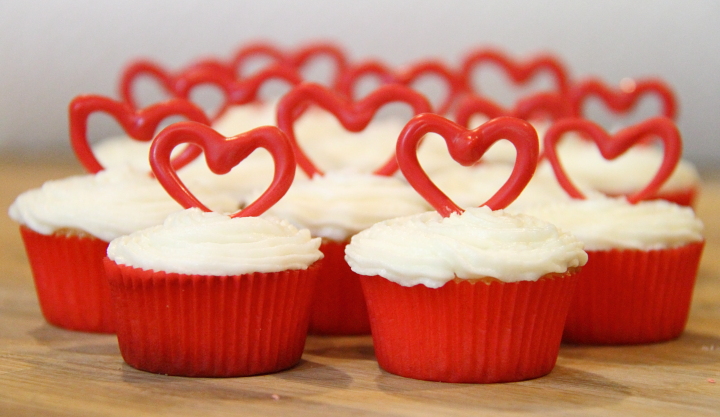
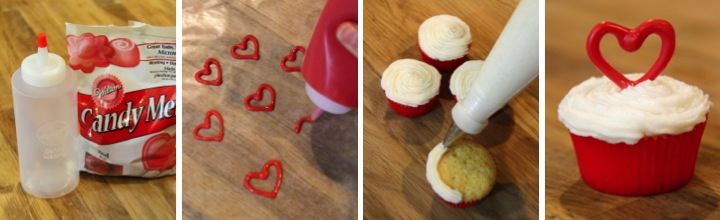
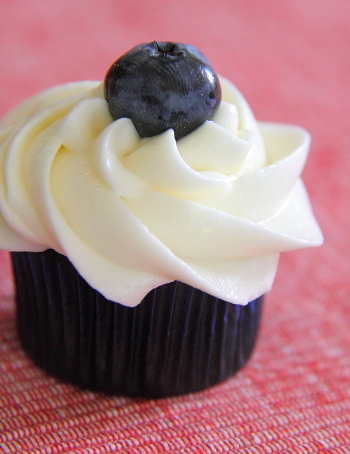
Sunday
Nov272011

Michigan vs. Ohio State Tailgate Cake

Since moving to Ann Arbor I've adopted the Michigan Wolverines as the football team I root for.  Neither my undergraduate or graduate alma mater have a very strong college football program and the way everyone in town backs the team and tailgates made following the team inevitable.

As part of the tailgate that I participate in I make a themed cake each week. Yesterday was not just any game, it was the game, Michigan vs. Ohio State, so for this week's cake I made a chocolate buttermilk cake and iced it with green tinted buttercream icing to make it look like a football field.  I made the field markings, school initials and football on the cake using fondant.  To make the intials stand up I inserted skewers inside them that extended into the cake. 

Watching the game was a lot of fun, albeit quite stressful, especially during the last few minutes when the fate of the game was held in the balance.  In the end Michigan pulled out the win with a 40-34 final score and ended the 7-year winless drought against Ohio State.  Is the next stop a BCS Bowl Game?  I sure hope so!

Wednesday
Nov232011

A Wedding Cake for Tammy and Drue

Earlier this month I had the honor of making a wedding cake for my friends, Tammy and Drue.  At their request the cake is a yellow cake with buttercream icing.  

Tammy's only guidance about the cake design was that she wanted to use the Willow Tree Promise Cake Topper since she collects Willow Tree figures to commemorate important events in her life.  Using the cake topper as inspiration I made fondant roses to match the base of the topper and paired them with ribbon wrapped around the base of each layer.  

This was my first time using ribbon on a cake and I found that even though the ribbon was double-sided, grease from the icing was bleeding through the ribbon.  I removed the ribbon and started again by ironing freezer paper onto the back of a new piece of ribbon before putting it on the cake.  The freezer paper provided a barrier that seemed to work well and kept the ribbon looking fresh and pretty.

I feel lucky that I had a small part in Tammy and Drue's special day and I wish them all the best as they embark on married life together.

Page 1 2