Welcome

My name is Lisa and I'm a crafty girl with wanderlust working as an engineer by day. My blog chronicles projects in my home as well as pictures and stories from my travels.

Search


Instagram

Blog Index
The journal that this archive was targeting has been deleted. Please update your configuration.
Navigation
Tuesday
Jan312012

Spray Paint Tips & Tricks

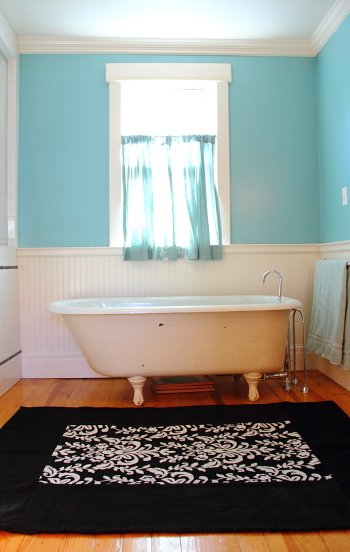
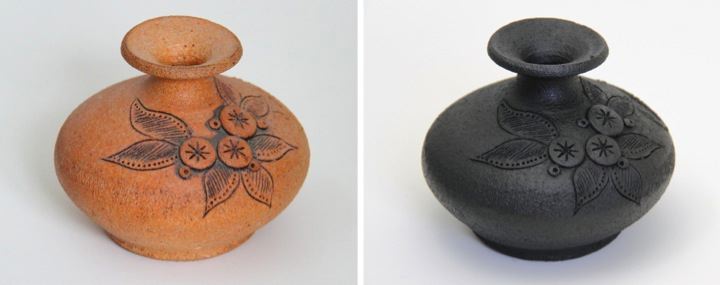
On Saturday morning I found this cute little terra cotta vase for only a dollar at the Ann Arbor ReUse Center. It was a little too eighties for my taste (it was even marked 1982 on the bottom) in its original condition, but I love how it turned out after I gave it a quick make over with matte black spray paint. I think it will look great in my bathroom once I get everything finished and put back together.

I love using spray paint to transform things that are a little bit worn or outdated. It is so easy and has such a big impact. I thought for fun I'd share a few of my pointers for getting a great spray paint finish. Most of them are common sense, but I've learned the hard way from trying to hurry the process that they are vital. Happy painting!

Spray Paint Tips & Tricks
- Before you start make sure to lay down newspaper or plastic that extends far beyond the object you are spray painting. Just a little breeze can send the paint flying and leave a little halo on the ground around your newspaper or plastic
- Make sure your surface is clean and properly prepared (you can use a deglosser on glossy surfaces) so that you can get the best adhesion
- Use a primer before spray painting bare wood
- Don't try to cover everything in one coat or you risk drips
- Several light coats holding the can about 10" away from the object gives a nice, drip free finish
- After thoroughly dried, flip the object over and spray again to make sure to get any parts that couldn't be reached right side up
- Don't touch the object until it is completely dried so you don't smudge the finish 

Tuesday
Jan312012

Picture of the Day: Sea Grasses Along the Great Ocean Road

Victoria, Australia
01.01.2009

Monday
Jan302012

The Story of My Kitchen Sink

My kitchen sink is one of my favorite parts about my kitchen. When I was remodeling my kitchen I wanted a big, old fashioned cast iron sink with side drainboards to sit under my new large back window. The closest new sink that I could find to what I wanted was the Clarion Farmhouse Drainboard Sink but at more than $1500 it was over ten times my budget.

With the Clarion sink completely out of the question I set about hunting for my dream sink. I made weekly stops at the Ann Arbor ReUse Center and the ReStore searching through all the old sinks. I constantly checked eBay and Craigslist in the Southeast Michigan area. After looking for months I finally found a promising listing on Craigslist for $100 and made arrangements to see it.

One look at the sink and I knew it was perfect. It was 60" wide with a double bowl and drainboards on both sides. The porcelain had some minor discolorations but was free of any chips or scratches. I was in love. Despite the fact that I was deliriously happy at having finally found a sink, I hid my excitement and calmly offered $75 for the sink. The guy who was selling it just wanted to get rid of it (he had just ripped it out of his kitchen as part of a remodel) and gladly took it.

The sink was a beast and weighed a ton. When the countertop guys tried installing it the first time they cracked the thin piece of granite in front of the sink opening and had to fabricate it again. Once installed the sink was exactly perfect for the space. It's the focal point of my kitchen and it is wonderful to have so much bowl space. I absolutely love my kitchen sink and it was definitely worth the long search.

Monday
Jan302012

Picture of the Day: Rainbow Over Iguaçu Falls


Foz do Iguaçu, Brazil
05.30.2007 

Sunday
Jan292012

Sprucing Up the Bathroom Built-in


I love this built-in, but as part of finishing up my master bathroom I wanted to spruce it up a little bit. It was all white and just seemed too white to me. Inspired by the black and white damask towel that I turned into a rug for the bathroom, I thought that some black and white damask wallpaper might do the trick.

I didn't want to do anything permanent since I wasn't sure if I would like it or not so instead of applying the wallpaper using the paste on the back I decided to use double sided tape. I ran a strip of tape right along the perimeter of the back, across the place where the seam would be and then in various spots around the middle of the built-in. After that I hung the first piece of wallpaper, with extra along the top and bottom, smoothing it down against the double sided tape. I then hung the second piece the same way, lining up the pattern along the seam. After both pieces were secured, I ran a razor blade around the edges to trim off the excess paper. On the second piece there was so much overhang that I ended up cutting it to an inch to get rid of the bulk before doing the exact trim with the razor blade.

I'm not sure how well it will hold long term, but the double sided tape seems to be doing the trick and will at least give me some time to decide if I want to make it permanent.

After paper the back of the built-in shelves I wanted to paint the part that boxes in the old chimney to match the rest of the walls in the bathroom. Luckily I had some of the paint saved and it was in good shape still. Typically I like to cut in my edges by hand since I have a pretty steady hand and it saves time instead of taping. After two coats of paint with a small foam roller I was all done. Since I had the paint out I also did some minor paint touch ups around the rest of the bathroom that I had been putting off. 

So far I think it is a big improvement and I like the way that it looks. Now I get to have some fun figuring out what to put on my shelves!

 
If you are interested, check out the rest of my bathroom posts here: Bathroom Blog Posts

Sunday
Jan292012

Picture of the Day: Fruit Stall in Singapore

Singapore
12.25.2008 

Saturday
Jan282012

Making a Bathroom Rug from Towels

This weekend I decided that I needed to get cracking on my long list of items to finish up my bathroom. Since I still had black thread on my sewing machine from making my laptop sleeve, I thought making my bathroom rug would be the perfect place to start.

I have some black in my bathroom with the liner bar tile in my shower and the black ceramic light fixtures so when I stumbled upon a solitary black and white damask towel at HomeGoods I thought it would be perfect for turning into a rug for my bathroom. It was a bit smaller than I wanted, though so I decided to add a black border with two black towels that I picked up from Target. I had priced out buying black terry cloth from a fabric store but buying the bath towels instead turned out to be cheaper.

To start, I trimmed off the binding on the damask towel with my rotary cutter.  The towel was a little puckered on the end so I made sure to trim that part off as well so I was left with a flat rectangle with straight edges. I then cut each of the black towels into two 14" long strips.

I took one of the black strips and pinned it, with the right sides together, to one of the long sides of the damask towel. After stitching the pieces together I pressed the seam flat and repeated the same steps on the other side of the damask towel with another strip of black. I decided on using a 5/8" seam since the material was so bulky.

With the two sides sewn on, I trimmed off the excess black towel so it was even with the damask towel on both ends. On each of the ends I attached another piece of black towel like mentioned above and then trimmed the ends so I was left with a large black rectangle framing the damask pattern. To finish the edges I simply turned the salvage under and sewed it in place with a seam 1/4" from the edge.

I like how the rug turned out and since it is made from towels it is soft under my feet and I can simply throw it in the wash to clean it. It was also great for my budget costly only about $12 to make. Now I need to tackle a few more projects... 

If you are interested, check out how my master bathroom renovation finally turned out: Master Bathroom Renovation Recap

Saturday
Jan282012

Thank You for Looking

When I started this blog I had two main purposes. I had been meaning to start writing down a few of my travel stories and organize some of my favorite travel pictures for a long time and I thought that starting a blog would give me some motivation to finally get around to doing it. I also have tons of unfinished projects around the house that I thought blogging about would spur me to finally get done.

In the two months I've been blogging I've had a lot of fun and it has definitely jump started my motivation. I have also been honored to have some people stop by and read what I am writing and I want to say thank you so much for looking. I've decided to start enabling my comments now so if you are so inclined please let me know what you think or just say 'hi'. Thank you! 

Saturday
Jan282012

Picture of the Day: View of Flores from Lake Petén Itzá


Lake Petén Itzá
Flores, Guatemala
07.02.2010

Friday
Jan272012

Picture of the Day: Fisherman on the Galata Bridge

Galata Bridge
Istanbul, Turkey
11.27.2009