Welcome

My name is Lisa and I'm a crafty girl with wanderlust working as an engineer by day. My blog chronicles projects in my home as well as pictures and stories from my travels.

Search


Instagram

Blog Index
The journal that this archive was targeting has been deleted. Please update your configuration.
Navigation
Thursday
Feb162012

Japanese Going Away Cake 

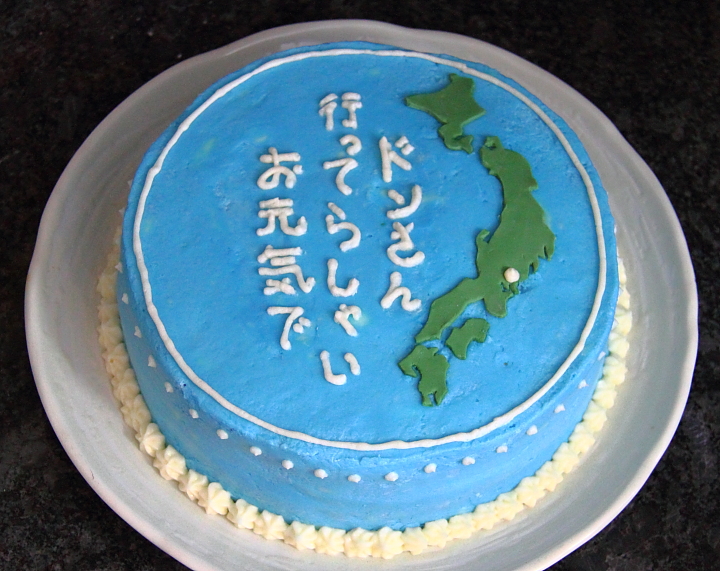
My friend, Don, is moving over to Japan so I am bringing in this cake that I made to work today as part of his going away celebration. If his time there is anything like my time living in Japan it is going to be a life changing experience and I am excited for him.

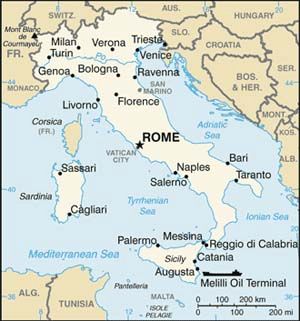
I started by making a two layer 8" round yellow cake and icing it with buttercream icing that I had tinted light blue. I then rolled out some green fondant and cut out a map of Japan's four main islands to put on the right side of the cake. I marked where he was moving to with a little icing dot on the map and wrote on the cake in Japanese 「ドンさん、行ってらっしゃいお元気で」which means "Bon Voyage, Don. Take care." This was my first time piping in Japanese so it's a little messy but I think it turned out okay. Plus I've discovered over time that while I can be a perfectionist about things, no one else cares as long as the cake tastes good.

To finish up the cake I piped a line and some dots for a border around the top and used stars for a border around the bottom. Although I am going to miss having Don in town I am sure that he is going to have a wonderful experience living in Japan and I truly wish him the best of luck. 

If you are interested, check out some of my other cake posts here: Cake Decorating Blog Posts

Thursday
Feb162012

Picture of the Day: St. Stephen's Cathedral in Vienna


St. Stephen's Cathedral (Stephansdom)
Vienna, Austria
05.31.2006

Wednesday
Feb152012

Picture of the Day: Aquarium Seahorse on the Mornington Peninsula


Mornington Peninsula
Victoria, Australia
01.05.2009 

Tuesday
Feb142012

Valentines Day Mini Heart Cupcakes

Happy Valentine's Day! Last night I made these mini cupcakes to give to Frank today for Valentine's Day. Since it was a week night I wanted to do something simple but festive so I made little candy hearts to top the cupcakes for decoration.

While my cupcakes were baking I melted some red candy melts in a squeeze bottle on low heat in the microwave. I laid out a sheet of wax paper on my work surface and drew hearts on it with using the melted candy. If you have to use too much pressure to get the candy to come out of the bottle, just pop it back into the microwave for a few more seconds. Conversely, if it is coming out too easily and making a mess, a little time in the refrigerator will get the candy to the right consistency.

When I am making candy designs like this I like to make extras in case I don't like how some turn out or some break. Any that you don't use you can melt down to use again or you can just eat them like me. Also, I did mine free hand but if you want a little more consistency or have a more elaborate design, draw or print out your design on paper. You can then place the paper under the wax paper and just trace your design. 

The hearts will firm up pretty quickly, but if you want to speed up the process placing them in the refrigerator will do the trick. Once the hearts are completely cooled you can just peel them off the wax paper.

To decorate my cupcakes I iced the top with buttercream icing using a #18 star decorating tip and then placed one of the candy hearts on top. I think they look cute and I hope that Frank likes them.

Is anyone else making some sweets for their sweet? What kind of homemade treats do you like best?

Tuesday
Feb142012

Picture of the Day: View Over Istanbul from Galata Tower

Istanbul, Turkey
11.27.2009

Monday
Feb132012

Heading Back to Italy

Frank and I have been talking about going to Italy this spring and yesterday we booked our tickets for next month. I am really excited. Ten years ago I went to Italy as part of my first trip overseas and I haven't had a chance to go back since then.

On that trip I had a wonderful time roaming about by myself and meeting other travelers along the way. I went hiking between the five tiny fishing villages of Cinque Terre, saw the leaning tower and field of miracles in Pisa and explored the Renaissance art and architecture of Florence. In Rome I was amazed by the ancient ruins at the Colosseum and Forum and fantasized about being Audrey Hepburn in Roman Holiday. I spent a whole day just at the Vatican Museum in Vatican City and strolled along the canals and learned about traditional glass making in Venice. It was an amazing trip that had a profound impact on me and I can't wait to go back.

Frank and I are flying into Rome and then we are thinking of going to Naples and the Amalfi Coast and maybe the hill towns of Central Italy. Have you been to any of these areas? Do you have any recommendations or suggestions? Thirty-one days and counting! Bring on the limoncello!

Monday
Feb132012

Picture of the Day: Boat Quay in Singapore at Night

Singapore
12.25.2008

Sunday
Feb122012

Fabric Organization for My Craft Room

My fabric stash in my craft room had gotten completely out of control so I decided that I needed to do something about it. Because my plan is to someday build myself a fabric armoire I didn't want to spend much on this project since it isn't a long term solution for me. I already had this white Billy bookcase with a CD insert from IKEA that I had purchased nearly ten years ago for almost nothing in the As-Is section. By moving the CD insert to the top shelf and removing the bottom shelf I thought I could turn the bookcase into some functional fabric storage.

To organize my fabric that is at least 1/2 yard I made my own fabric bolts out of foam board. I decided to make the bolts 6-1/2" x 23" for a few reasons. 23" height allows for easy storage of 45" fabric folded in half plus it was short enough to just fit under the CD insert on the bookshelf. 6-1/2"depth fit nicely on the shelf and worked out well for maximizing the number of bolts (seven) that I would get out of a piece of 30" x 40" foam board. 

To start making the bolts I adjusted my foam board cutter's cutting depth so it was just longer than the depth of my foam board. When I cut foam board I do it in top of an old ratty rug that I don't mind getting torn up a bit from the cutter. I actually keep the rug solely for the purpose of cutting things on it. 

Using my quilting ruler as a guide I cut my bolts out of 30" x 40" foam board per the diagram I drew out. I made a 23" cut across the board lengthwise and then cut the piece into 6-1/2" strips. The leftover top piece was enough to cut one more 6-1/2" x 23" bolt. After cutting my bolts I wrapped my fabric around them and secured the edge with a T pin. 

After getting my larger pieces of fabric wrapped onto my foam board bolts it was time to start organizing the rest of my fabric. The CD insert was the perfect place for storing my fat quarters and I put small fabric scraps sorted by warm and cool hues in some glass jars that I already owned. Larger, bulky fabric scraps (like the fleece left over from my DIY laptop sleeve and the fleece monogrammed scarves I made) got organized into a wire basket that I had. I put my bolts of fabric in the bottom of the bookshelf and since I had a little room left over I also squeezed in an old soda Coca-Cola crate that I bought in Japan. The crate was the perfect size for organizing my thread and on top for fun I put an antique children's sewing that I picked up in Notting Hill in London.

I'm really happy that I was able to make some sort of sense out of my fabric stash and now that I can see everything easily I'll be more likely to use what I have on hand. I'm also glad that apart from spending about $25 for foam board I already had everything else making this an inexpensive organization project. 

How do you keep your fabric stash under control? Do you have a good organization method?

Sunday
Feb122012

Picture of the Day: Manila Cathedral in the Intramuros

Manila, Philippines
01.18.2009 

Saturday
Feb112012

Caribbean Carnival Considerations

In October 2006 my sister moved from Ohio down to St. Thomas in the USVI. A month later I went down to visit her for Thanksgiving and to help her get settled and moved into her new place. Ever since (with the exception of when I was living in Japan) I've headed down to the Caribbean once or twice a year to meet up with her. Sometimes I've visited her on St. Thomas, but more often than not we've gone island hoping around the Leeward Islands of the Lesser Antilles. Over the years we've been together to Puerto Rico, St. John, Tortola, Virgin Gorda, Jost Van Dyke, Antigua, Barbuda, St. Maarten/St. Martin, Seba, St. Barts, Anguilla, St. Kitts and Nevis.

Thursday night this past week, my sister called me up with a new proposal for our island getaway this spring; she wants me to come down to St. Thomas at the end of April for Carnival. That all sounds well and good, but she wants us to actually join the Infernos Carnival Troupe with her friends and to be in the parade. To quote her, "Haven't you always wanted to wear a feathered headdress in a parade?" The 2012 Carnival theme for the troupe is entitled "Be Jeweled" with Jewel of India (orange costumes), Amethyst (purple costumes) and Emerald (green costumes) sections. 

Although I am more than a little nervous about wearing one these costumes, it would be a lot of fun to be a part of one of the island's big cultural events. St. Thomas held its first Carnival in 1912 and again in 1914 before lapsing due to World War I. It was revived in 1952 and has since become an annual celebration called the V.I. Carnival. Filled with dancing and music from the African and European traditions that influenced the islands it would really be something to see and be a part of. 

So what do you think? Am I crazy for doing this? What color do you like best (we are leaning toward the purple)?Would you want to be in a Carnival Parade? Have you always wanted to wear a feathered headdress?