Wednesday
Aug292012
Picture of the Day: Dance Festival in Hakodate
 Hakodate, Japan
9.2010
 Lisa | 1 Comment | Share Article | Email Article | Print Article

My name is Lisa and I'm a crafty girl with wanderlust working as an engineer by day. My blog chronicles projects in my home as well as pictures and stories from my travels.

Hakodate, Japan
9.2010
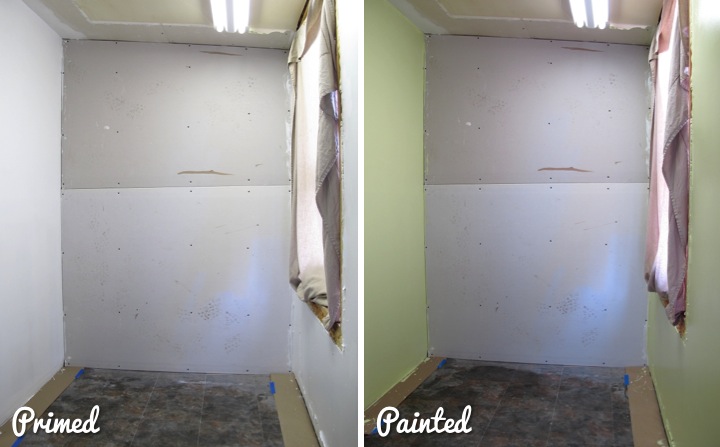
Lisa | 1 Comment | Share Article | Email Article | Print Article Picking up from where I left my back entry, on Sunday I sanded down all the mudded seams and screw holes. The trick for me to make sure it is perfectly smooth is to check it by running my hand over the wall to find any imperfections. After I was done I ran a tack cloth over the wall to remove any dust. 
I primed the walls with Kilz and then followed up with two coats of Valspar Soothing Aloe. I really like how cheerful and bright the color is. It's a shade or two lighter than my kitchen making a nice transition between the rooms.
I have to repair and paint the ceiling still from where I took out the soffit, but since the ceiling flows through to the laundry area which also needs some ceiling work I am going to do that all at the same time later.
On a side note, don't you just love the old tablecloth I have hanging in the window? I need something to keep the sun from beating on me while I am working back there and I don't want anything that I would care about ruining. Is it ugly? Definitely, but it is serving a needed purpose.
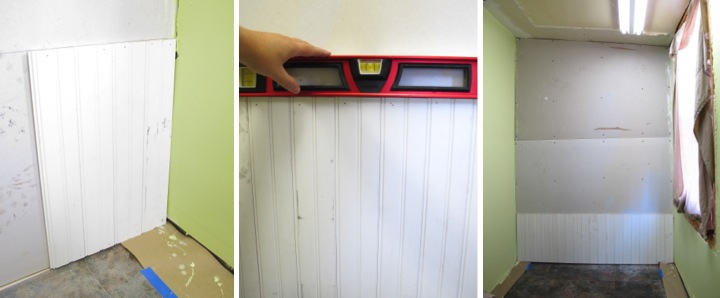
With the side walls painted it was time to attack the back wall. At my local Habitat for Humanity ReStore I had picked up two large bundles of primed pine beadboard for just $10 about a year ago. I knew it would be perfect for the back wall. It was a little scuffed up, but in great shape so once it is painted I think it will look great.
The height of the beadboard was 48" so I had to be strategic about cutting it so that seam lines would fall behind trim pieces and be hidden. For the bottom course of boards I trimmed everything to 19" which would fall right under the trim piece on top of the bench I planned to build.
With my house over a hundred years old nothing is square so I figured out the highest point on the floor, measured up 19" and then used a level to mark a level line across the wall from that point. I set my first piece of beardboard against the corner aligned with my mark and then checked it was plumb vertically as well with my level. Getting the first piece level and plumb was very important otherwise the whole wall would be off.
With the first piece in position I tacked it to the wall at the top and bottom with my brad nailer where the holes would later be covered by trim. I slid the next piece into the notch, tacked it down and repeated until I had spanned the whole wall. Every five or six boards I would double check that I was staying level by placing my level on top.
With the first course done I put up a second course in the same way that was 43" tall followed by a final course that was 14" tall. Originally I had planned to take the beadboard up the entire back wall but I decided against it so I will need to finish the little bit of exposed drywall when I fix the ceiling.
After finishing up the wall I put up a piece of 1x6 that the hooks will hang from. My shelf will go right on top of it and getting a 1x6 level is much easier than the shelf so I started by hanging the 1x6. I did it by measuring up from the floor in the middle where the top of the piece needed to be and then tacked it with one brad nail. I then set my level on top and nudged it around the brad (which acted as a pivot point) until it was level and then tacked down the rest of the board. If you look closely at the pictures below you can see that this trim piece completely hides the top beadboard seam.
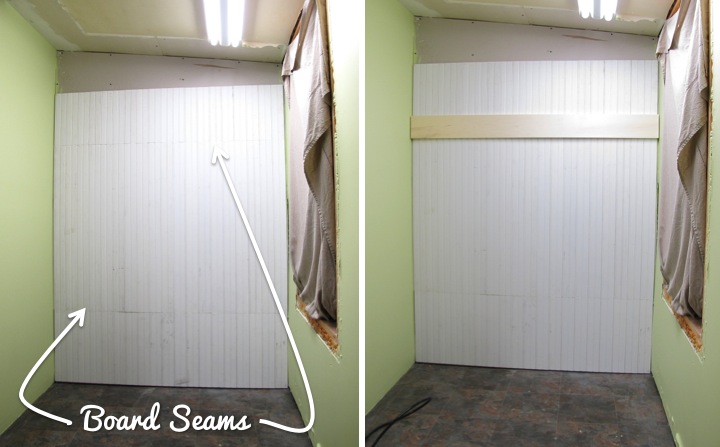
It feels good to get a little traction on a project that I have been putting off. There is still a long way to go, but it is starting to look like something now. Next up is to build a shelf up top and then a shoe bench down low.
Are you tackling a project you had put on the back burner for a while? What have you done to make a more your back entry more functional?
If you are interested, read about my ideas to transform this little nook in my back entry into a useful space here: Plans For My Back Entry
Lisa | 4 Comments | Share Article | Email Article | Print Article  Blue Mountains
New South Wales, Australia
11.2010
Lisa | Post a Comment | Share Article | Email Article | Print Article  Mani Peninsula, Greece
11.20.2009
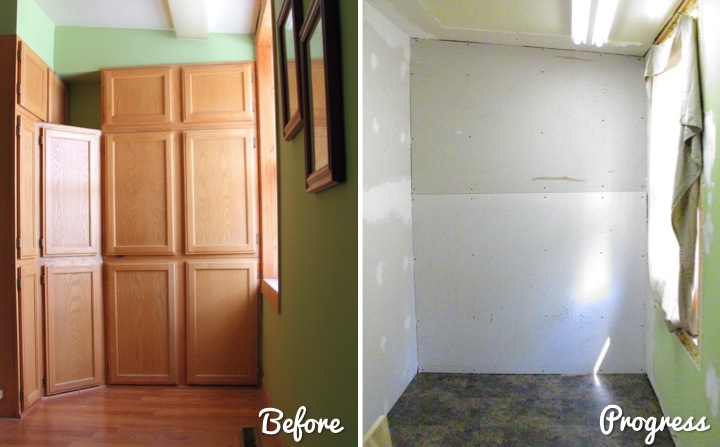
Lisa | 1 Comment | Share Article | Email Article | Print Article 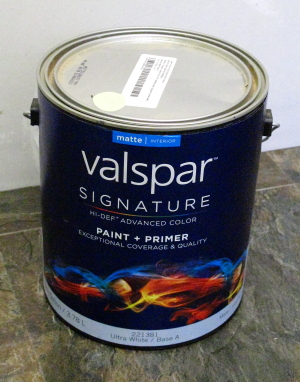 I mentioned back in June that I had some plans for my back entry but hadn't made any progress on it until yesterday. As a recap, my basic idea is to get rid of the weird cabinetry and build a shoe bench with hooks in the space instead.
As you can see in the picture below, the cabinets and soffit are torn out and the pergo flooring has been replaced. The next step was to mud and tape the drywall that was left unfinished behind the cabinets which I did yesterday. Because I am going to be covering up the back wall I left it alone. I definitely don't feel the need to do more work than necessary! It doesn't look pretty right now but at least I'm finally making some progress.
I also picked out and purchased the wall color that I am going to use. It's a pale yellow-green called Soothing Aloe by Valspar. There is only one window in the back entry/laundry room area so I wanted to get something light and cheerful. Unfortunately, today I have to sand all the mud from yesterday before I can prime and paint. I can't wait to finally get some color on those walls! Well, it's off to do some sanding for me...
Have you been working on any projects recently that you put off? What do you have in your back entry to make it functional?
Lisa | 2 Comments | Share Article | Email Article | Print Article  Pompeii, Italy
3.21.2012
Lisa | Post a Comment | Share Article | Email Article | Print Article 
New Orleans, Louisiana
1.01.2012
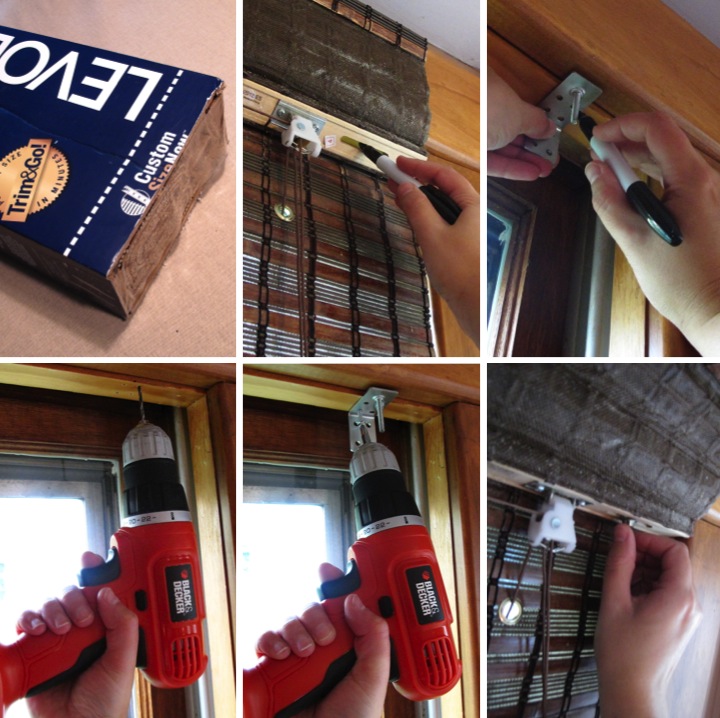
Lisa | Post a Comment | Share Article | Email Article | Print Article 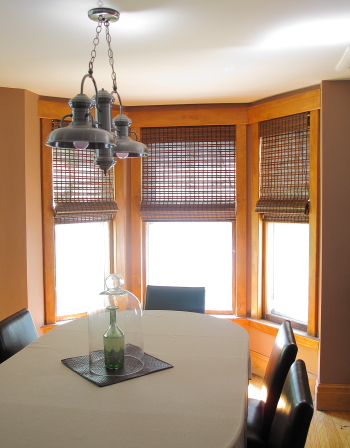 One of the to do items in my dining room has been to put up some blinds on my bay window. Being an old home, the windows are not a standard width but I am too impatient and too cheap to get custom blinds. Instead I bought some inexpensive bamboo blinds and tried trimming them down.
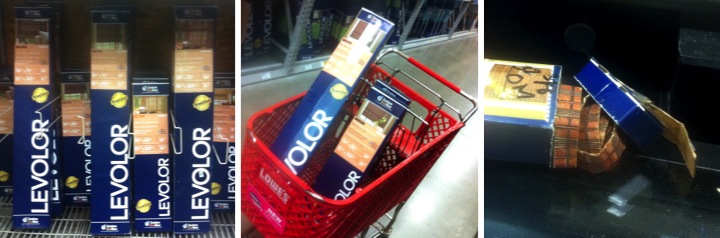
The middle window is 32.5" wide and the sides are 22.5" wide so I bought a 36" blind and two 30" blinds. On the smaller blinds I needed to remove 7.5" which meant 3.75" on each side. I wrapped painter's tape on the end of the blinds and then in the middle of where I needed to cut. The tape kept the pieces of bamboo together while I was cutting. I made a mark on the tape where I needed to trim and then used my chop saw to cut down the ends. It was a good idea in theory but the inexpensive bamboo chipped a lot on the ends and it looked really bad. The blind was only $15 so it wasn't a very expensive mistake and I am glad that I at least tried it.
I took the remaining blinds back to the store and looked around for another option. I found some bamboo blinds that are pricier but that the store will cut down for you. They were also a nicer quality and had a privacy backing. At a total of $128 for the three blinds it was way more than I wanted to spend but still a lot less than if I ordered custom blinds.
Luckily the store had exactly what I needed left in stock, one 36" wide blind and two 24" wide blinds. I brought them over to the cutting area, gave them my window measurements and did some other shopping while I waited.
Unfortunately when I came back the machine had screwed up one of the shades and didn't cut it all the way through. They weren't going to have restock for that blind for another week but they were able to call the other store across town to hold the one that they had left in stock.
After a jaunt across town I finally had all three shades and I crossed my fingers that everything would fit and be the correct size. Luckily the install was easy and I had the shades up in no time. I just measured where the brackets needed to go, marked the hole locations, pre-drilled the holes, screwed in the brackets and then attached the blinds.
Getting blinds for my dining room ended up being more of an ordeal than I thought it would be but I love how they look and I am so happy that I have this item checked off of my long to-do list. I think that when I eventually paint the trim white the bay window will really look phenomenal.

Are you working on any window treatments for your home? Have you ever had something you thought was going to be simple turn out to be more trouble than you thought?
Lisa | 3 Comments | Share Article | Email Article | Print Article  Gujo Hachiman, Japan
7.21.2012
Lisa | Post a Comment | Share Article | Email Article | Print Article 
Ann Arbor, Michigan
10.2011
Lisa | 3 Comments | Share Article | Email Article | Print Article 