Picture of the Day: Sydney Harbour Bridge
Sydney, Australia
1.05.2010
 Friday, October 5, 2012 at 7:03AM | Posted by
  Lisa |
  Post a Comment | |
  Email Article |
  Print Article
 My name is Lisa and I'm a crafty girl with wanderlust working as an engineer by day. My blog chronicles projects in my home as well as pictures and stories from my travels.
Sydney, Australia
1.05.2010
 Friday, October 5, 2012 at 7:03AM | Posted by
  Lisa |
  Post a Comment |
  Share Article |
  Email Article |
  Print Article
 The 2012 American Presidential campaign is in full swing with the first of the debates between Mitt Romney and Barack Obama last night. Election time is such a wonderful chance to see our democracy in action and I enjoy learning more about the candidates and their ideas.

I like following politics and can be pretty opinionated sometimes so I always vote in every election. A typical presidential Election Day will find me heading to the polls and then dorkily, but proudly wearing my "I Voted Today" sticker to work. In the evening I eagerly watch the election returns come in, often times inviting people over to watch for an election party.
During the last presidential election, however, I had quite a different experience since I was living in Japan in 2008. One of the biggest differences was my exposure to campaign ads. Back in the US it is common to be continuously bombarded with election information and advertising. In Japan I had the luxury of choosing how much I wanted to be exposed to since I was seeking information out myself on the internet. I found it quite refreshing actually and had a lot of fun following how the campaigns unfolded from afar.
Having the chance to talk to other expats from different countries and my Japanese colleagues about what they thought of the election was interesting. Hearing an outside perspective was thought provoking and I had a number of fun discussions learning about how elections are run in other countries and how it contrasts with the United States.
A little town in Fukui Prefecture in Japan is named Obama (小浜) so during the election it received a lot of publicity in Japan for sharing a name with one of the American Presidential candidates. The town capitalized on its newfound fame by making all sorts of memorabilia with the candidate's image on it. They even made sweets emblazoned with Barack Obama's face.
Actual voting was quite different for me while I was in Japan. I wasn't going to let being overseas keep me from voting so I applied for an absentee ballot which I had never done before. It seemed really strange to vote by mail in October a few weeks before the election instead of going to my local polling station on Election Day but I was still happy to be have my chance to exercise my right to vote.
The weirdest thing for me was watching the returns come in. Instead of watching at home they were coming in while I was at work due to the 13 hour time difference from Eastern Standard Time and Japan Standard Time. All morning as I was working at my desk I kept peeking at the Internet to check the electoral college standings. By lunchtime I knew that Barack Obama had won over John McCain. This was a far cry from the election eight years prior to that where I stayed up until the wee hours of the morning during the 2000 election only to learn that the decision between George Bush and Al Gore would not be decided that night.
Despite already knowing the outcome of the election, I wasn't deterred from having an election party at my apartment that night. I decided to make American comfort food. With my Japanese kitchen only equipped with a stove top and a small convection microwave and my grocery access limited to Japanese offerings I had to be creative with my menu. I wanted to make burgers but since that wasn't feasible in my kitchen I made sloppy joes served on some rolls that I found instead. For sides I made potato salad and green bean casserole. I also decided to make curried apple pumpkin soup since I had some canned pumpkin that I had brought from the US to Japan with me for something special.
To add a little patriotic flare I added some skewers to the sloppy joes. I had found a package of red, white and blue twist ties at a Hyaku-En Store and attached them to the top of the skewers making little pennants.
We had a fun night and for the Americans in attendance it was nice to eat some food we hadn't had in a long time. I never knew before that I could crave potato salad...
What do you normally do on Election Day?
 Thursday, October 4, 2012 at 8:09AM | Posted by
  Lisa |
  6 Comments |
  Share Article |
  Email Article |
  Print Article
 Oamaru, New Zealand
9.20.2005
 Thursday, October 4, 2012 at 7:03AM | Posted by
  Lisa |
  Post a Comment |
  Share Article |
  Email Article |
  Print Article
 Kruger National Park, South Africa
7.29.2004
 Wednesday, October 3, 2012 at 8:36AM | Posted by
  Lisa |
  2 Comments |
  Share Article |
  Email Article |
  Print Article
 After yesterday's post about how you can prepare your own applesauce it's time to delve into canning it. Successful canning is all about keeping things hot and sterile. If you are new to canning The National Center for Home Food Preservation website is a wonderful resource sponsored by the government for explaining proper and safe methods as well as answering questions about preserving food. I would highly recommend reading their basic canning information.

To begin with you need proper canning jars with lids and bands. Mason jars with a single piece lid or bail jars look super cute but are not appropriate for safe canning. You can reuse jars and bands after cleaning them, but you cannot reuse lids because the sealing surface (gasket) will have already been compressed from the first time it was used. If you use a lid again you won't be able to guarantee a proper seal which could lead to the food spoiling.
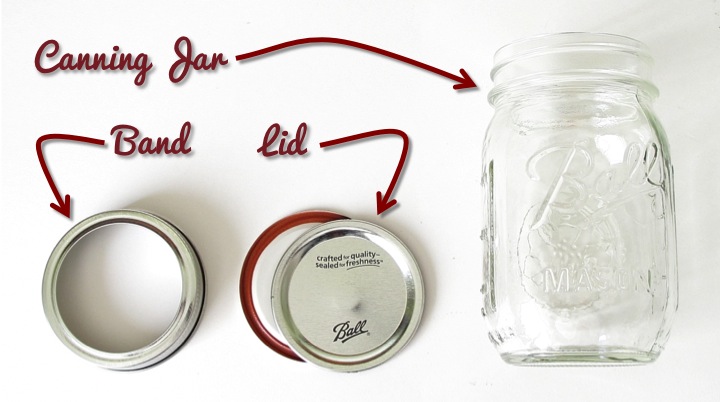
Some basic tools are also required for canning. For applesauce because it is high in acidity we can use a boiling water canning method which requires a large pot and jar rack. You can buy a water-bath canning pot with a jar rack pretty inexpensively (about $20). I actually have two canning pots, one which I use for preparing whatever food I am going to can and one for the jars. The jar rack comes with the canning pot and sits in the bottom of the canner. It keeps the jars from sitting on the bottom of the pot so that the boiling water can flow underneath them. It also allows you to raise the jars up so that loading and unloading jars is easier.
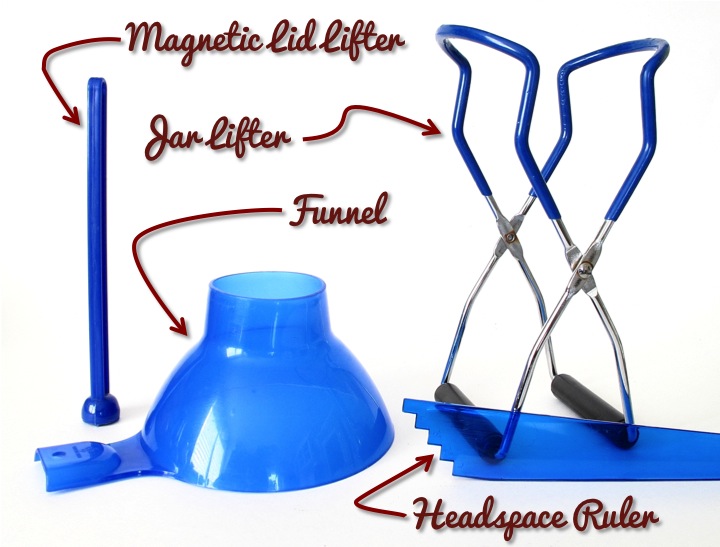
A few more tools are needed to get started. In order to grab the jars out of the boiling water a jar lifter is essential. It clasps around the neck of the jar so that you can pull it out securely and not worry about slipping. A magnetic lid lifter is just a long stick with a strong magnet on the end which allows you to pull the rings and lids out of the water. A funnel helps you pour your applesauce into the jars without making a complete mess. A headspace ruler has notches on in in 1/4" increments so that you can measure the headspace (distance between the top of what you are canning and the rim of the jar). Headspace is specified in each recipe and is important. If you leave too little you may have difficulty getting a seal and if you leave too much you could have some discoloration on the top of your food. These tools are generally sold as a canning utensil set which runs a little over $10.
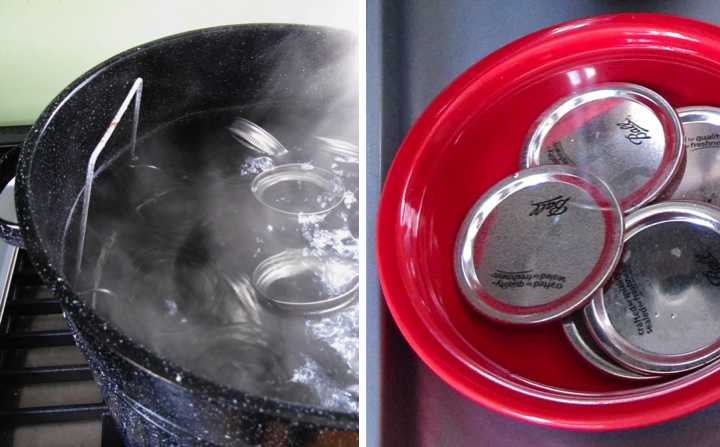
Now that we've covered the background, let's start canning. First you need to thoroughly clean your jars. You can wash them with hot soapy water or run them through the dishwasher. To sterilize the jars place them in the canner, cover them with water and bring it to a boil, boiling for at least ten minutes (longer if you are above sea level). I also boil my bands in the pot. My general process is that after I put whatever I am canning on the stove to cook I start boiling my jars. After the ten minutes has elapsed I turn the heat down to a simmer on the jars, keeping the water and the jars hot. The jars need to stay hot so that when you pour your hot liquid into the jars they won't break.
Lids should not go in the boiling water which could compromise the gasket which makes the seal. Instead after washing them, place them in a bowl of hot, but not boiling, water until you are ready to use them.
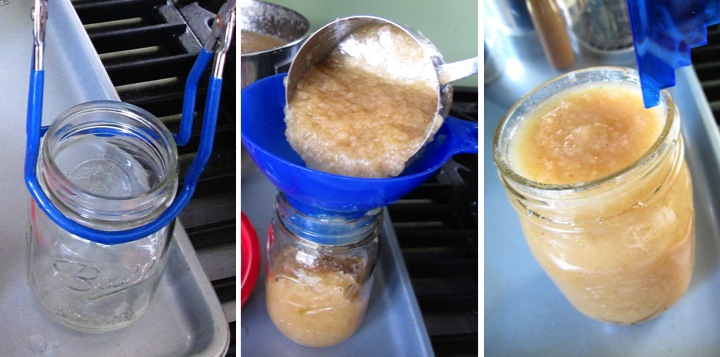
After you have prepared the applesauce it is important to keep it hot while you are in the process of filling the jars. A simple way to do this is to put it in a pot on the stove over medium heat.
To start filling the jars, pull a hot jar from the water using the canning jar lifter and place it on your work surface. Place your funnel in the jar and ladle in applesauce, leaving 1/4" of headspace (distance between the top of the applesauce and the rim of the jar). Use the headspace ruler to scrape against the inside of the jar to release any air bubbles and then check your headspace. If you spilled any applesauce on the rim, use a cloth to wipe it off so that you have a good surface for your seal.
Using the magnetic lifter, pull a lid out of the hot water and place it on top of the jar. Pull a band from the simmering water in the same way and place it on top of the lid. Screw down the band over the jar.
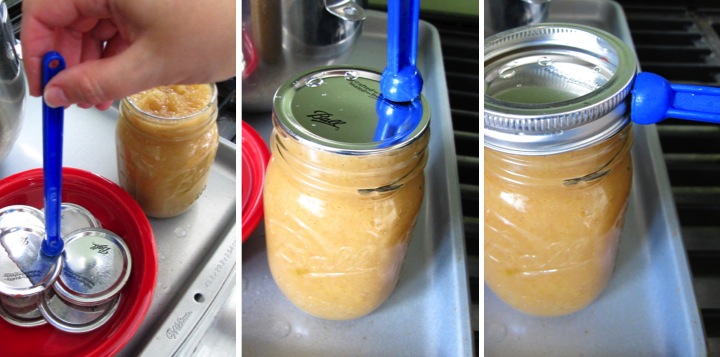
The jar of applesauce is now ready to go back into the canner using the jar lifter. Once you have filled all of your jars, lower the jars into the water with the jar rack. Make sure that you have at least one inch of water covering the top of the jars. Place the lid on the canner and turn the heat on high to boil the water.
Processing time starts from when the water begins vigorously boiling. If you are at sea level (altitudes less than 1000 feet) then you will need to process pint jars for 15 minutes and quart jars for 20 minutes. If you are at a higher altitude check the NCHFP processing times for applesauce. The water must remain boiling for the entire processing time, otherwise you need to bring the water back to boiling and restart the processing time. If the water level appears that it will drop to less than an inch over the jars, add additional boiling water.
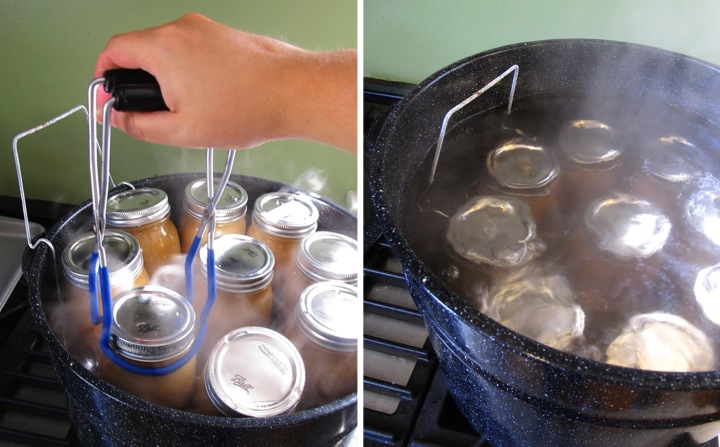
Once processing is complete, turn off the heat and remove the lid of the canner. Let the jars sit in the hot water for five minutes before pulling them out with the jar lifter. Place the jars with an inch between them and allow then to cool undisturbed for at least twelve hours.
As the jars cool and seal you will probably hear them making a little pop sound. After they have completely cooled you should check your seals by pressing on the top of the lids. If the lid springs back after you lift your finger, your jar did not seal. If your jar did not seal, place it in the refrigerator and eat the applesauce within the next few days.
The sealed jars no longer need the bands and can be stored without them. If you do want to keep the bands on it is a good idea to loosen them a bit so they won't get stuck on. Properly sealed applesauce can be safely stored for a year.
Now you can sit back and enjoy your beautifully canned applesauce and have the taste of fall all throughout your winter. Happy canning!
If you are interested in canning, check out Homemade Applesauce Part 1: Cooking & Sieving
 Tuesday, October 2, 2012 at 7:24AM | Posted by
  Lisa |
  Post a Comment |
  Share Article |
  Email Article |
  Print Article
Meteora, Greece
11.22.2009
 Tuesday, October 2, 2012 at 7:03AM | Posted by
  Lisa |
  1 Comment |
  Share Article |
  Email Article |
  Print Article
 After coming home with several bags of apples yesterday I set about doing one of my favorite fall activities, making and canning homemade applesauce.
One of the key things in making tasty applesauce is to use a variety of apples instead of just one. Also, it is best to use sweet apples instead of tart ones so that you don't need to add any sugar to your applesauce. From year to year the apples that I use vary based on what is reasonably priced and available. This year my applesauce is a combination of Jonathon, Yellow Delicious, Gala and Honeycrisp apples. Red Delicious, Fuji, McIntosh, Winesap and Pink Lady apples are also wonderful for making applesauce.
With my apples picked out I set about preparing them. After washing them in cold water, I cut them into eighths and tossed them into my large canning pot with an inch or two of water in the bottom. Because I use a strainer with my food grinder, there is no need to peel or core the apples. Super easy!
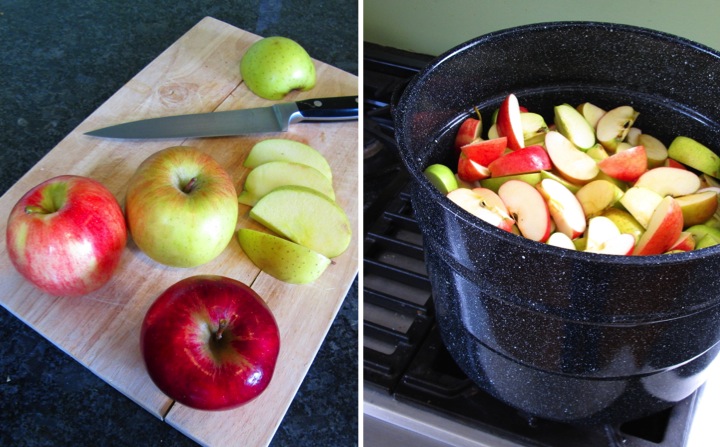
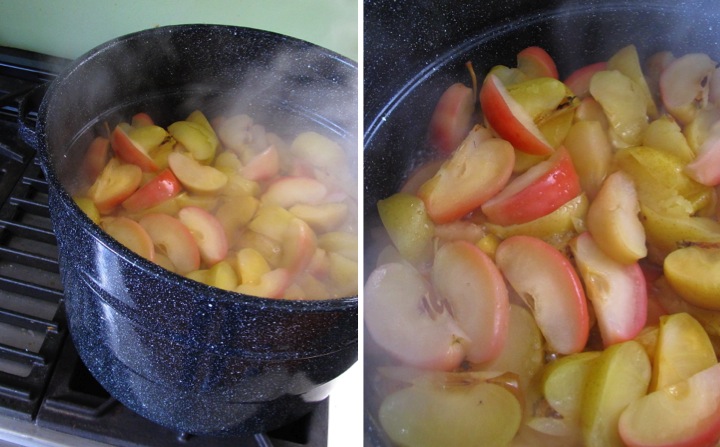
I put the pot on the stove with high heat, turning it down to medium-high once it started bubbling. I just love the smell of the apples cooking on the stove top. When the apples are nice and soft it's time to sieve the apples. If I am planning on canning my applesauce I put the canning jars on to boil at this time (more on canning is coming tomorrow).
As I mentioned before, my setup combines a food grinder with a strainer so I don't need to peel or core the apples. I use my KitchenAid mixer (a college graduation present from my grandparents) with the KitchenAid Food Grinder Attachment and the KitchenAid Fruit and Vegetable Strainer Attachment. I know that this is pricey, but I use these tools a lot and they are a big time saver for me so over the years I've decided it was worth investing in them. If the expense of the KitchenAid tools is not for you, fear not, you can still make tasty applesauce with a Foley Mill. They are pretty reasonably priced at anywhere between $20-$40 and you can build up some arm muscles with the hand cranking.
I am lazy, however, so I will continue on with my powered method.
My setup is pretty simple. I attach my food grinder to the front of my KitchenAid mixer with the fruit and vegetable strainer added in front. I then position my mixer so that the front end of the strainer sticks out over my sink and then place a bowl under the strainer. I ladle the soft apples into the top of the food grinder tray and then use the stomper (yeah, I think it is strange that is what is called, too) to push the apples down into the grinder. The seeds and peels spit out the front of the strainer right into my sink where I can wash it down my garbage disposal. Meanwhile the tasty applesauce spills out underneath and is caught into my bowl.
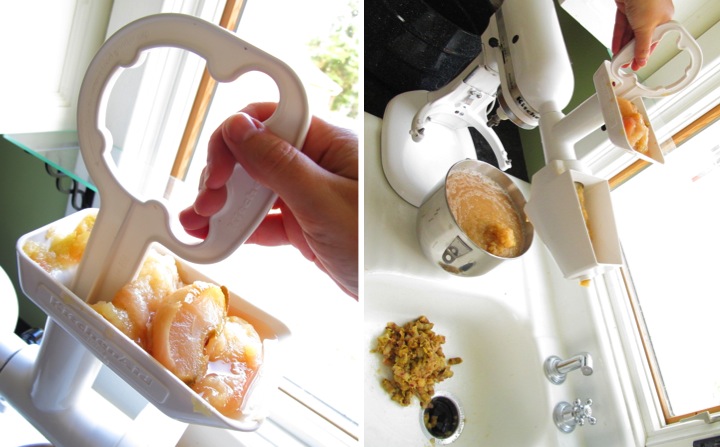
Once all the apples have been sieved I just stir in some cinnamon to taste and I am ready to start canning. If you like you can also add some sugar, but if you chose sweet apples it probably isn't necessary. Stay tuned and tomorrow I will share how to can the applesauce using a boiling water canner.

Do you make applesauce at home? What apple varieties do you like?
If you are interested in canning, check out Homemade Applesauce Part 2: Canning
 Monday, October 1, 2012 at 10:51AM | Posted by
  Lisa |
  2 Comments |
  Share Article |
  Email Article |
  Print Article
 Lake Petén Itzá
Flores, Guatemala
7.02.2010
 Monday, October 1, 2012 at 9:54AM | Posted by
  Lisa |
  Post a Comment |
  Share Article |
  Email Article |
  Print Article
 Autumn in Michigan means that it is cider and doughnut time. There are several cider mills in the area and visiting a few of them throughout the fall is one of my favorite traditions of the season. 
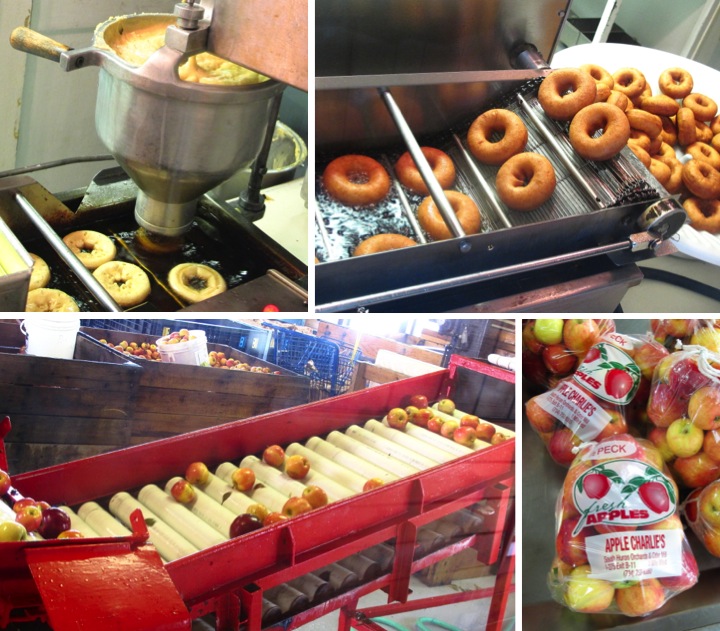
This morning Frank and I headed to Apple Charlie's which is the cider mill that he went to as a kid. We were both hungry so we made a beeline straight for the cider and doughnuts getting a variety of both plain and cinnamon sugar dusted doughnuts. Nothing tastes like fall more than hot apple cider and it was delicious.
Warm and full, we then took a look around the cider mill. There were the typical activities for kids of hay rides and an area to pet animals. They also had windows where you could peek in and see the doughnuts and apple cider being freshly made. Delicious!
We also took a look at all of the pumpkins and gourds they had for sale. I especially love all the bumpy ones and the colorful little minis.
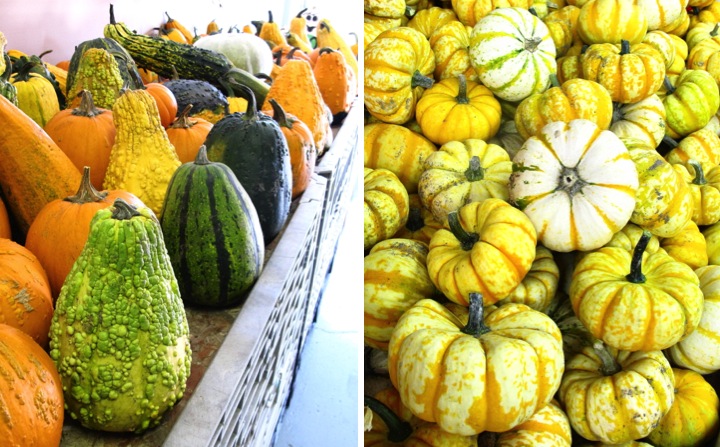
On our way out we took a little stroll through the pumpkin patch. It was such a gorgeous morning with the sun shining and the bright blue sky full of puffy clouds.
After Charlie's we headed over to Block's Stand & Greenhouse. Block's is an amazing place full of wonderful deals on seasonal plants and produce. In the spring I buy most of my garden plants there and then in the summer and fall they have amazing produce. I really have no idea how they can sell things so cheaply. My biggest problem is that I have to contain myself from over buying and letting things go to waste.
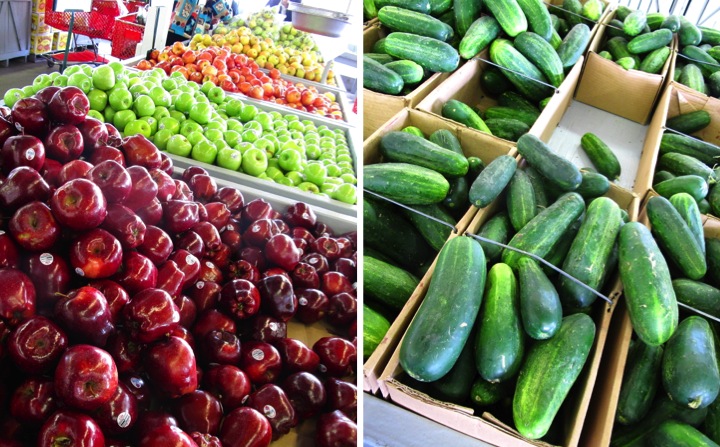
I couldn't resist getting a variety of apples to make some applesauce as well as some cucumbers for pickles. The apples were between $0.89 and $0.99 per pound depending on the variety and I got an enormous basket of pickling cucumbers for $5.99. I can't grow things that inexpensively.
On the pumpkin front I bought six nice sized pie pumpkins to make puree for fall recipes as well as some fun decorative pumpkins and gourds for around the house.
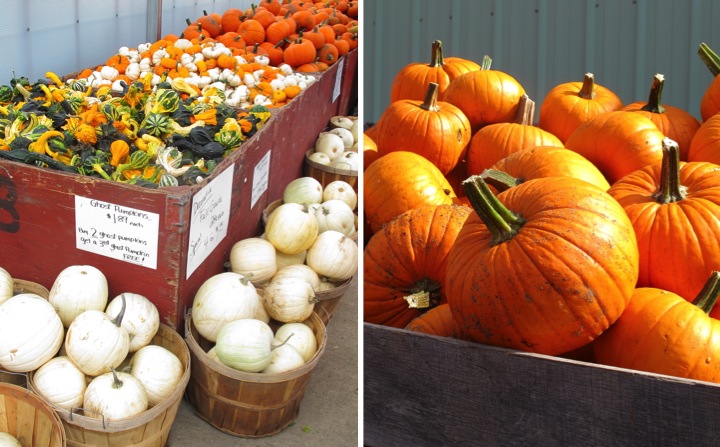
Last but not least I bought two enormous pots of mums as well as some beautiful purple flowering kale to plant out front. Depending on how mild the fall is I have had luck with some of my fall plantings lasting until the end of November. It's nice to have some color outside as long as possible before winter sets in.
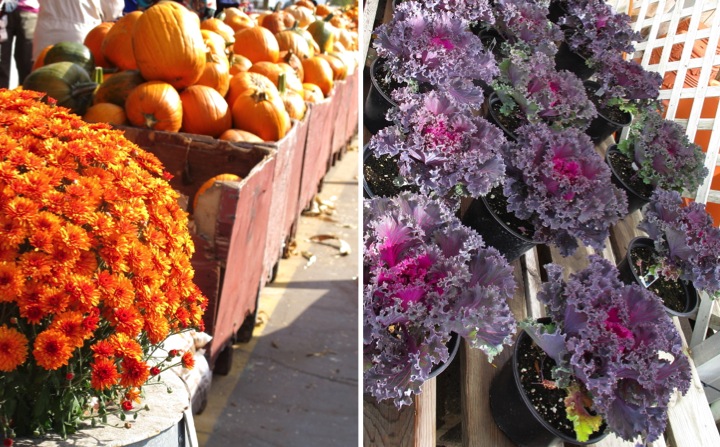
After coming home I am now surrounding with bags of fruits and vegetables that I need to can or freeze as well as a bunch of plants that need to get in the ground. So much for a relaxing Sunday!
Do you love cider and doughnuts? What fall traditions do you have where you live? Do you have any plans for canning or planting this fall?
 Sunday, September 30, 2012 at 1:22PM | Posted by
  Lisa |
  Post a Comment |
  Share Article |
  Email Article |
  Print Article
Tofuku-ji
Kyoto, Japan
12.04.2011
 Friday, September 28, 2012 at 8:11AM | Posted by
  Lisa |
  3 Comments |
  Share Article |
  Email Article |
  Print Article