Welcome

My name is Lisa and I'm a crafty girl with wanderlust working as an engineer by day. My blog chronicles projects in my home as well as pictures and stories from my travels.

Search


Instagram

Blog Index
The journal that this archive was targeting has been deleted. Please update your configuration.
Navigation

Entries in Study (3)

Thursday
Mar292012

How to Patch Up a Hole in the Wall

Now that I am back in town it is time for me to get working on my study again. Due to an outlet getting moved I had a nice big hole in my wall next to the closet that I needed to patch up and some dirty fingerprints left by the electrician to clean up and paint over.

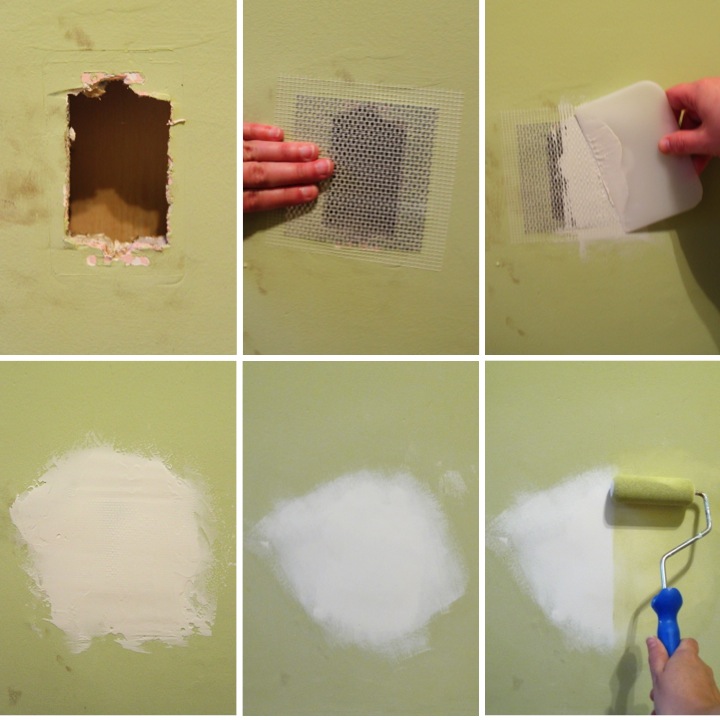
Since it was a large hole I used a 4" x 4" aluminum wall patch to cover it. Generally, you should get a patch that is large enough to extend an inch past the hole on all sides. After removing the backing I placed the self adhesive patch over the hole. I then applied a layer of drywall compound over the patch feathering it out at the edges. It doesn't need to be perfectly smooth, but the smoother it is, the less you will need to sand.

After letting it dry overnight I put another coat of drywall compound on over the patch. Once that was completely dried I sanded it smooth. To make sure it was perfectly flat I ran my hand over it to check if I could feel any remaining unevenness or roughness.

With the patch complete I primed over it with a coat of Zinsser primer and then finished it off with two coats of wall paint. This was a simple and easy project requiring only about twenty minutes of hands on time, but it was something that I needed to get done in the room. I am now one tiny step closer along my way in getting the room together...
If you are interested, check out the rest of my study renovation posts: Study Blog Posts

Monday
Mar052012

Starting Work On My Study Ceiling

Yesterday I decided to start working on my study ceiling. This is going to be quite a project to get the beadboard eventually looking decent but I am hopeful that it will turn out well when I am done.

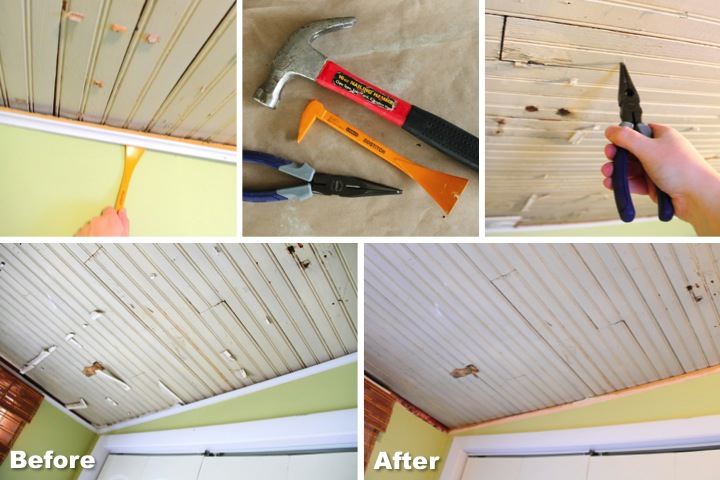
I began by pulling down the old crown molding. It was flush with the ceiling tiles so it was sitting about half an inch below the beadboard and looked funny. It was also very narrow and I want something a little beefier so I decided to scrap it.

To remove the trim I used a thin pry bar and hammered on the end of it to get it under the molding. I then pried up each finish nail gradually widening the gap as I moved down the wall until I could pull the piece away completely.

With the molding down I moved on the cleaning up the ceiling. After the ceiling tiles had been pulled done the beadboard was full of staples and bits of the tiles still stuck in the ceiling. I used a needle nose pliers to pull all of the staples out. It was pretty tedious and I ended up doing it in two shifts because my arm was getting sore working above my head.

With the staples gone and the molding down the ceiling still doesn't look good but I am one step closer to getting it done. I still need to patch the holes and sand down the beadboard before I can paint. I love the bright aqua of my beadboard porch ceiling and I am thinking I may use a shade of blue or teal for my study ceiling. I feel like if I am going to put all this effort into fixing the beadboard I want to highlight it. What do you think? What color would you use? 

If you are interested, check out the rest of my study renovation posts: Study Blog Posts

Saturday
Mar032012

Plans for My Study

With my bathroom complete I am excited to get going on my next home project. I thought that fixing up one of the rooms in my side wing to make into a study for myself would be nice.

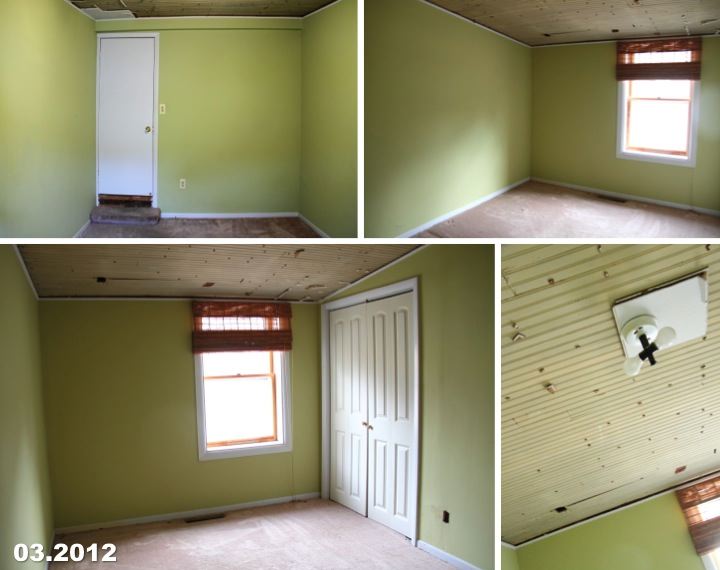
When I bought the house this room was by far in the best condition so I haven't done much with it. Unlike the rest of the house the walls were finished drywall so apart from patching an excessively large plumbing access hole in the wall that had been covered with a cork board (honestly, what were the previous owners thinking?) all I did to the walls was paint them pale green. With fresh paint throughout the room, a cheap temporary closet door and a bamboo blind that I bought on super sale the room was passable and I moved on to more pressing things.

Now I'd like to make this room into something usable for me. I already pulled down the pressboard ceiling tiles that the previous owners had stapled to the ceiling and found beadboard. Based on that discovery along with the ceiling slope and the fact that the room is set down two steps below the rest of the house makes me think that it was once a porch that was later enclosed. I love the beadboard so I am planning on trying to salvage it by pulling out the staples, patching the holes and refinishing it.

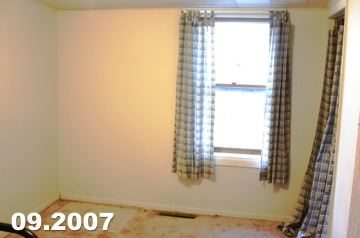
After the ceiling the biggest project in the room will be replacing the flooring. This is also the only room in the house where I haven't replaced or refinished the floor and I would like to add hardwood. I want to do the same for the rest of the side rooms (they currently have some cheap carpet I had put down for a short term solution in 2007) so I may wait and do all the floors at the same time.

I have a few other to do list items for the room like new trim for the door, closet and window, new doors for the closet and room (flimsy hollow core doesn't fit in with the solid wood five panel doors I have elsewhere) and crown molding. I'm also excited to make the room functional with a desk and daybed and then decorate, which is always the most fun. I can't wait to get started!