Now that I am back in town it is time for me to get working on my study again. Due to an outlet getting moved I had a nice big hole in my wall next to the closet that I needed to patch up and some dirty fingerprints left by the electrician to clean up and paint over.
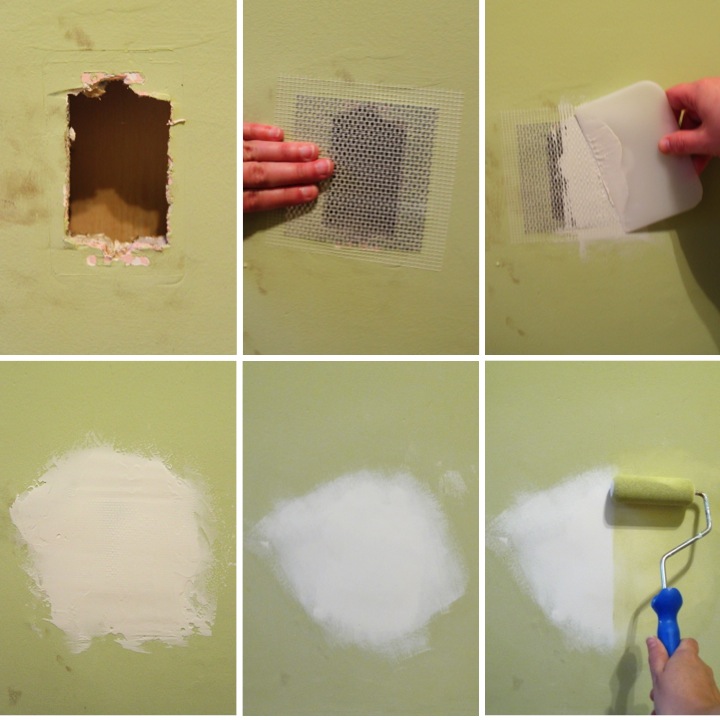
Since it was a large hole I used a 4" x 4" aluminum wall patch to cover it. Generally, you should get a patch that is large enough to extend an inch past the hole on all sides. After removing the backing I placed the self adhesive patch over the hole. I then applied a layer of drywall compound over the patch feathering it out at the edges. It doesn't need to be perfectly smooth, but the smoother it is, the less you will need to sand.
After letting it dry overnight I put another coat of drywall compound on over the patch. Once that was completely dried I sanded it smooth. To make sure it was perfectly flat I ran my hand over it to check if I could feel any remaining unevenness or roughness.
With the patch complete I primed over it with a coat of Zinsser primer and then finished it off with two coats of wall paint. This was a simple and easy project requiring only about twenty minutes of hands on time, but it was something that I needed to get done in the room. I am now one tiny step closer along my way in getting the room together...
If you are interested, check out the rest of my study renovation posts: Study Blog Posts