


Hardwood Flooring - Selection & Underlayment
While the main part of the house has old hardwood floors that were previously refinished, the side wing of my home was an old neighborhood grocery store and had tile underfoot. When I first bought the house in 2007 I had other things to address (like evicting the raccoons living the living room wall and getting electrical outlets on the second floor) so even though I knew that I wanted hardwood eventually I decided to replace the carpet that was over the tile for the time being.
The carpet had to be replaced because the previous owners were heavy smokers and beside being stained, replacing the carpet was the only way to get rid of the smell. Getting the side wing liveable was pretty important since that was the part of the house I was living in while the main part was gutted to the studs. I remember meeting with the carpet installer to go over the estimate and then asking him how soon he could get in to install the carpet. He asked me what difference did it make since I obviously wasn't living in the house with it all torn apart. I laughed and told him that yes I was actually crazy enough to be living in the house. He was quite surprised and made sure to get my carpet in pretty quick.
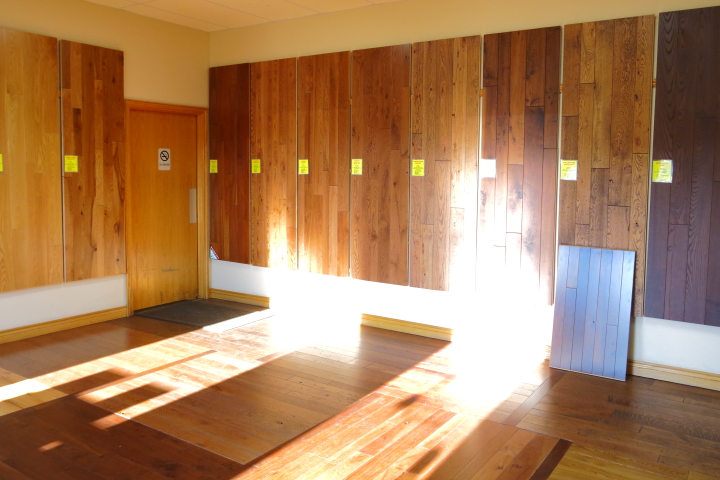
Fast forward almost six years and my dreams of hardwood flooring in the side wing are finally coming true. I had done a lot of research and decided I wanted to get my flooring at Chelsea Plank Flooring. They make all of their flooring from hardwood trees in the Northern Midwest so it has a tight grain that would be similar to the old floors in the rest of my house. On top of that it is made locally and the factory store is only half an hour away from Ann Arbor.

The factory store had a small showroom with several samples of the hardwood flooring on display on the walls and floor. The main part of the house has 2-1/4" oak that has a honey color to it. I wanted something that would look nice with it, but not try to match it since it would always be off and look strange. I was set on getting something with a 2-1/4" width otherwise known as strip flooring. The sales lady patiently looked up which types of hardwood they had in stock in strip flooring and then Frank and I mulled them all over.
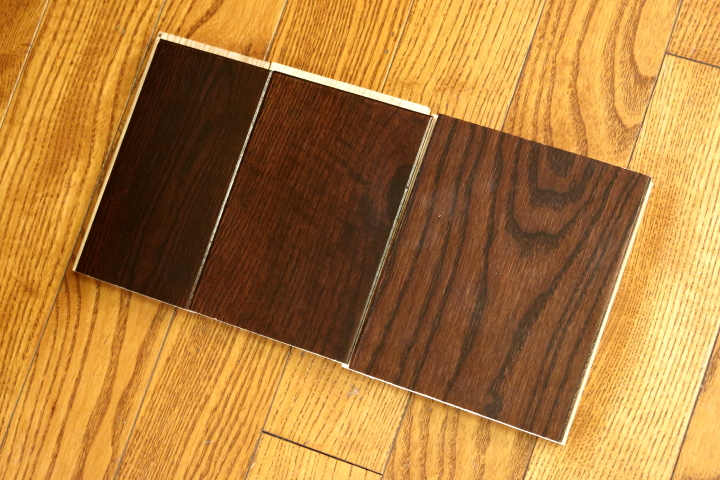
We decided to go with the Northern White Ash with Oxford stain. Ash has a grain similar to oak so it would work well with my existing floors and it has a Janka hardness of 1320 so it should wear well. We liked the dark Oxford stain since it wouldn't look like we were intentionally trying to match the floors.

Just to check we put a few sample pieces of the Oxford Ash against some flooring at the store that looked close to what is in the main part of the house and it looked great.
The Oxford Ash strip flooring was also on overstock special so the price was marked down from the already low factory pricing. The next thing I knew we were buying 26 boxes (546 sq. ft.) of flooring, enough for all three bedrooms in the side wing plus the hallway. The bathroom and laundry/mudroom in the side wing are going to have tile, but that is a story for another day.
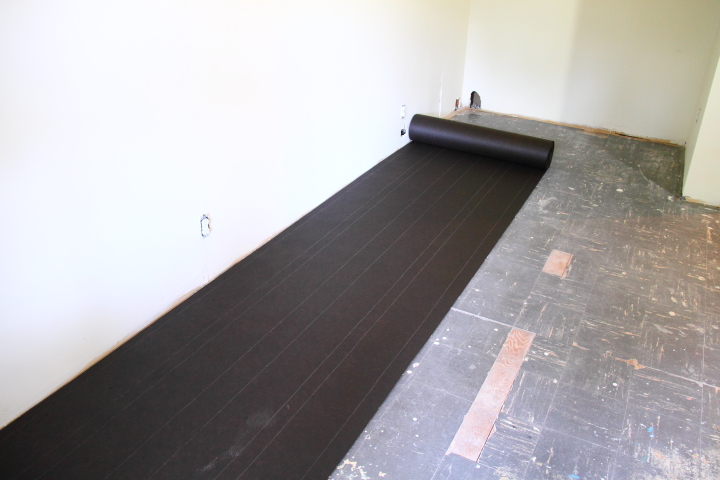
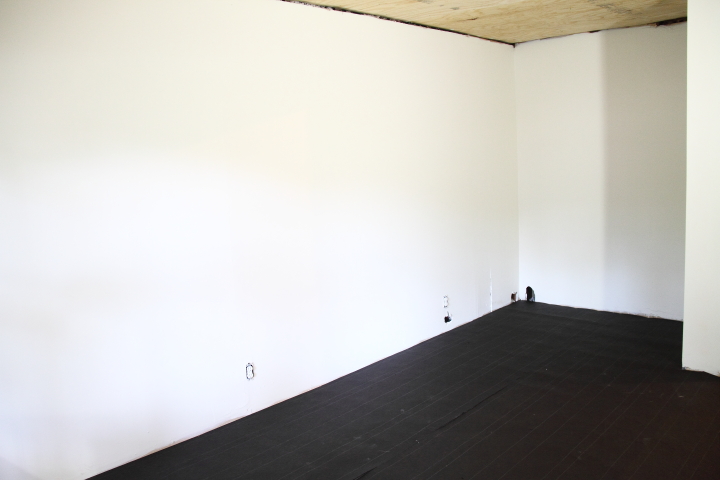
The flooring has been sitting in our house for a while and now that it has acclimated we decided that the first room that would get the new hardwood would be Frank's man cave. After Frank had pulled up the carpet and pad and I removed all of the tack strips and nails the floor was ready for underlayment. Underlayment is important because it can help with squeaking of your hardwood rubbing against the subfloor plus it can make it easier to slide your boards together.
I ended up putting down the underlayment on Saturday while I was waiting for the wall paint to dry before painting the stripes. Luckily the floor was already pretty flat so I didn't need to do any leveling. Because there were a few spots where the tiles were chipped or missing I decided to use 30 lb. roofing felt which is a little thicker than the 15 lb. felt. The tiles are super thin so once the felt was over the missing spots you couldn't tell where the missing spots were.
I started by rolling out the felt against the long wall in the room.
I then used my stapler to tack down the felt.
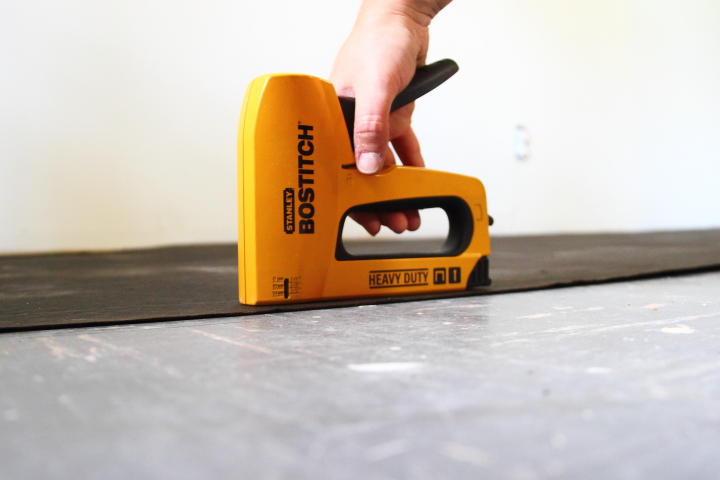
I cut my strips of felt long and then creased them at the wall. I then used an X-Acto knife to trim the excess off.
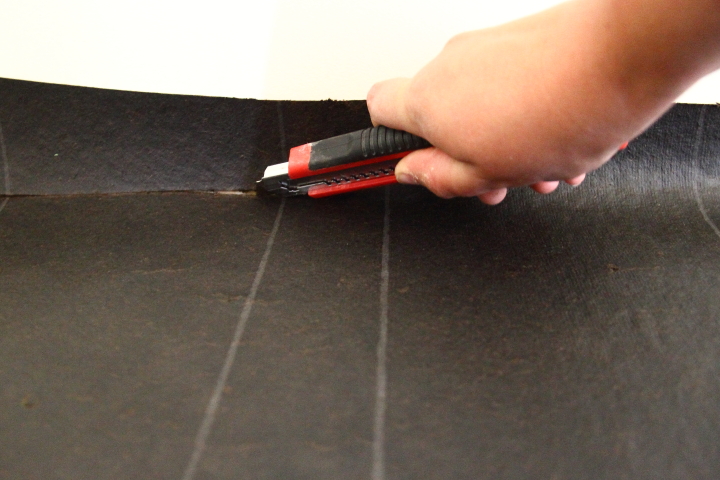
For 15 lb. felt you overlap the strips of felt but because the 30 lb. is thick you just butt the edges together. It all went pretty quickly until I had to deal with the closet but eventually I got the whole floor covered.
At this point on Saturday evening I couldn't wait to get the started on laying the hardwood but it seemed wiser to finish painting first so Frank and I started it on Sunday. I'll share about that later this week.
 Lisa | 34 Comments | Share Article | Email Article | Print Article