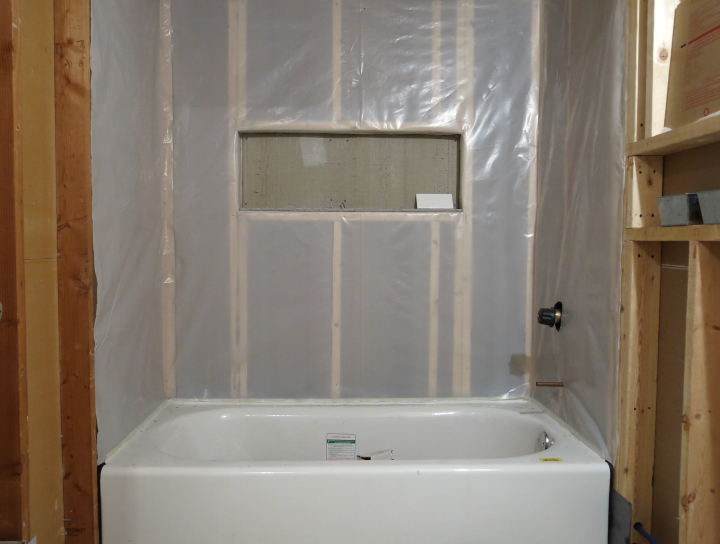
After a hiatus from working on the downstairs bathroom for a few months I finally got back at it. In the fall I had closed up the floor and installed the underlayment, insulated the ceiling and installed the vapor barrier for the shower but then things got stalled with a busy work schedule and travel.
About a month ago Frank and I drywalled the ceiling with him holding the sheets in place while I screwed them in. It was a bit of a challenge in the tight space but we got it up together.

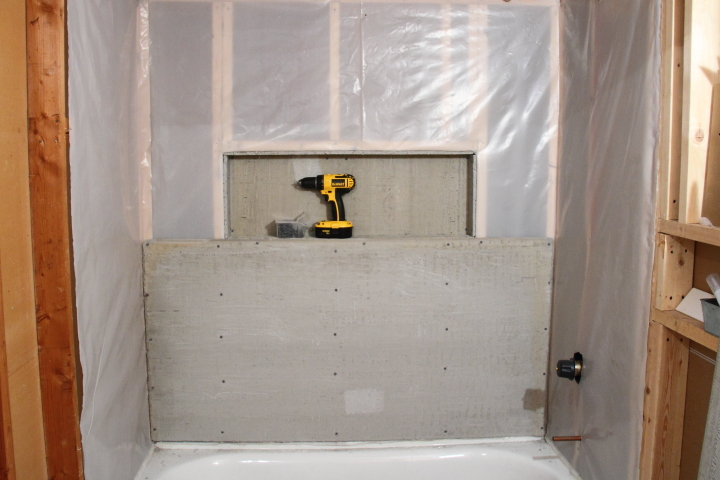
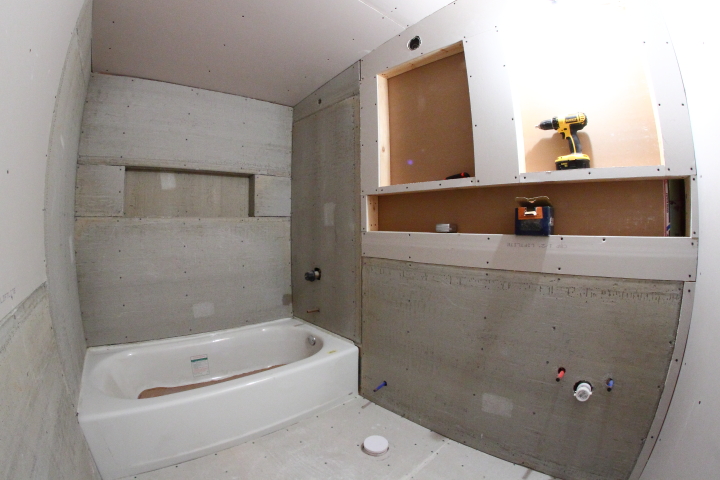
This past weekend I started closing up the walls in the bathroom, starting with the 1/2" thick cement board on Saturday. Cement board is waterproof making it an ideal substrate for tiling the shower surround.
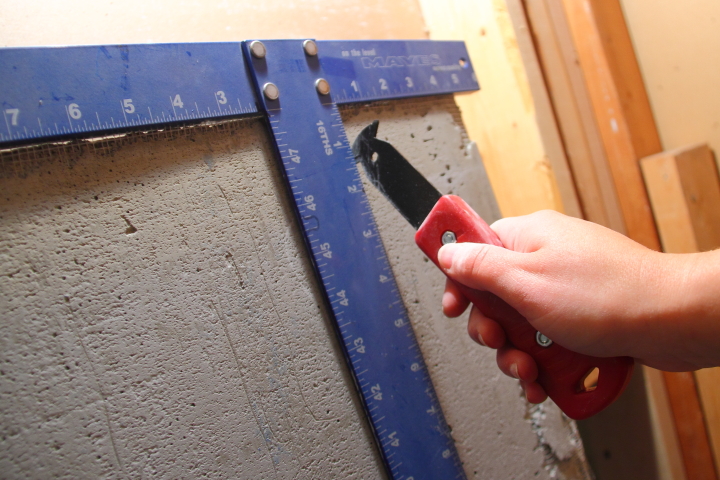
Cutting cement board is the same as the score and snap method for drywall. Using a carbide cutter and a T-square score the cement board panel a few times making a groove in the cement and cutting through the glass fiber mesh.
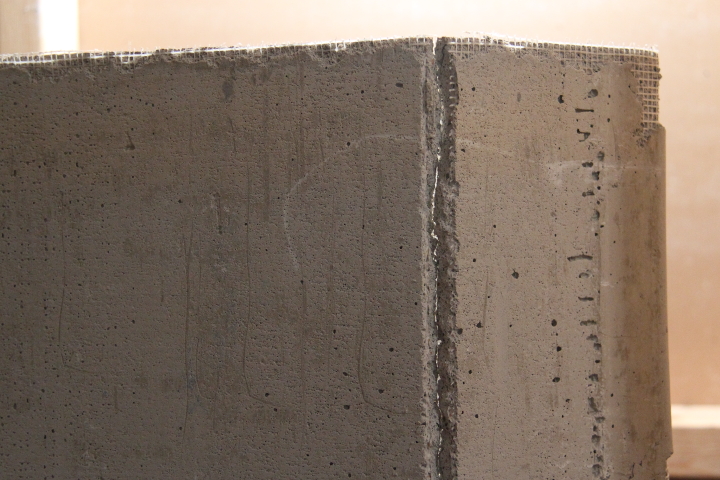
Next bend the panel so it snaps along the groove.
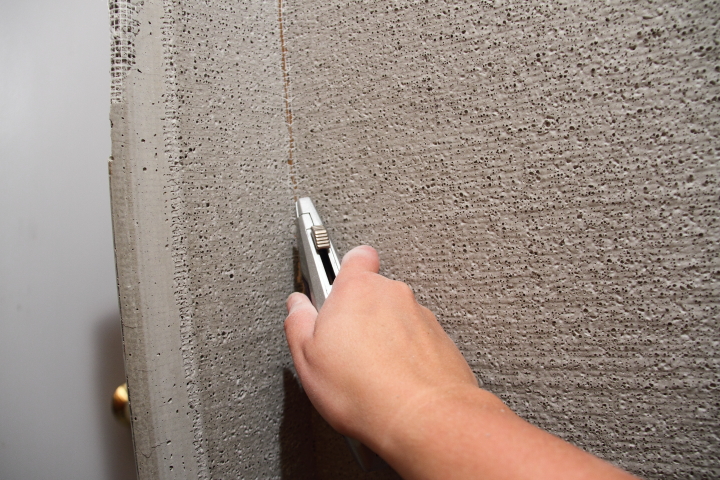
Finish by using a utility cutter to cut the glass fiber mesh on the back side.
To install the cement board in the shower surround it is important to use screws that are designed for cement board and are rust and corrosion resistant since it is a wet area. The cement board needs to be installed 1/4" above the tub flange and due to its heaviness I had Frank hold it up for me while I screwed it in to guarantee the gap. It sure is handy to have a husband around...
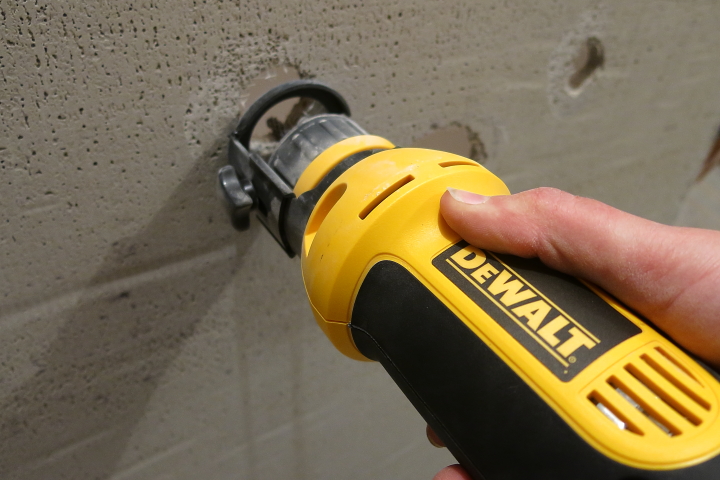
To make the cutouts for the plumbing I used a carbide tip meant for cement board with my handy dandy cut-out tool. Sometimes Frank jokes that he married me for my power tool collection. I don't blame him.

I wrapped up the shower surround on Saturday and moved on to the rest of the room on Sunday. I'm planning on tiling part way up the wall in the main area of the bathroom. Because that area is outside of the wet zone of the shower I could use drywall under that tile but since I had extra panels of cement board on hand I decided to use cement board.
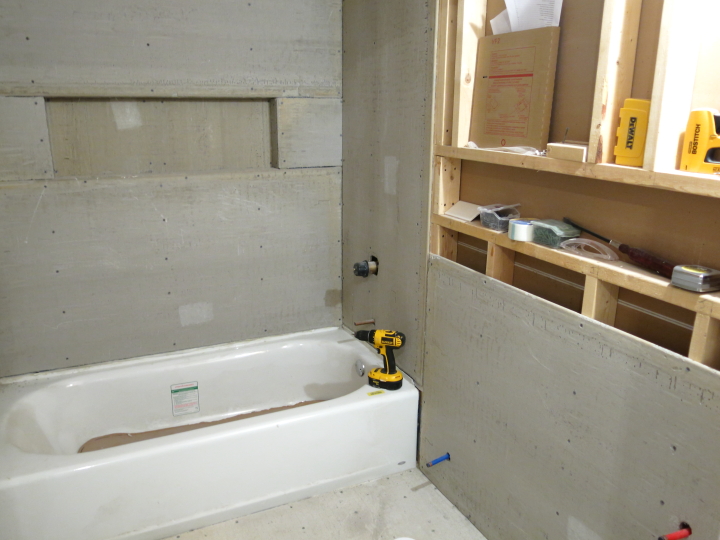
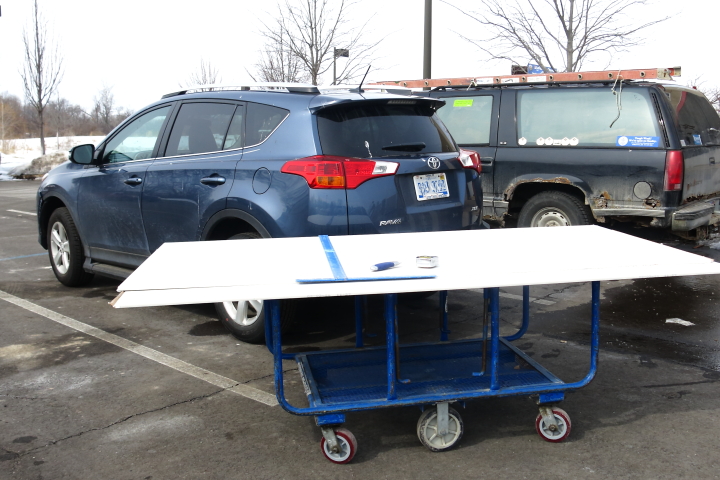
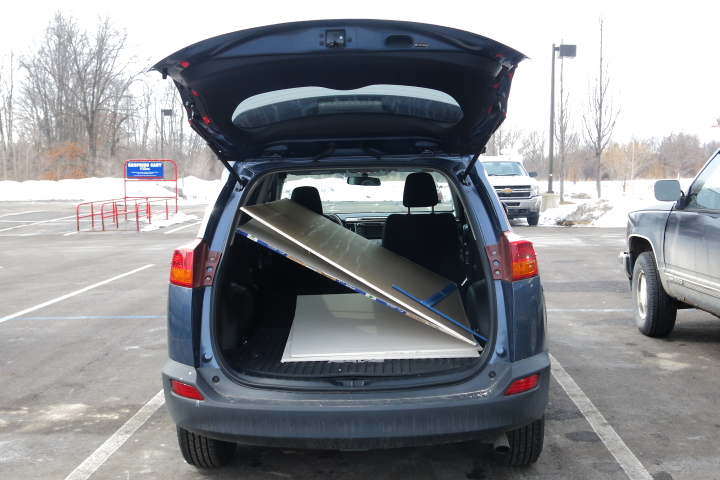
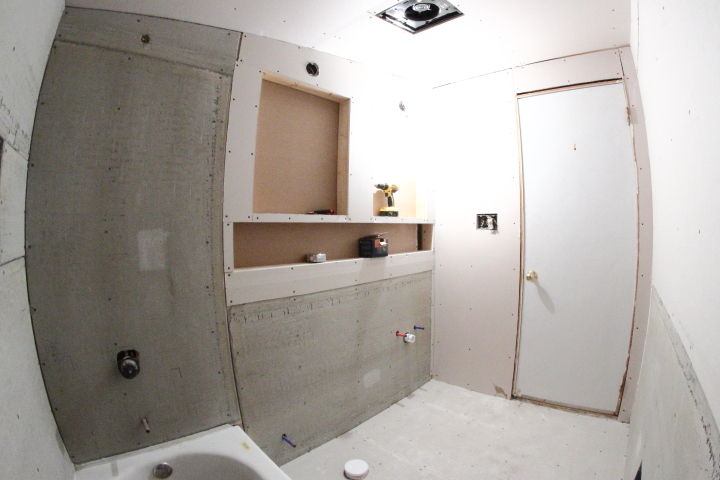
With the cement board all installed I was ready to finish closing up the walls with drywall. I had only one problem: no 1/2" drywall at home. Normally I would sweet talk Frank into going with me to Lowe's with his truck but he had left for a work trip at noon so I was left to my own devices on this one.
I took measurements of the cuts I would need, packed my T-square, measuring tape and utility knife in my car and headed off to Lowe's. I bought the two sheets of drywall I needed, rolled it out to the parking lot and then just cut the sheets down to what I needed in the parking lot. With my back seats folded down it barely fit but I got it all in.
I could have waited until Frank came home but he won't be back until Friday night and I didn't want to wait. Plus, being stubborn and independent is part of my charm, right?
By Sunday evening I had all of the drywall on the walls and everything closed up. I was pretty exhausted from the weekend (cement board is heavy!) but so glad that the bathroom is starting to look like a room. Next up is mudding and taping the drywall!
For other related posts about this bathroom renovation check out the history of my downstairs bathroom, fixtures for my bathroom renovation, plumbing in the downstairs bathroom, installing the floor tile underlayment, insulating the ceiling and installing the vapor barrier for the shower. If you are interested in my completed master bathroom renovation check out master bathroom renovation recap.