 Frank's middle niece is ten years old and a pastry chef in the making. She loves to cook and especially loves to bake. She's always asked me a number of questions about cake decorating and even helped me decorate the Thanksgiving cake last year. I thought that for Christmas this year I would put together a beginning collection of her own cake (and cupcake) decorating supplies.
I didn't like any of the plastic decorating toolboxes that I saw available so I decided that I would make my own. Originally I planned on building my own box, but when I saw the perfect sized unfinished wooden box at Michael's I decided to buy it and just build the interior of the box to hold the supplies.
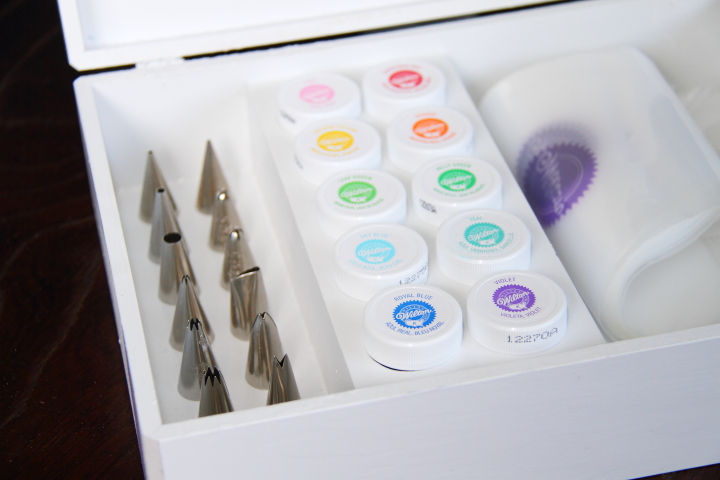
The first thing to build was a little caddy to hold the gel colors. I had a lot of frustration while building this but I'll outline what worked first and then explain what mistakes I learned along the way.
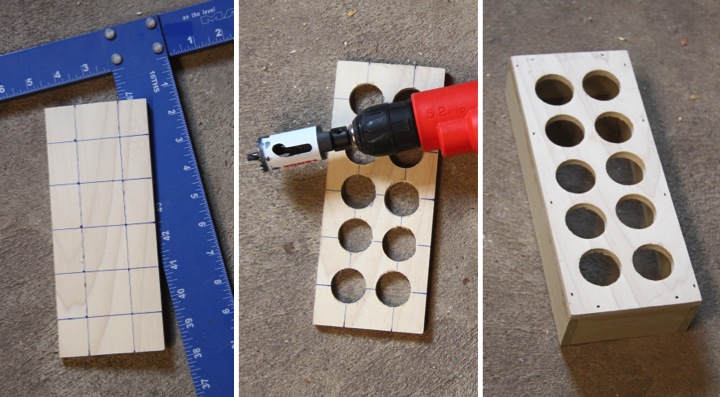
The box was 8-1/2" deep so I cut a piece of 1/4x4 craft board 8-1/2" long. I then marked center points for drilling my holes by drawing lines 1" from the outside edge, 1-1/4" from the top and bottom edge and then 1" spacing vertically between those lines. To make the holes I first pre-drilled a small hole at each line intersection and then used a 1-1/4" hole saw to drill the holes. I then finished up by building a box base with 1/4x2 craft board (2 pieces at 8-1/2" for the sides and 2 at 3" for the ends), attaching everything with wood glue and brad nails.
What I learned didn't work was mis-measuring the size of the gel color containers, using a 1-1/8" hole saw and then not realizing that the gel colors won't fit until you have already finished building the caddy. Also, trying to line up the hole saw without the pre-drilling the pilot hole led to a mess with the holes not lining up properly. All in all I had to build the little caddy three times before I got it right. That's what happens when you are tired and not thinking things through...
I filled the nail holes of the gel color caddy with wood filler and then sanded it and the box smooth. I wiped everything down with a tack cloth and then gave both pieces a coat of white spray paint with primer. I did this because I wasn't sure if I would be able to evenly coat the area under/inside the gel color caddy with paint after it was assembled.
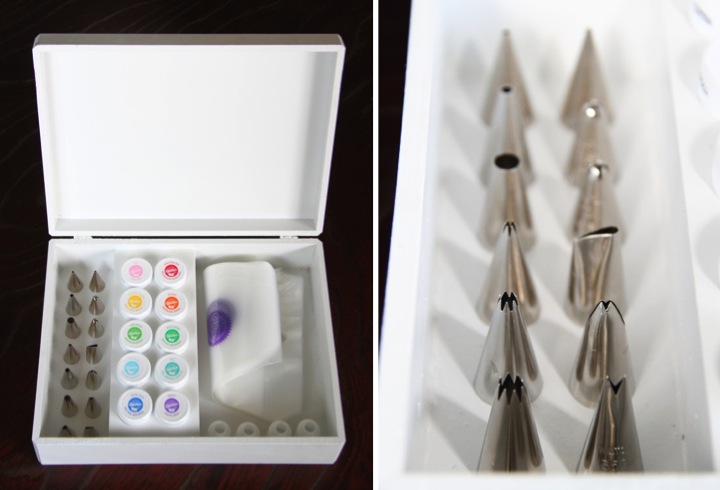
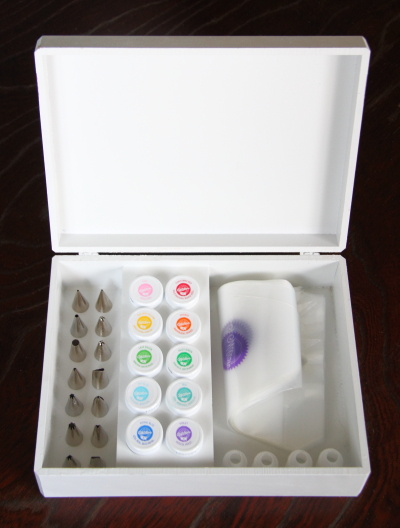
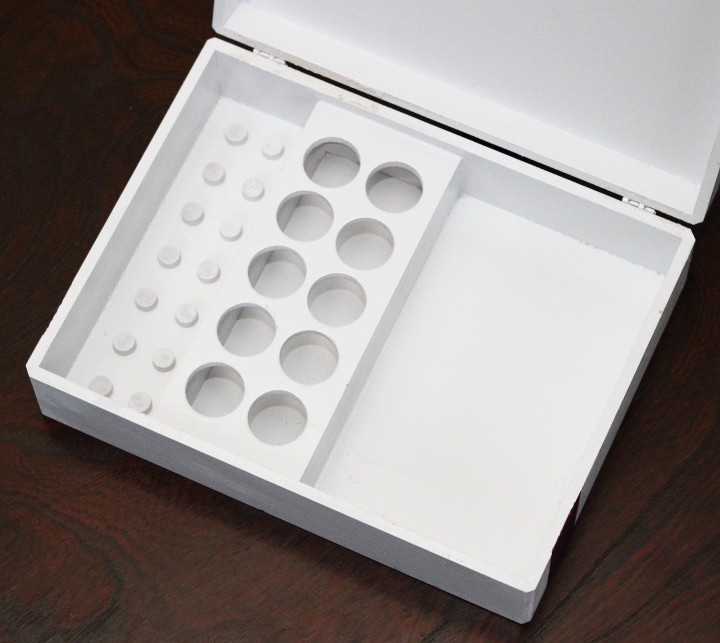
Once everything was dried I moved onto the area to store the decorating tips. At first I thought of cutting down a dowel but then had the idea to use 1/2" wooden hole plugs that I picked up at the hardware store. I lined them up with the wide side down in two rows along the left side of the box using some wood glue to attach them.
After the hole plugs were in place I put the gel color caddy inside the box, securing it with some wood glue and a few brad nails. I used some more wood filler to cover up the nail holes and fill in the seams where caddy met the box and then sanded everything smooth.

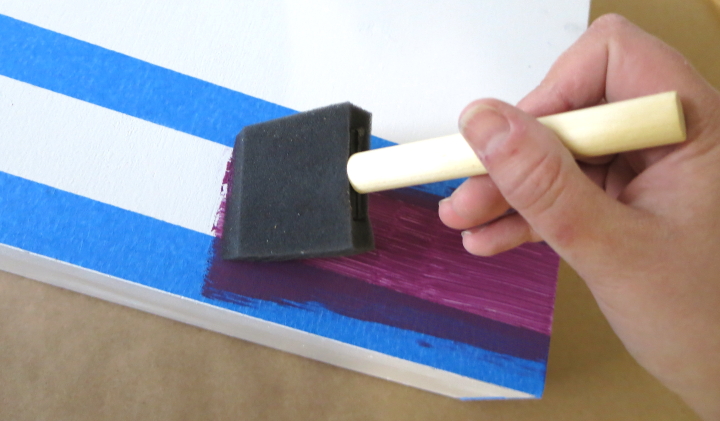
With the box built it was time to finish it. I used a few light coats of white spray paint of the inside and outside of the box.
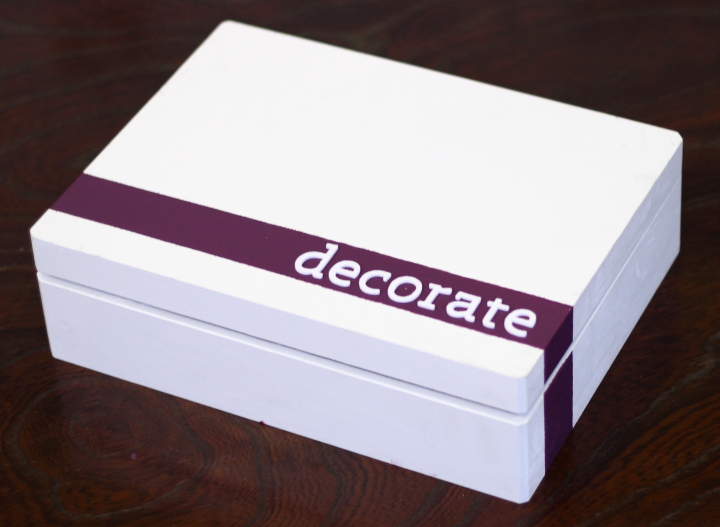
I decided to add a stripe across the top of the box in purple which is Frank's niece's favorite color. I marked off the space with some painter's tape and then used some purple acrylic craft paint and a foam brush to paint the line. Since the color was dark it took three thin coats to get nice coverage.
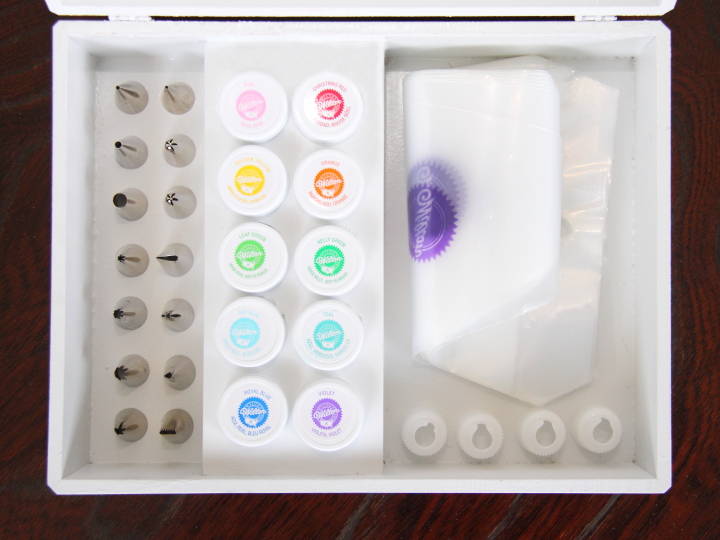
I used some foam stickers to add the word "decorate" to the top of the box and it was ready to fill up with cake decorating supplies. I picked out a variety of gel colors and a bunch of decorating tips to put in the box. On the right side I added some 12" disposable decorating bags and some couplers.
I am so excited to give this to Frank's niece (along with some pretty decorating books) and show her some techniques. I hope that she likes it!