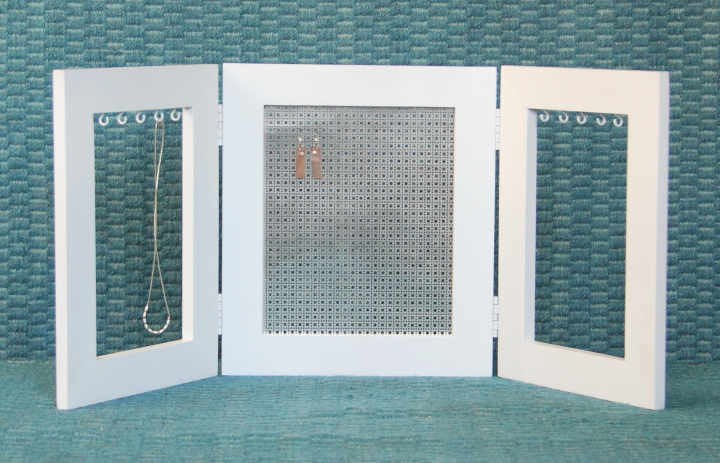
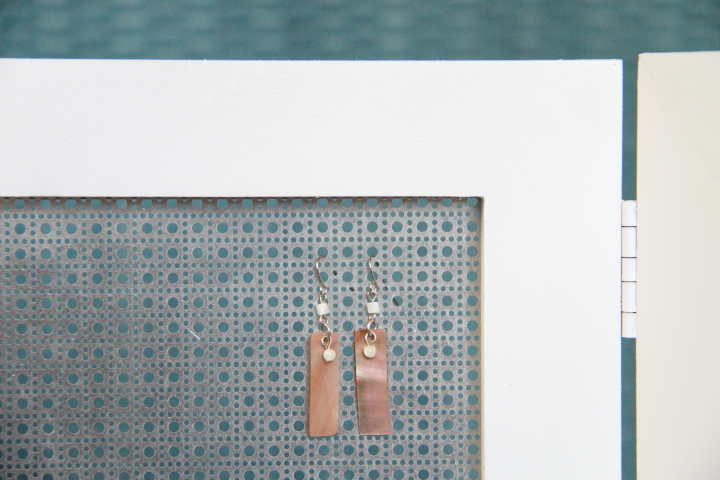
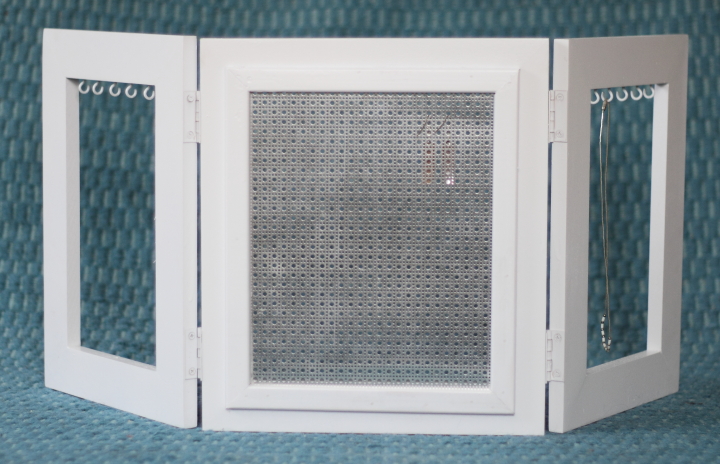
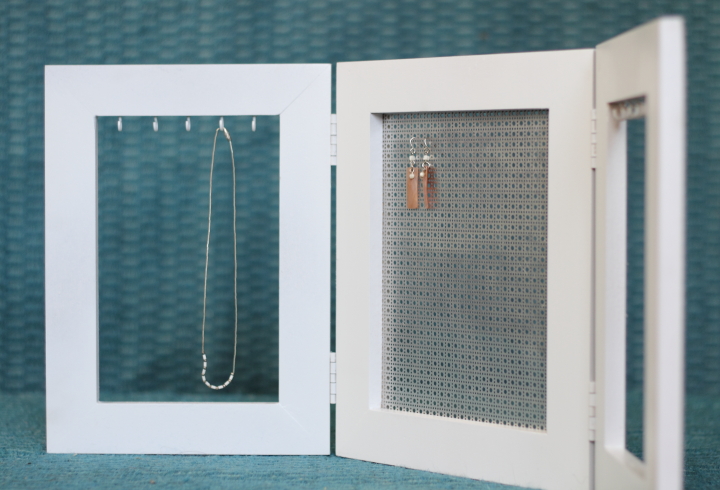
For Frank's oldest niece, who is 13, I decided to make a jewelry stand and small DIY earring kit (I'll share it in another post) for Christmas this year. I thought it would be fun to make a triptych with a place for earrings in the middle and necklaces on the sides, sketched out a basic design and got started building.
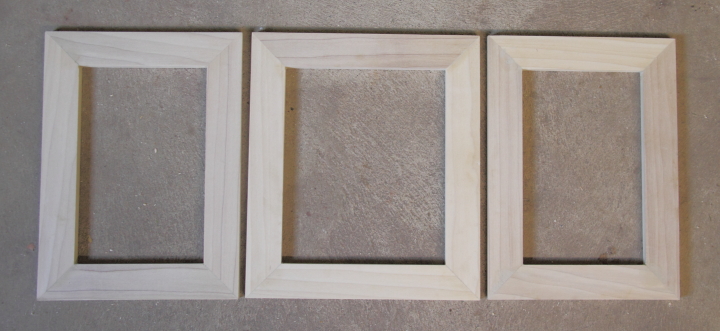
The first step was to make the frames. I bought some 1x2 pine boards and cut my pieces with a 45 degree mitre on the ends. I cut 6 pieces at 11.5" for the sides, 2 at 10" for the top and bottom of the middle frame and 4 at 8.5" for the top and bottom of the side frames. I did a dry fit to make sure that everything fit together nicely and then used glue and brad nails to assemble the frames.
I used wood putty to fill my holes from the nails, sanded down the frames, wiped them with a tack cloth and gave them a coat of primer.
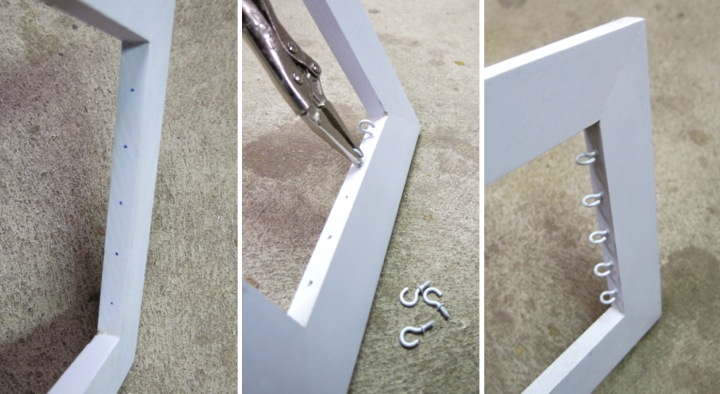
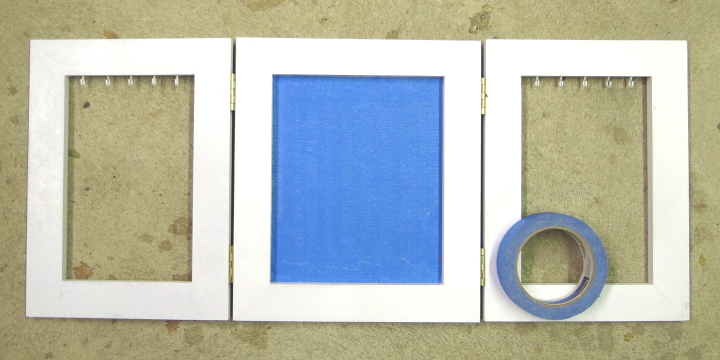
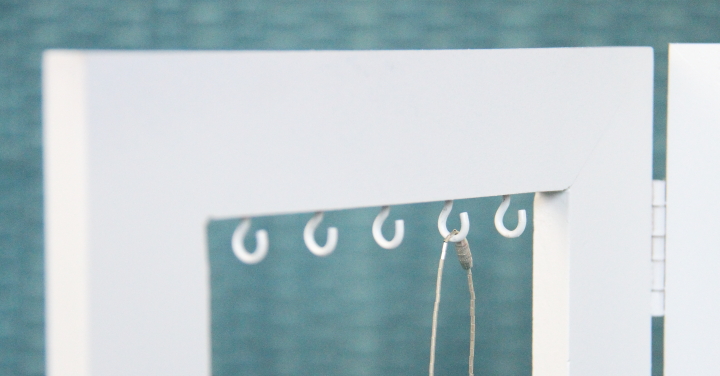
Next, I tackled adding the necklace hooks to the side frames. I chose tiny white 1/2" cup hooks since I thought they looked cute and dainty. I marked where I wanted my cup hooks to go with a 1" spacing between hooks and 3/4" from each edge and then used a 1/8" drill bit to predrill a hole in each spot. I started each hook with my fingers and then tightened them down using a small pair of vice grips.
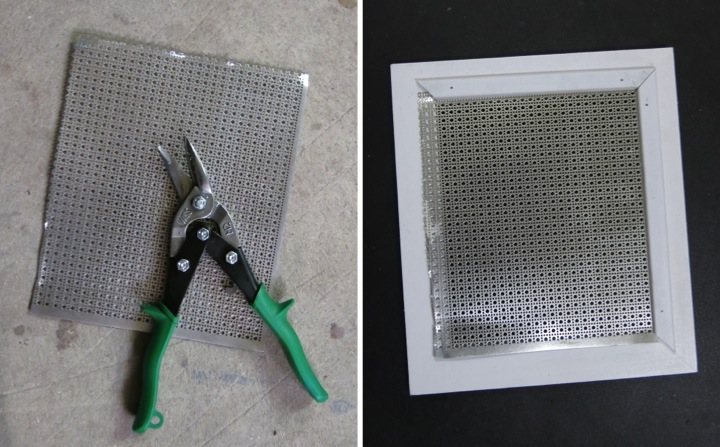
My next step was to add the metal mesh to the center frame for the earrings to hang from. I had some leftover perforated metal from making my bathroom vent cover which I thought would be perfect. I used my tin snips to cut a piece of the metal down to the right size and placed it on the back of the frame. I cut some pieces of screen molding to cover the rough edges and then used some wood glue and my brad nailer to attach it over the top of the perforated metal. I used wood filler to fill the nail holes and sanded it smooth.
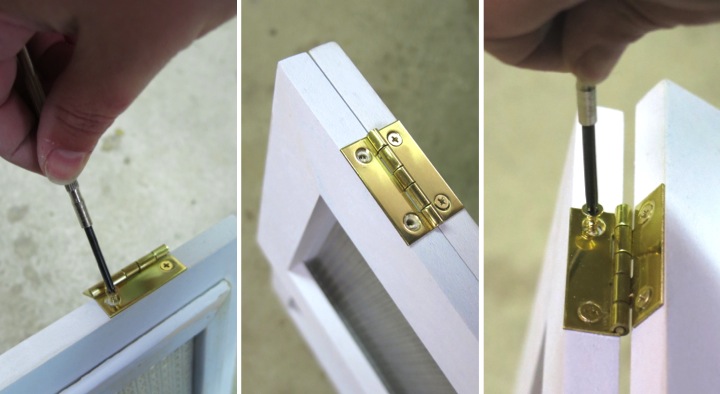
With each of the frames complete it was time to assemble everything. I used some small 1" hinges to join the frames together. I started by measuring up 1-1/2" from the ends on each side of the middle frame, positioning the hinges, and then marking where the screw would go. I then predrilled holes on the marked spots and used a precision screw driver to attach the screw hinges. Next, I lined up the side frames with the middle frame and repeated the process of marking where the hinge screws would go, predrilling holes and finally screwing in the hinge screws.
With my jewelry stand completed all that was left was a few coats of white spray paint to finish it off. I wanted to keep the perforated metal silver so I masked it off with painter's tape before spray painting.
I think that the jewelry stand turned out cute and I hope that Frank's niece likes it. I know I would have enjoyed it when I was 13!


How are your holiday presents coming along? Are you making anything fun?